Article Name: Configure External System
Category/Module: Administration
Tags: Credentials
Version: 3.10.9
Date Updated: 29 Nov 2017
This Credentials feature allows server-to-server interactions such as those between a web application and OpenEMIS Core.
- API Credentials
- Setting Up API Credentials in Core
- JSON Web Token (JWT)
- Generating JWT to request for an Access Token
- Access Token
- Requesting for an Access Token to access API
- Using Access Token to access API
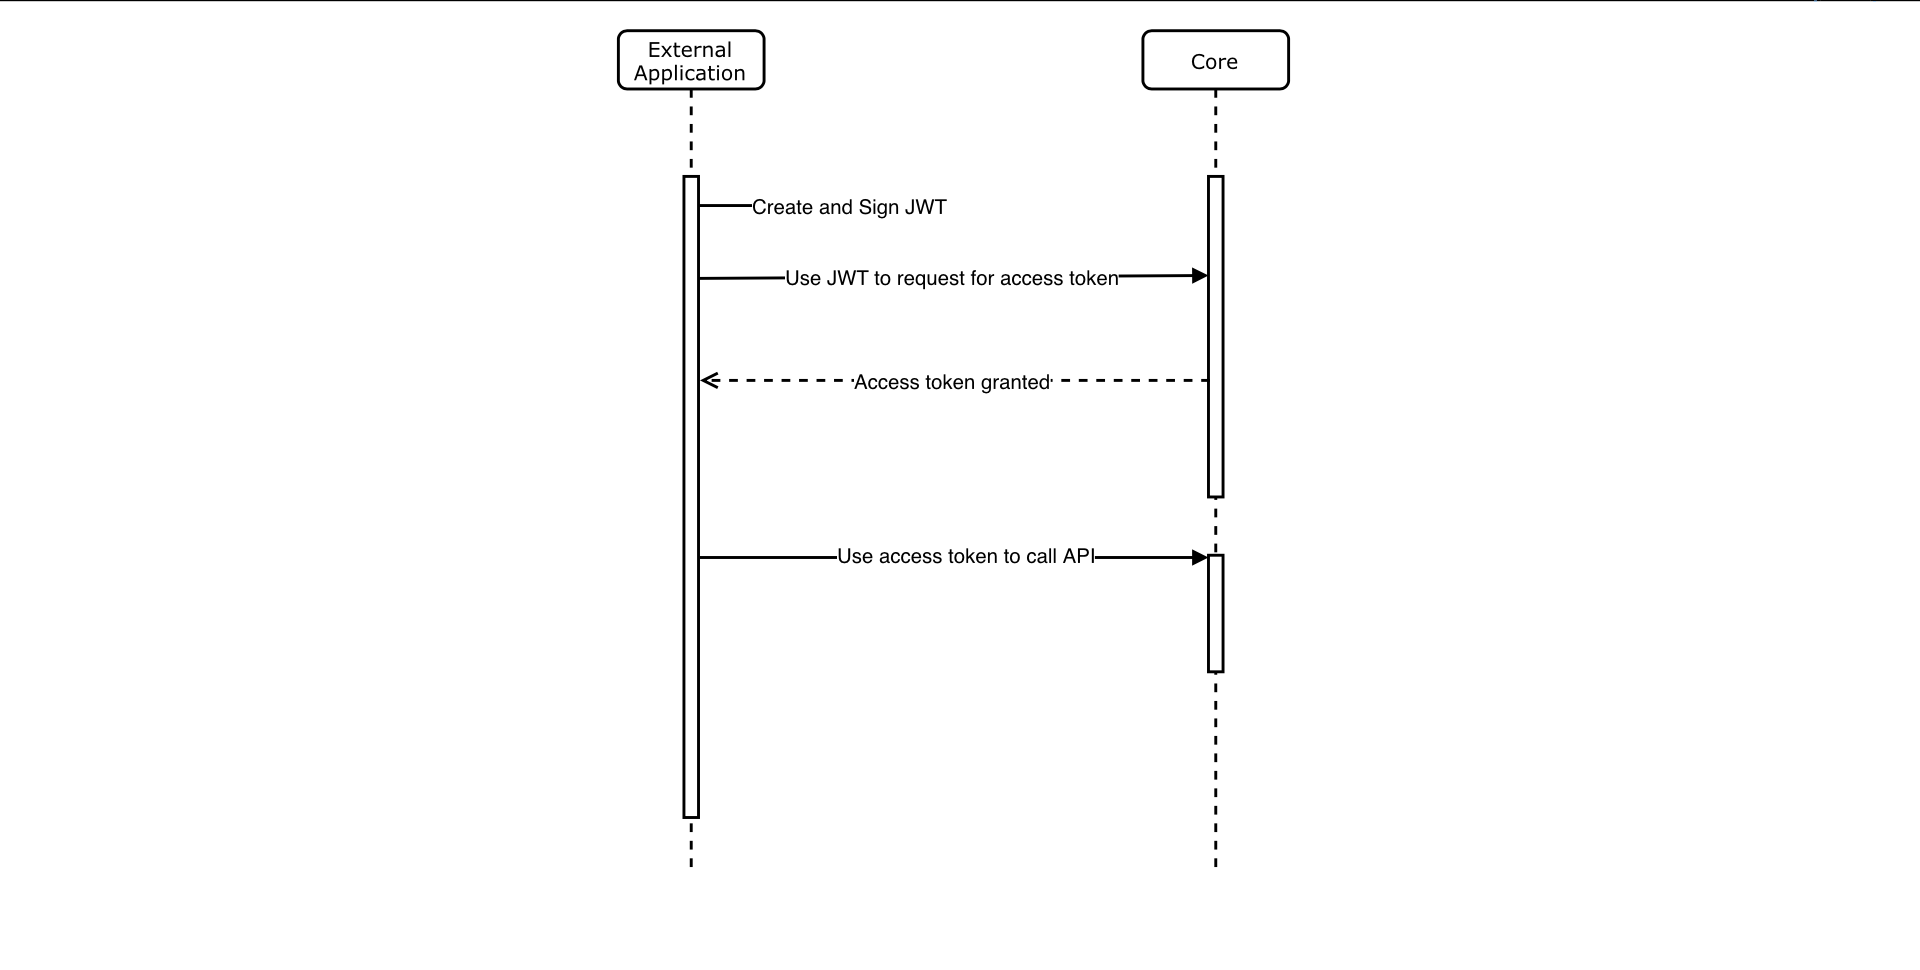
External API Flow Diagram
API Credentials
Setting Up API Credentials in Core
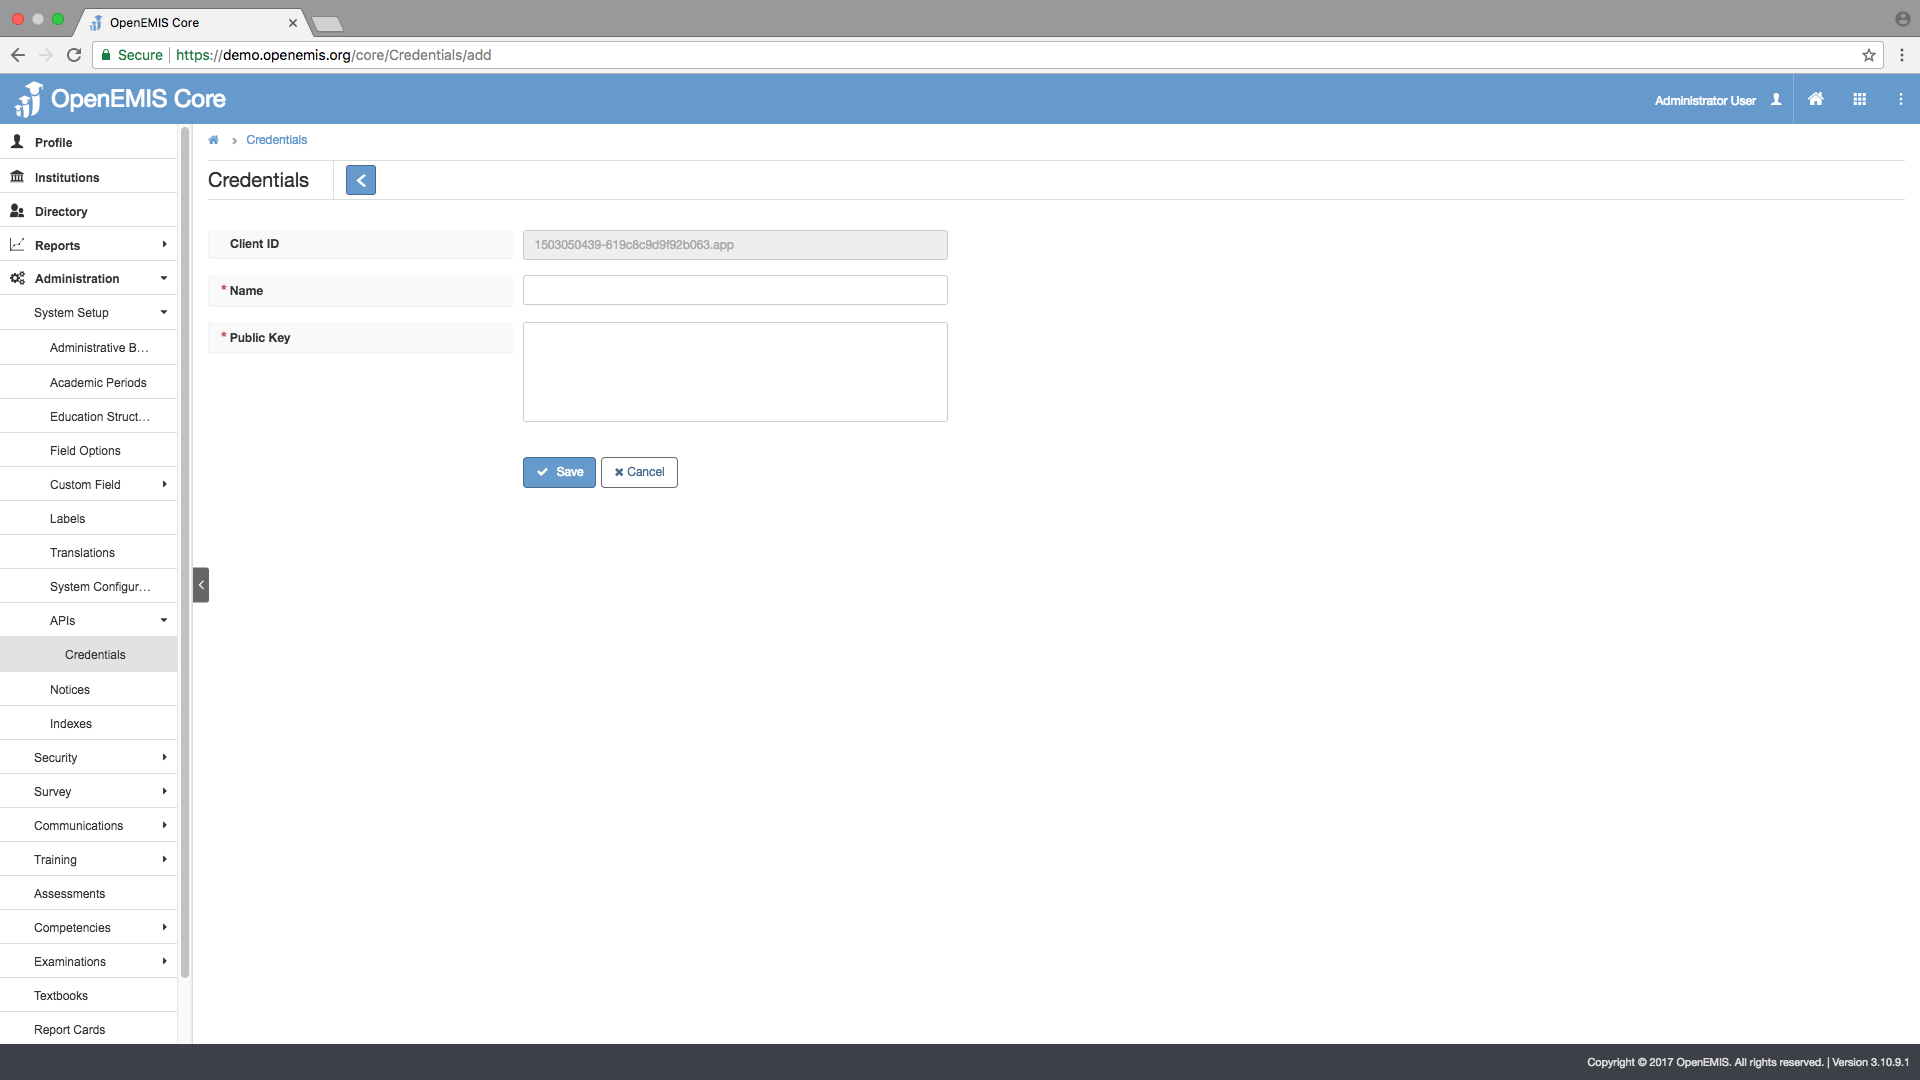
1) Go to Administration > System Setup > APIs > Credentials
2) Click ‘Add’
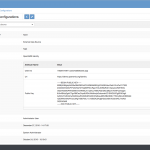
3) Enter ‘Name’ and ‘Public Key’
JSON Web Token
Generating JSON Web Token (JWT) to request for an Access Token
For illustration purposes, we will be using https://jwt.io/as an example to generate a JSON Web Token (JWT). You may use other alternatives to generate your JWT.
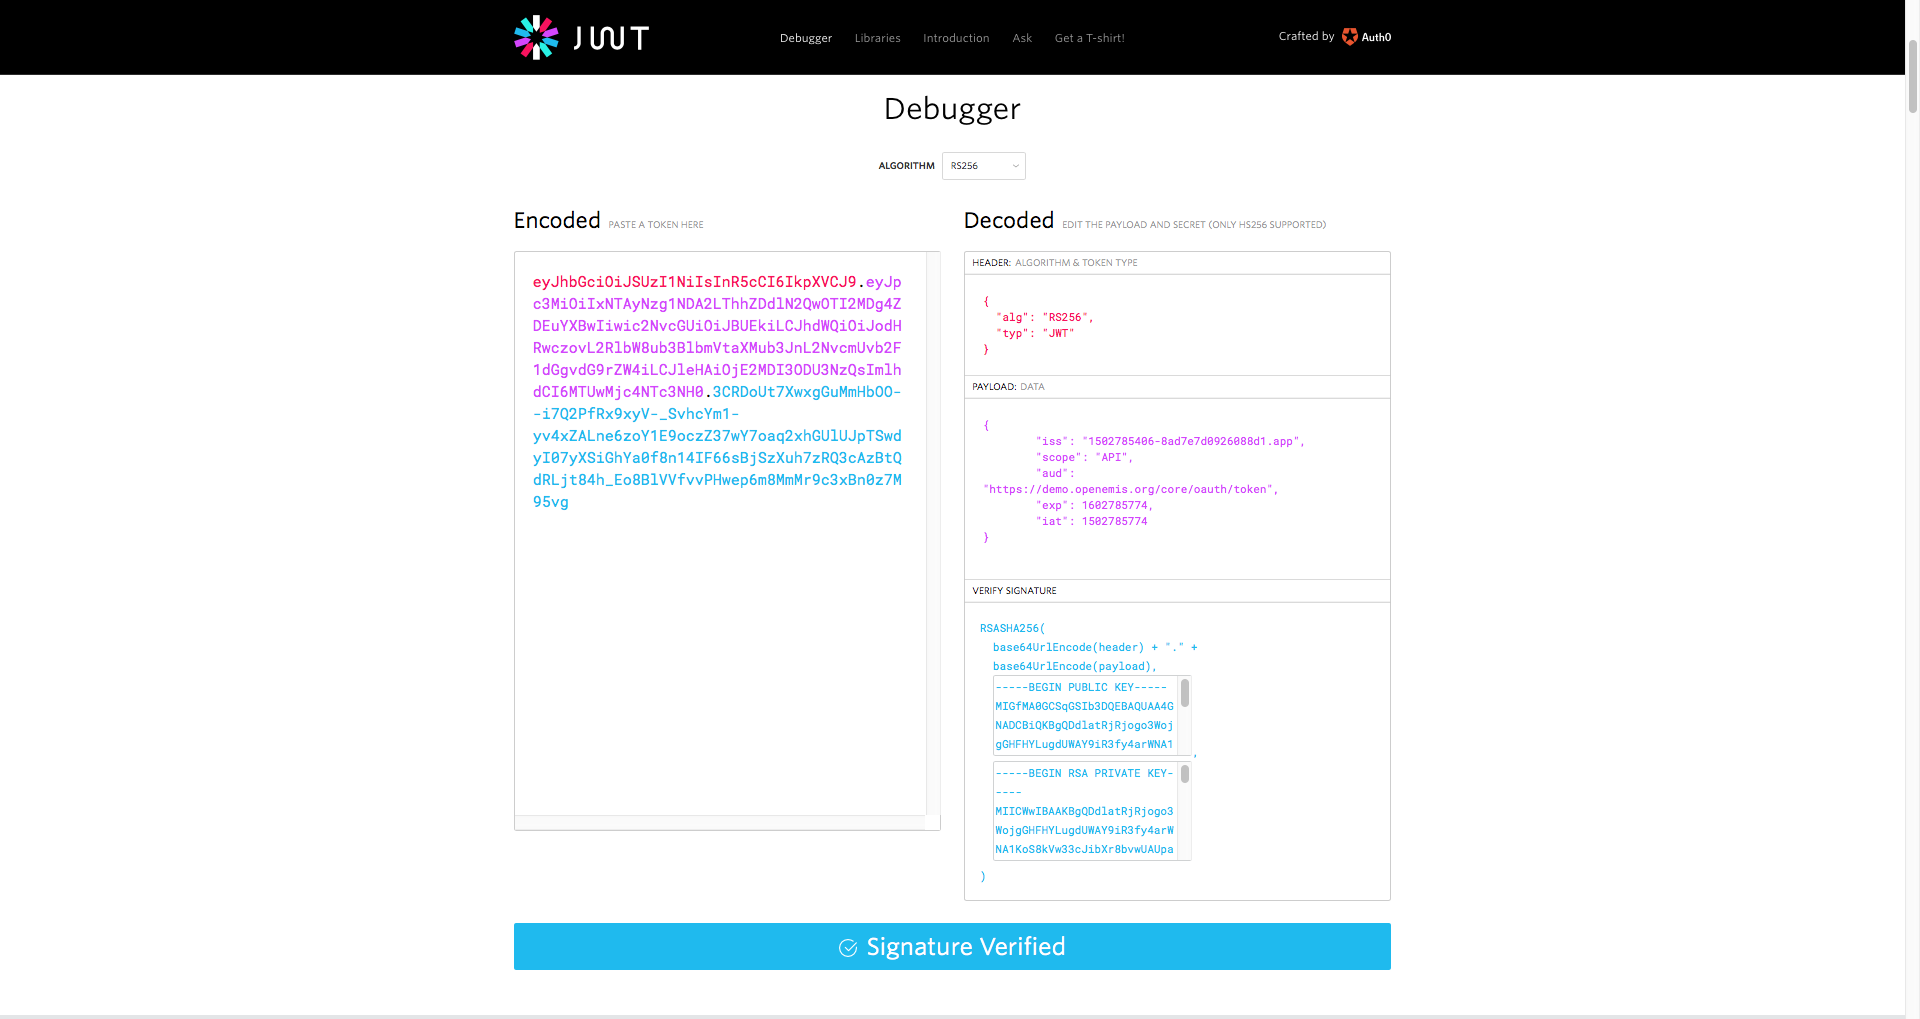
1) Go to https://jwt.io/
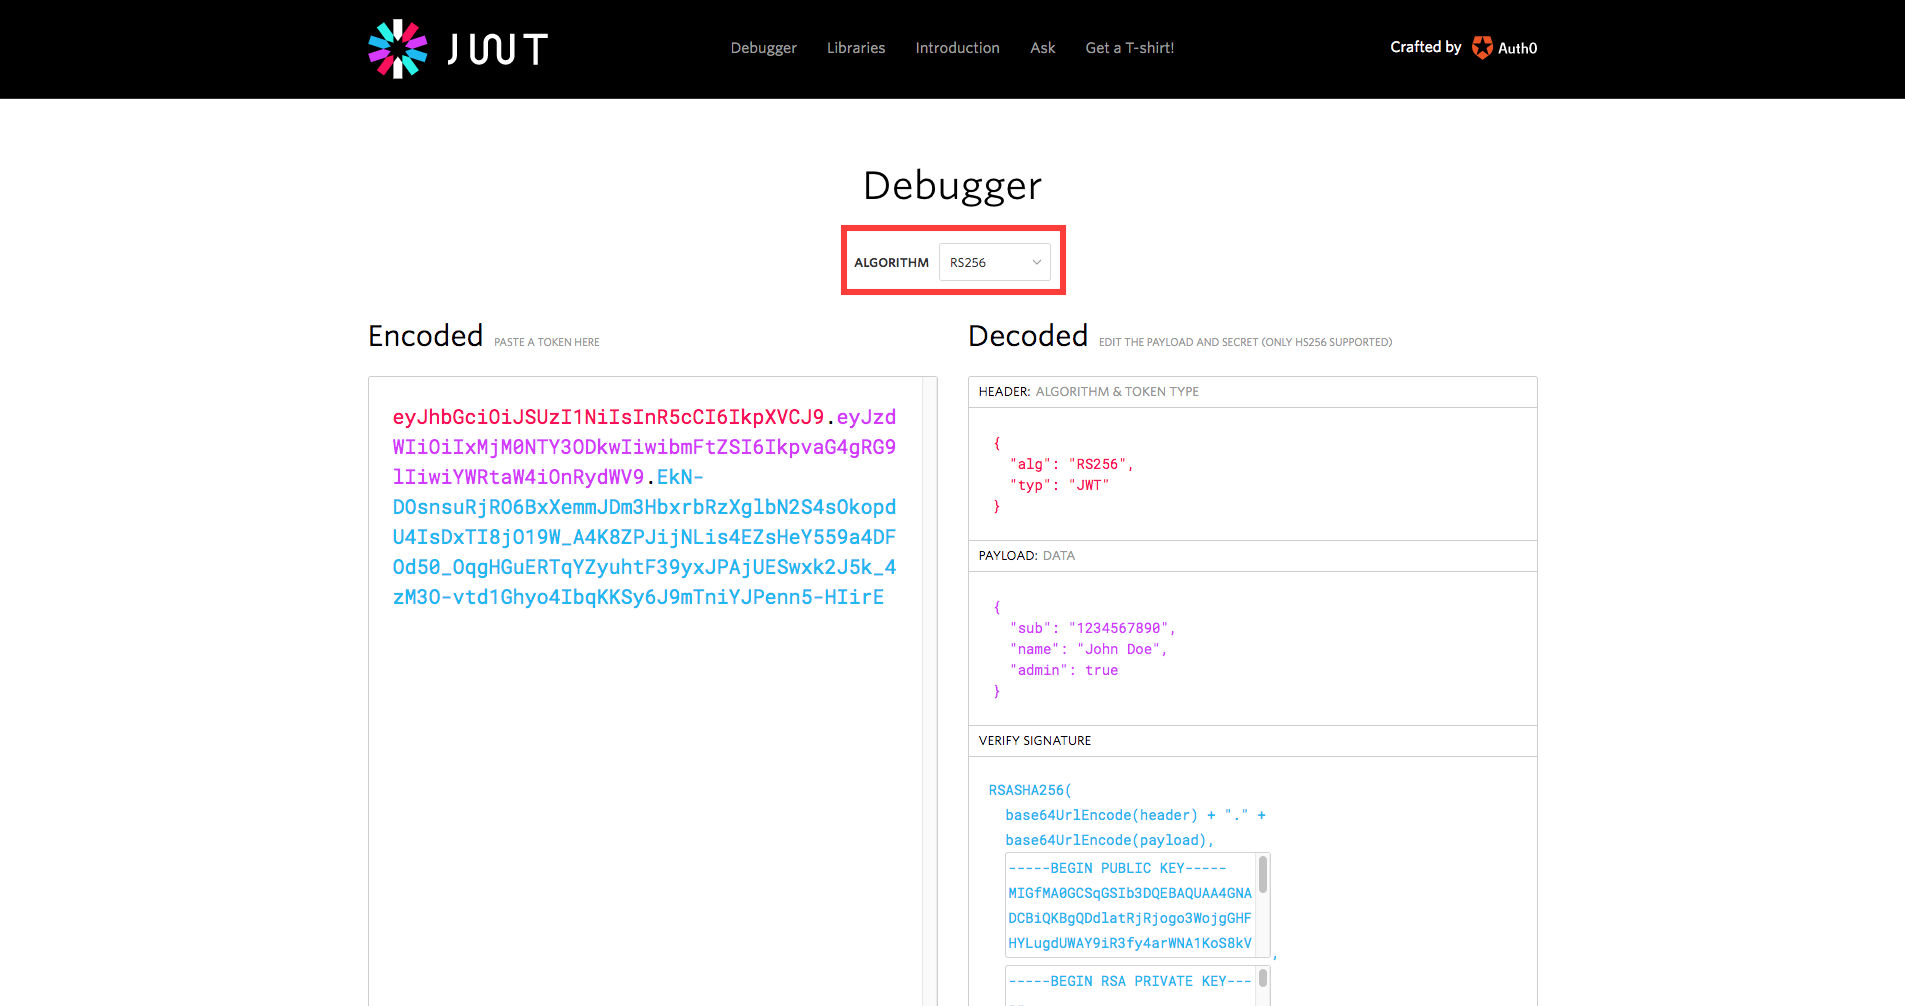
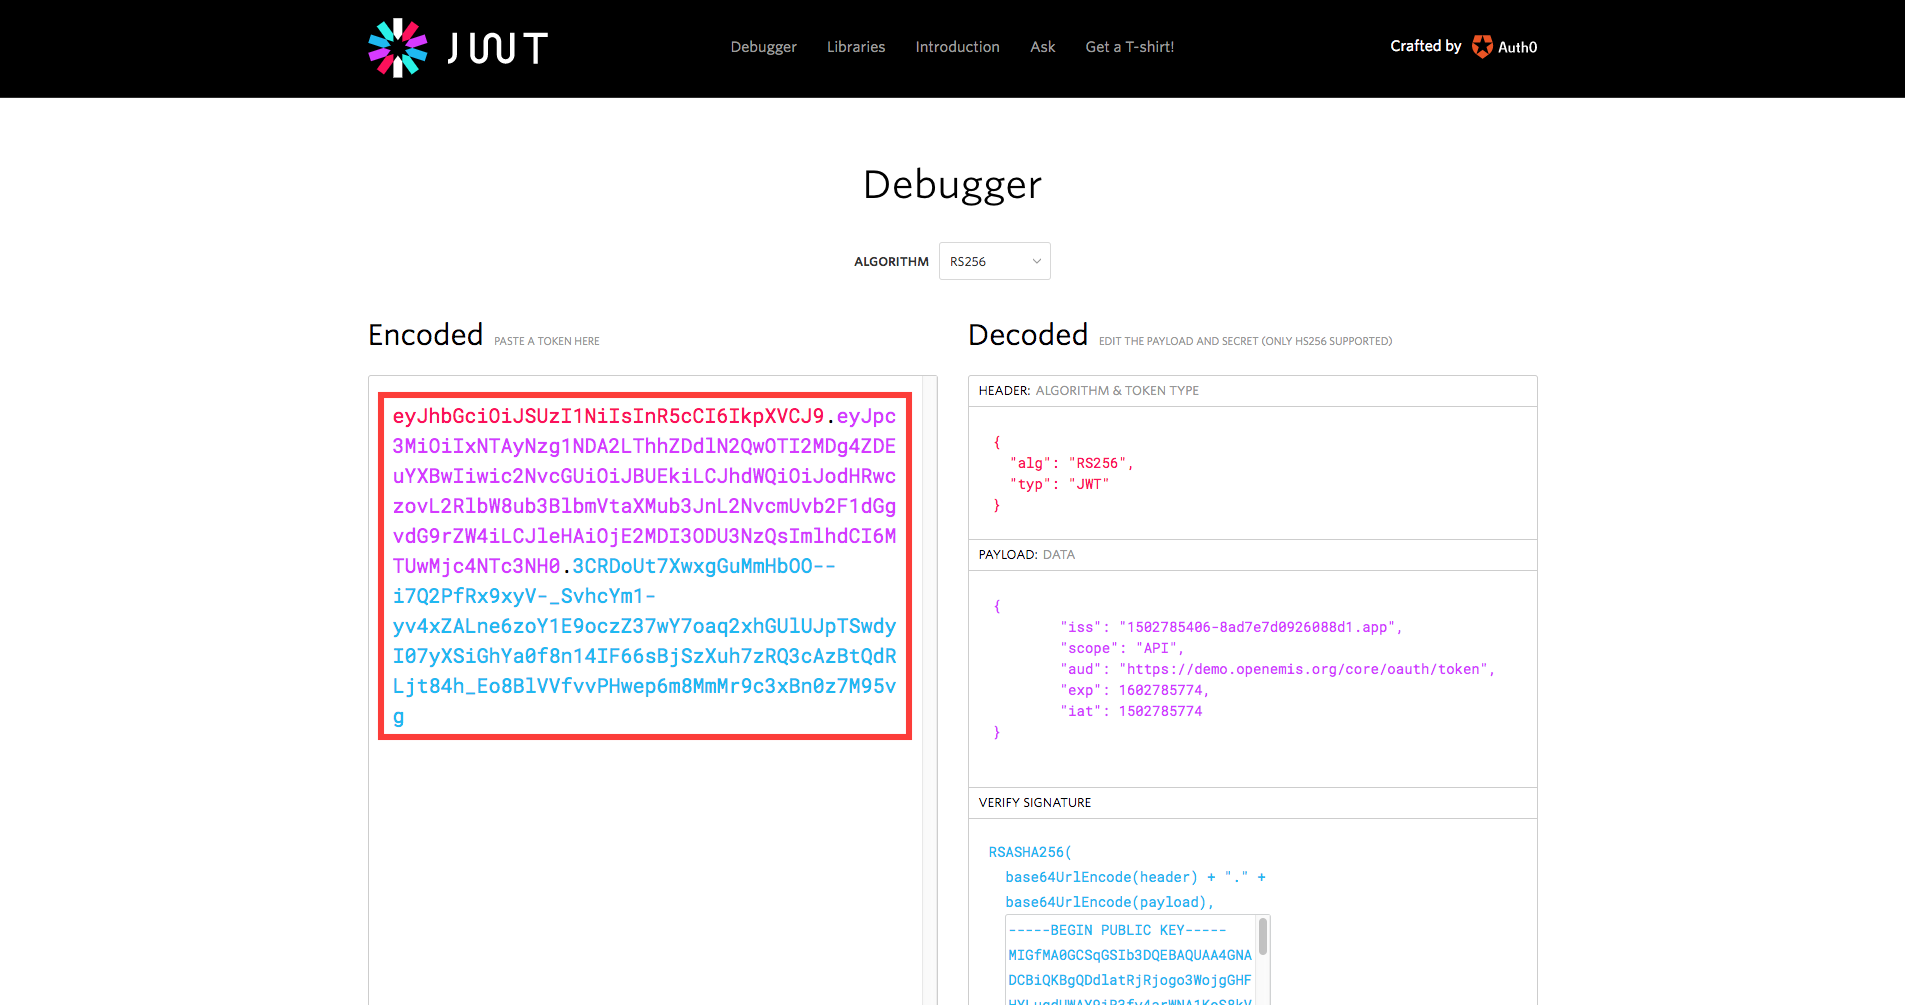
2) Set ‘Algorithm’ to ‘RS256’
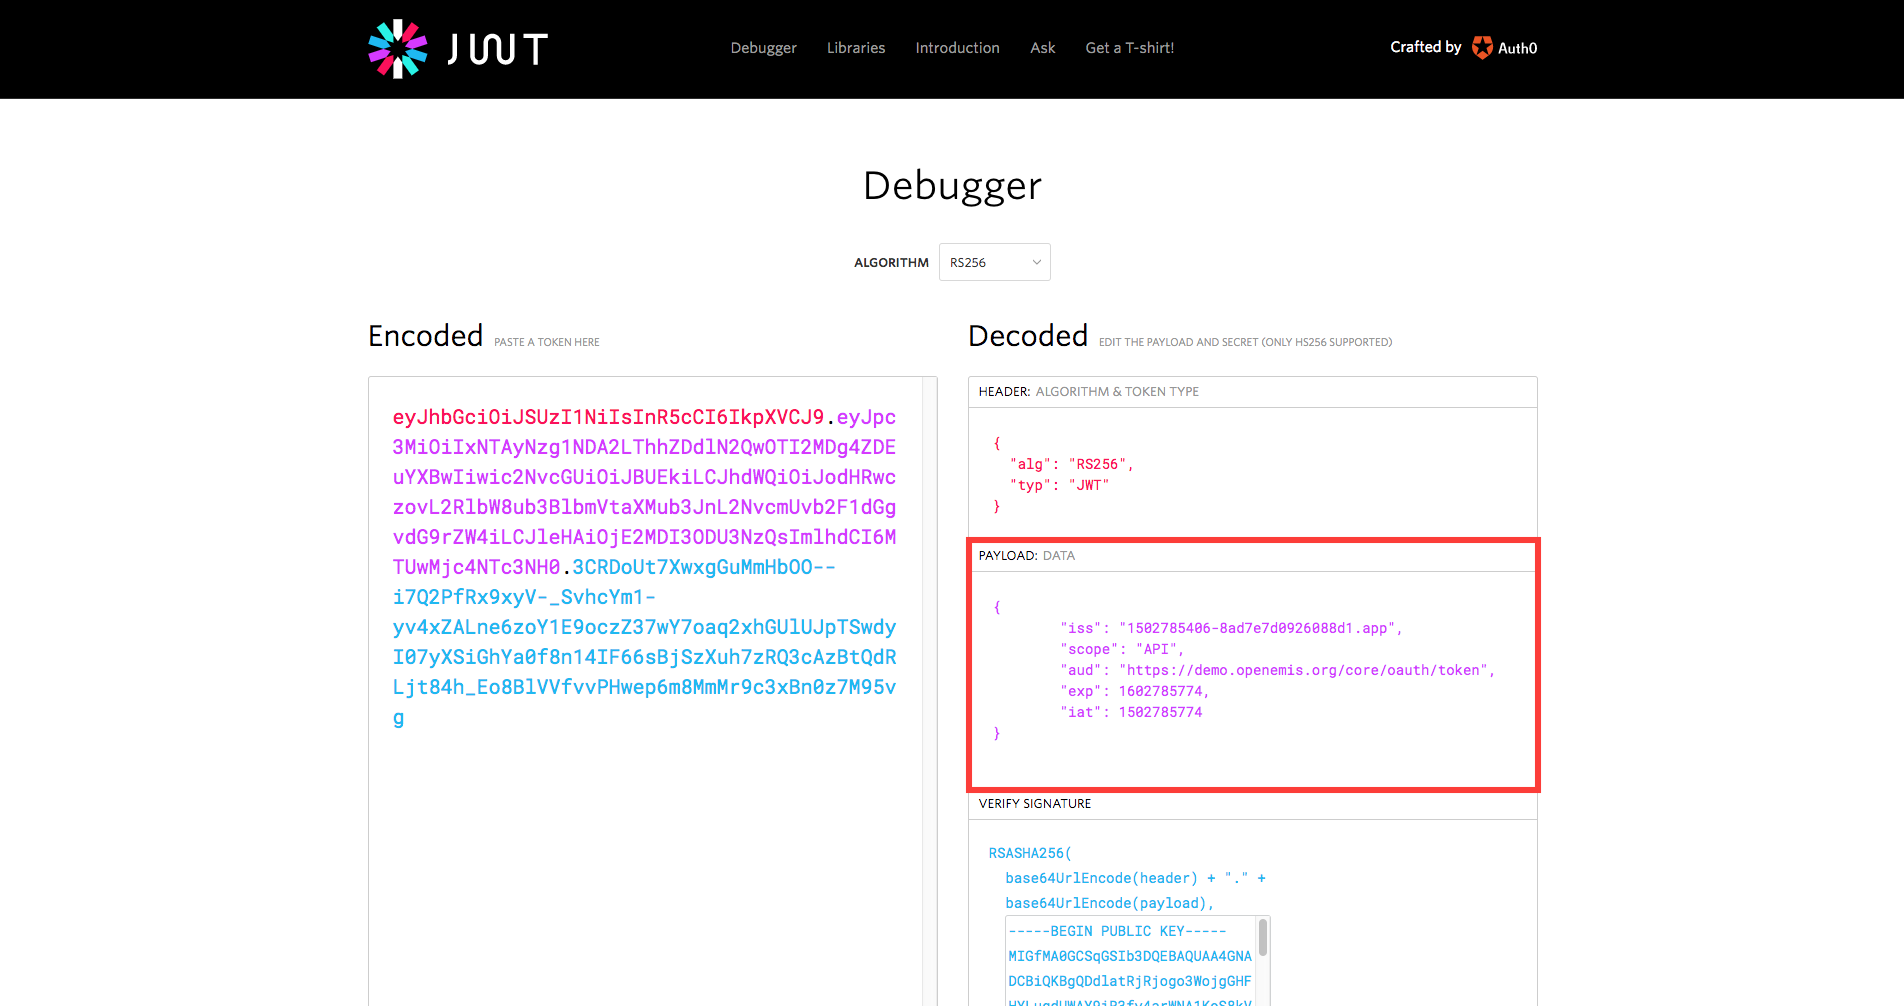
3) Under the ‘Decoded’ column, ‘PAYLOAD: DATA’ section, enter the following:
{
“iss”: “1502785406-8ad7e7d0926088d1.app”,
“scope”: “API”,
“aud”: “https://<enter URL here>/oauth/token”,
“exp”: 1602785774,
“iat”: 1502785774
}
For “iss”, enter the Client ID from OpenEMIS Core.
This is the client ID provided by OpenEMIS Core.
For “scope”, enter “API”
This is to restrict the API that the access token can be used for. If not specified, all the default scope for the API will be available. This is optional.
For “aud”, enter your OpenEMIS Core URL followed by “/oauth/token”
This is the authorisation URI to retrieve the token.
For “exp”, you may get the current timestamp from http://www.unixtimestamp.com/index.php and extend accordingly
This is the expiry time of the signed JWT request. This will determine the session time that you will be allowed to access the system.
For “iat”, you may get the current timestamp from http://www.unixtimestamp.com/index.php
This is the issued time of the signed JWT request.
4) The payload above should be signed by the public key and private key that is generated by your server.
To generate a public and private key pair, you may install OpenSSL extension. Use the command line by executing “openssl genrsa -out private.key 1024” and “openssl rsa -in private.key -pubout -out public.key”.
Under the ‘Decoded’ column, ‘VERIFY SIGNATURE’ section, enter your server’s ‘Public Key’ and ‘Private Key’.
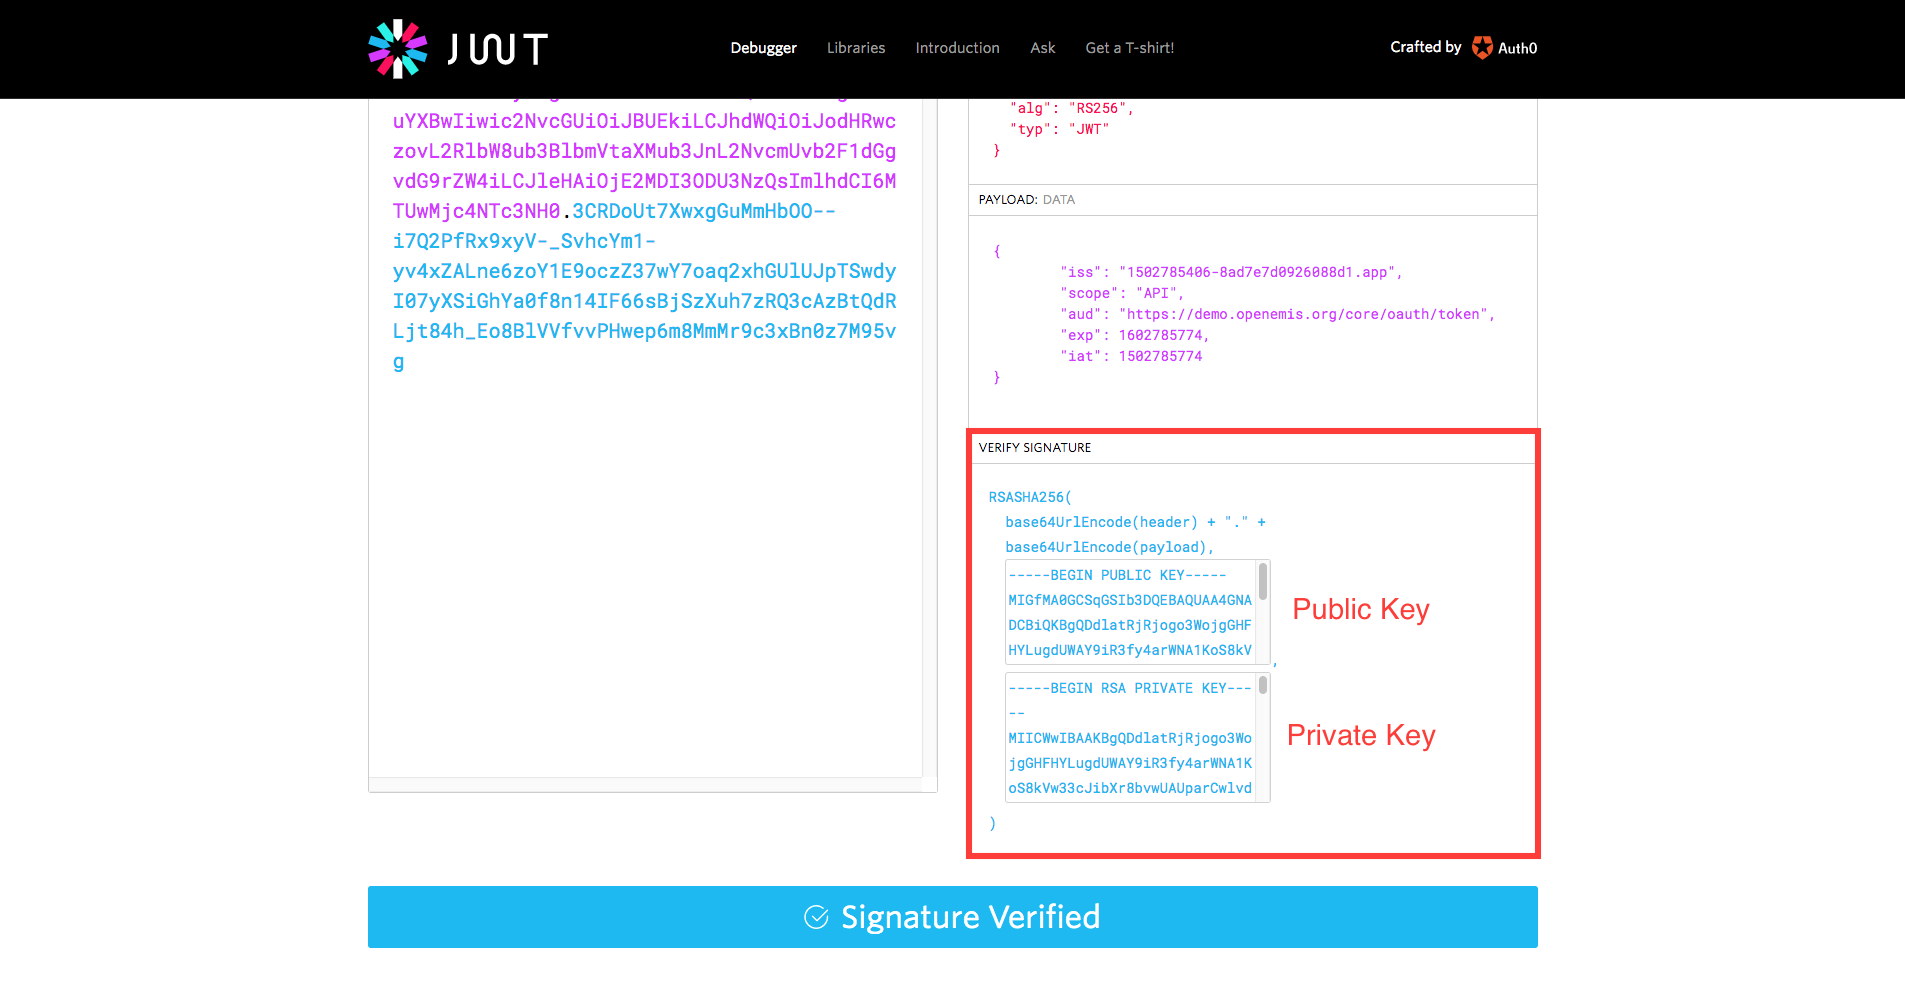
5) Your JWT will appear under the ‘Encoded’ column at the left hand side.
Access Token
Requesting for an Access Token to access API
For illustration purposes, we will be using a Chrome extension – Advanced Rest Client (https://chrome.google.com/webstore/detail/advanced-rest-client/hgmloofddffdnphfgcellkdfbfbjeloo/related) to request for an access token. You may use other alternatives to get your access token.
Send a HTTP POST request with the following in the body:
grant_type: urn:ietf:params:oauth:grant-type:jwt-bearer
assertion: <insert signed JWT here>
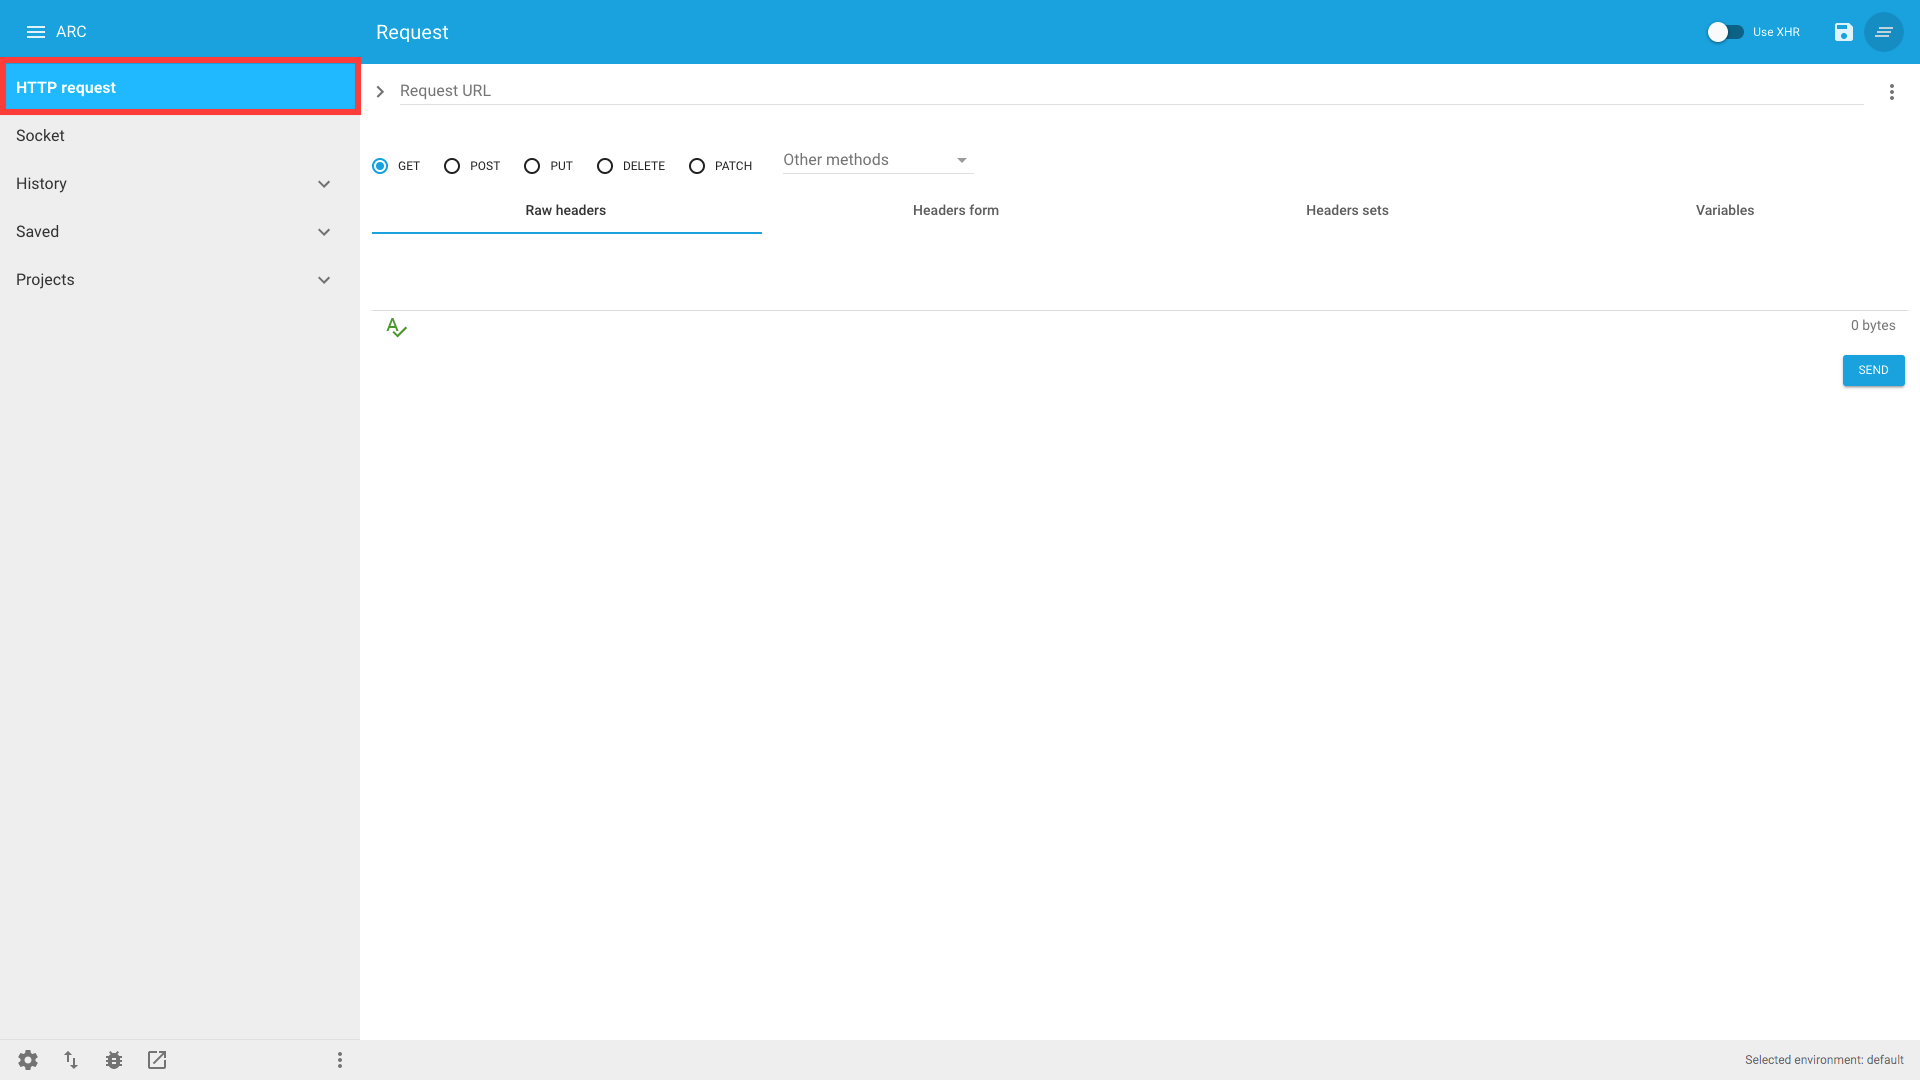
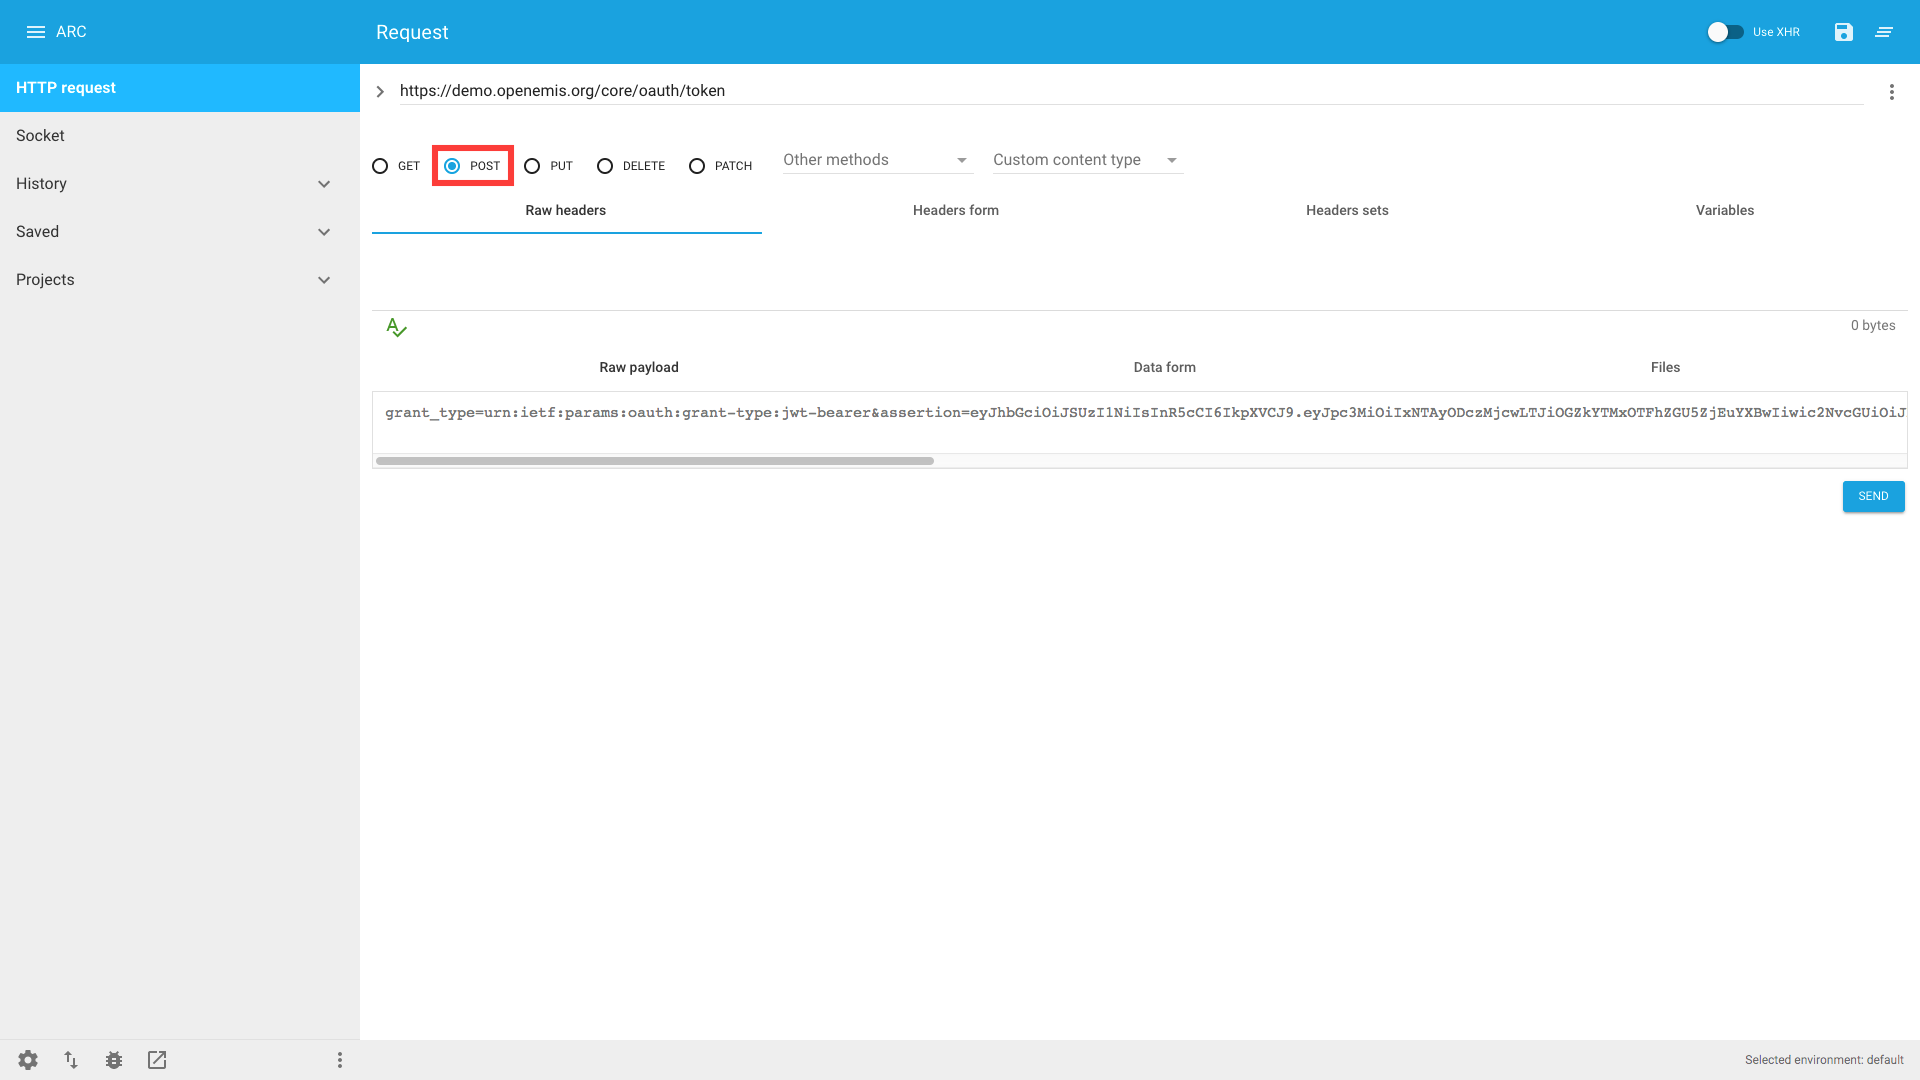
1) In ARC, navigate to ‘HTTP request’
2) Enter “https://<insert URL here>/oauth/token”
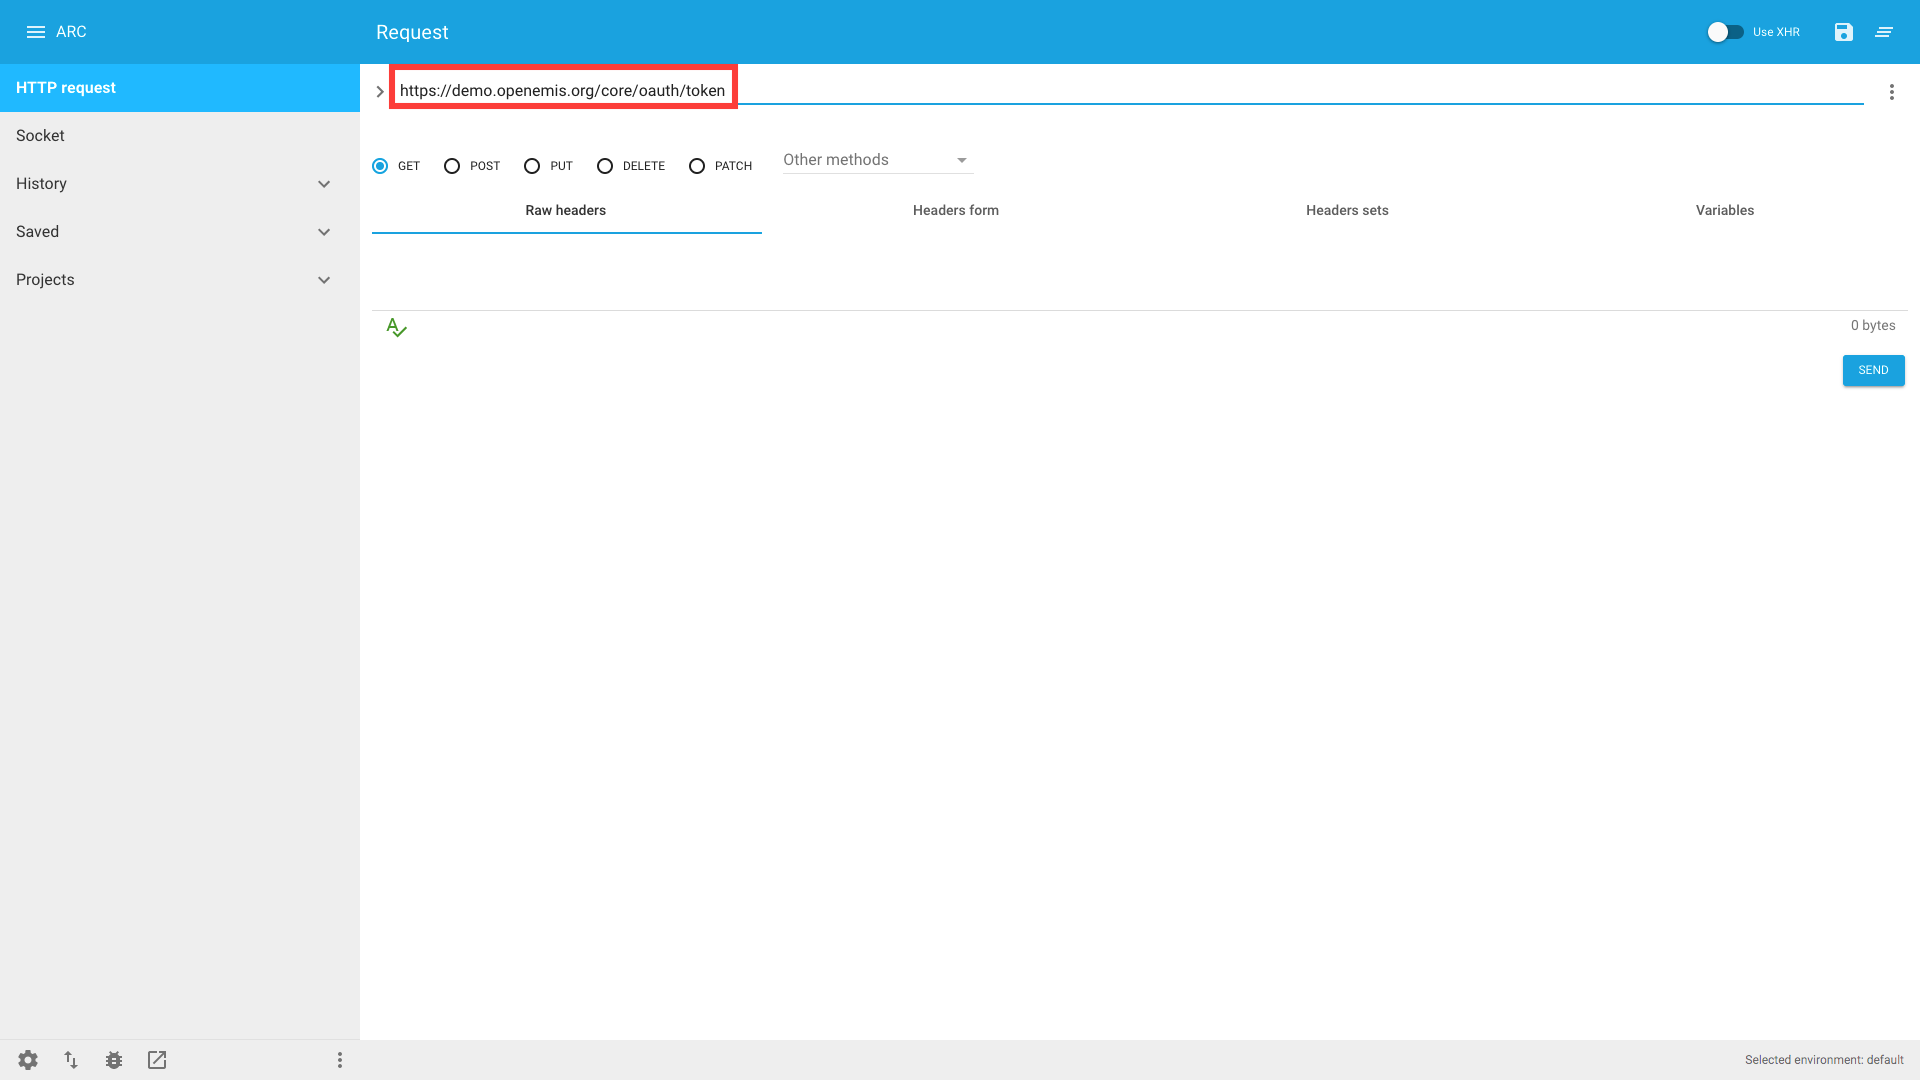
3) Select ‘POST’ from the radio buttons
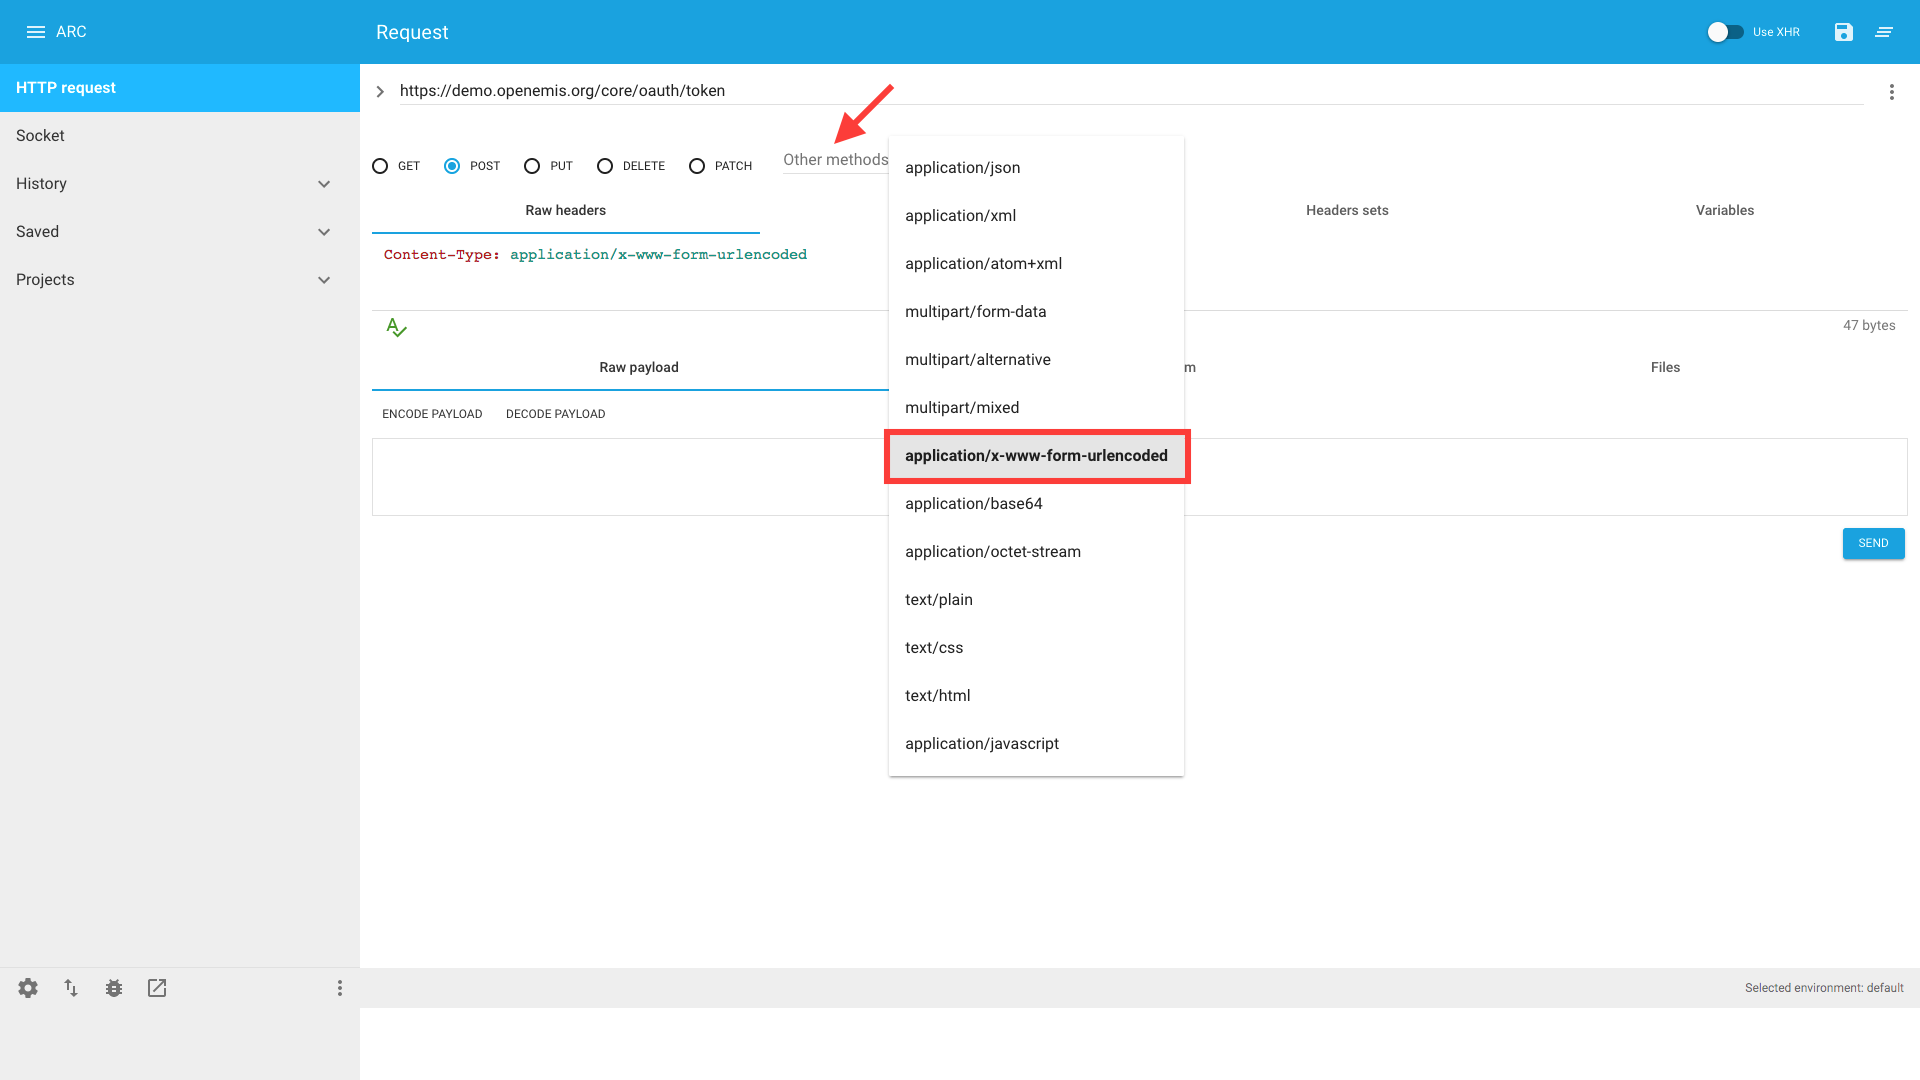
4) Select “Other methods” > “application/x-www-form-urlencoded”
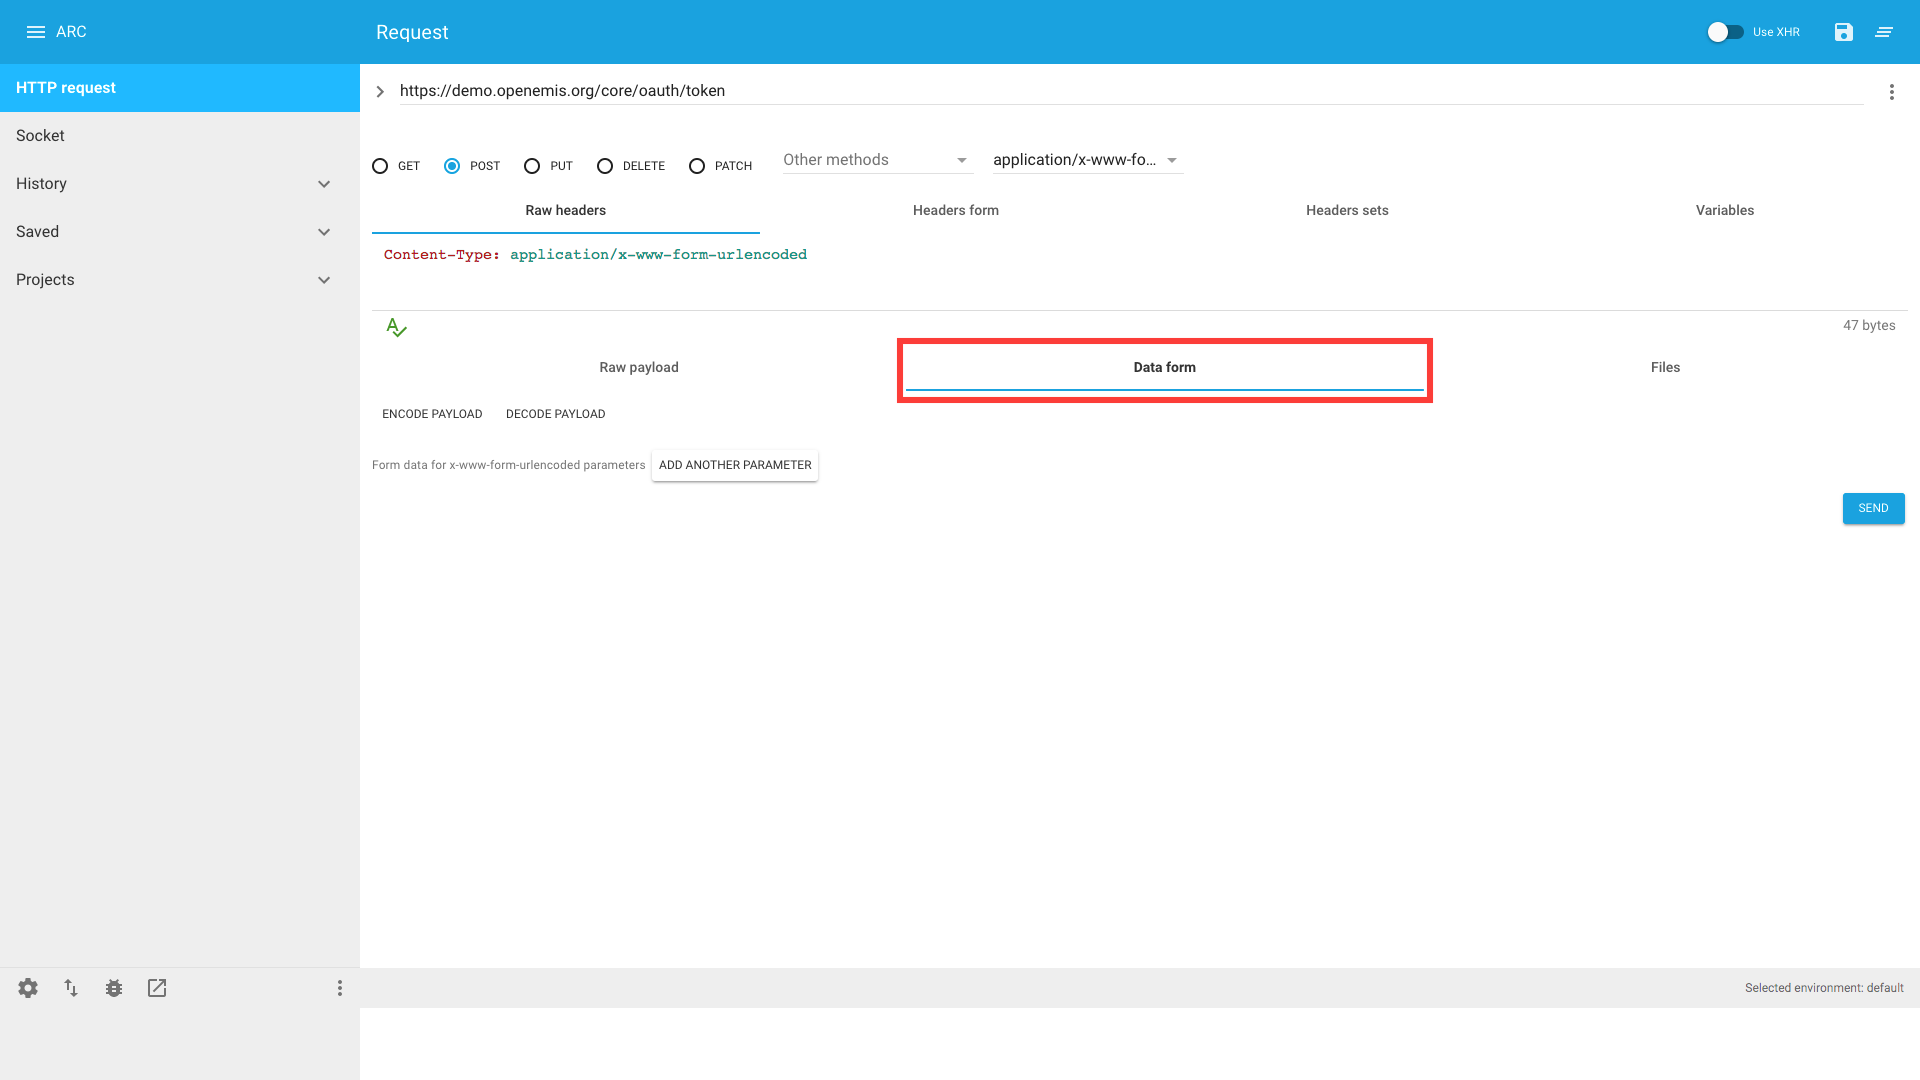
5) Click ‘Data form’
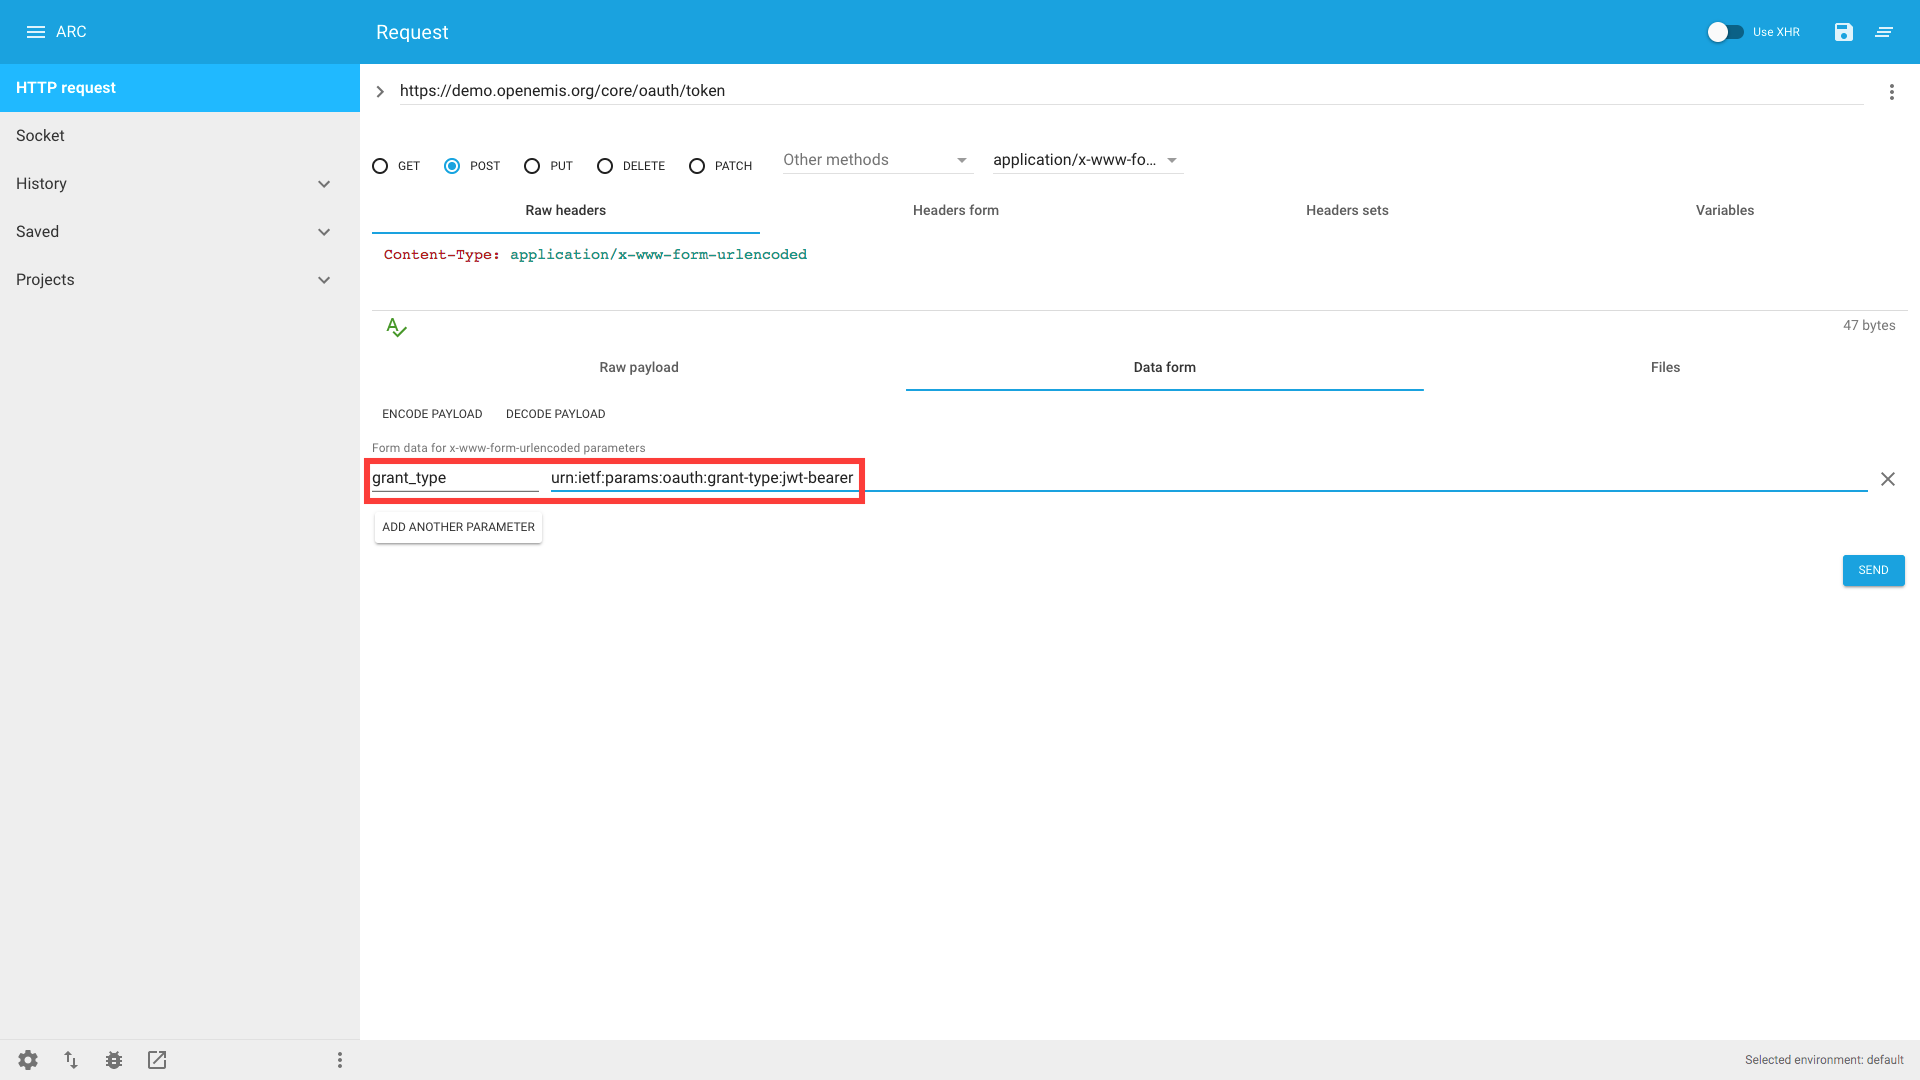
6) Click ‘ADD ANOTHER PARAMETER’
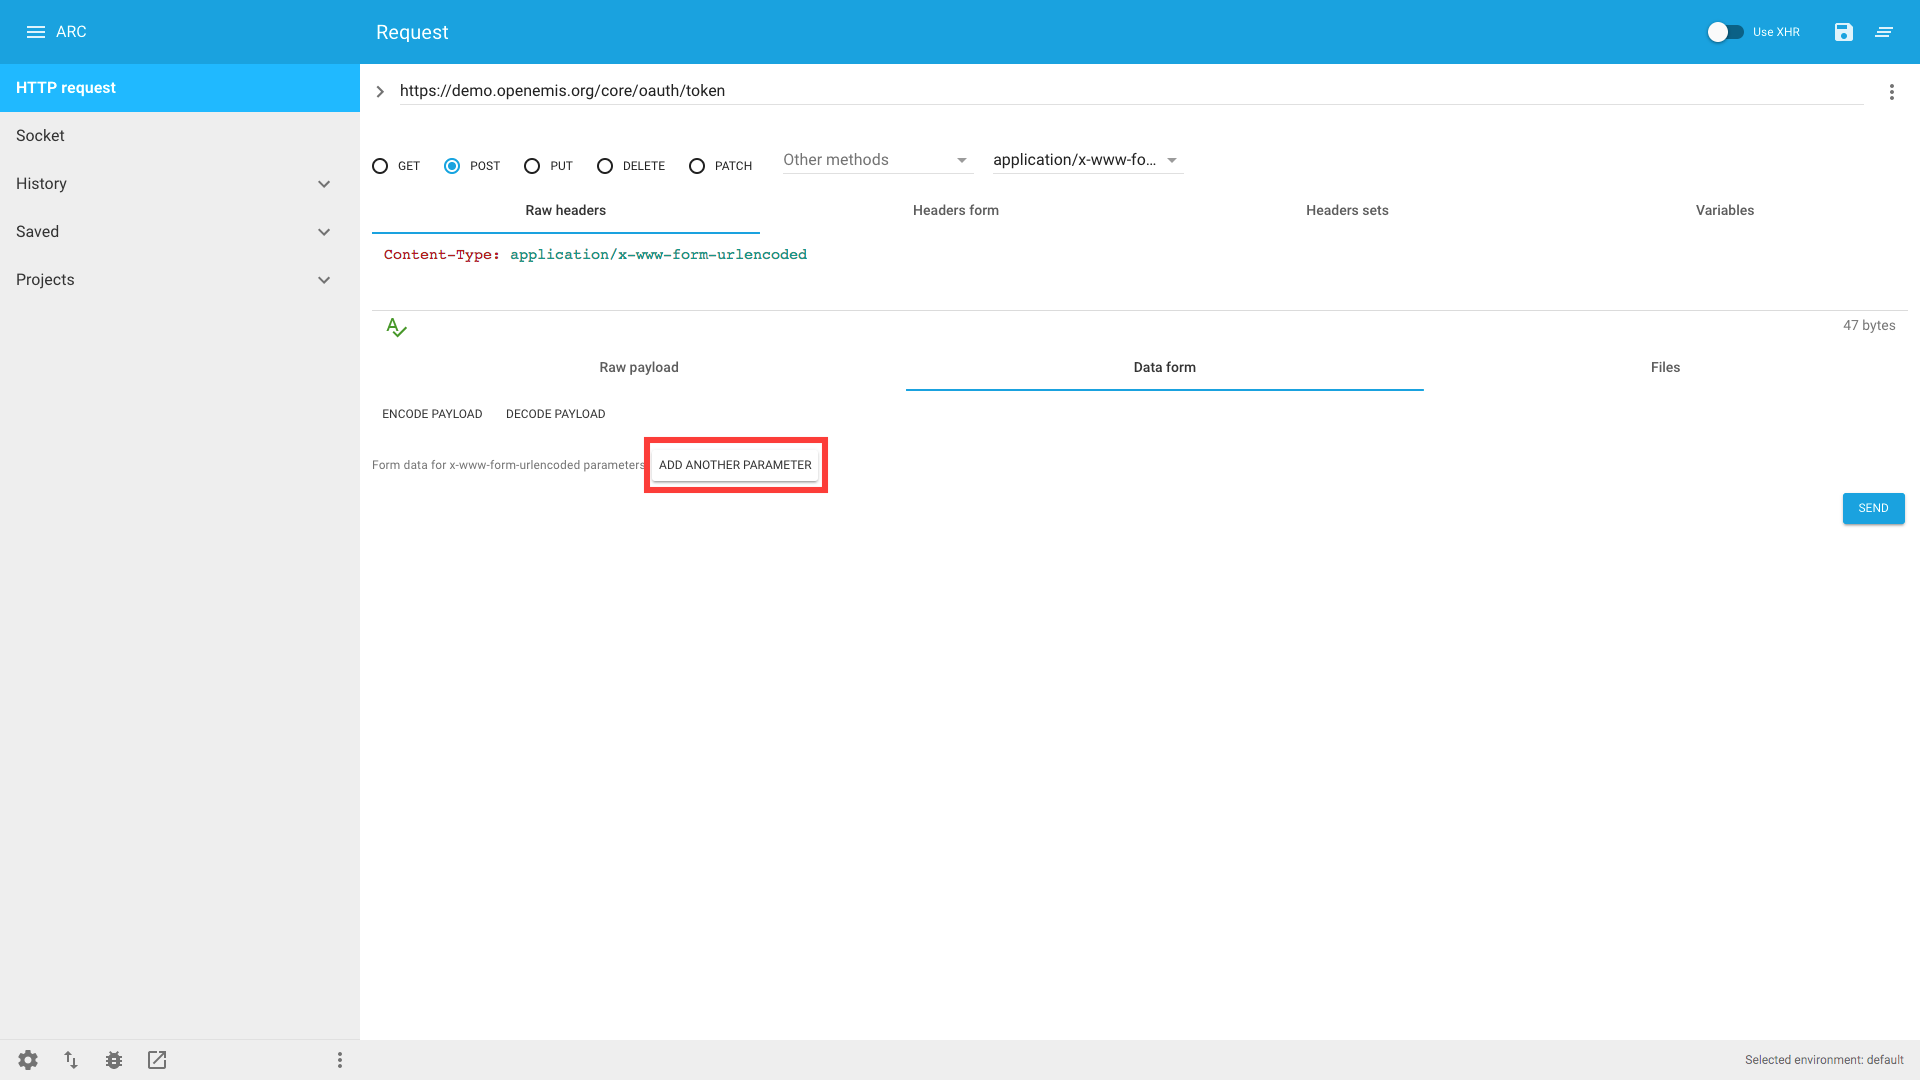
7) Enter grant_type / urn:ietf:params:oauth:grant-type:jwt-bearer
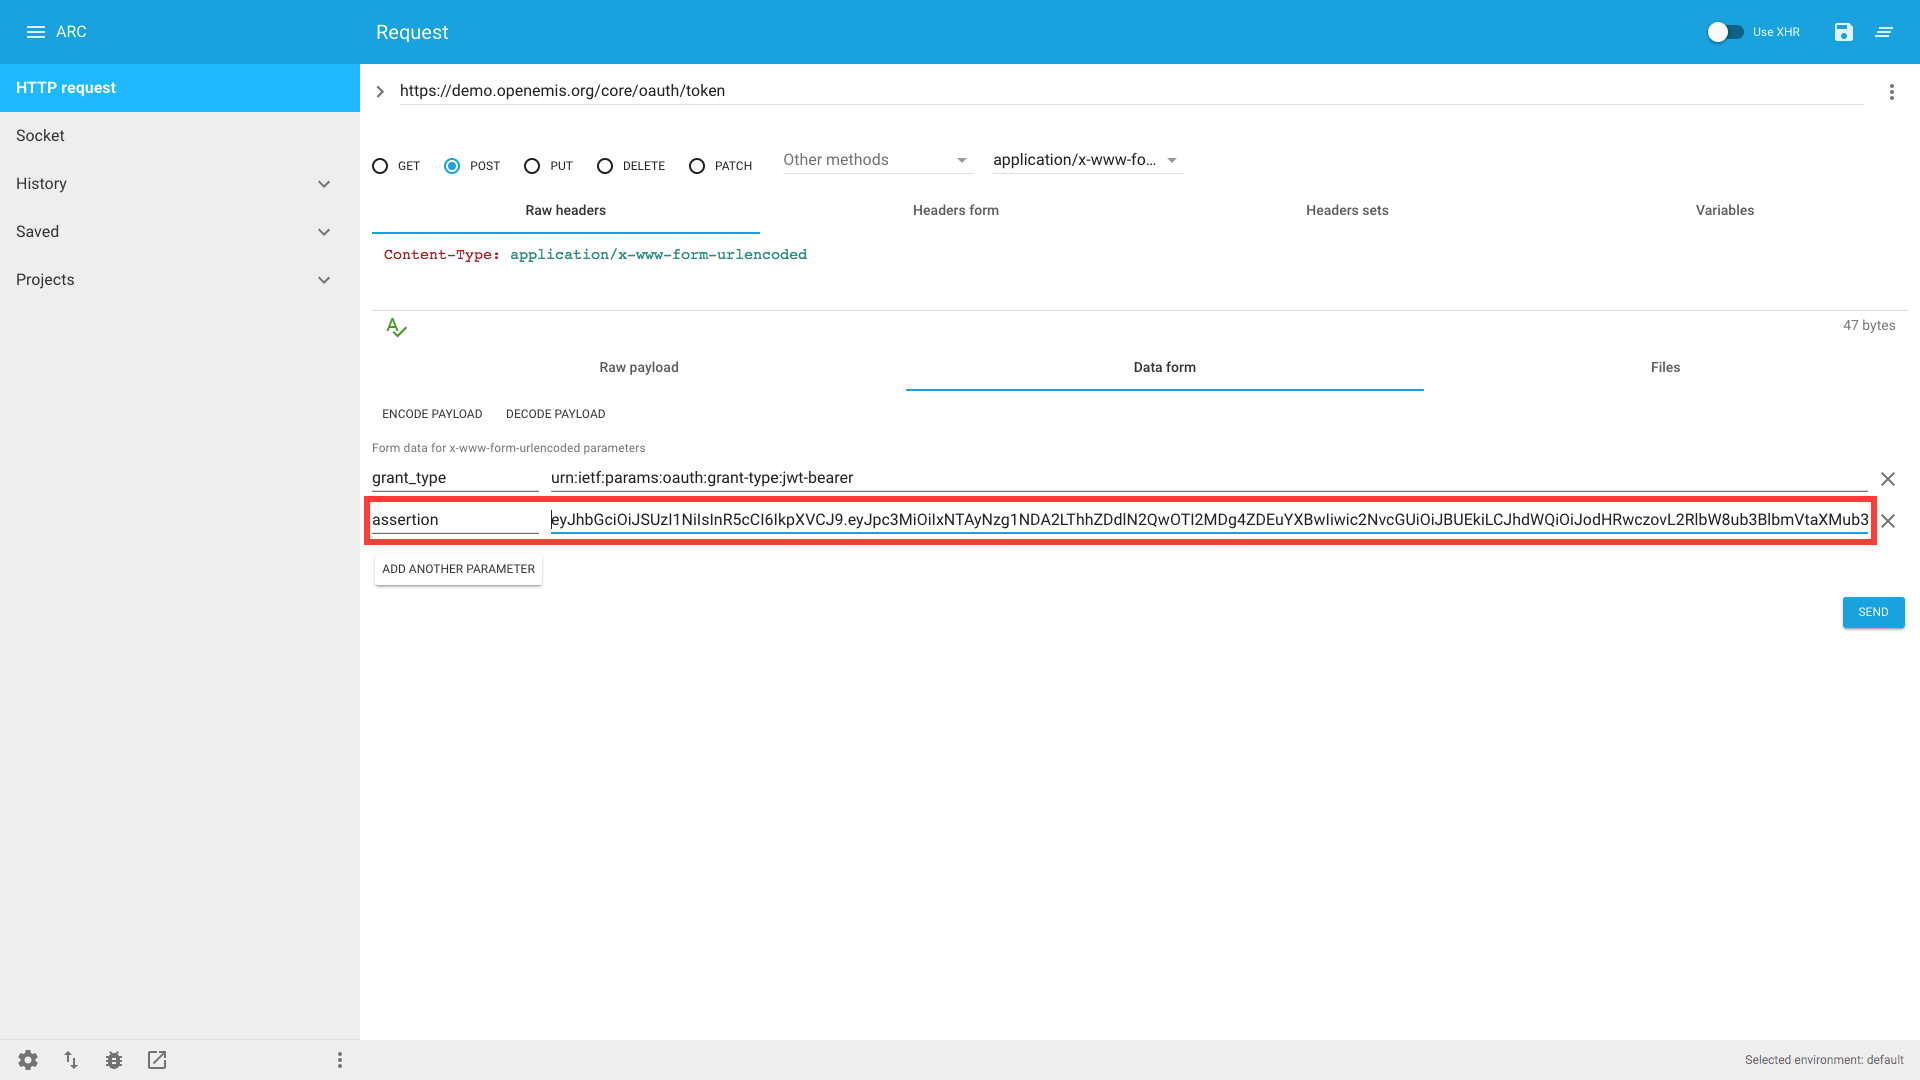
8) Click ‘ADD ANOTHER PARAMETER’ and enter assertion / <insert JWT here>
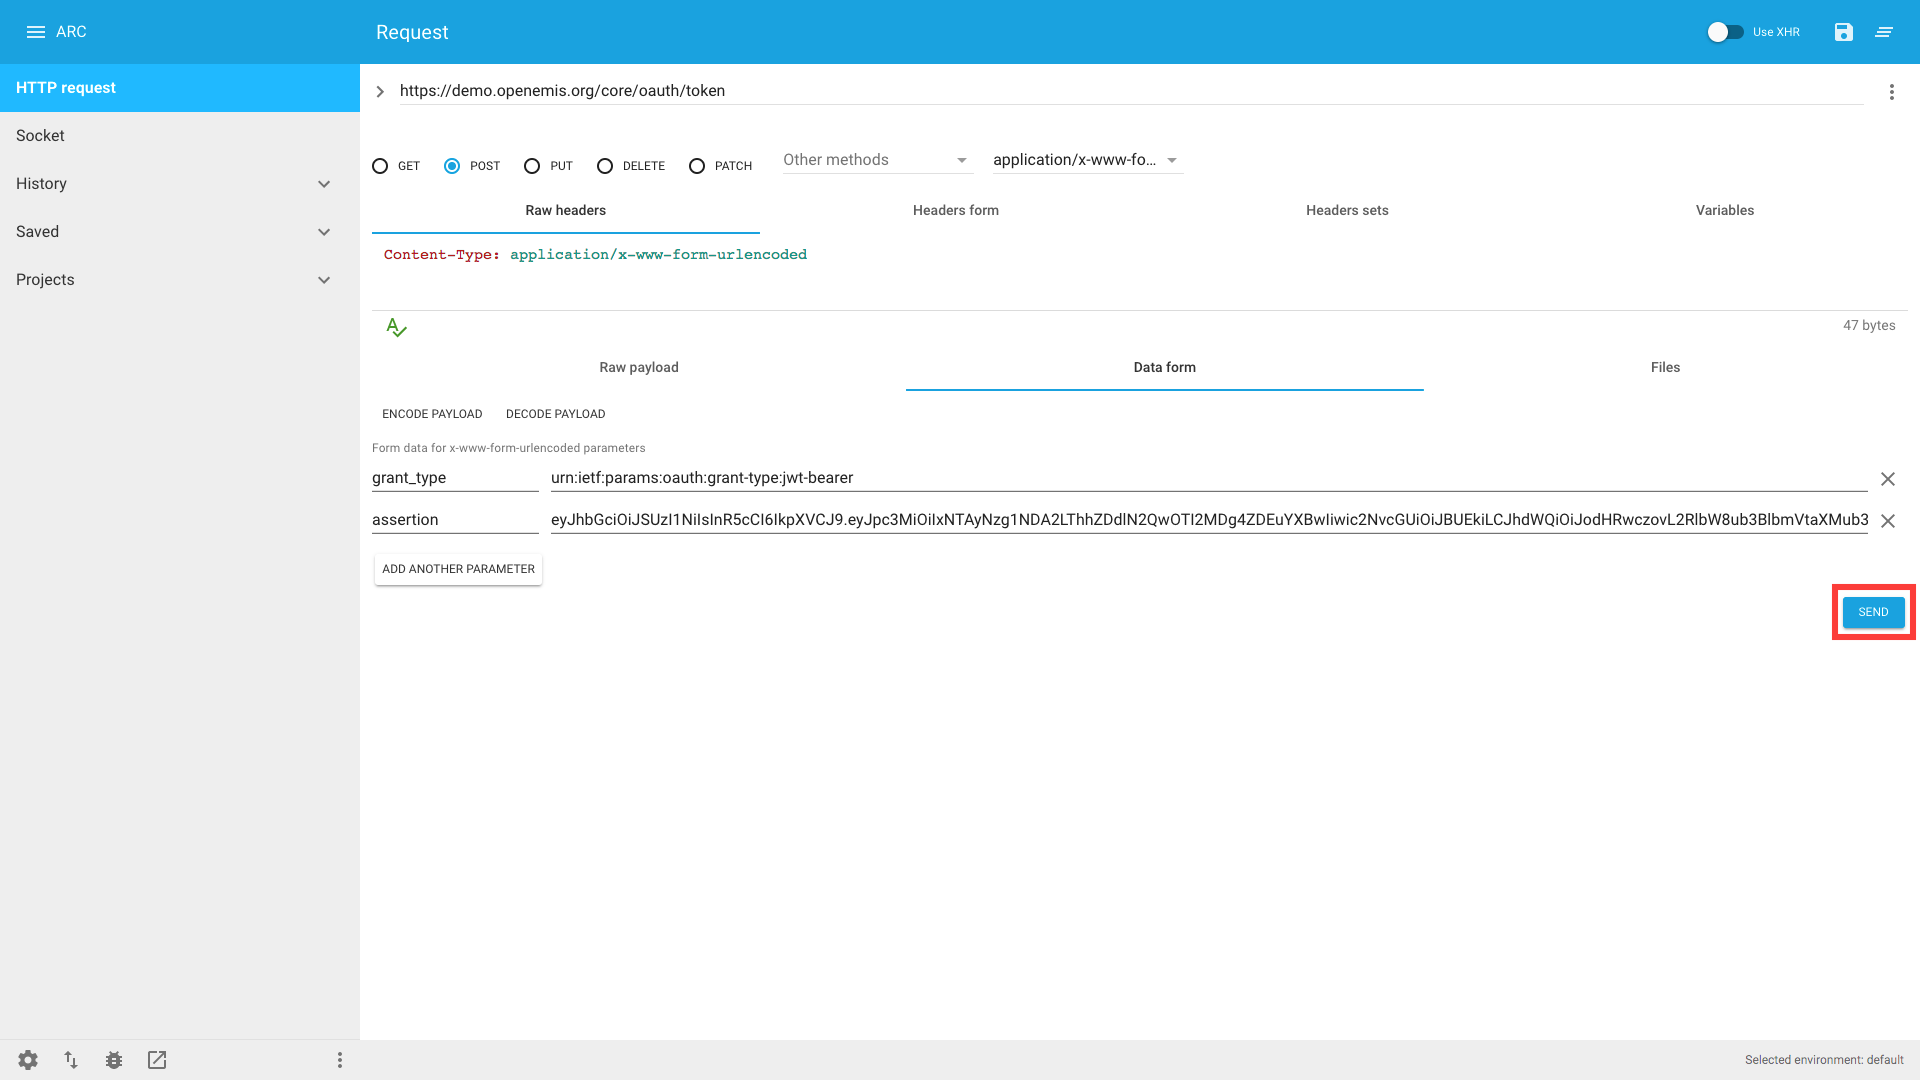
9) Click ‘SEND’
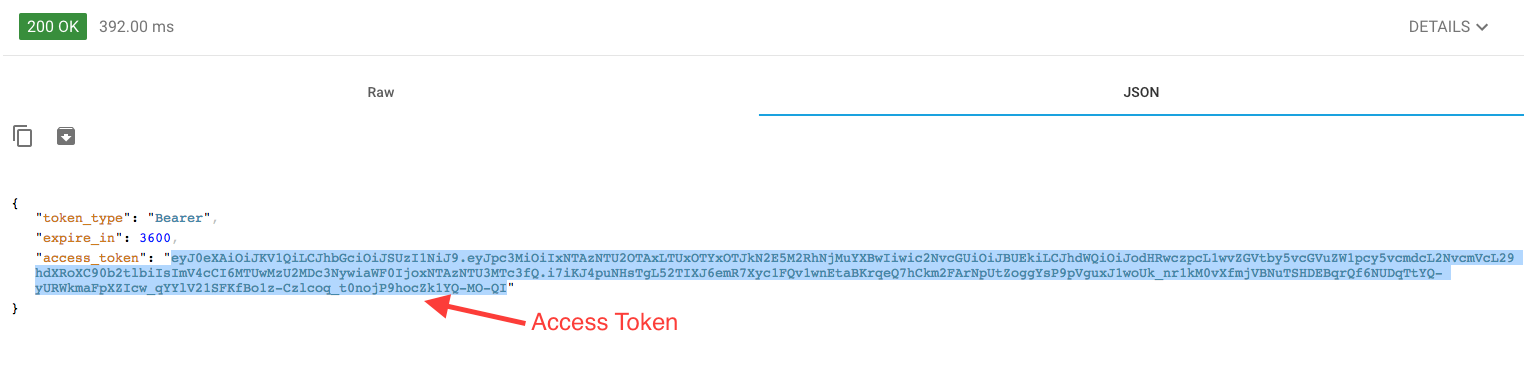
10) You should get a response similar to this:
Using Access Token to access API
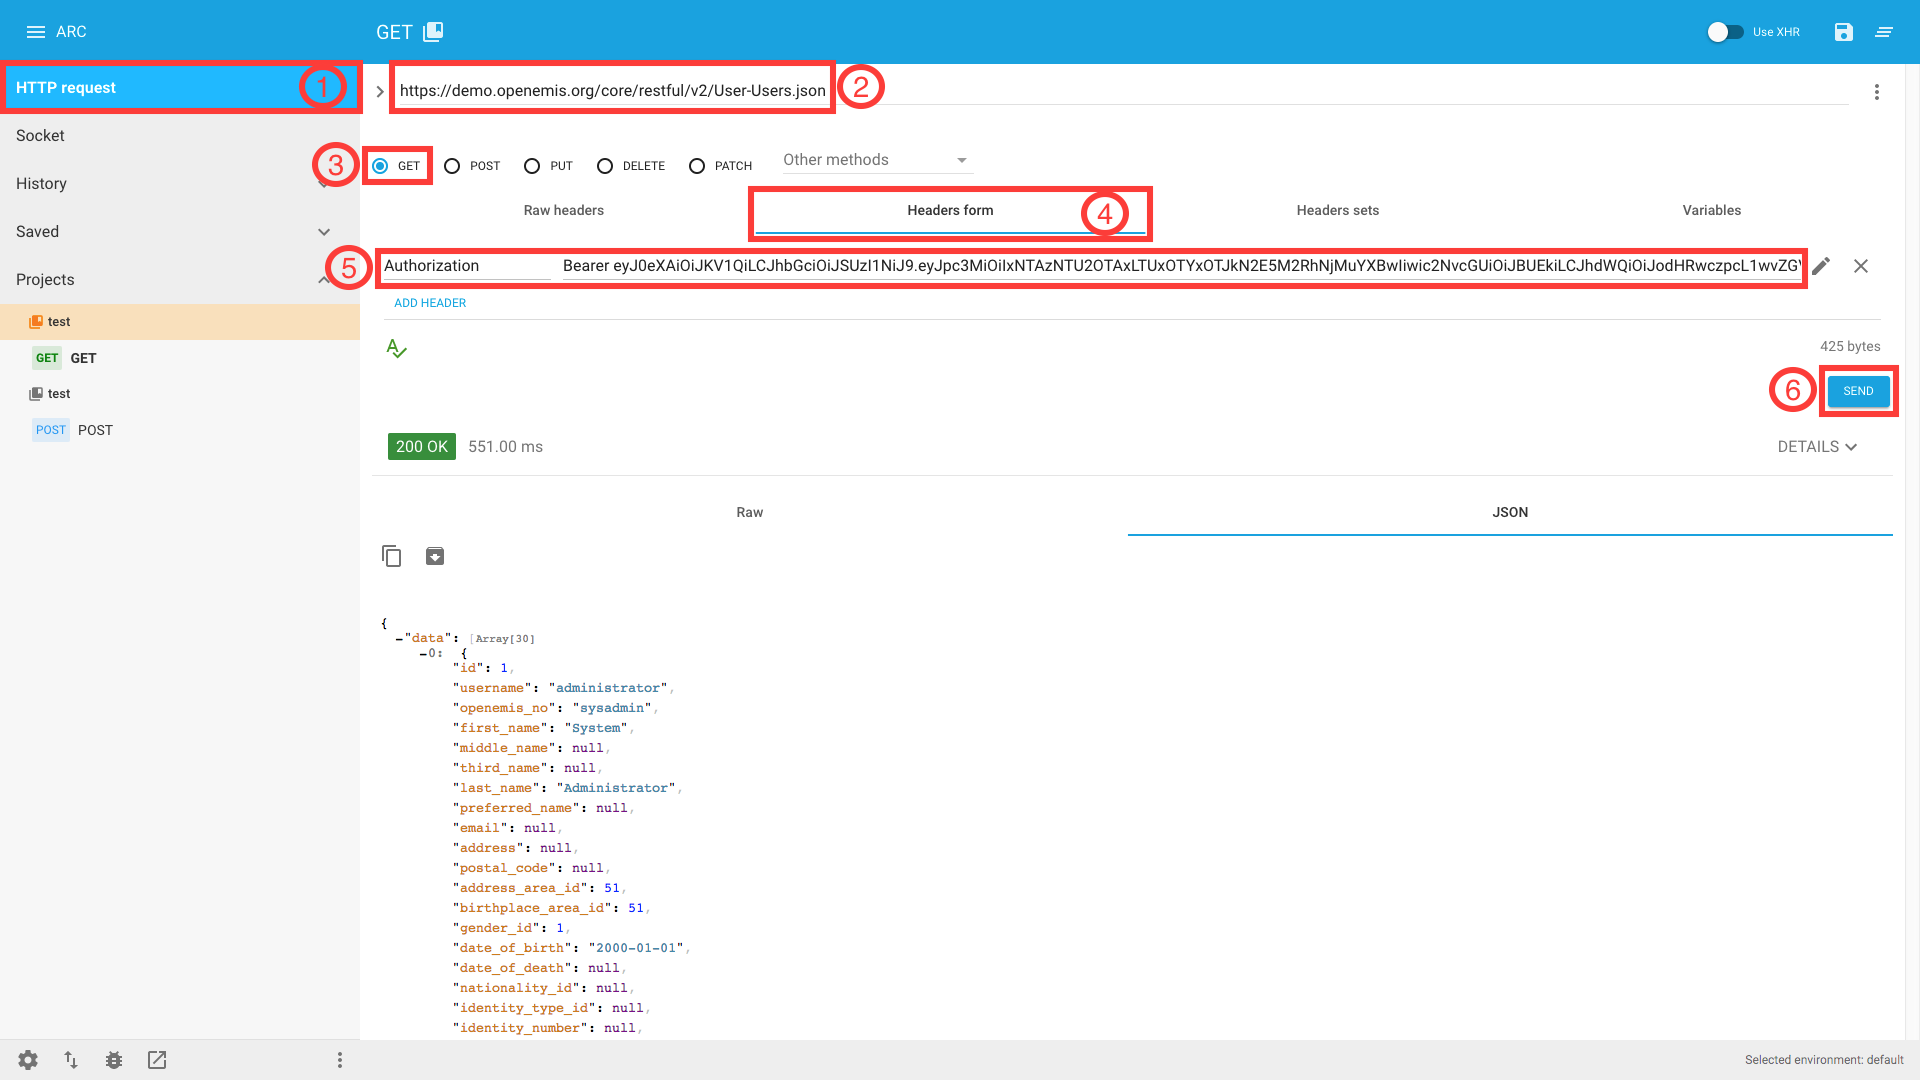
Again, for illustration purposes, we will be using a Chrome extension – Advanced Rest Client (https://chrome.google.com/webstore/detail/advanced-rest-client/hgmloofddffdnphfgcellkdfbfbjeloo/related) to request to access the API. You may use other alternatives to access API.
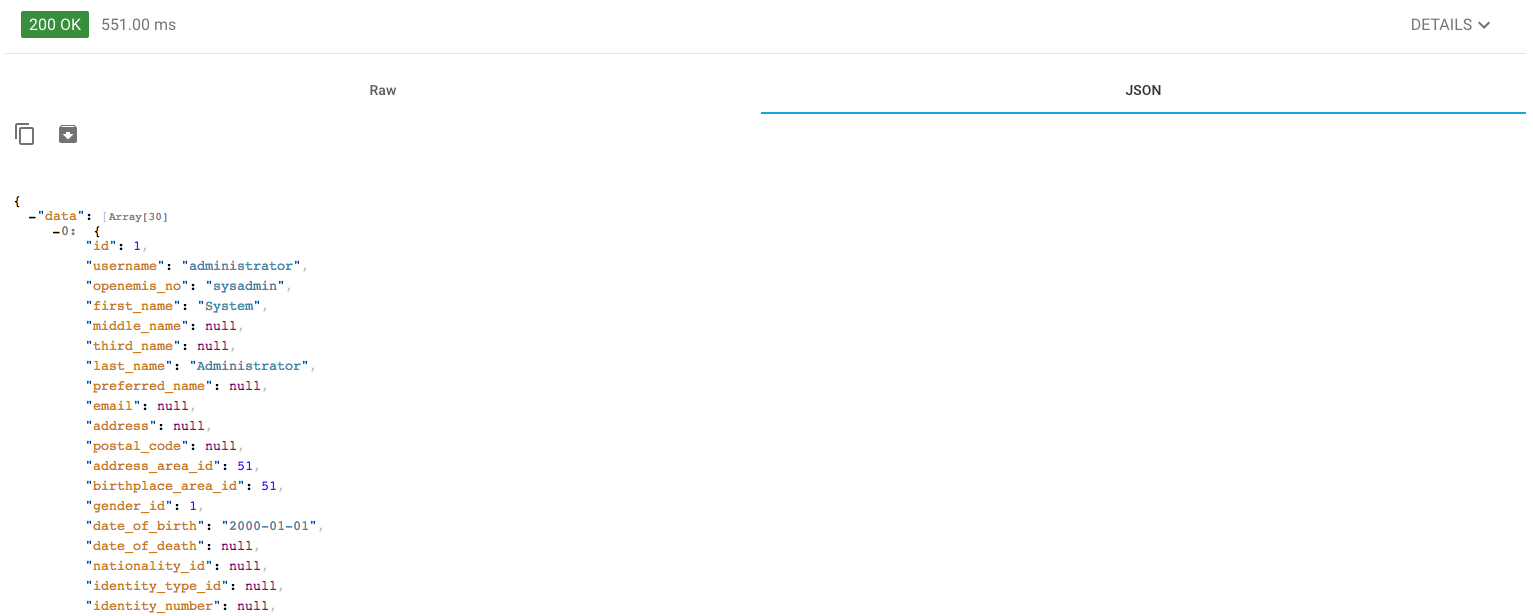
For this example, we will be accessing the Users API.
1) In ARC, navigate to ‘HTTP request’
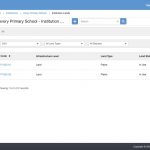
2) Enter the resource URI of the API that you want to access e.g. https://demo.openemis.org/core/restful/v2/User-Users.json
OpenEMIS Core resource URIs available:
- User-Users.json
- Institution-Institutions.json
3) Select ‘GET’ from the radio buttons
4) Click ‘Headers form’
5) Enter Authorization / Bearer <insert access token here>
6) Click ‘SEND’
7) You should get a response similar to this: