Article Name: Examination
Category/Module: Examinations
Tags: Examination, Exam, Register, Grades
Version: 3.7.3
Date Updated: 16 Nov 2016
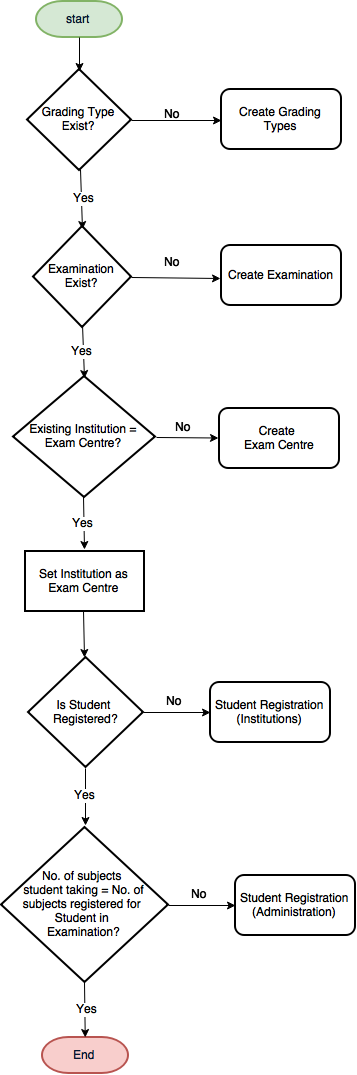
The examinations feature enables you to coordinate the national level examinations for Institutions. They are also responsible for creating registration for students, setting up exam centers, and assigning students to exam centers.
The following section will address the following features found in the Examinations.
- Managing Grading Types (Administrator)
- Managing Examination (Administrator)
- Managing Exam Centres (Administrator)
- Managing Exam Results (Administrator)
- View/Edit Exam Results (Marks)
- View/Edit Exam Results (Grade)
- Import Exam Results
- Manage Student Registration (Administrator)
Administrator
Managing Grading Types:

1) Go to Administration > System Setup > Examination > Exams.
2) Select on the Grading Types tab.
3) Select on the Actions Bar > View
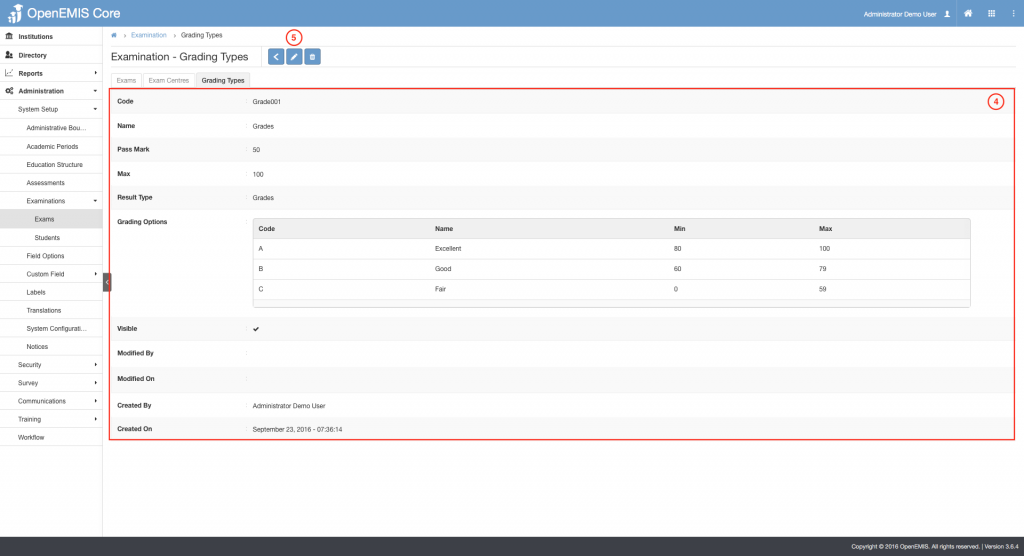
4) A detailed version of the Examination will be displayed.
5) Similarly, you can edit the data on the page.

1) Go to Administration > System Setup > Examination > Exams.
2) Select on the Add button.

3) Insert the required input such as Name, Result Type, Grading Options and etc.
4) Select Add New Option for Grading Options.
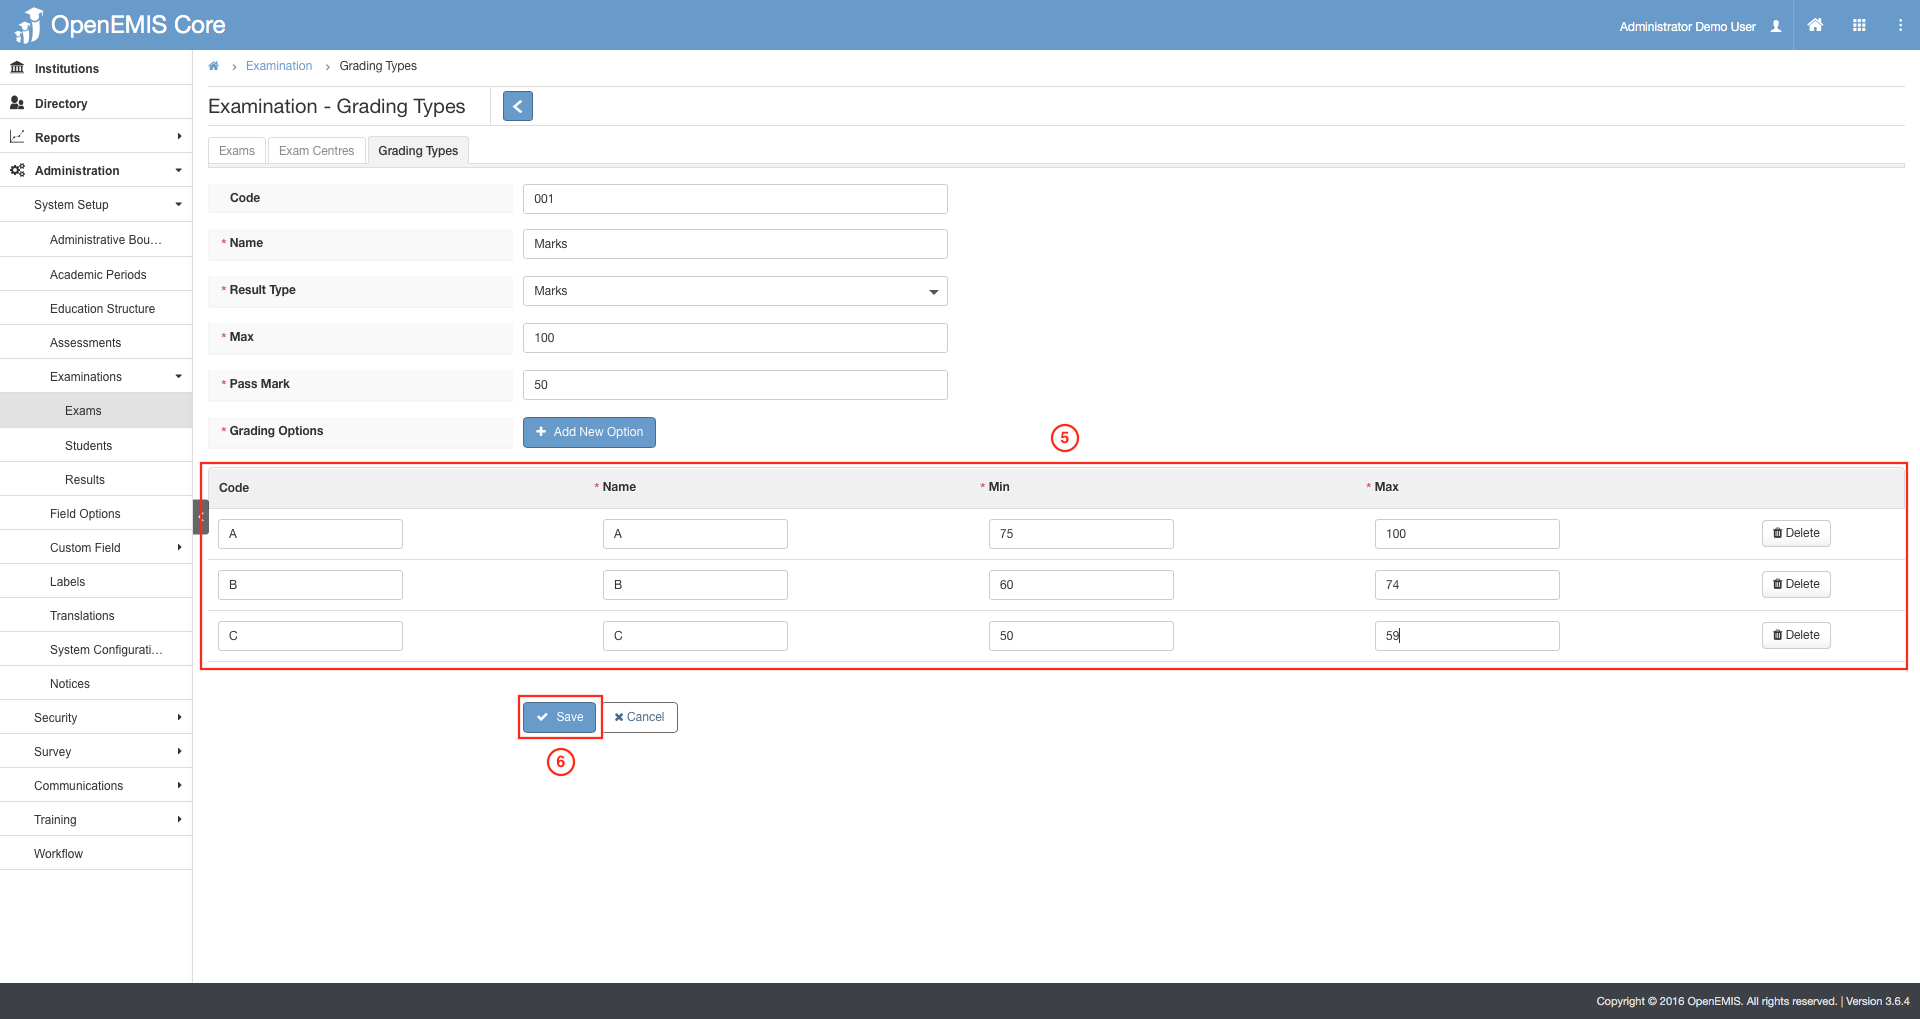
5) Fill in the required fields for the Grade Options.
6) Select on Save.
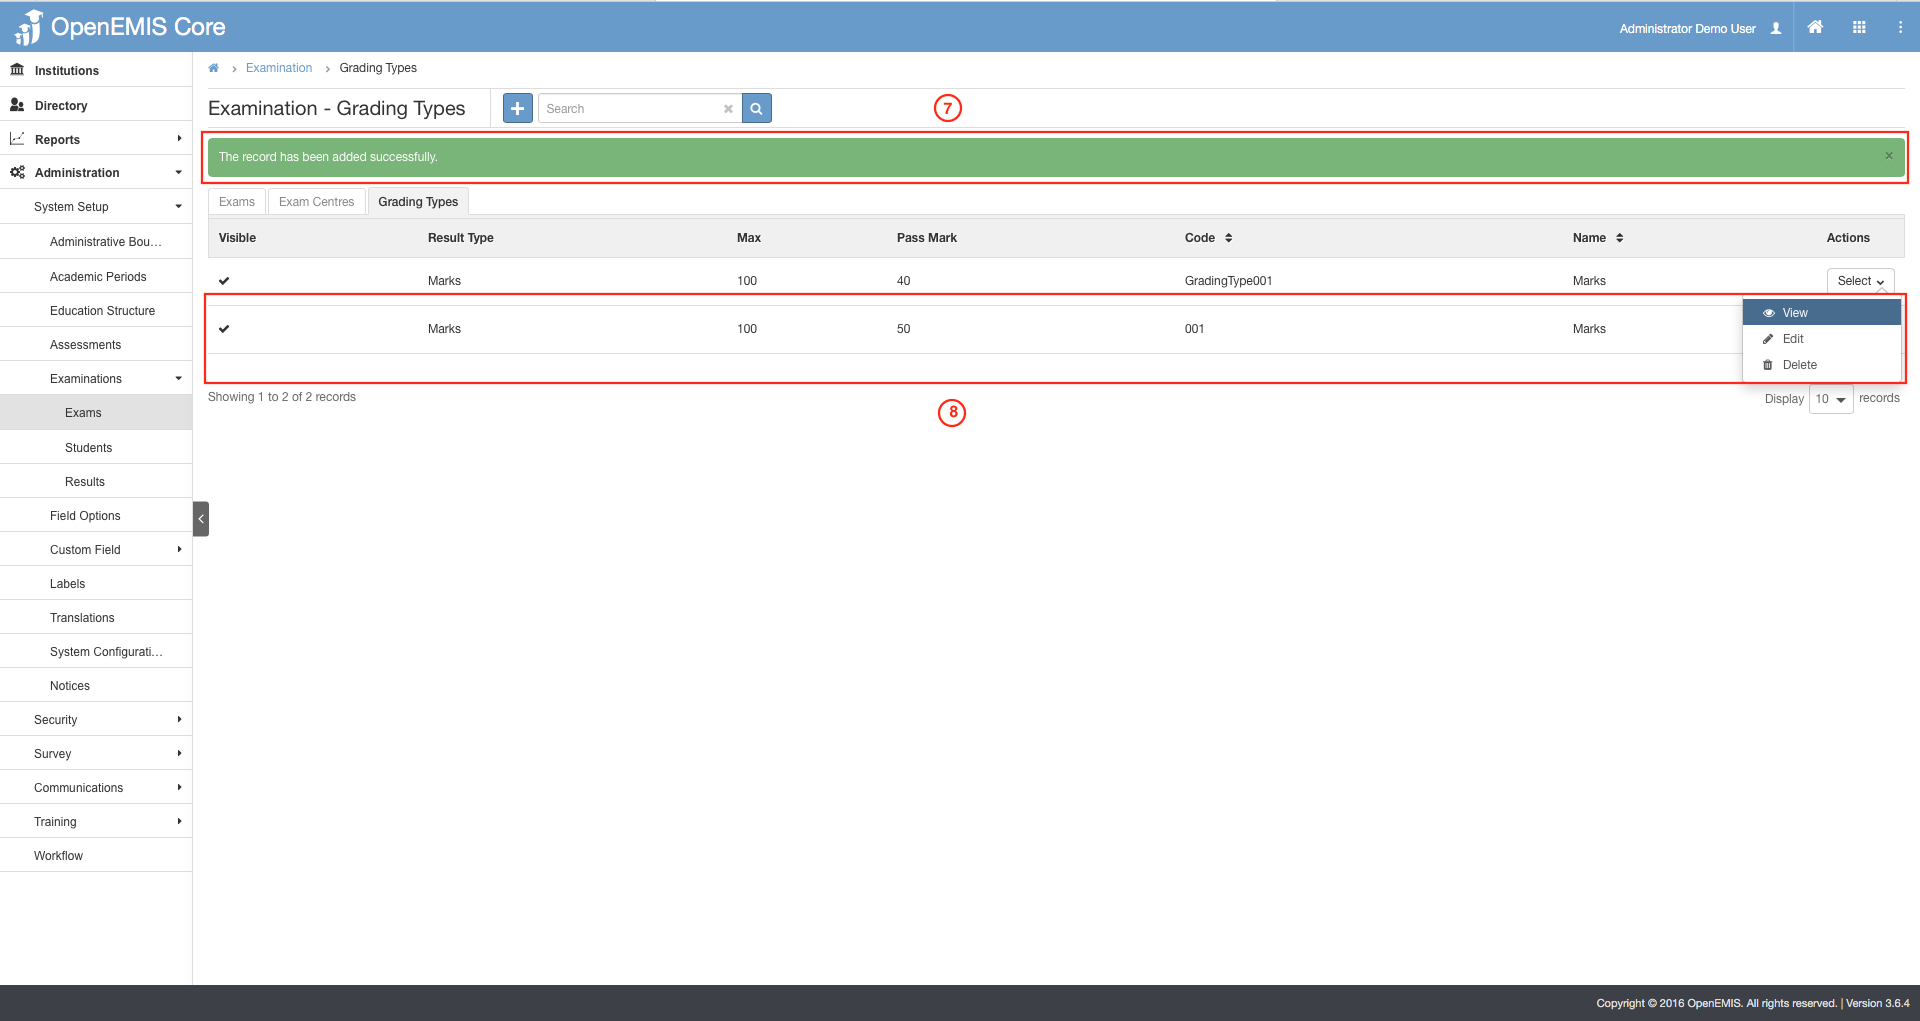
7) A successful message will be displayed upon a new record added.
8) You can view the record added in the table shown.
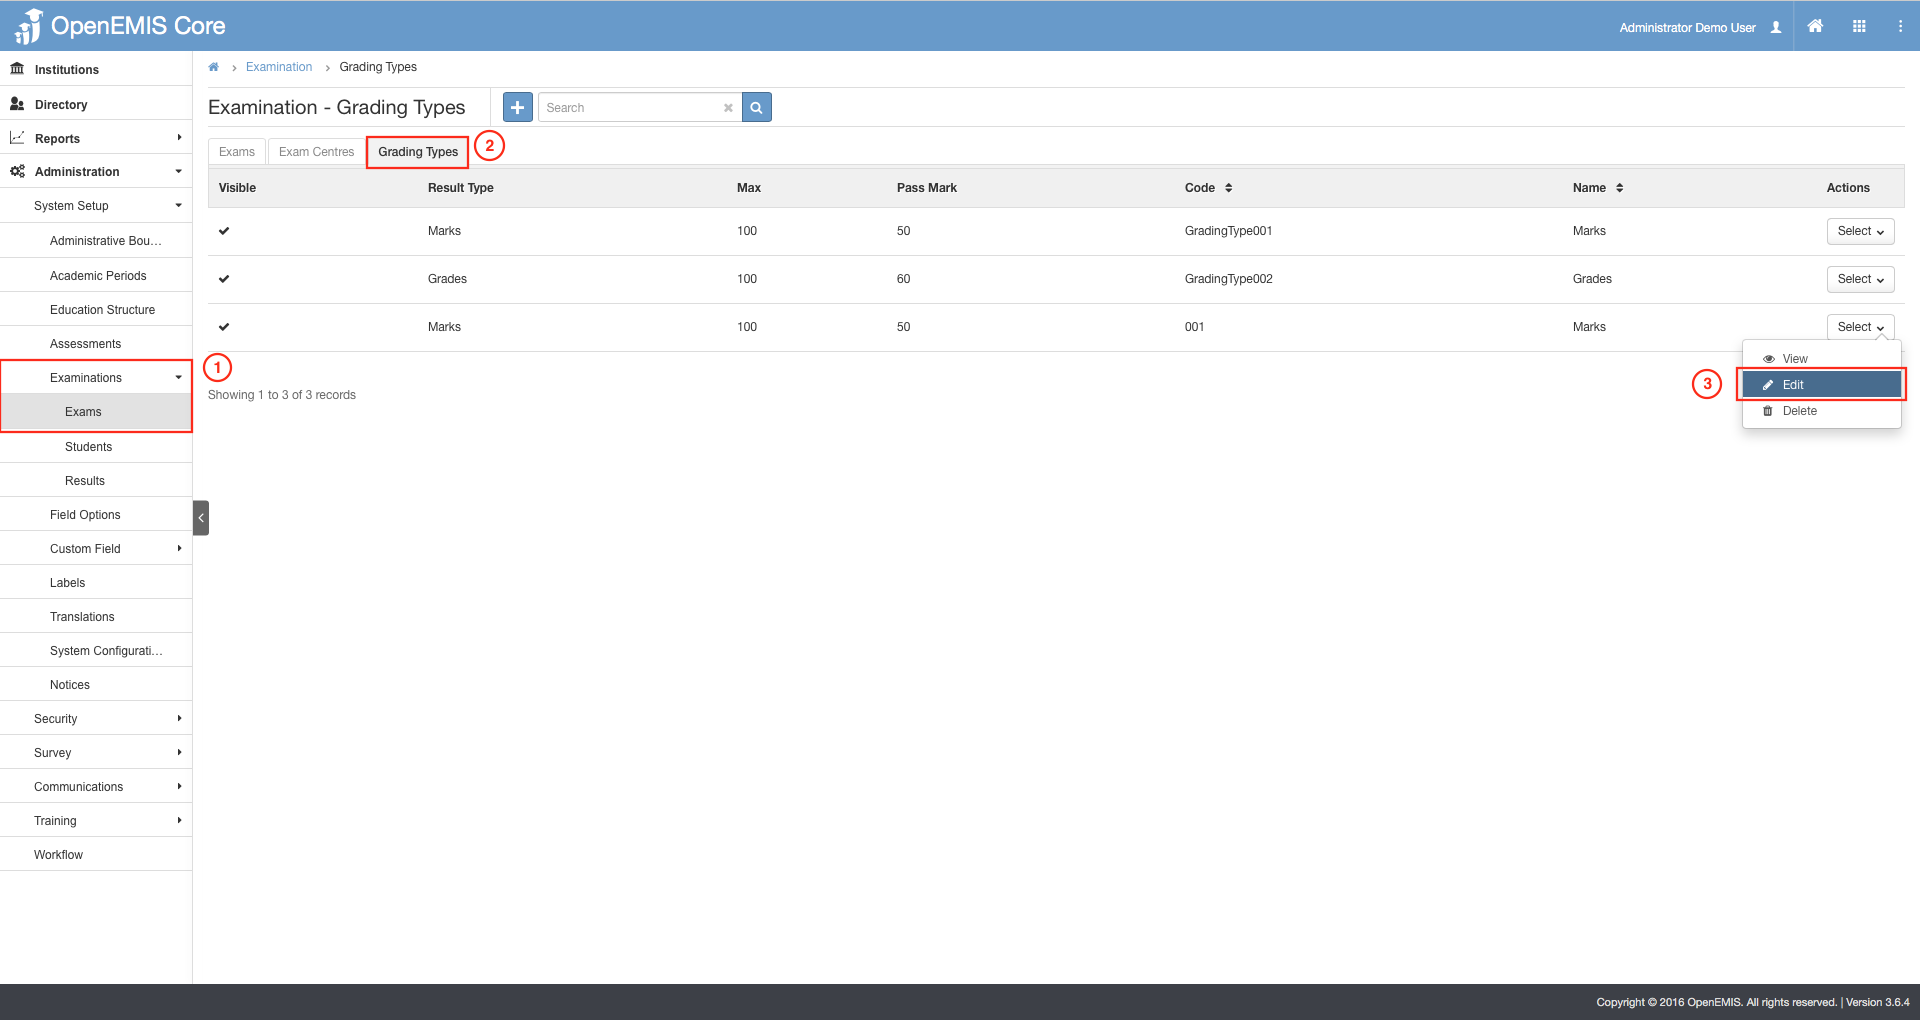
1) Go to Administration > System Setup > Examination > Exams.
2) Select on the Grading Types tab.
3) Select on the Actions Bar > Edit.
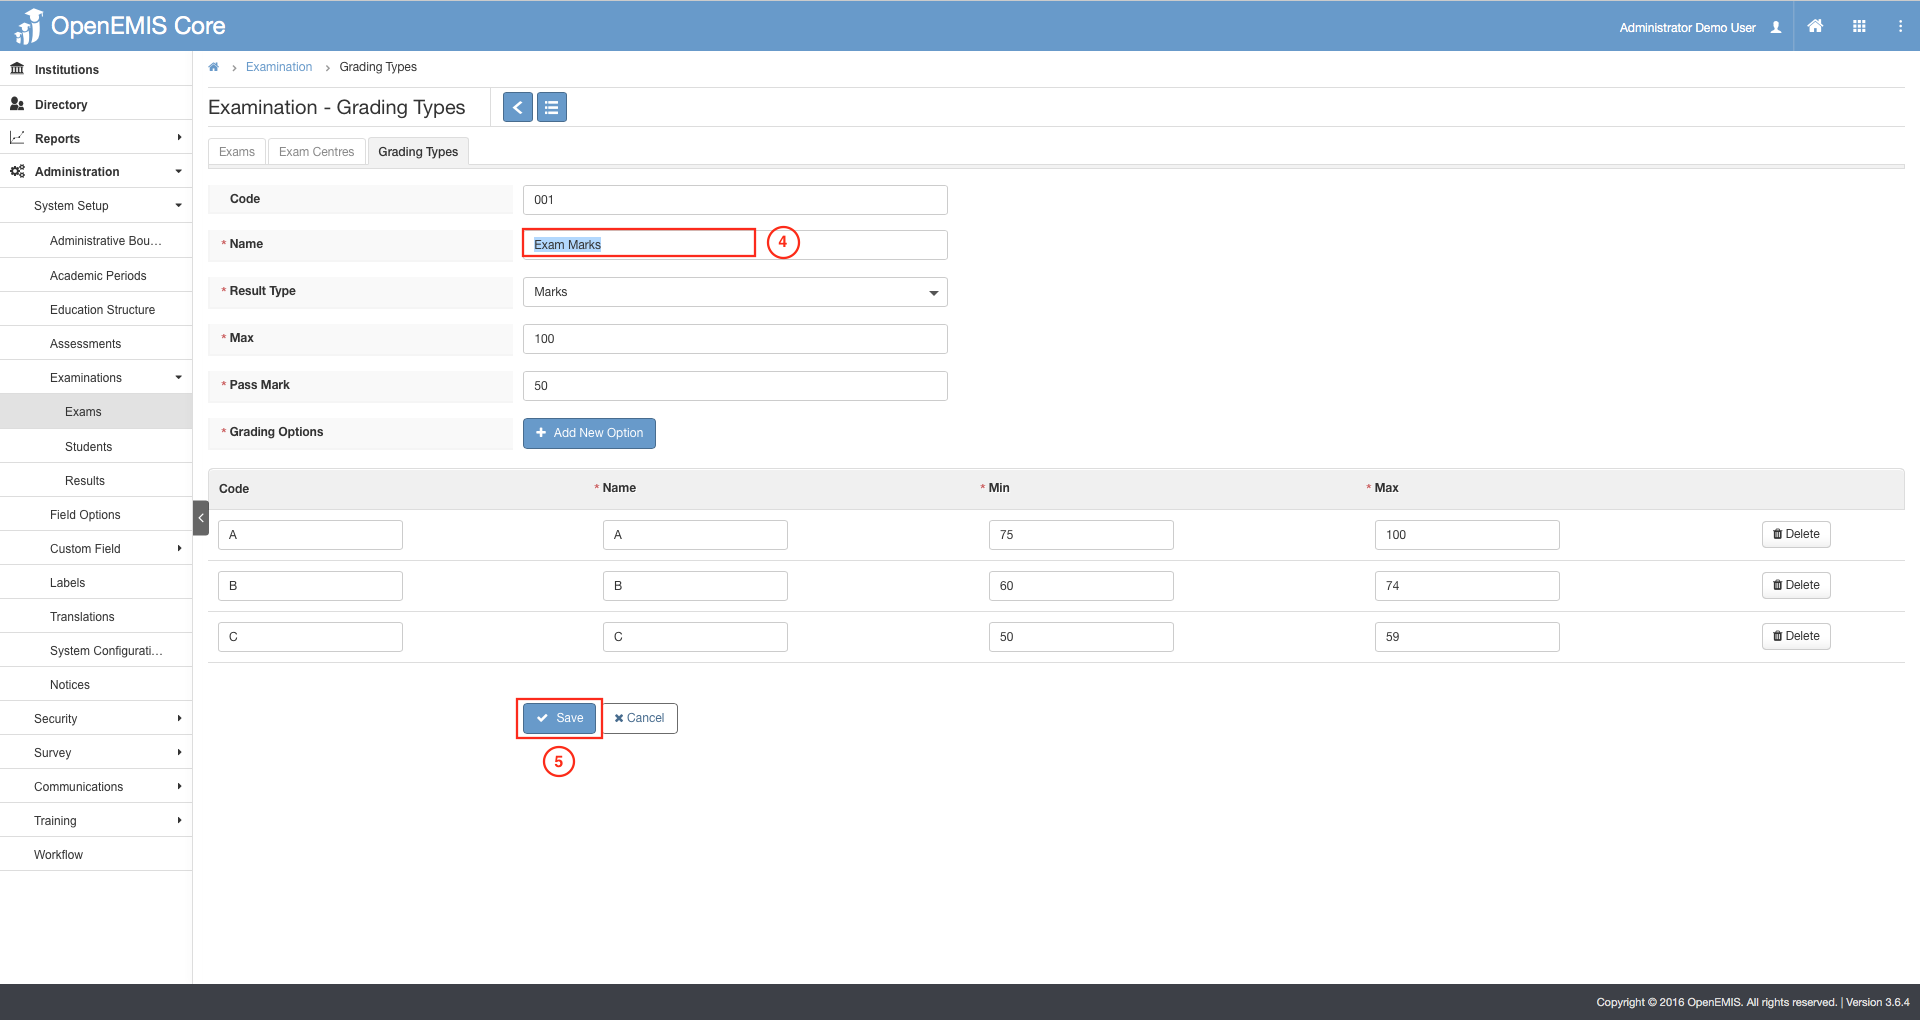
4) Make your changes.
5) Select on Save.
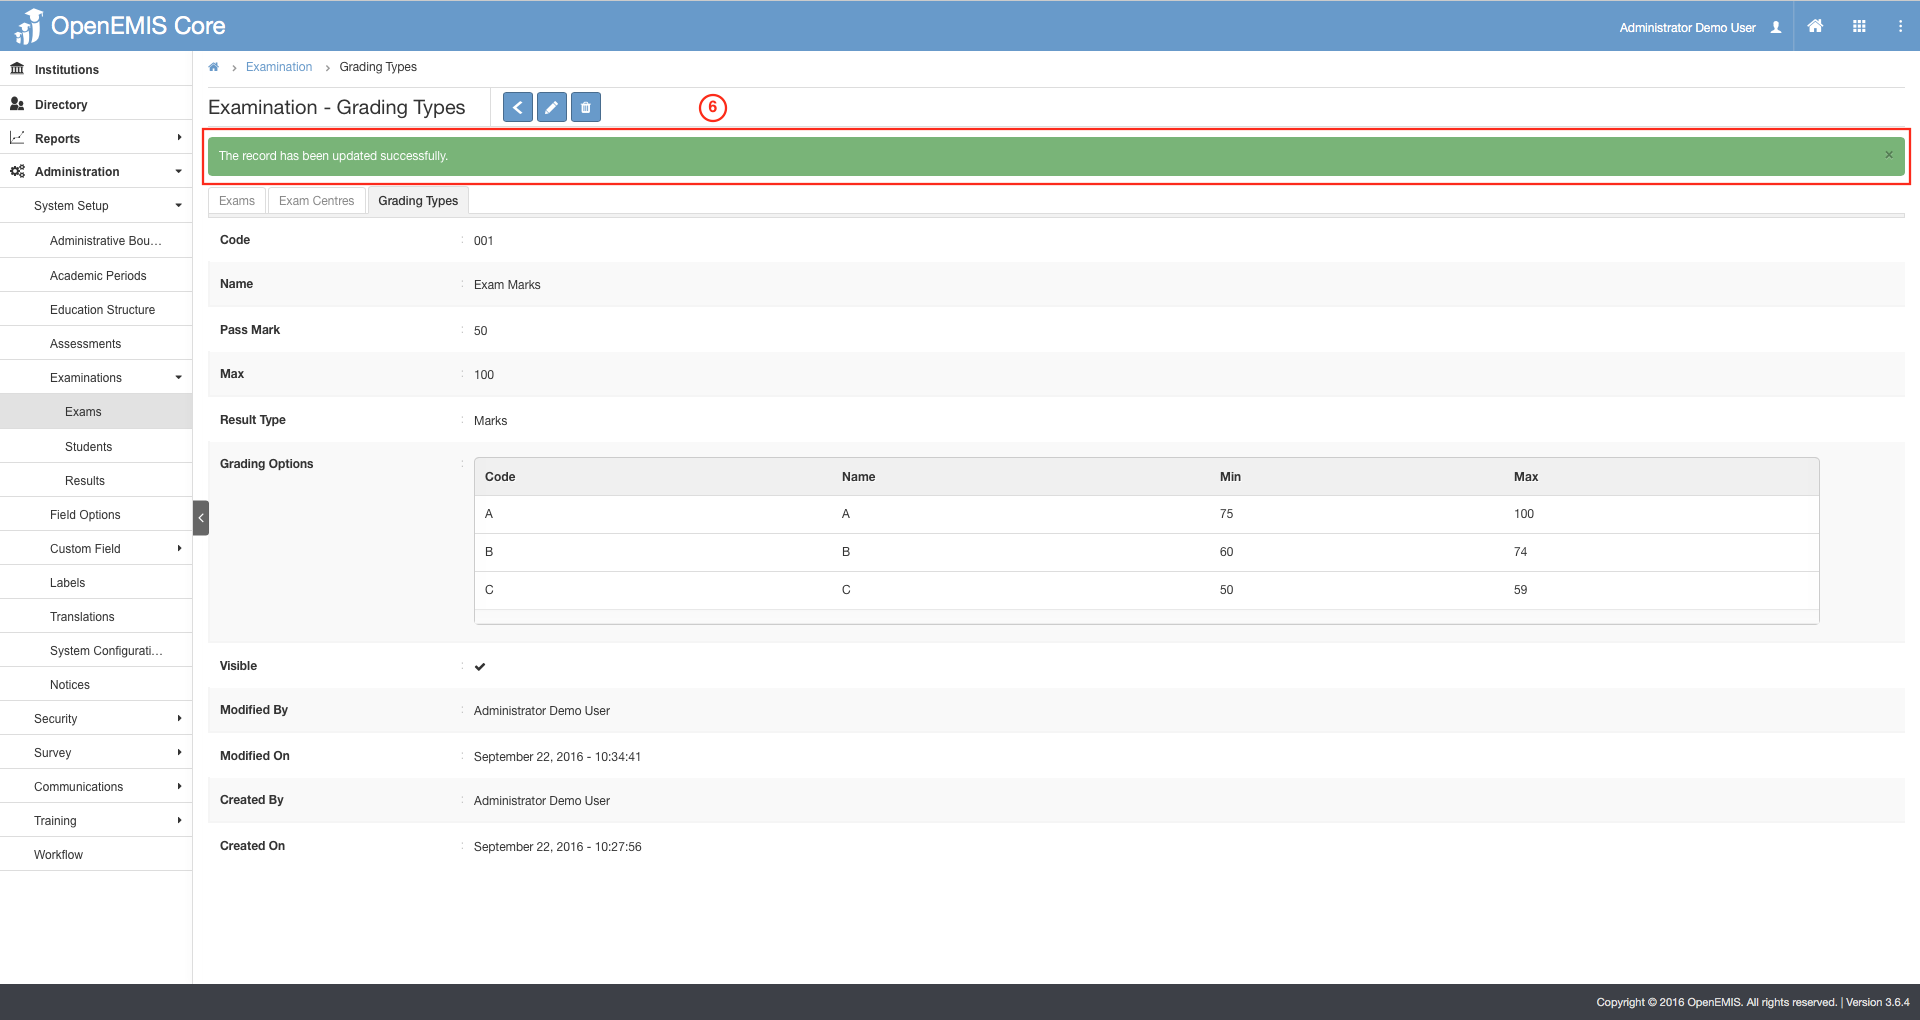
6) A message will be displayed upon record updated successfully.
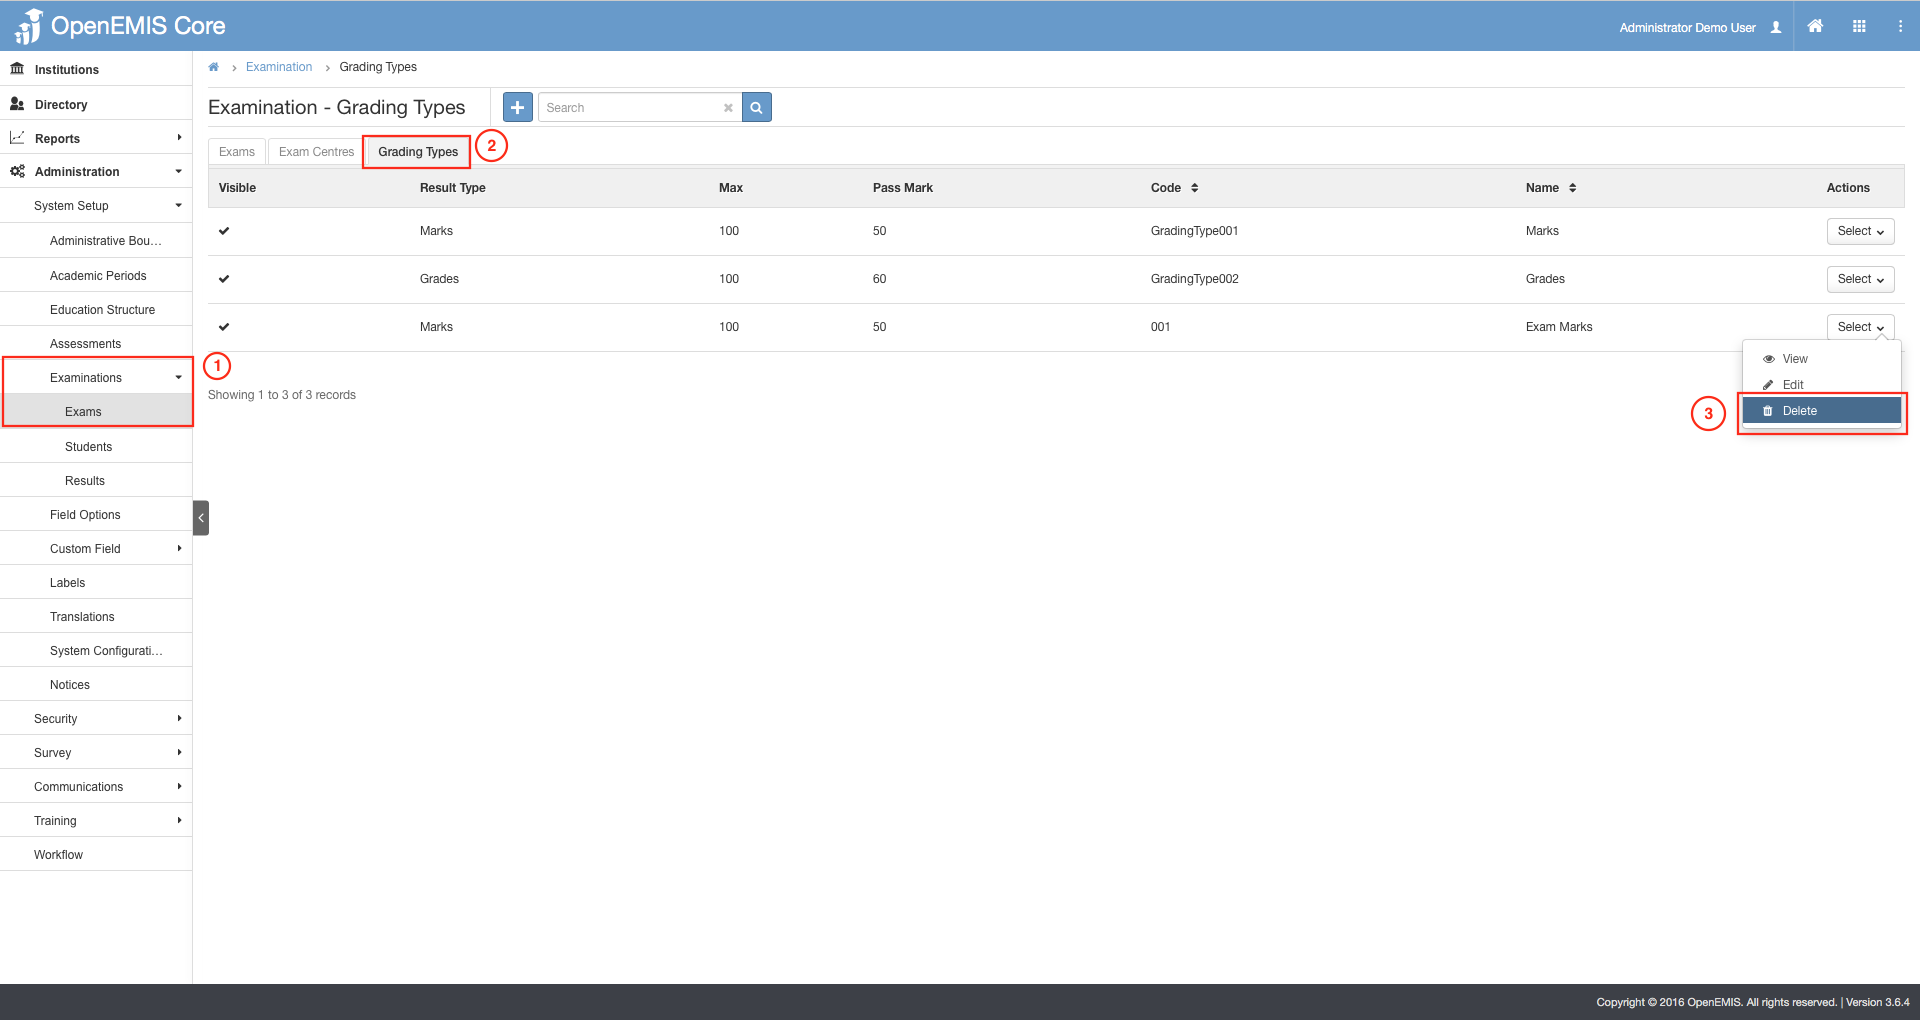
1) Go to Administration > System Setup > Examination > Exams.
2) Select on the Grading Types tab.
3) Select on the Actions Bar > Delete.
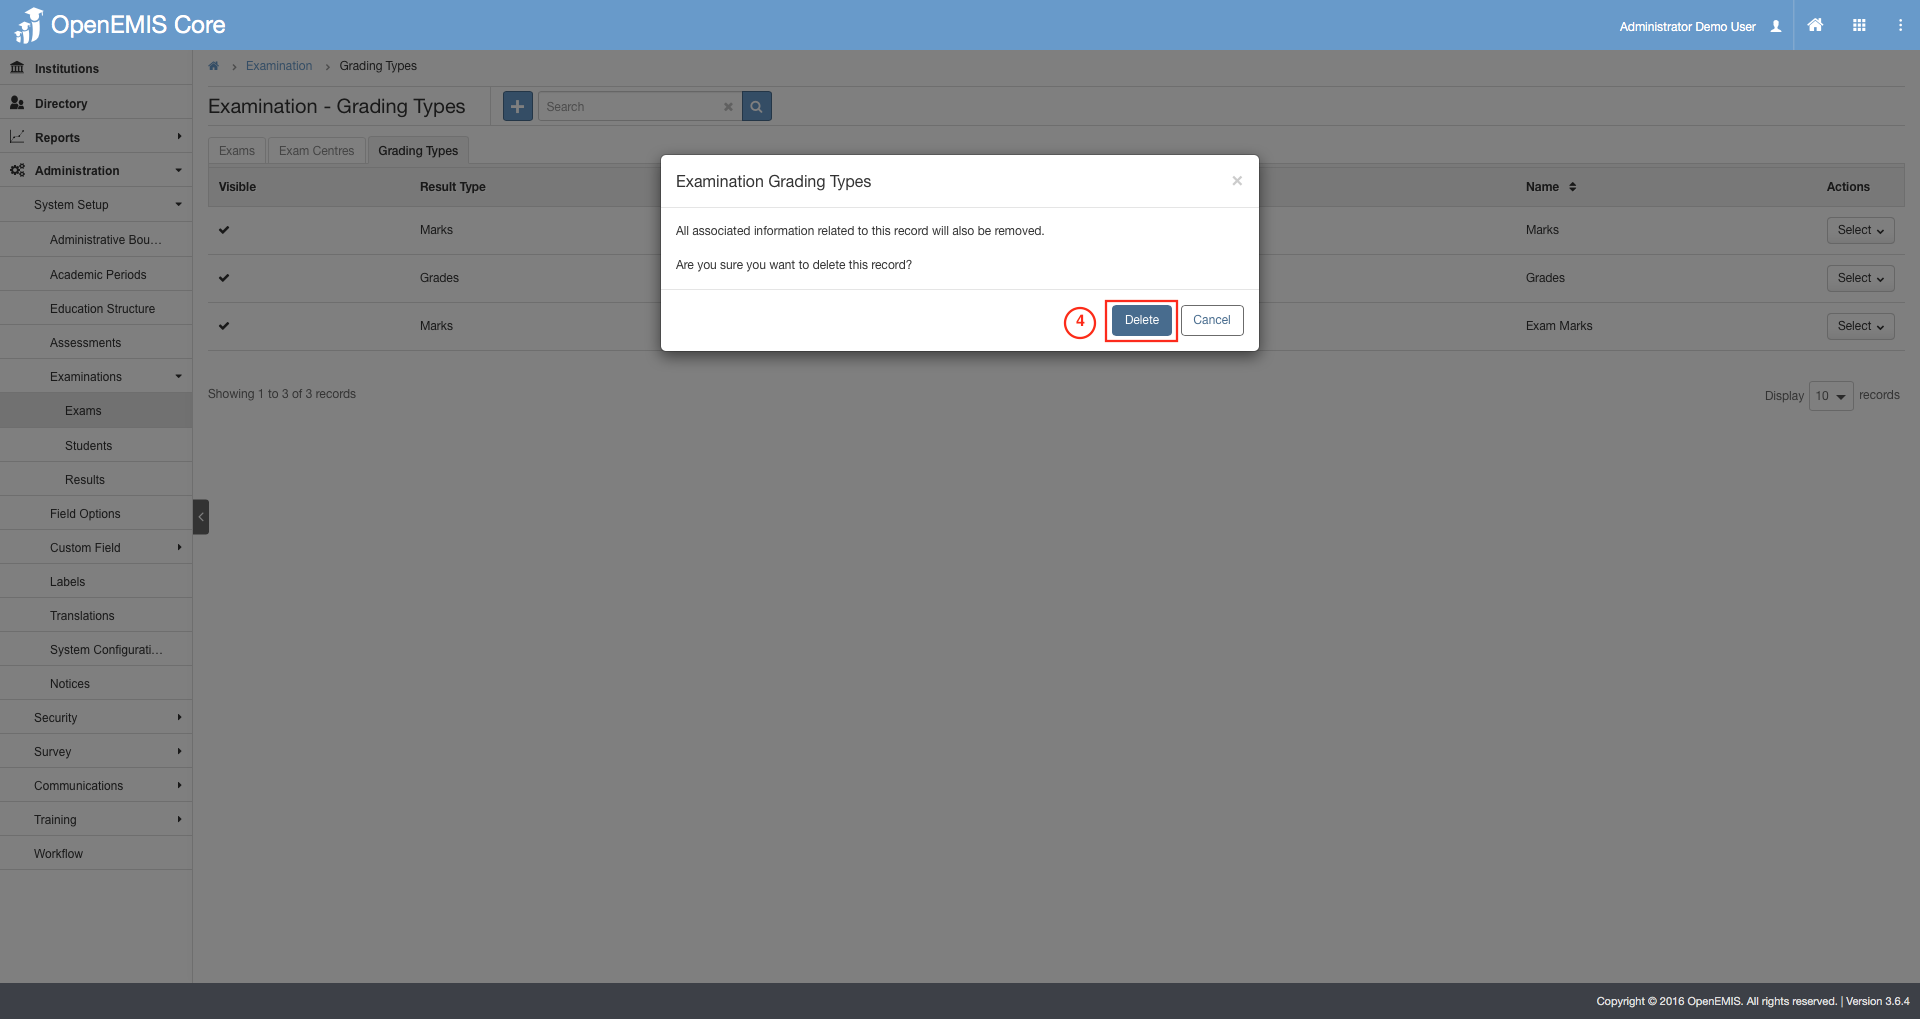
4) Confirmation prompt appears, select Delete.
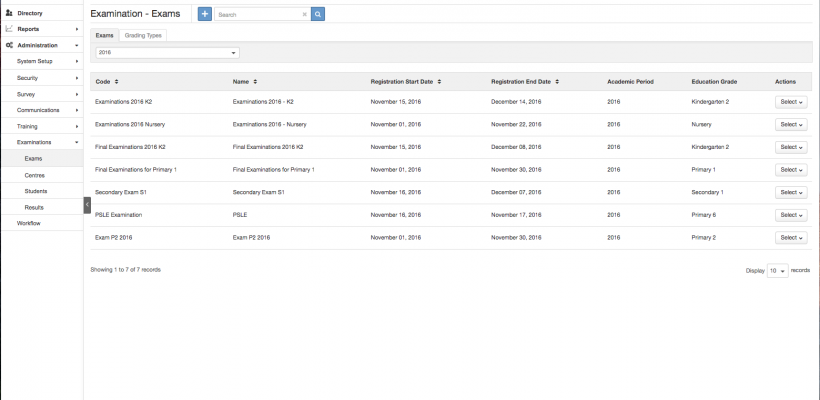
Managing Examination:
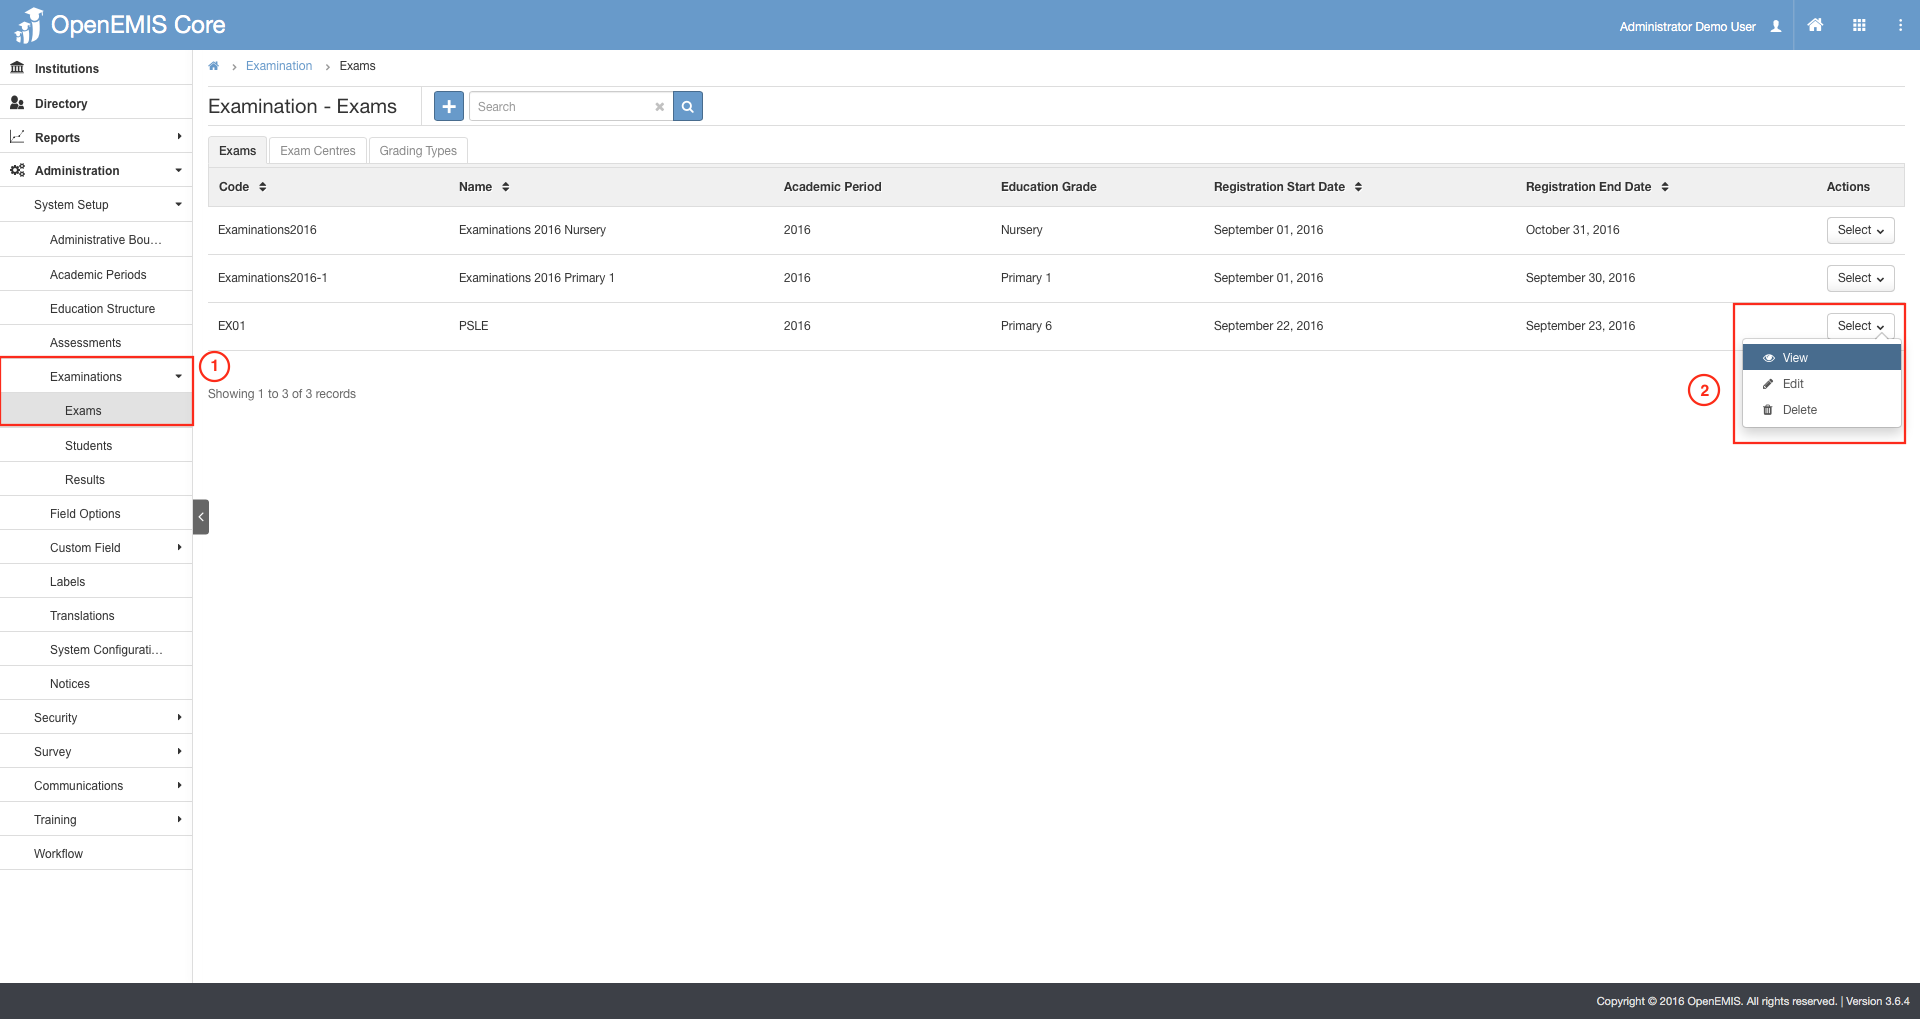
1) Go to Administration > System Setup > Examination > Exams.
2) Select on the Actions Bar > View.
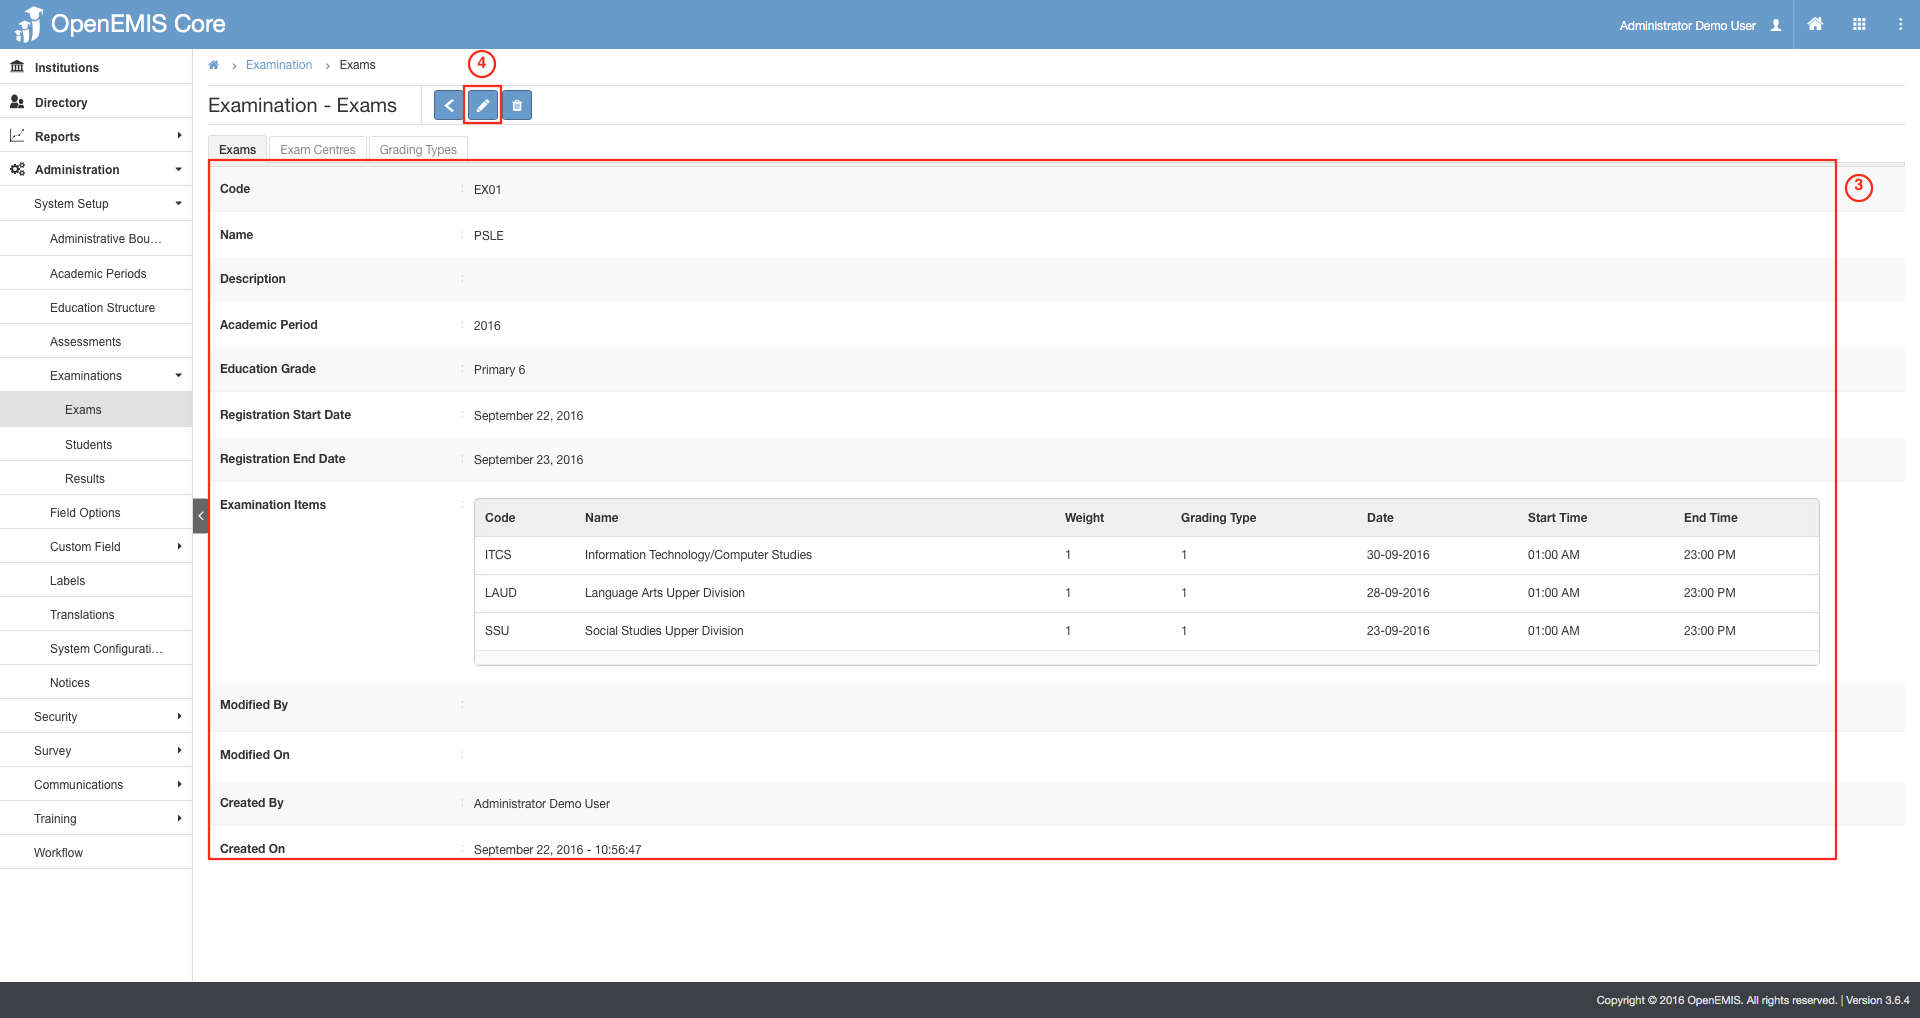
3) A detailed version of the Examination will be displayed.
4) Similarly, you can edit the data on the page

1) Go to Administration > System Setup > Examination > Exams.
2) Select on the Add button.
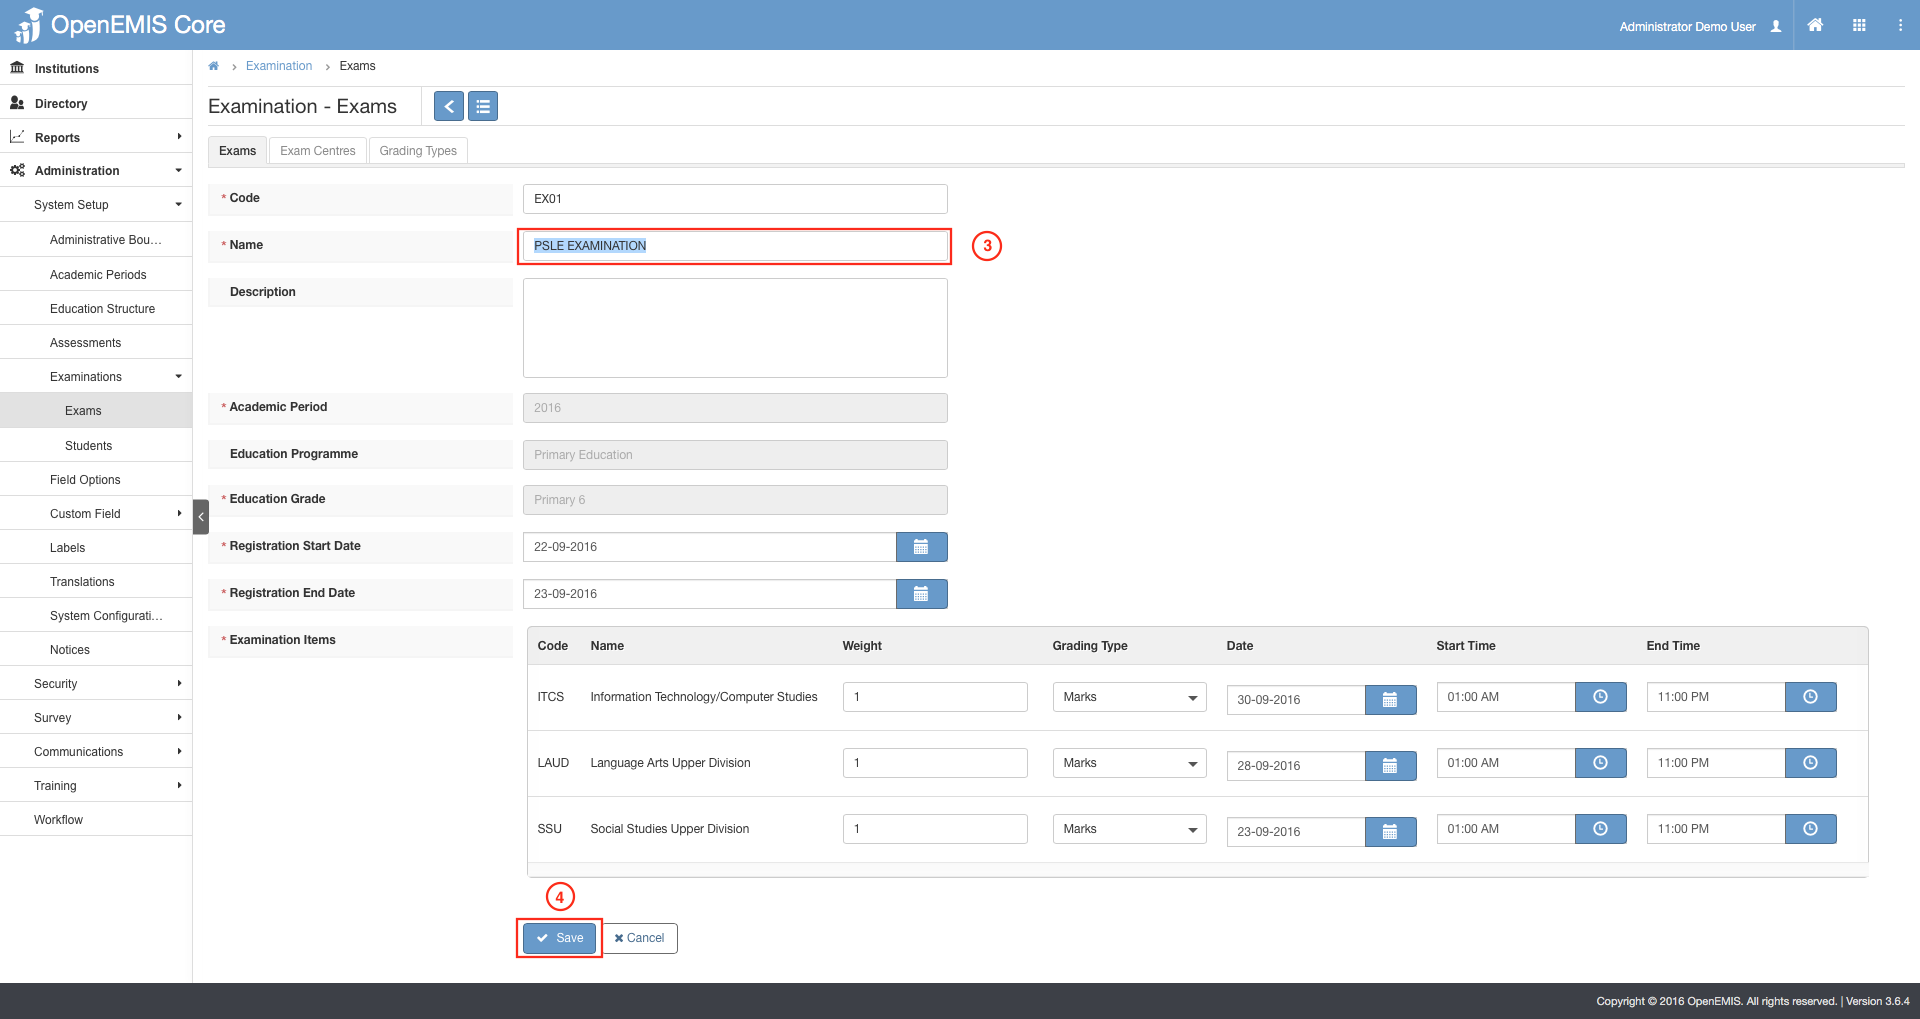
3) Insert the required input such as Code, Name, Academic Period, Exam Items, Weight and etc.
if Student A scores 70, his/her Total Marks will be 70 x 0.5
4) Select on Save.
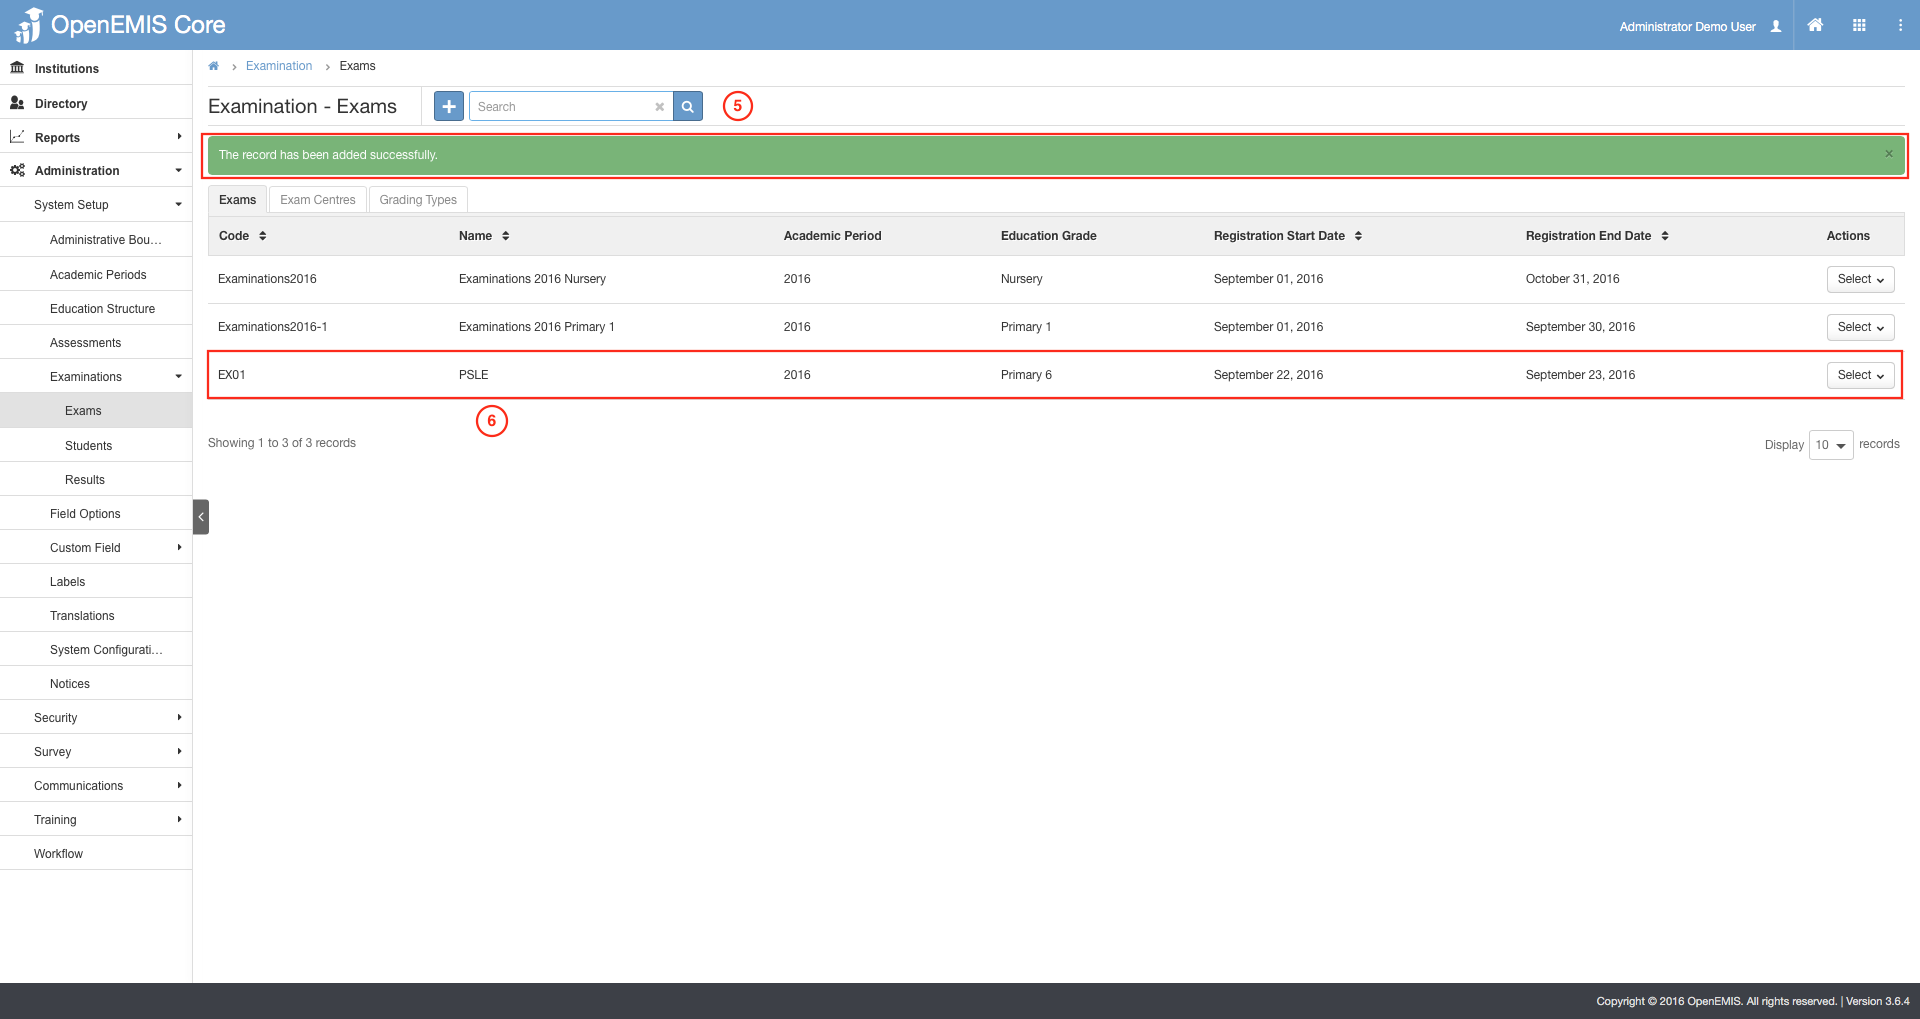
5) A successful message will be displayed upon a new record added.
6) You can view the record added in the table shown.
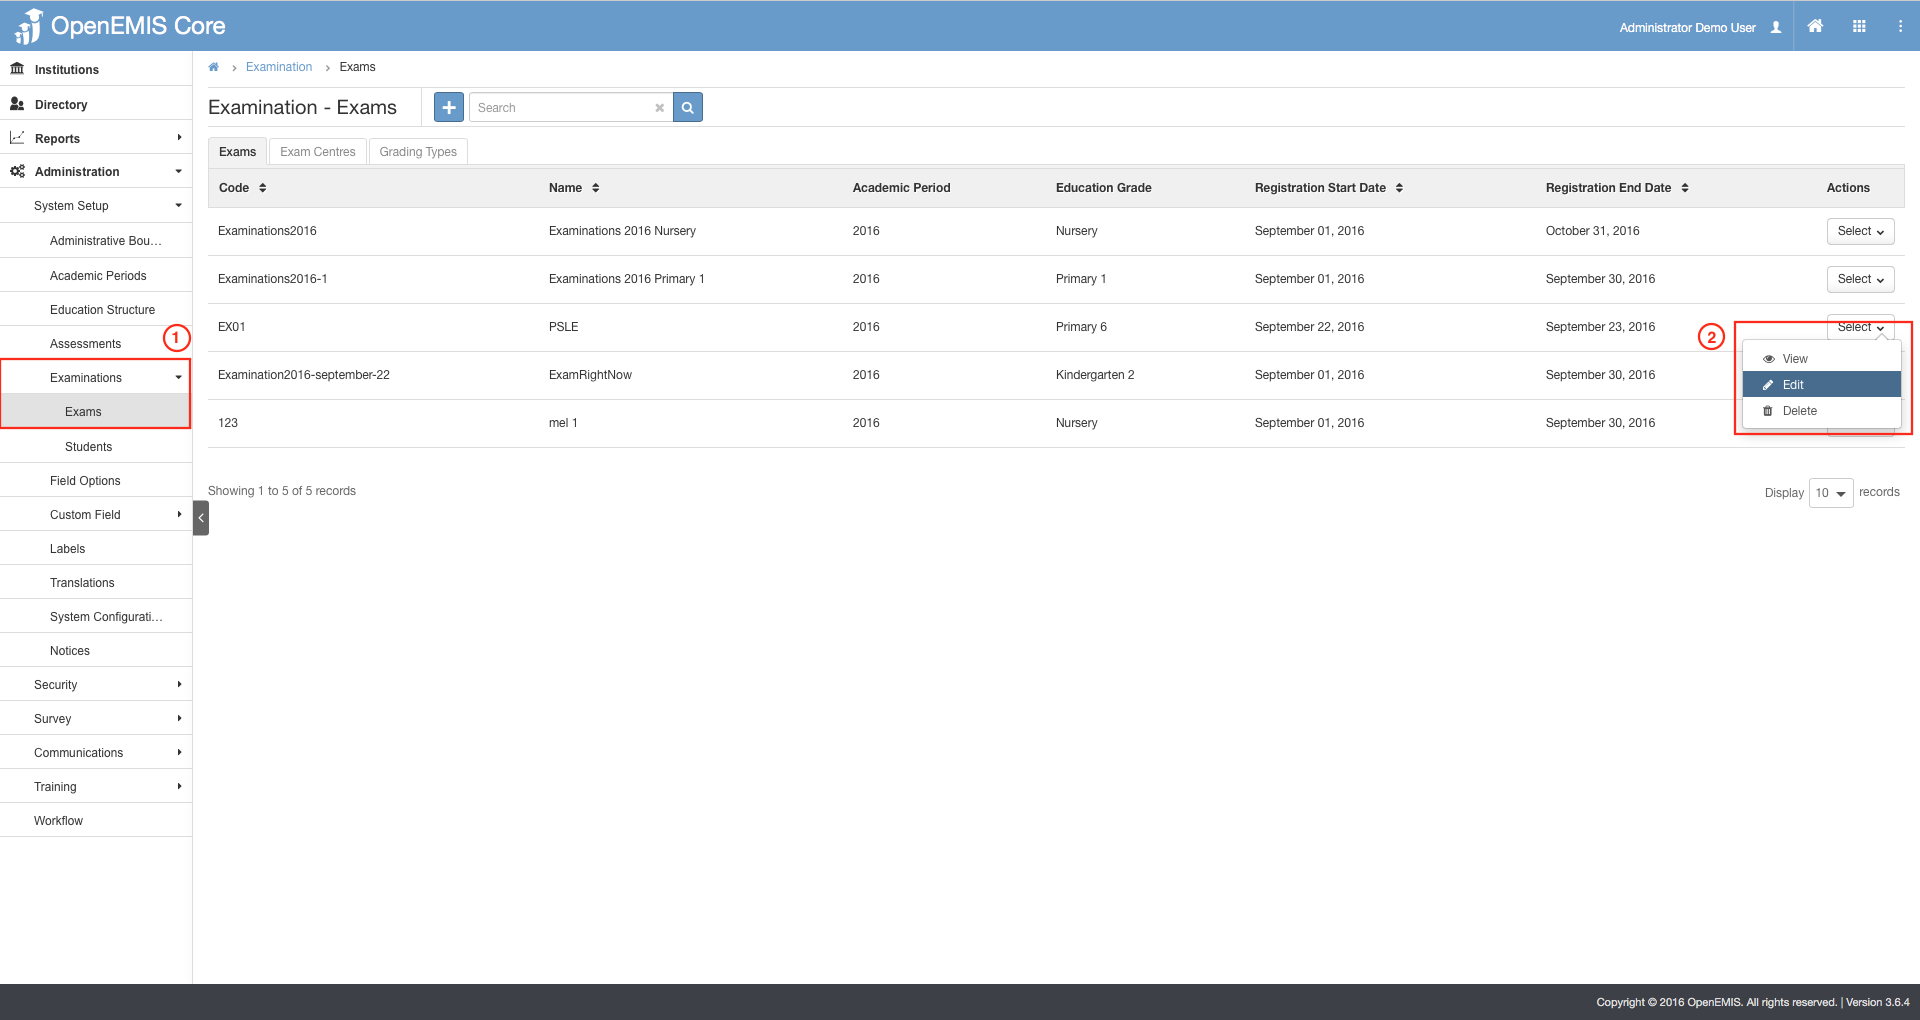
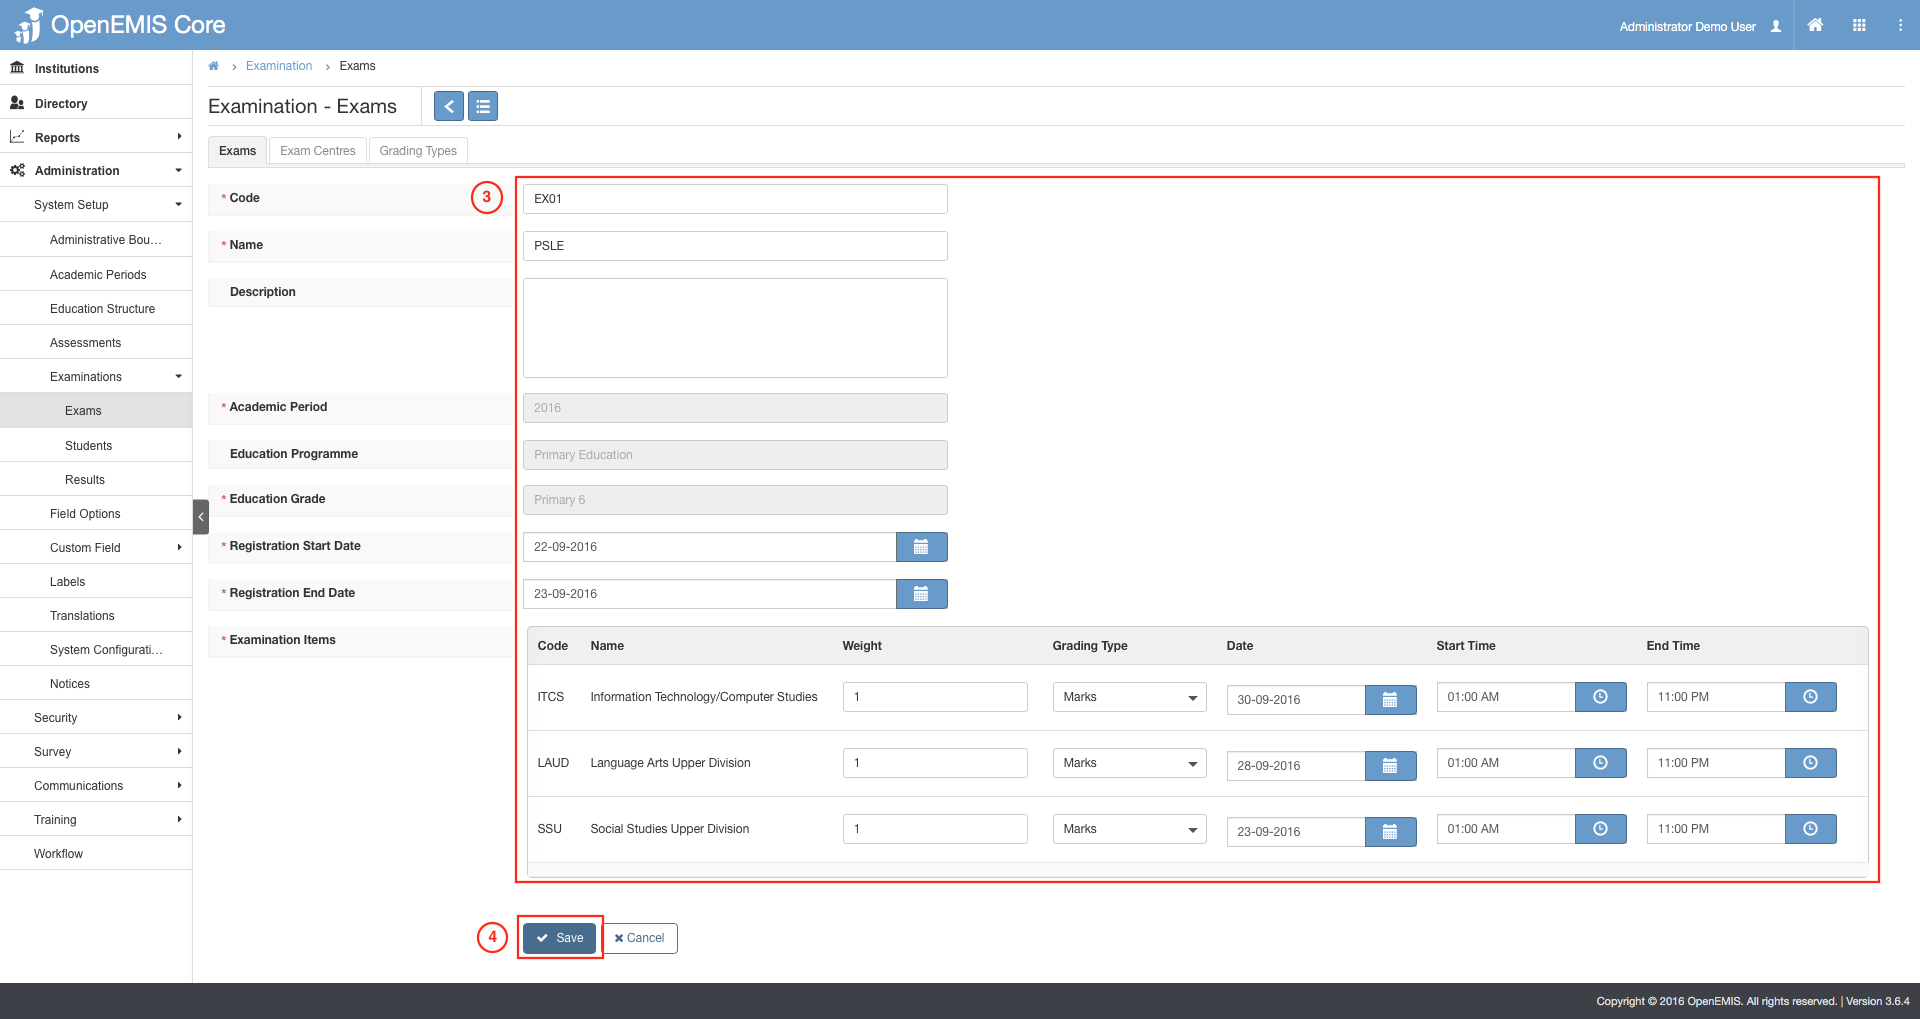
1) Go to Administration > System Setup > Examination > Exams.
2) Select on the Actions Bar > Edit.
3) Make your amendments.
4) Select on Save.
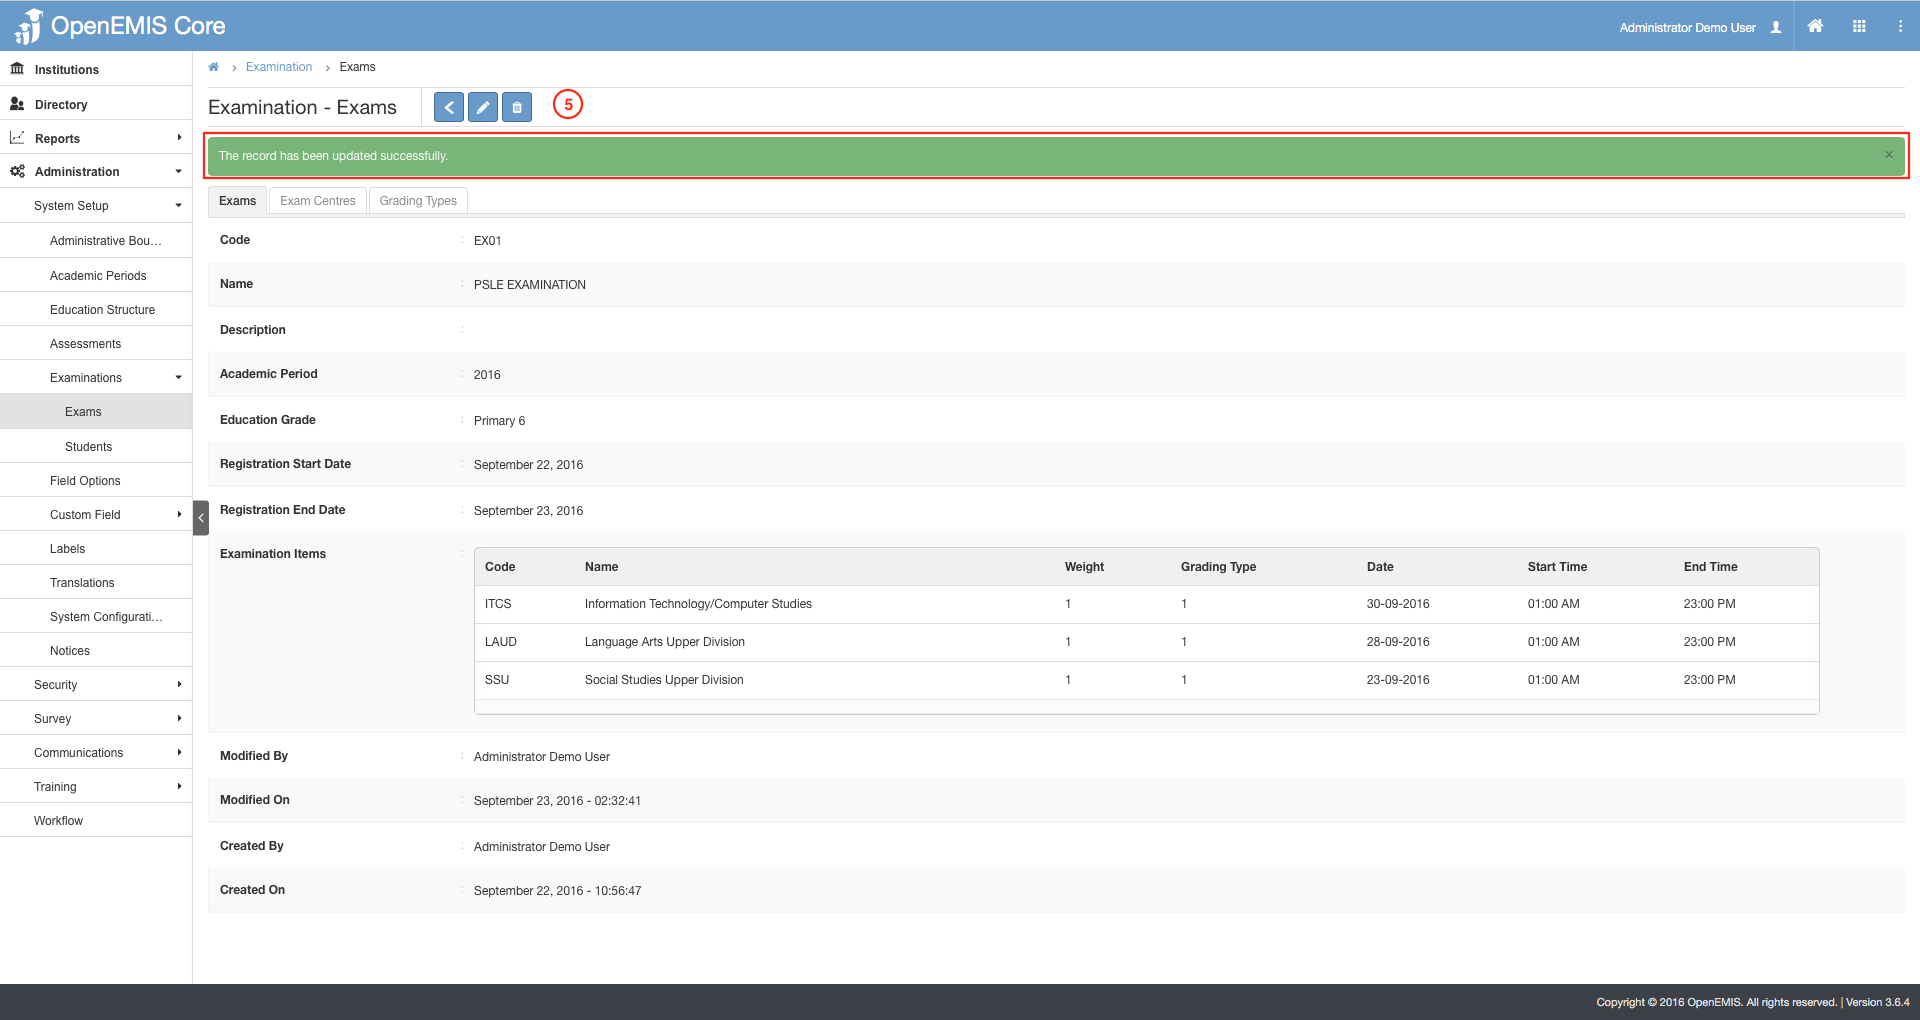
5) Successful message will be displayed upon the record has been updated.

1) Go to Administration > System Setup > Examination > Exams.
2) Select on the Actions Bar > Delete.
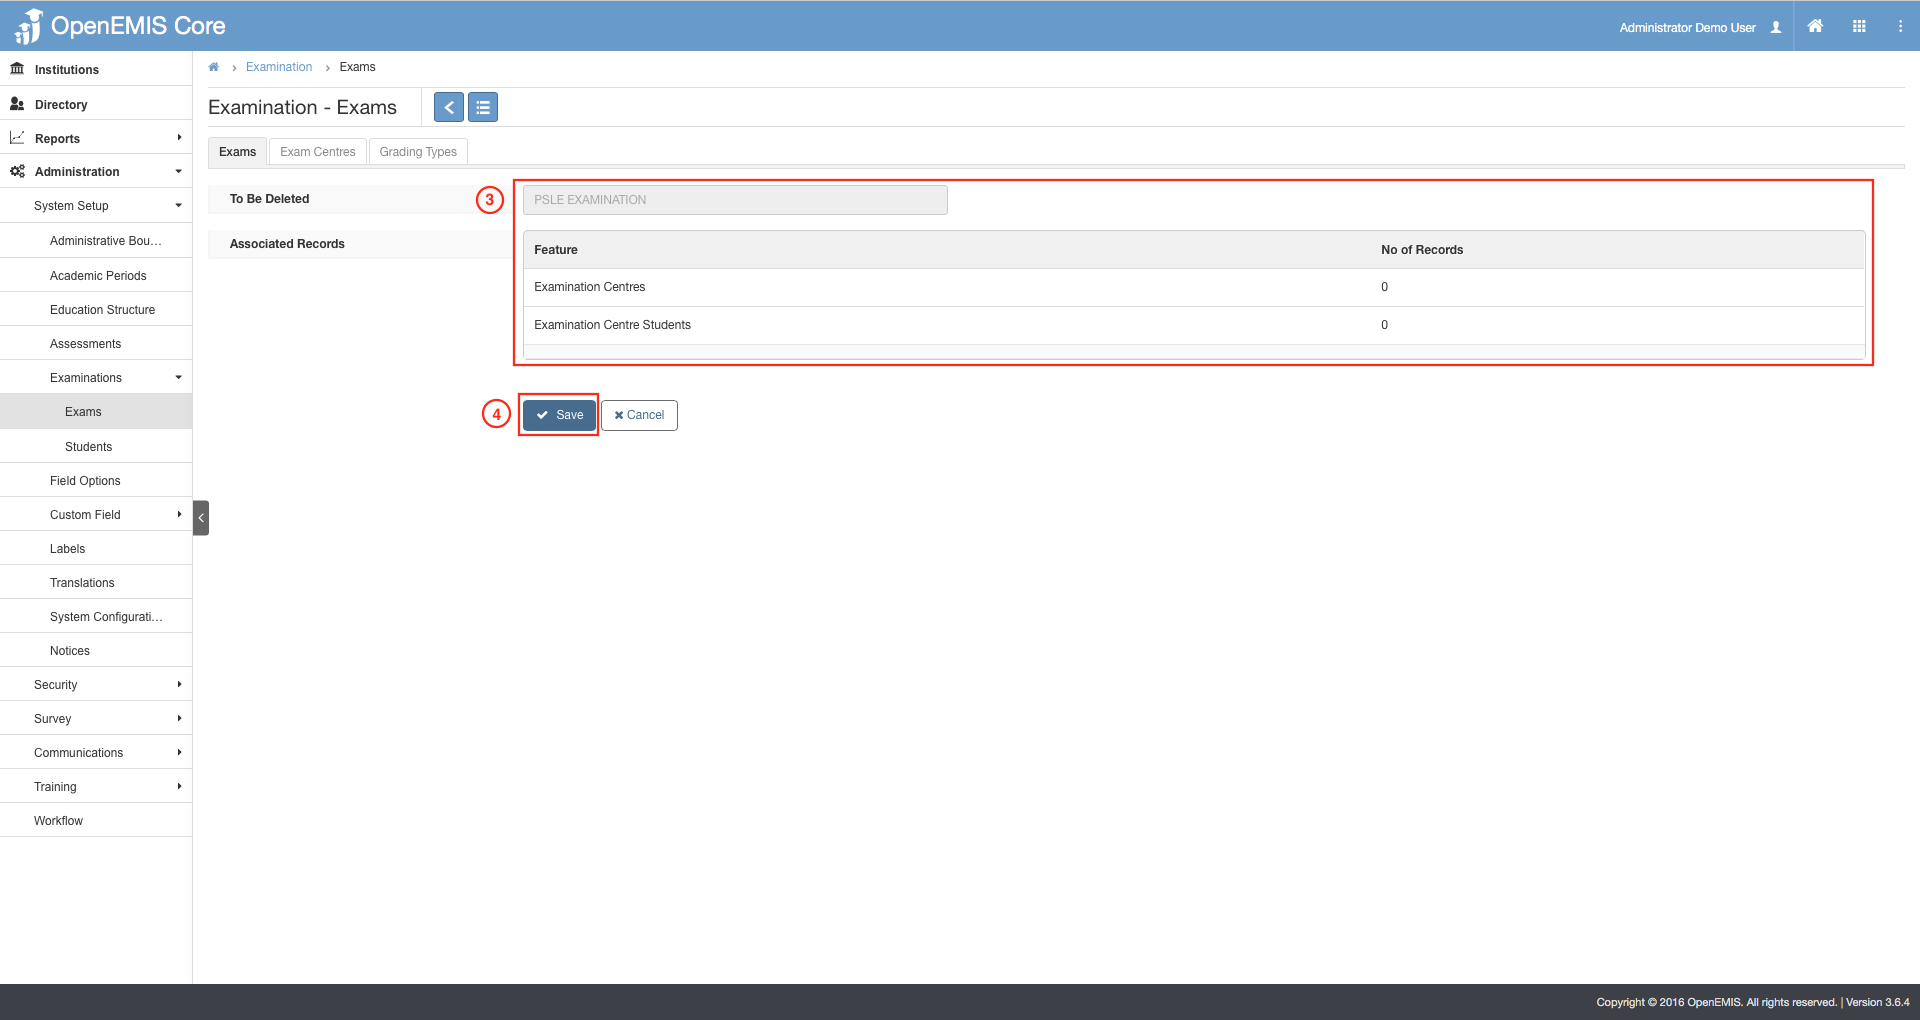
3) It will display all the associated records that is link to the deleted exam record.
4) Select on Save.
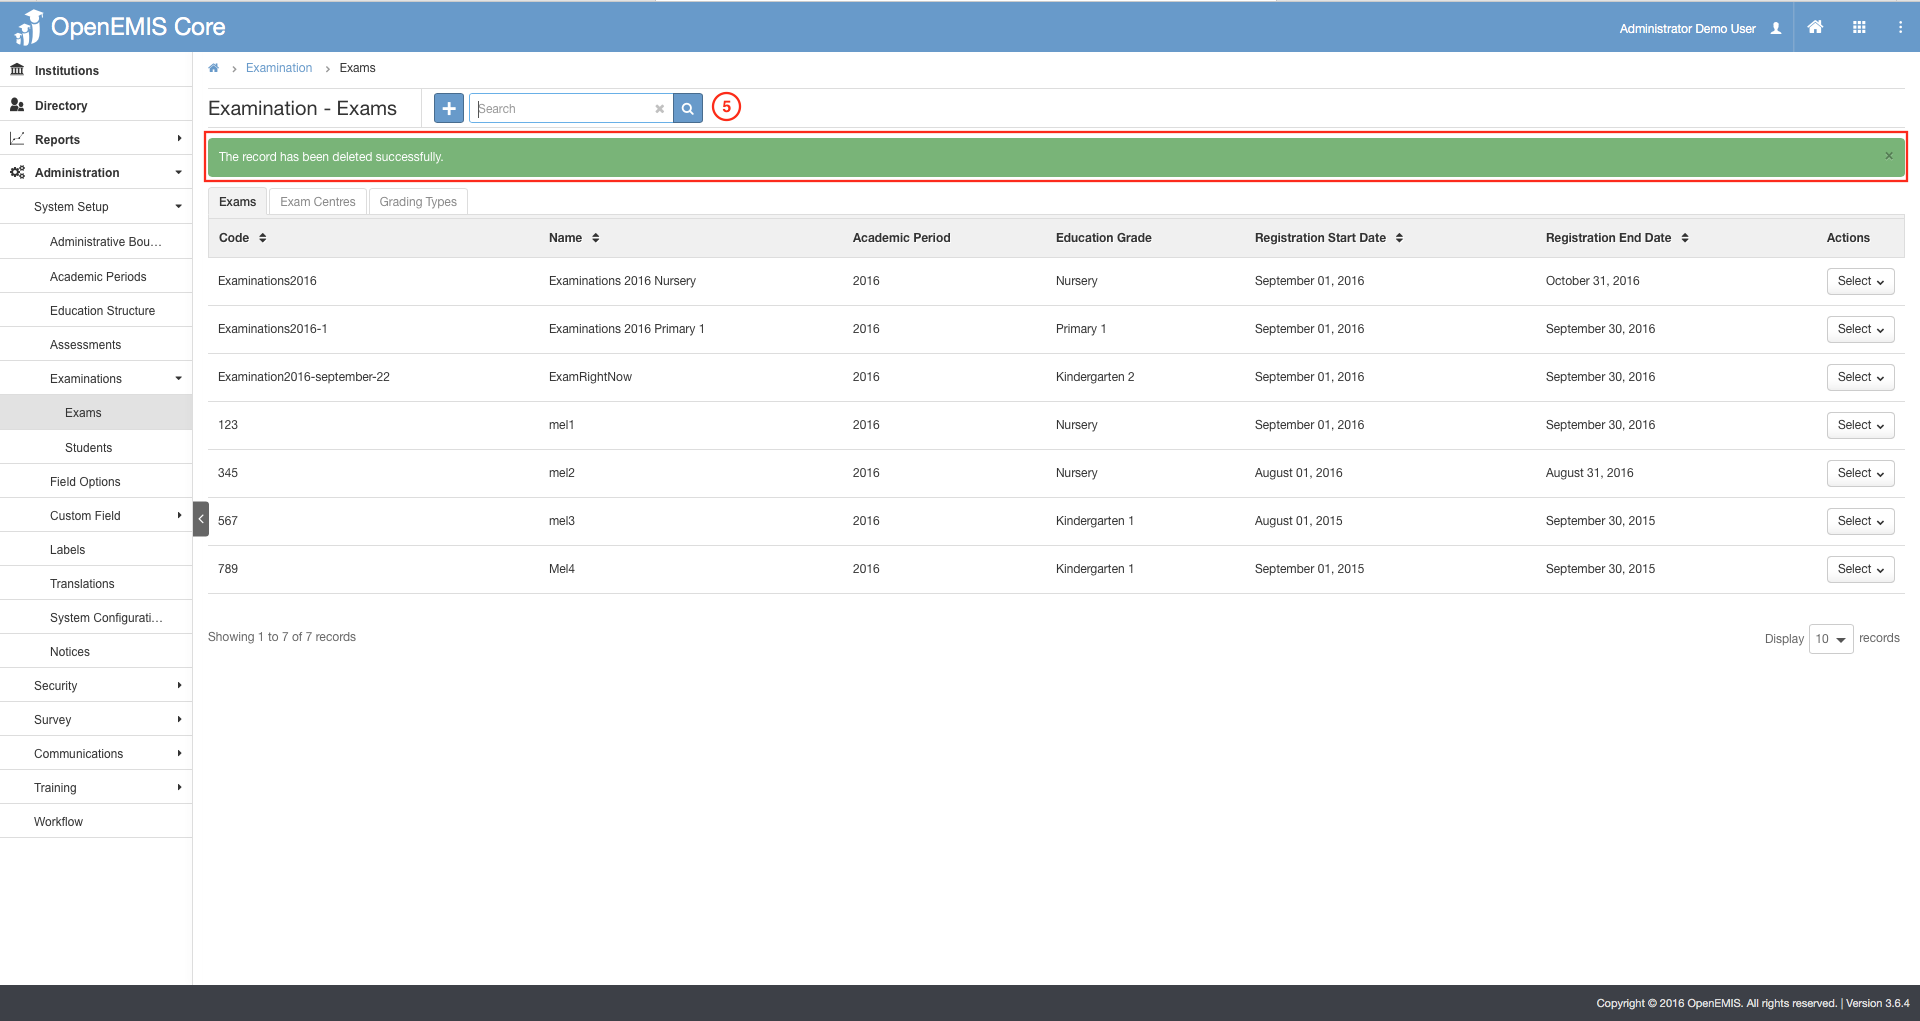
5) A successful message will be displayed upon deletion.
Managing Exam Centers:
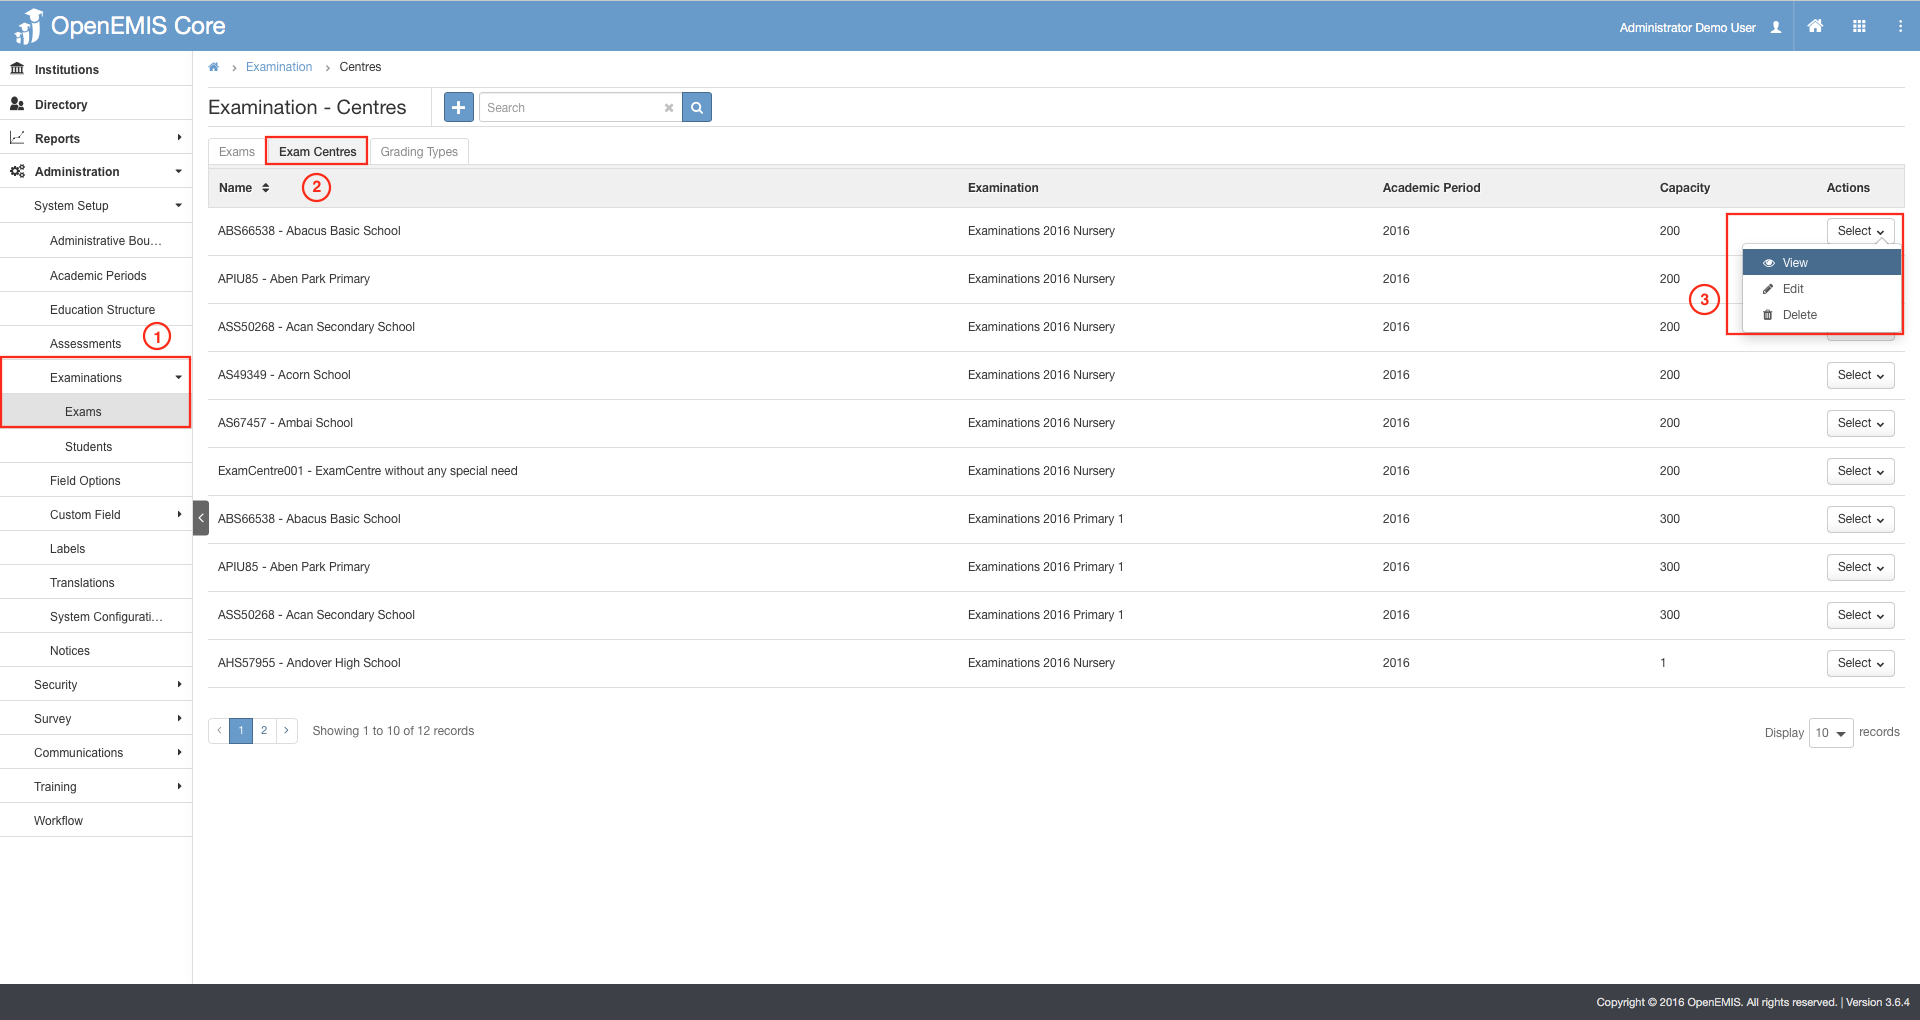
1) Go to Administration > System Setup > Examination > Exams.
2) Select on the Exam Centers tab.
3) Select on the Actions Bar > View.
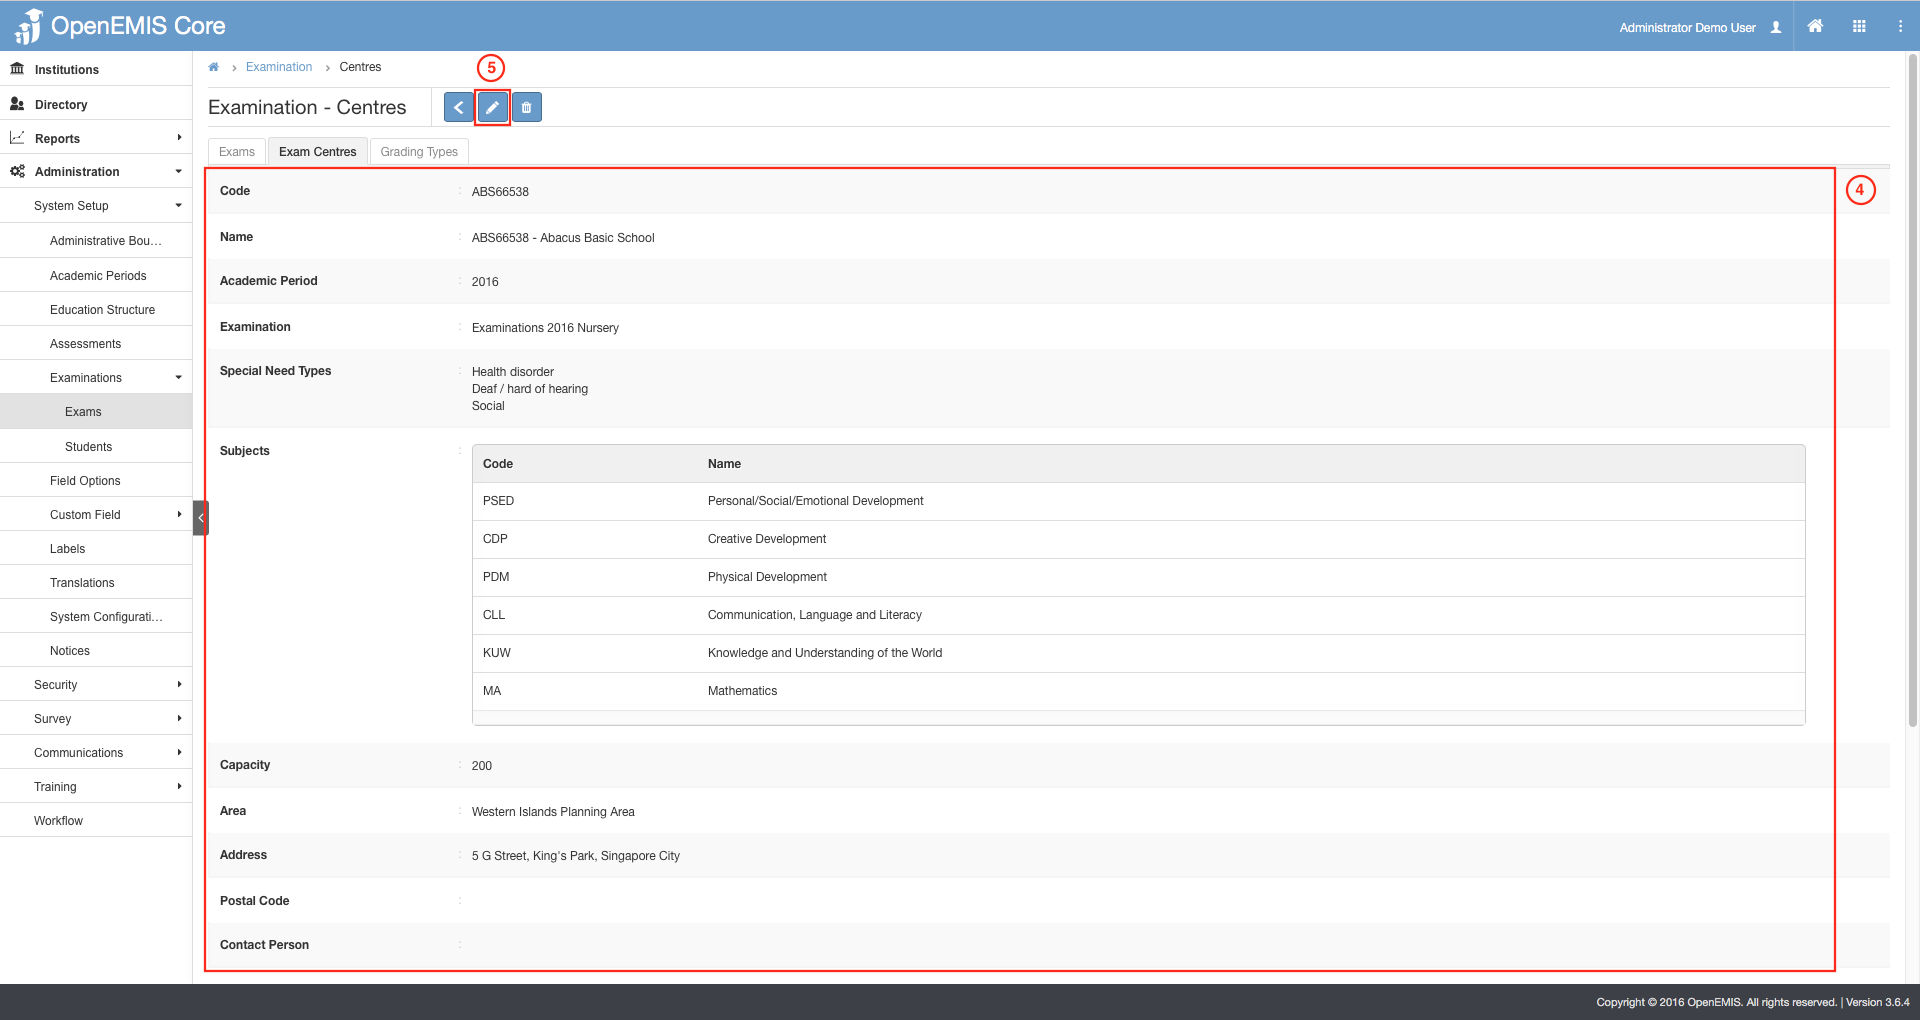
4) A detailed version of the Exam Center will be displayed.
5) Similarly, you can edit the data on the page
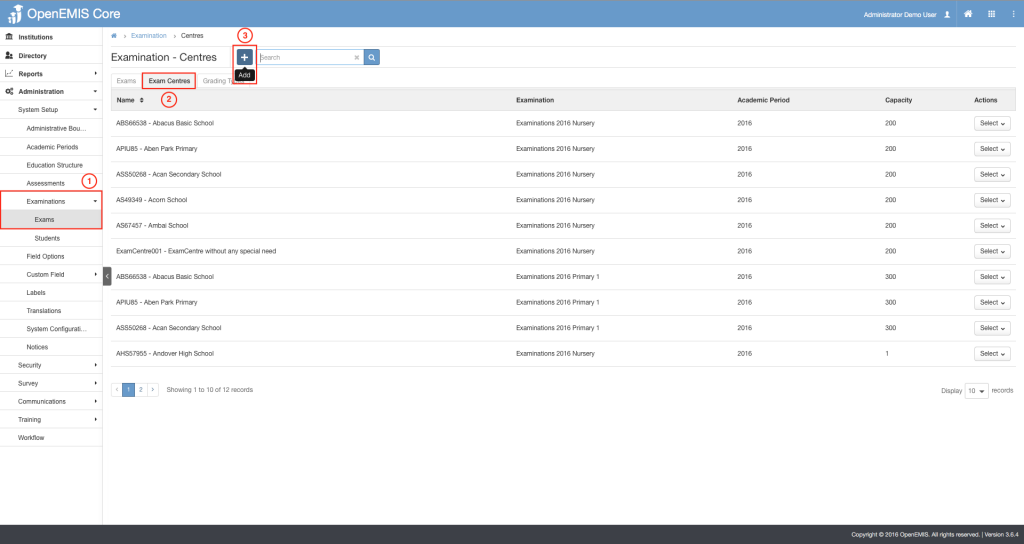
1) Go to Administration > System Setup > Examination > Exams.
2) Select on the Exam Centers tab.
3) Select on the Add button.
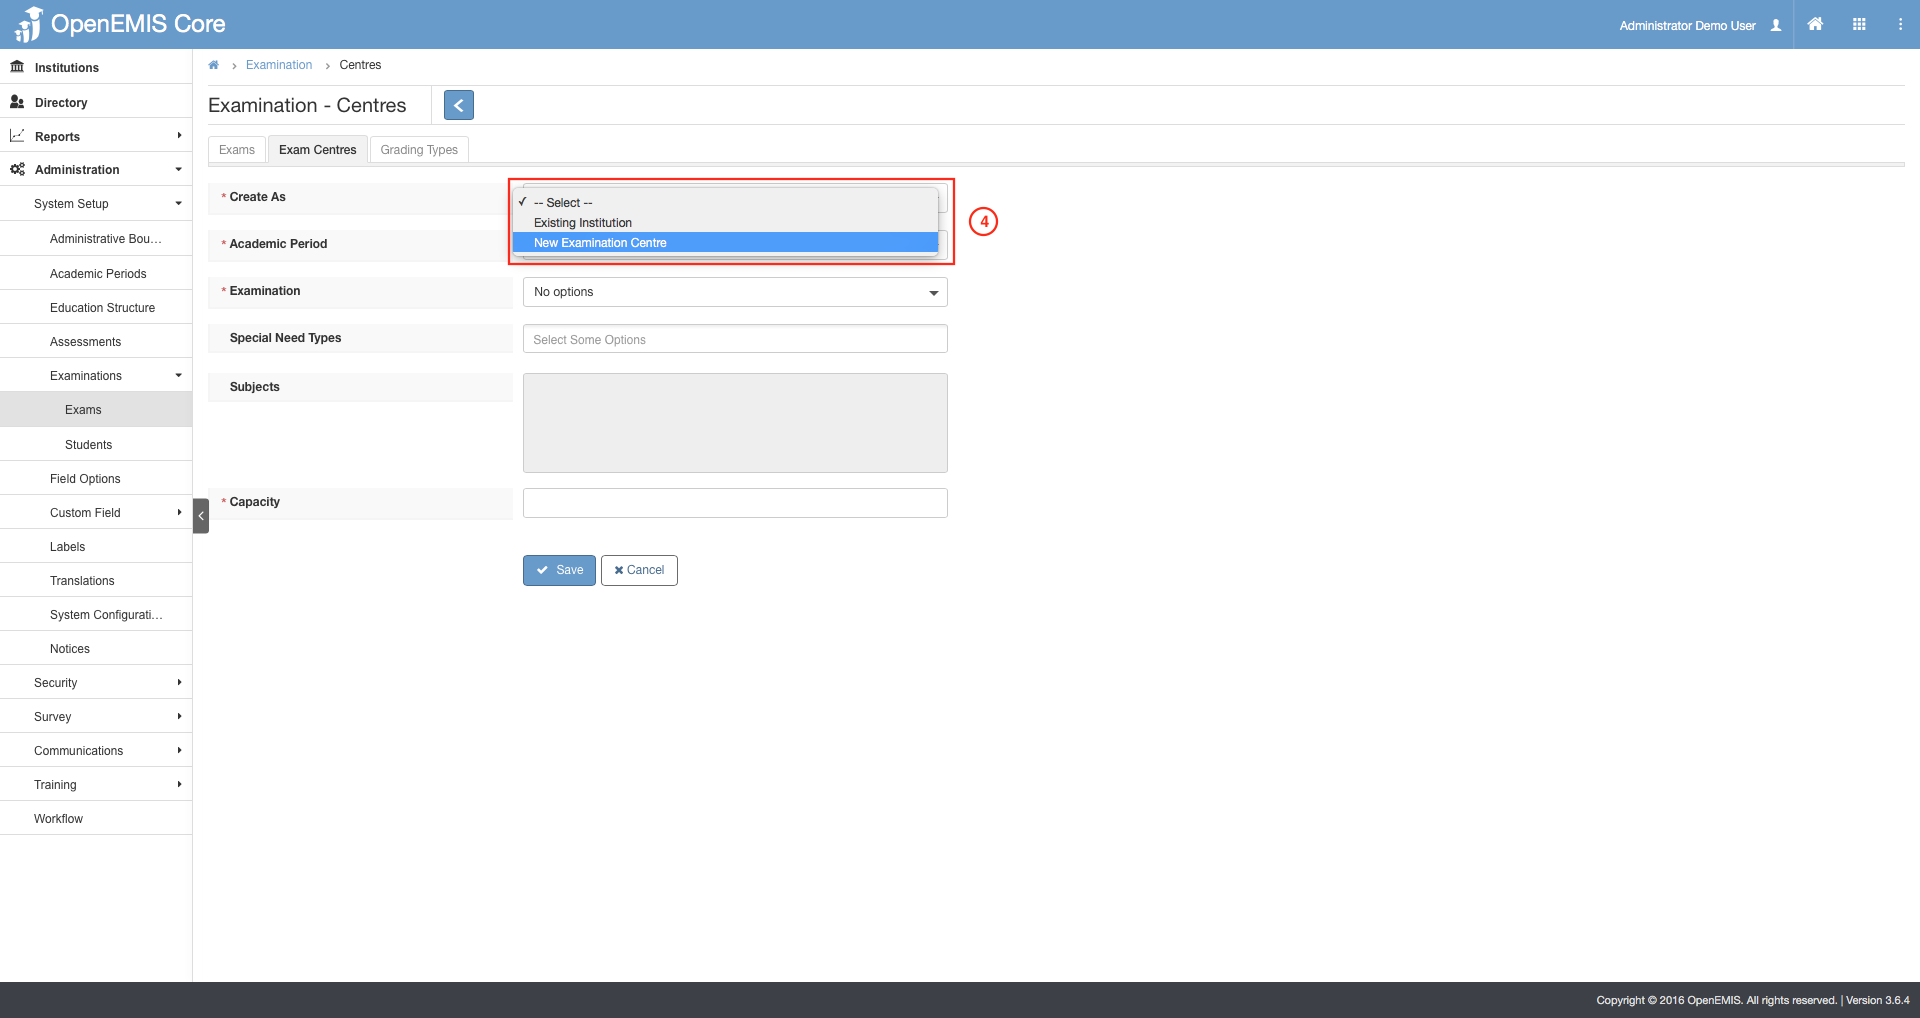
4) Select the New Examination Center option.
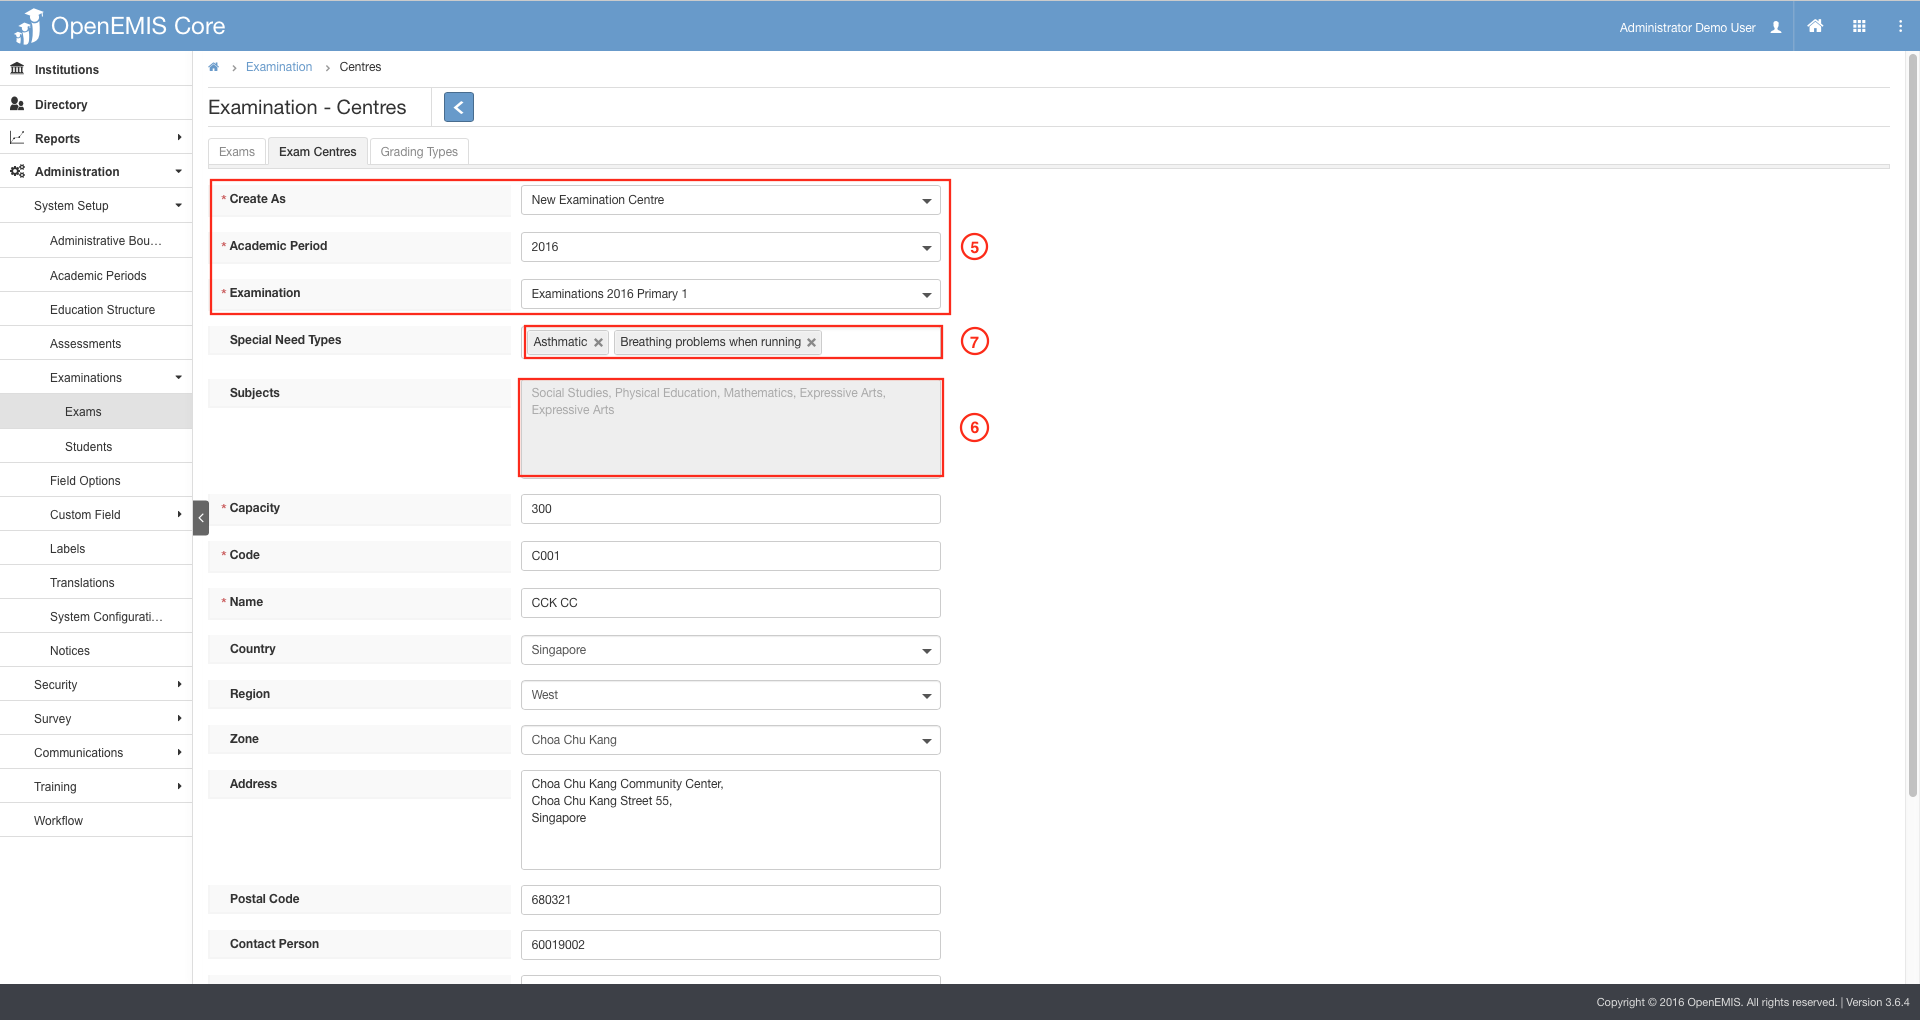
5) Insert the required input such as Academic Period, Examination, Code and etc.
6) Subjects will be auto-displayed upon selection of Examination.
7) You can select the Special Needs Options that the Exam Center provides.
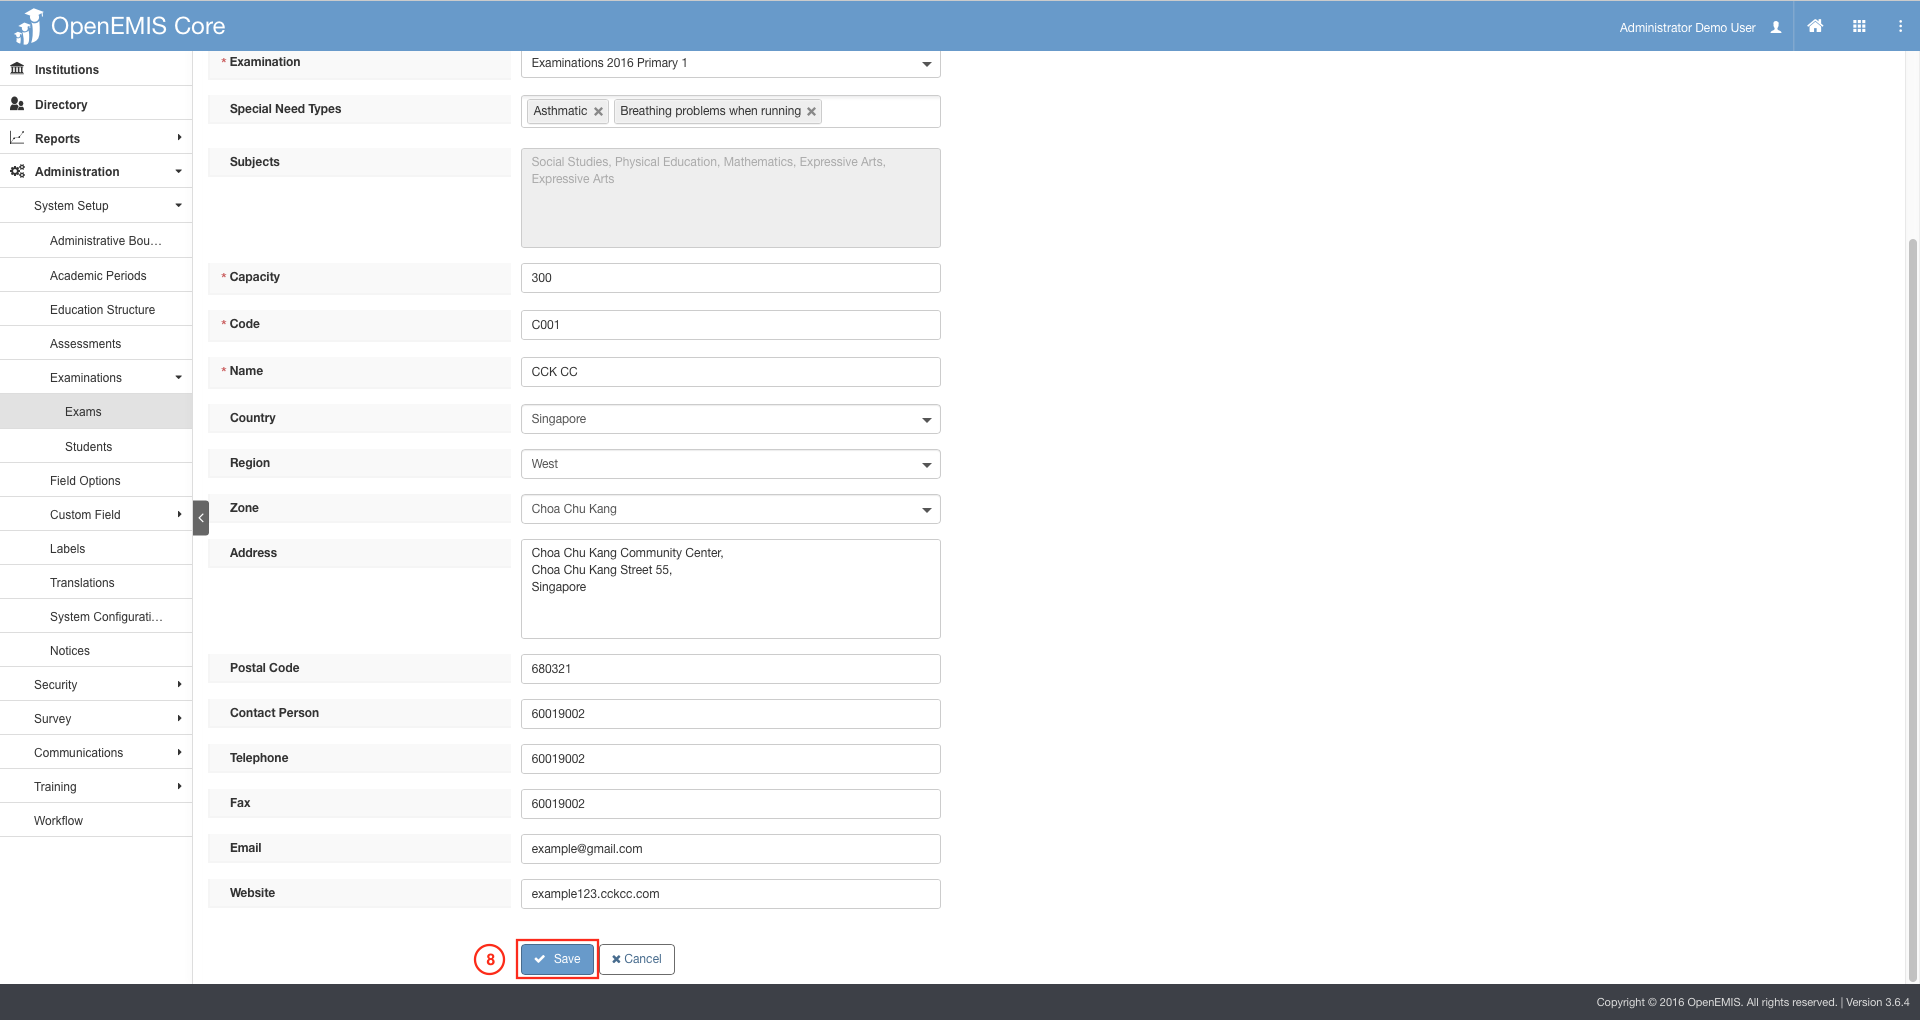
8) Select on Save.
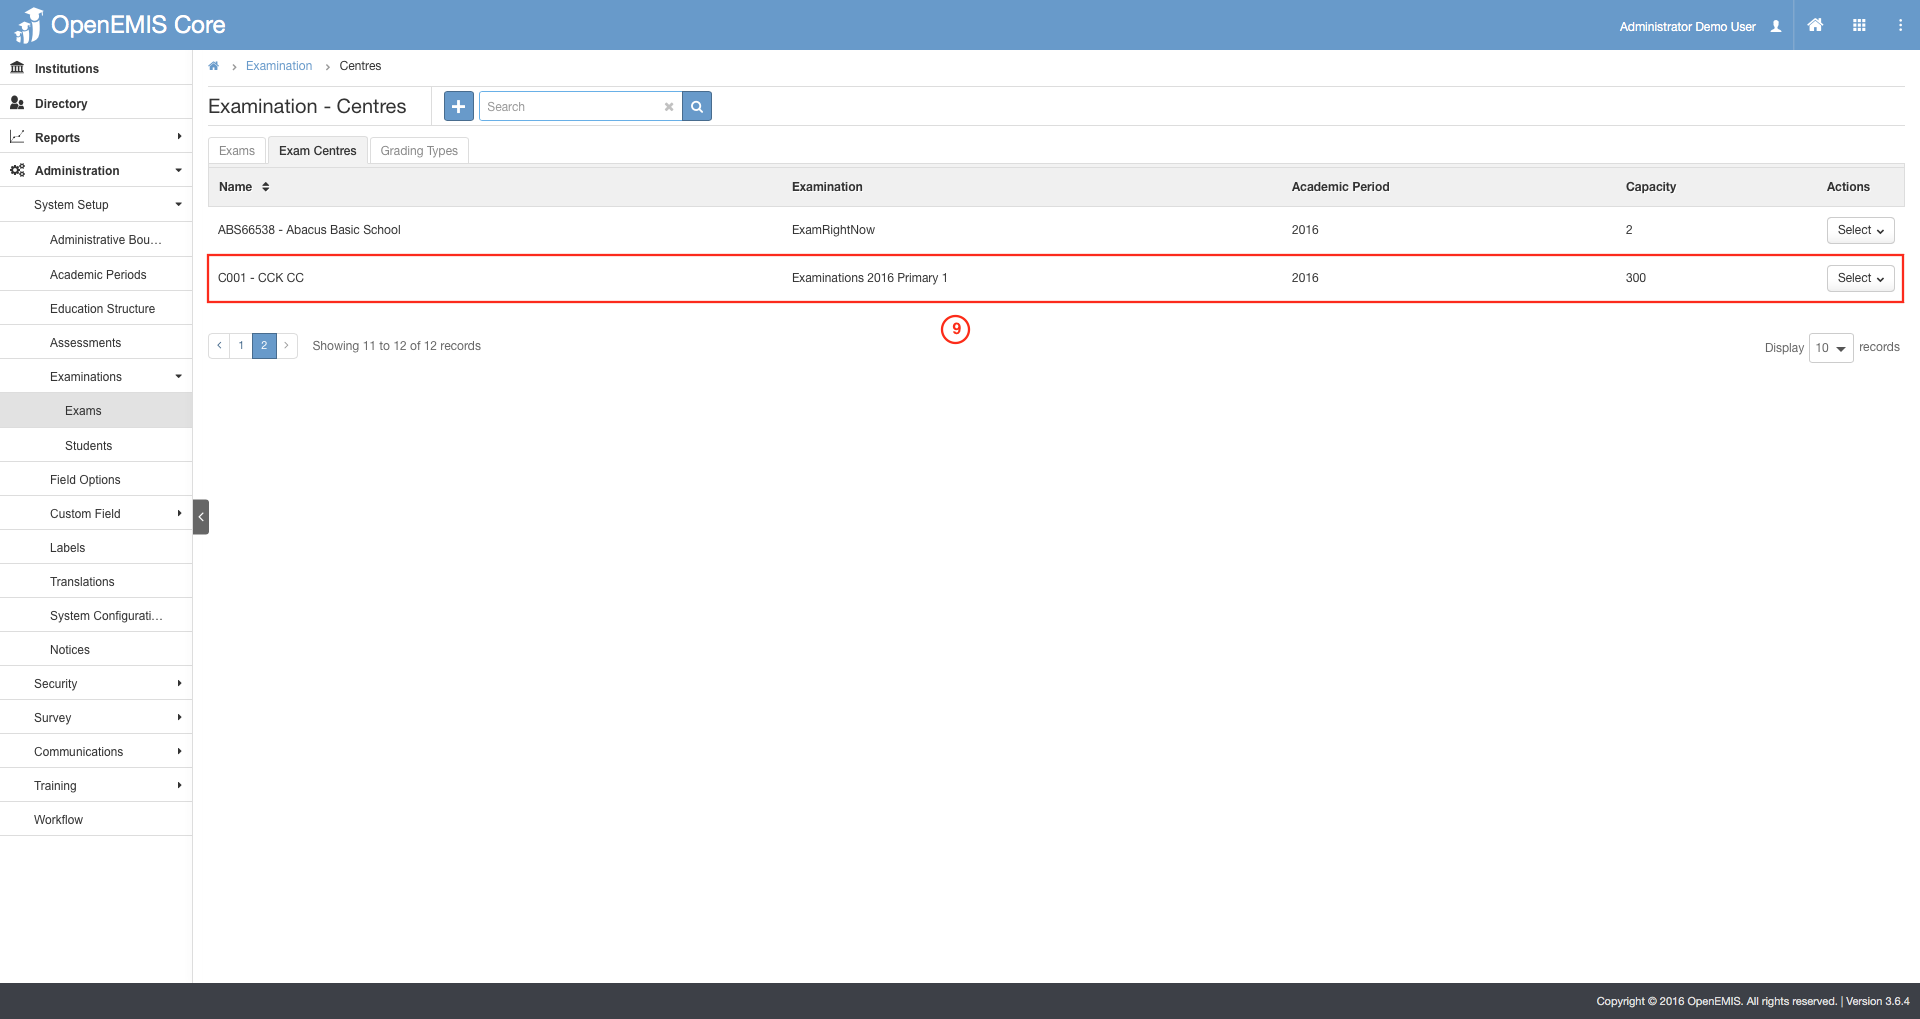
9) You can view the record added successfully in the table shown.

1) Go to Administration > System Setup > Examination > Exams.
2) Select on the Exam Centers tab.
3) Select on the Add button.
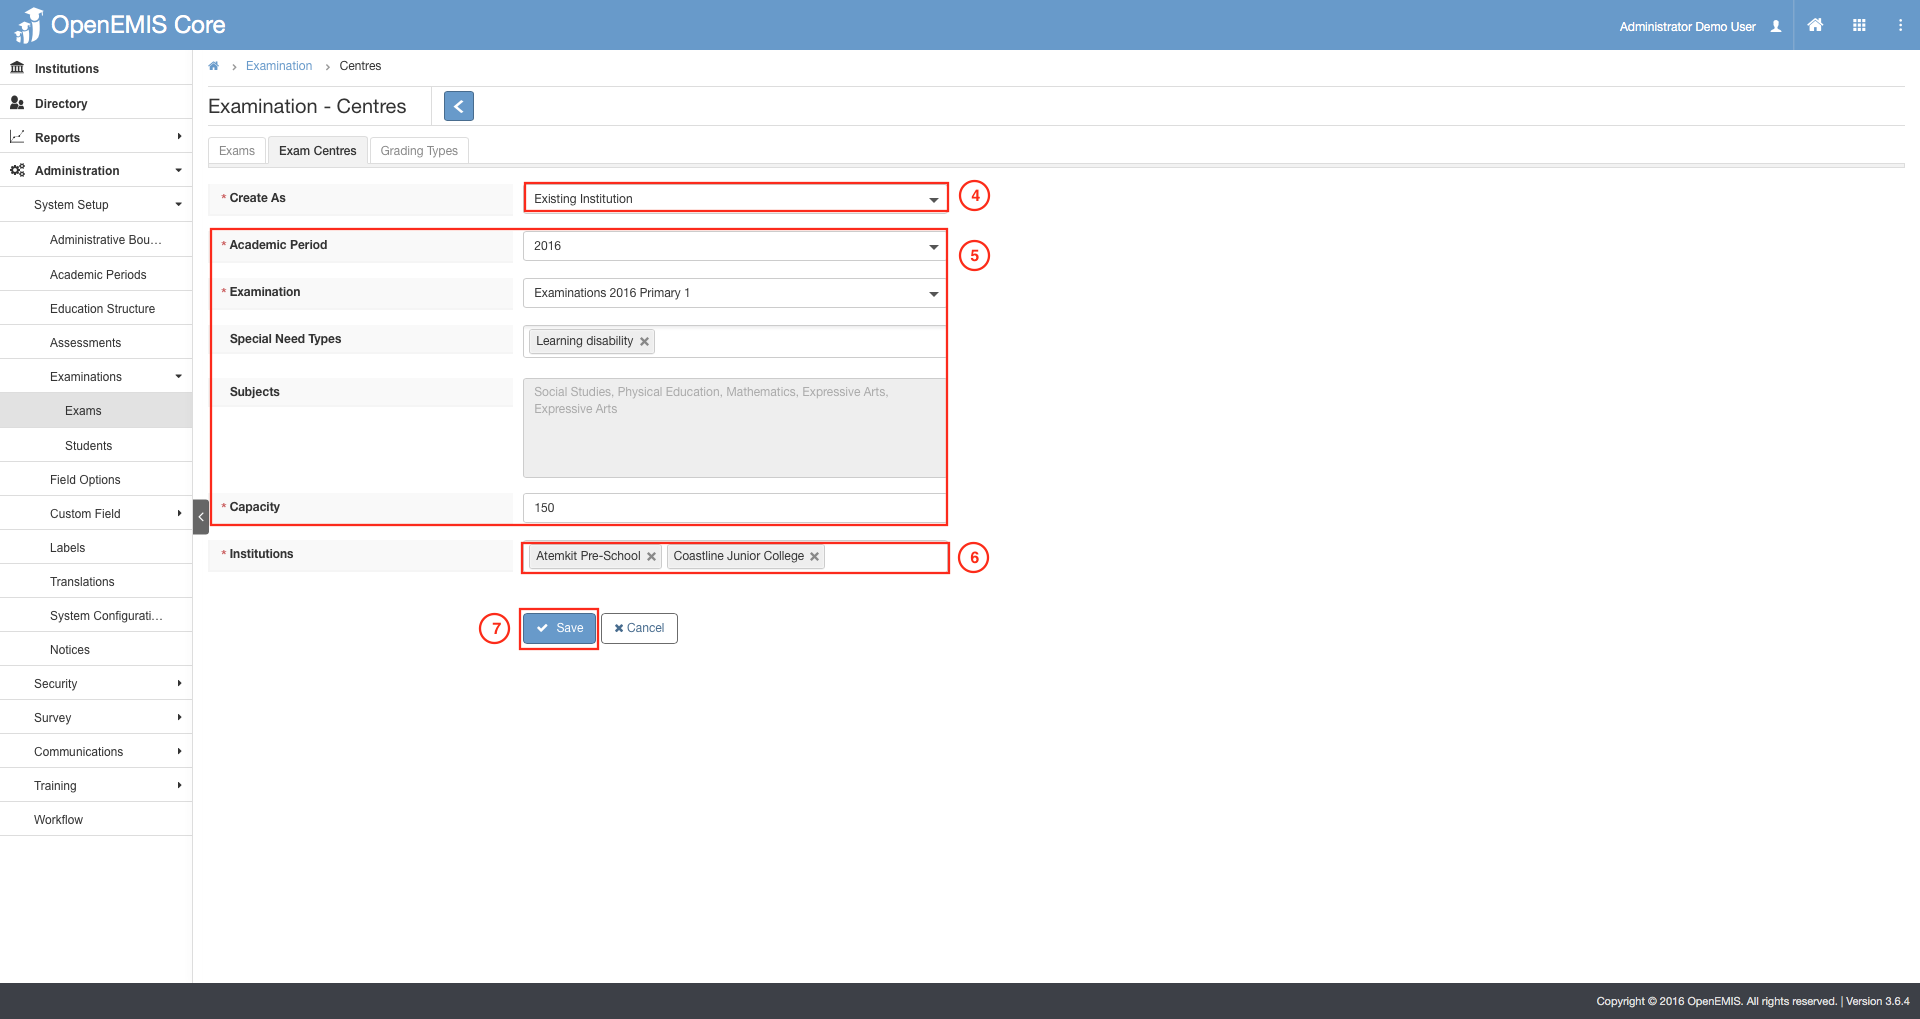
4) Select the Existing Institution option.
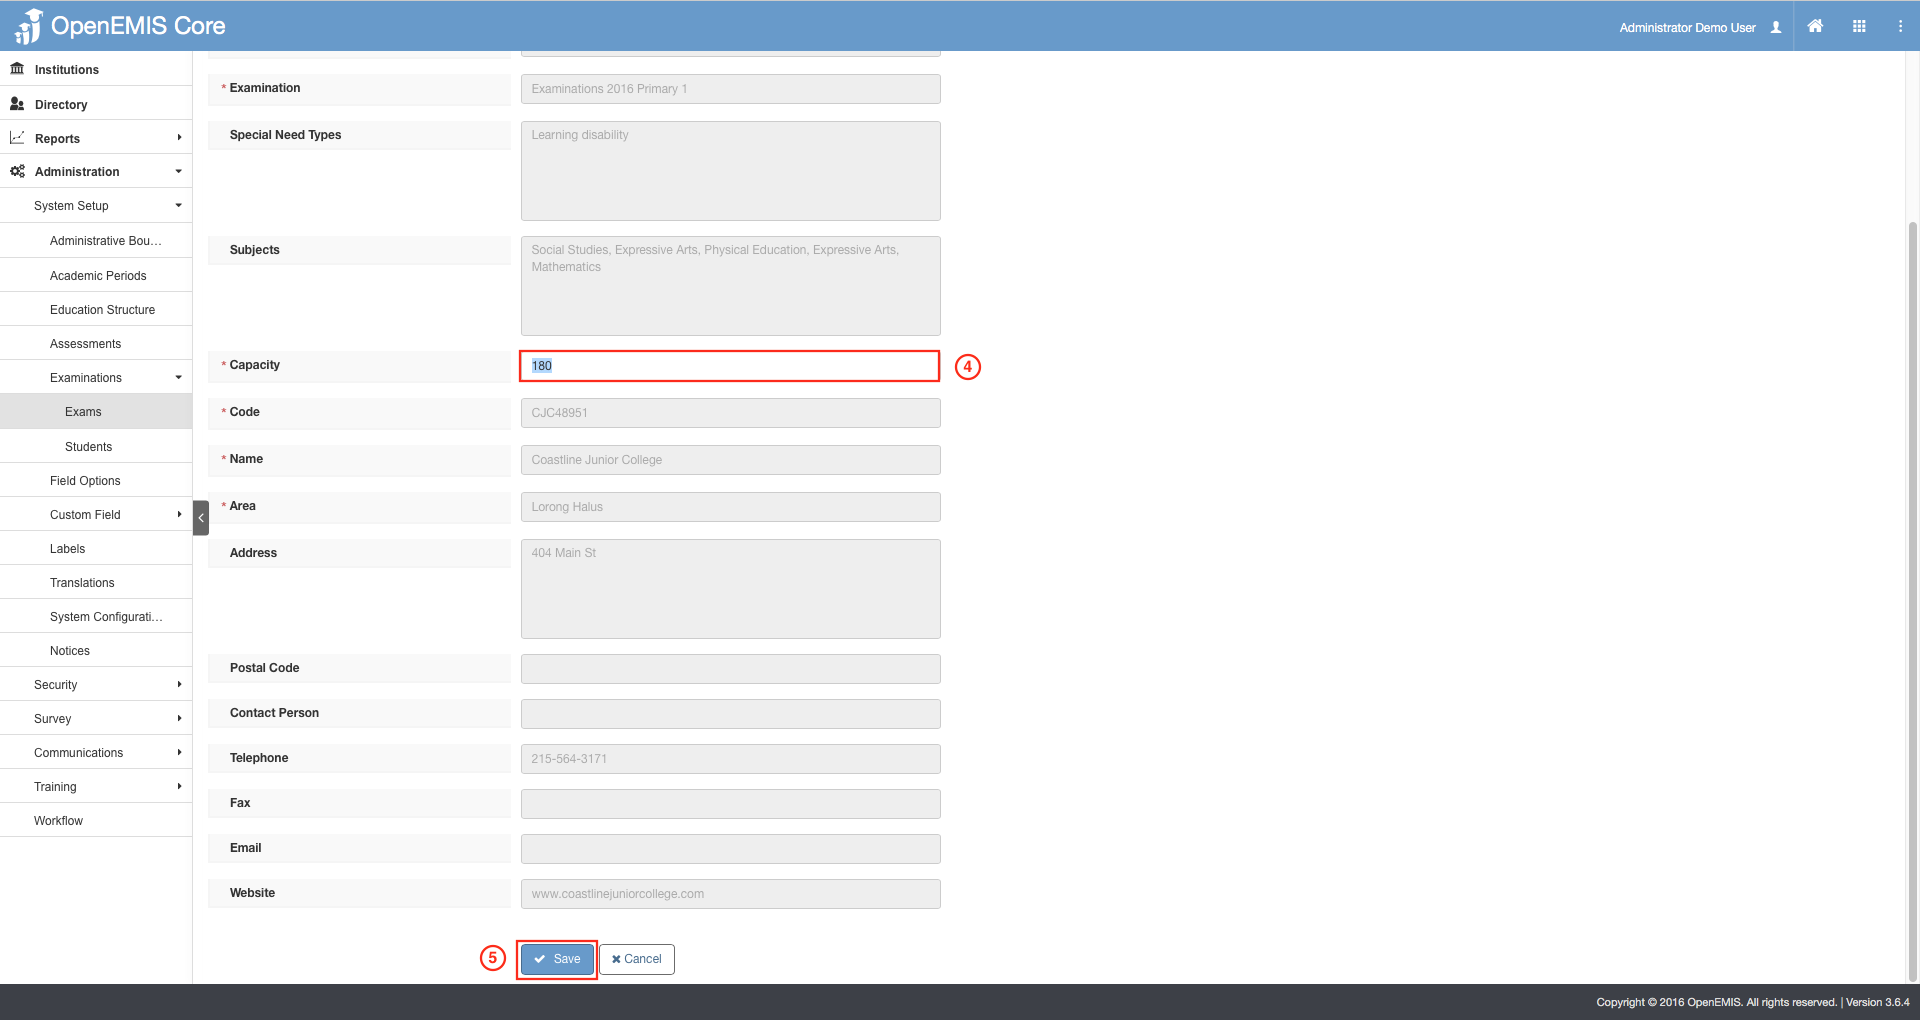
5) Insert the required input such as Academic Period, Examination, Capacity and etc.
6) Select the Institutions that filters according to Special Needs.
7) Select on Save.
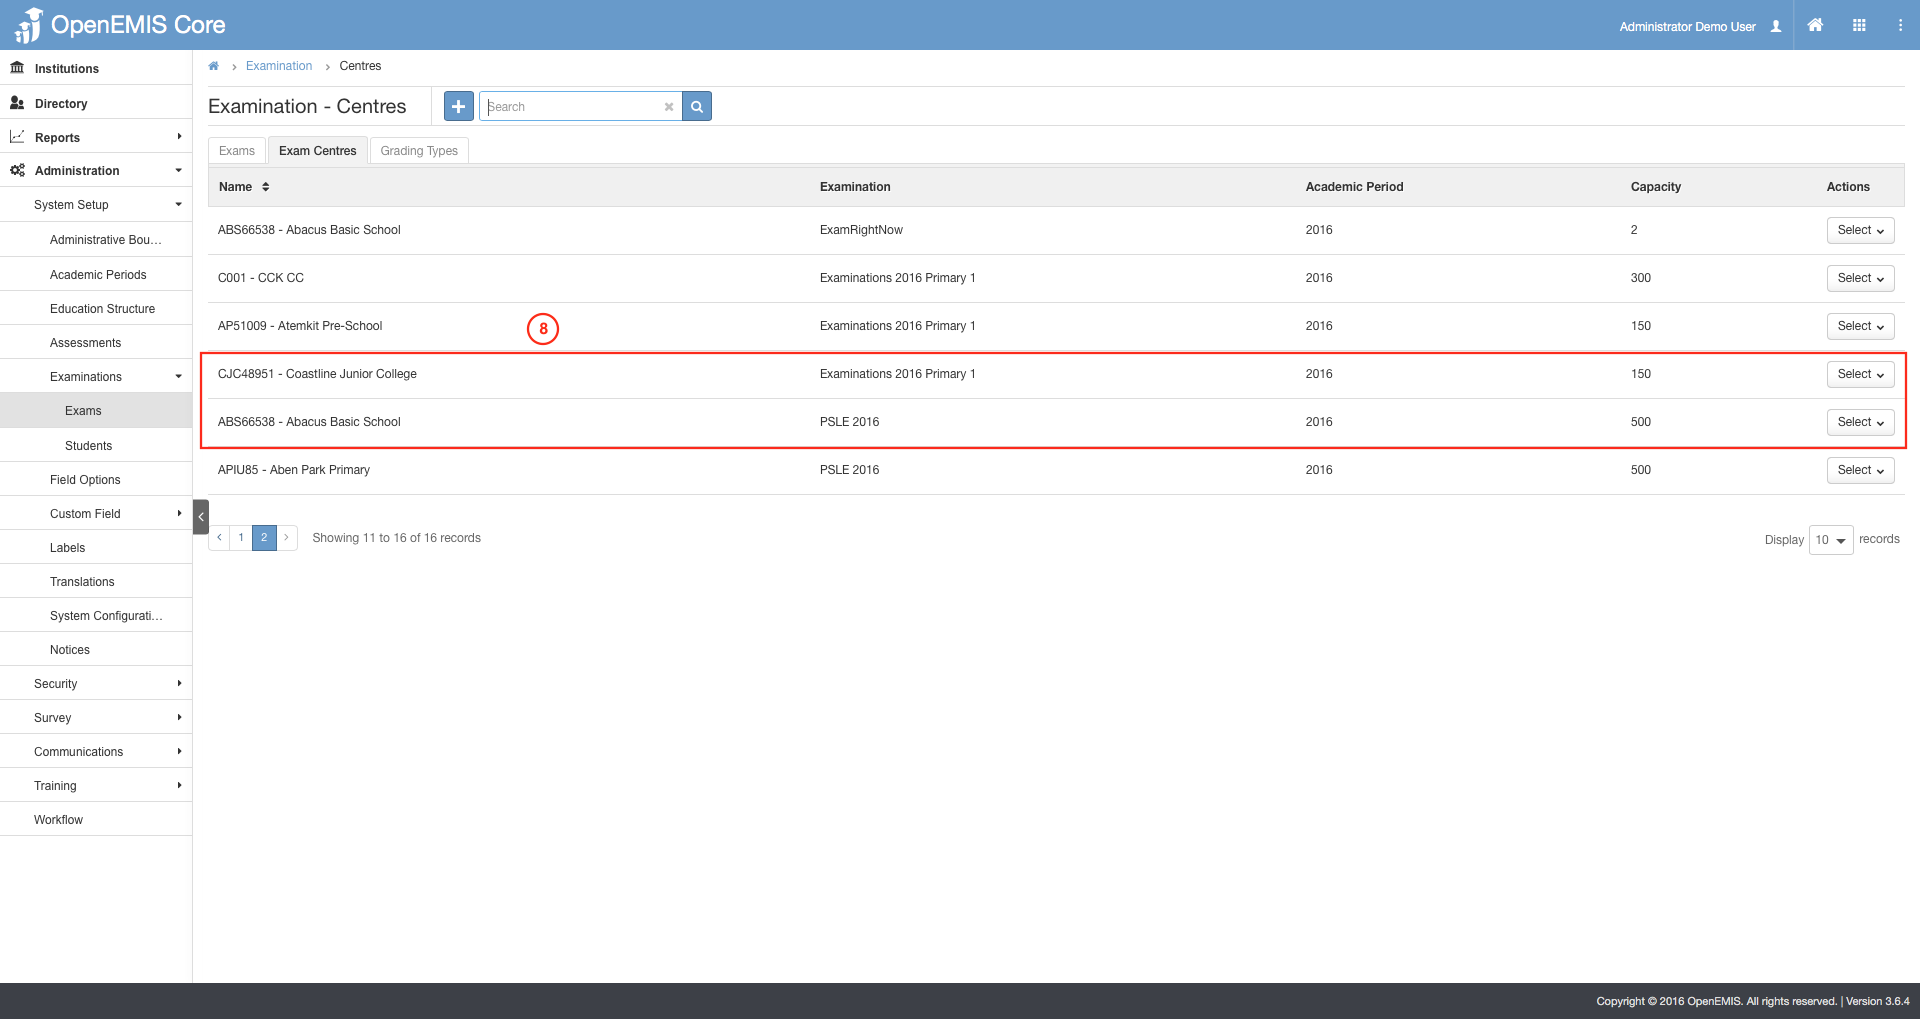
8) You can view the record added in the table shown.
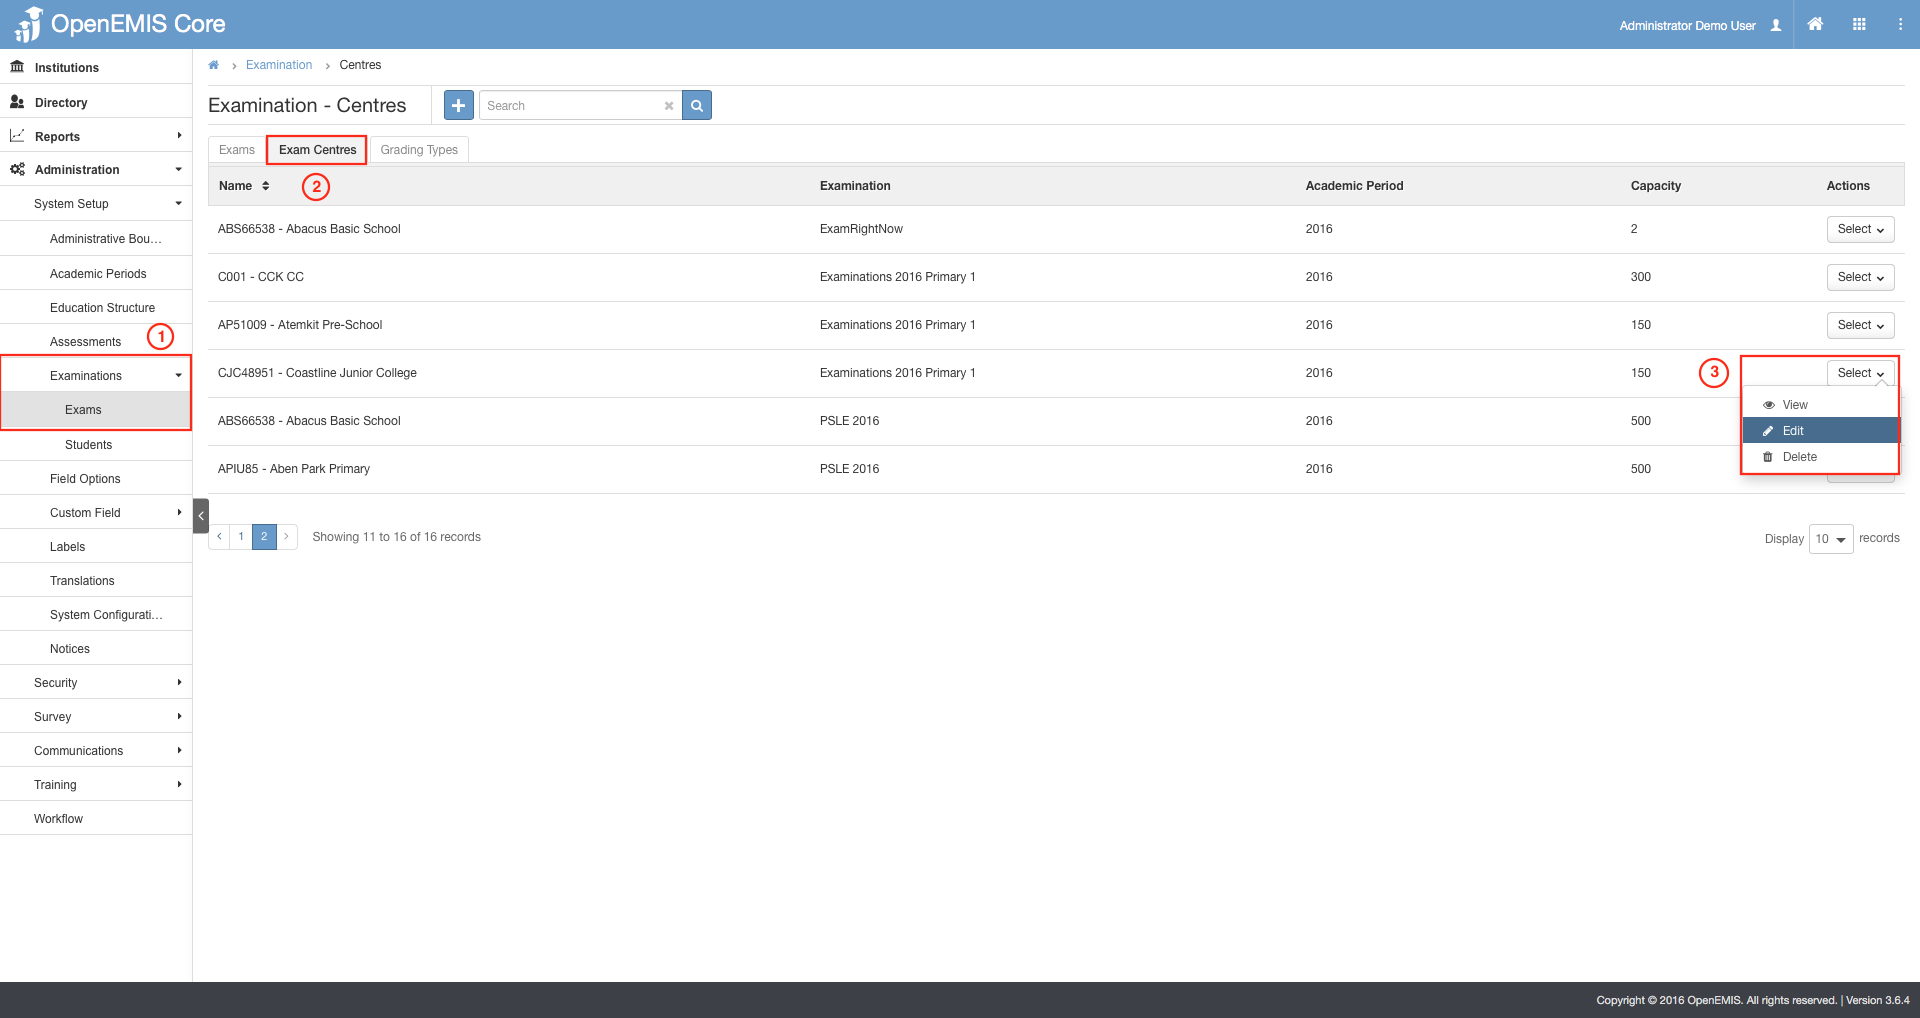
1) Go to Administration > System Setup > Examination > Exams.
2) Select on the Exam Centers tab.
3) Select on the Actions Bar > Edit.
4) Make your amendments.
5) Select on Save.
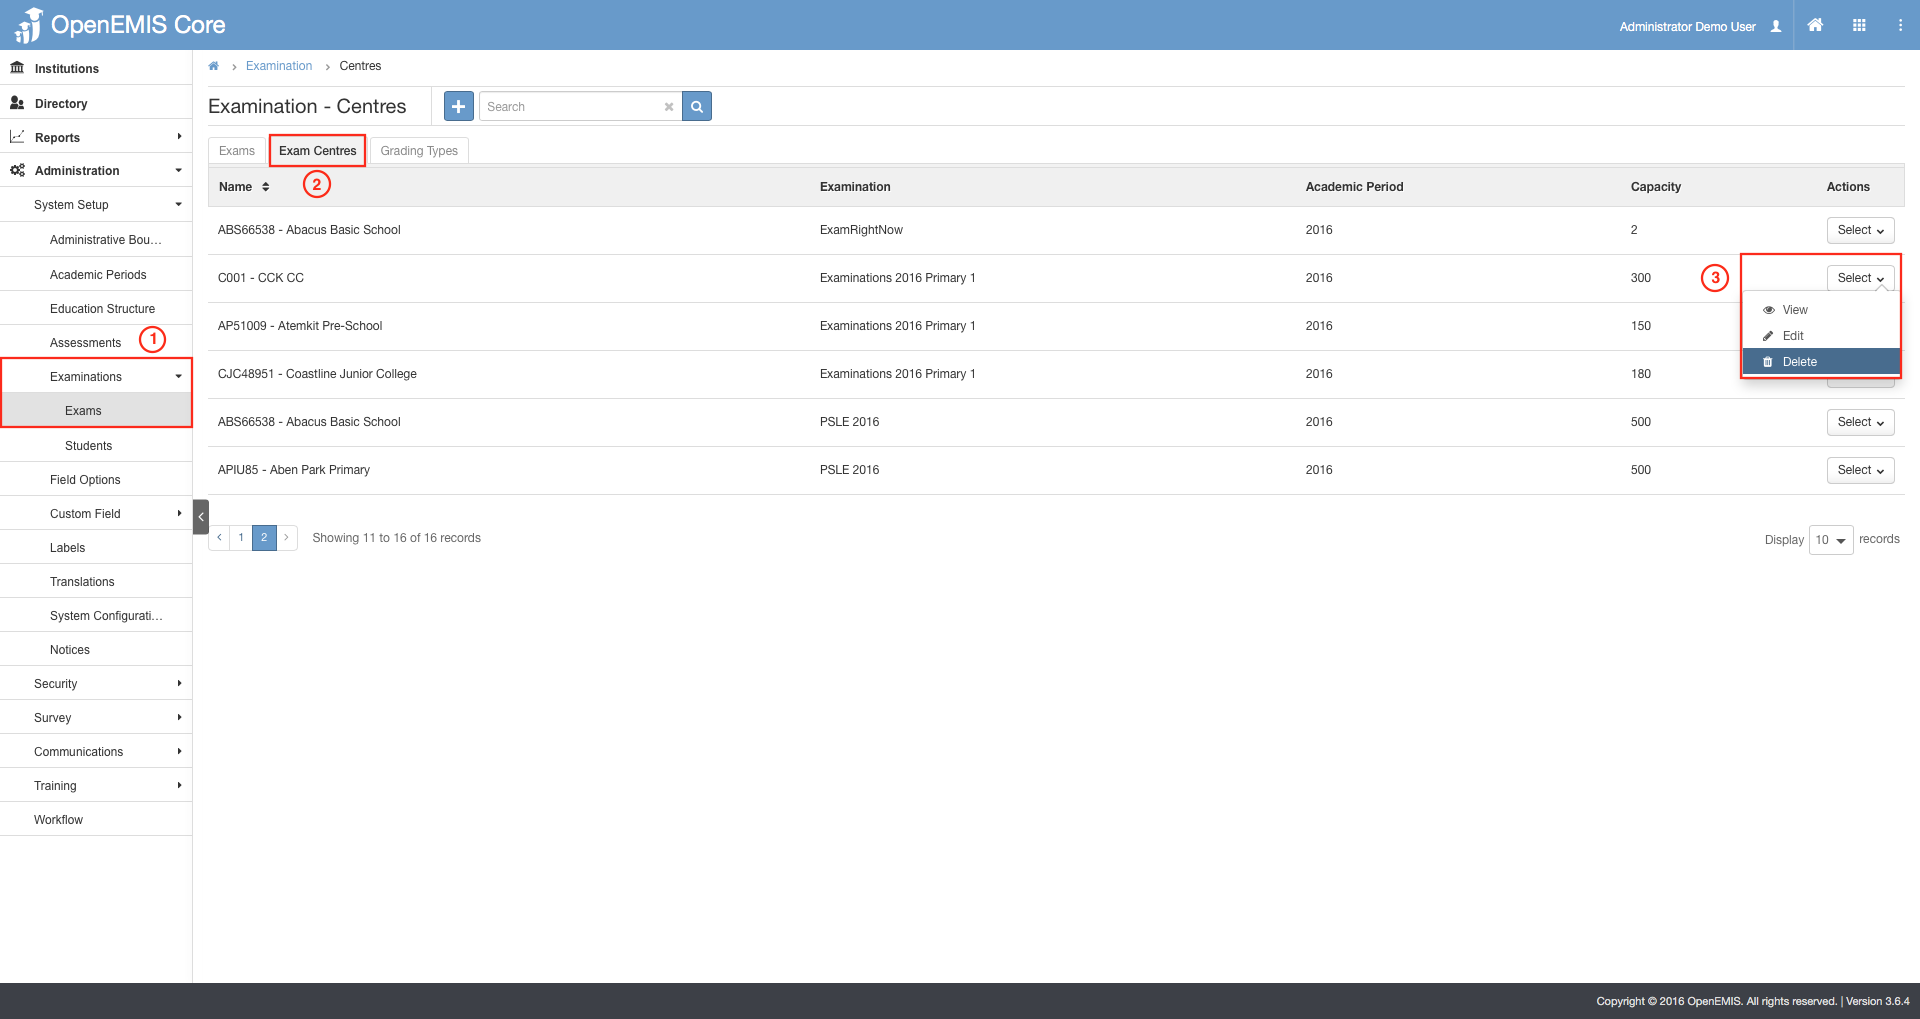
1) Go to Administration > System Setup > Examination > Exams.
2) Select on Exam Centers tab.
3) Select on the Actions Bar > Delete.

4) It will display all the associated records that is link to the deleted exam record.
5) Select on Save.
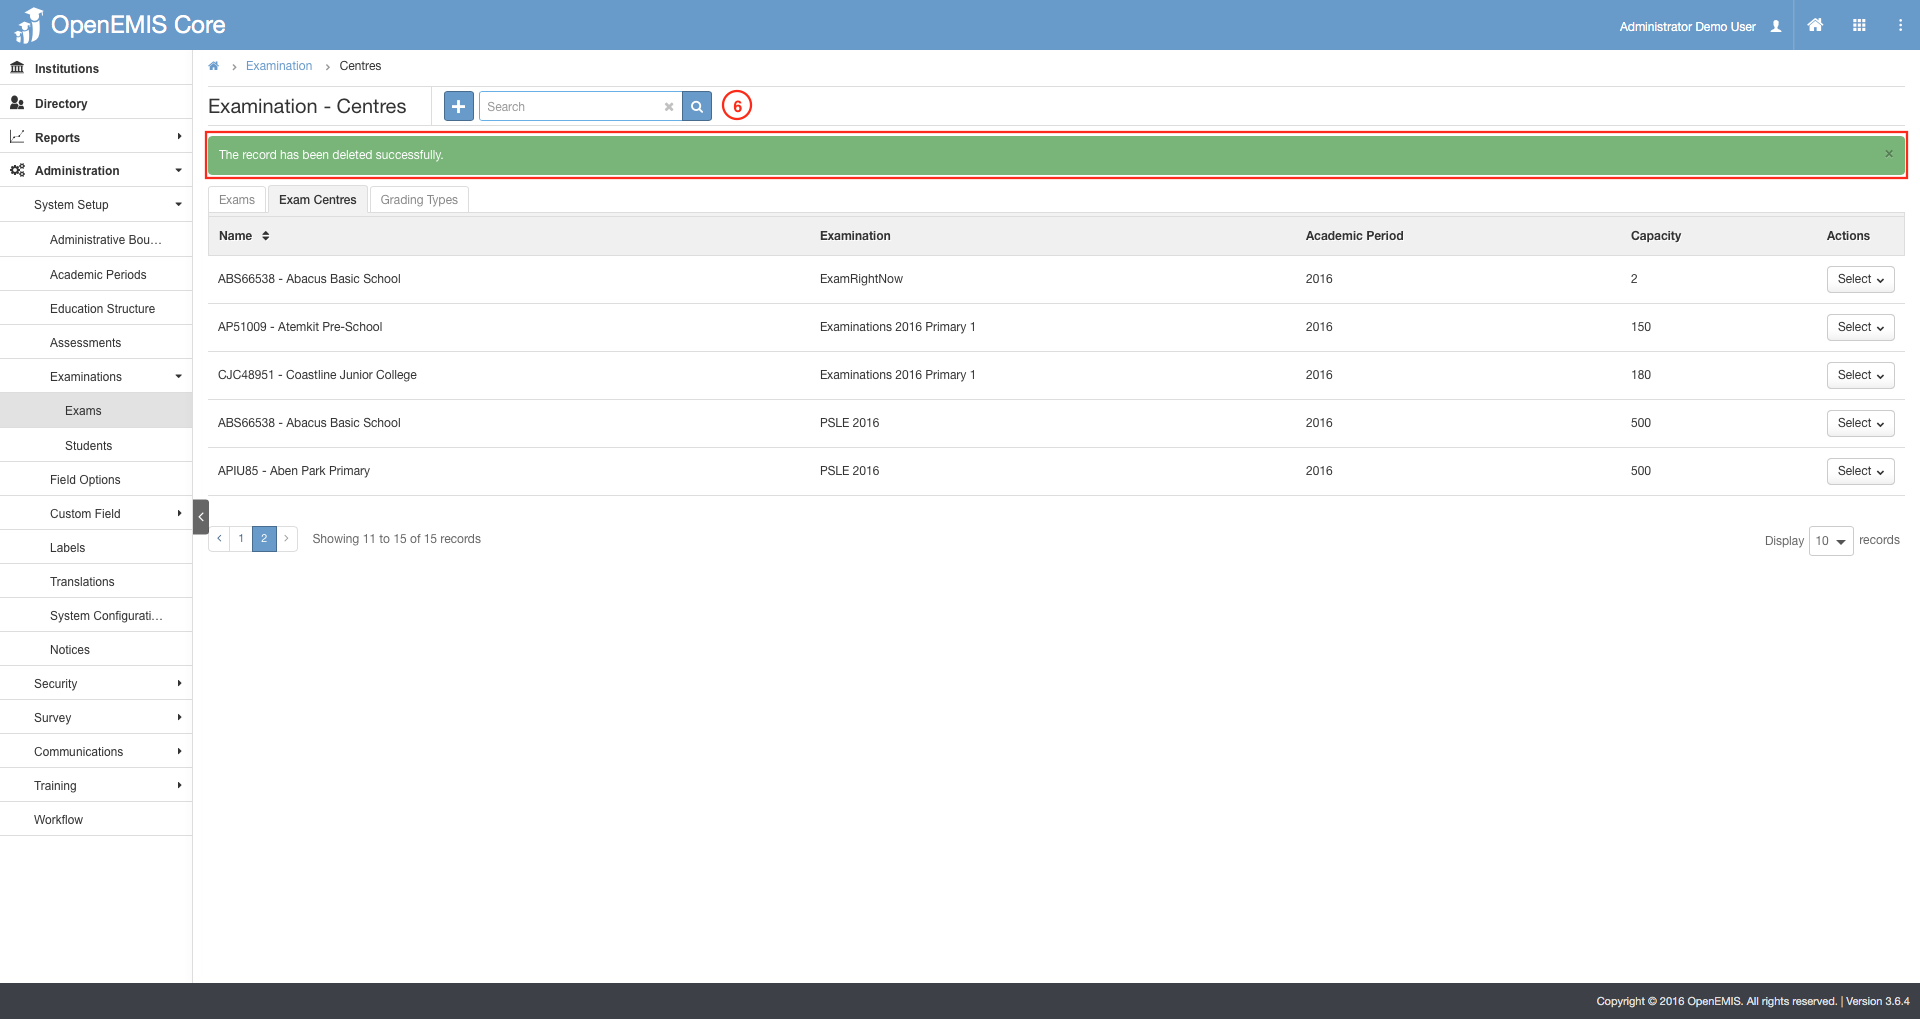
6) A successful message will be displayed upon deletion.
1) Go to Administration > System Setup > Examination > Centres.
2) Select on an Exam Center record.
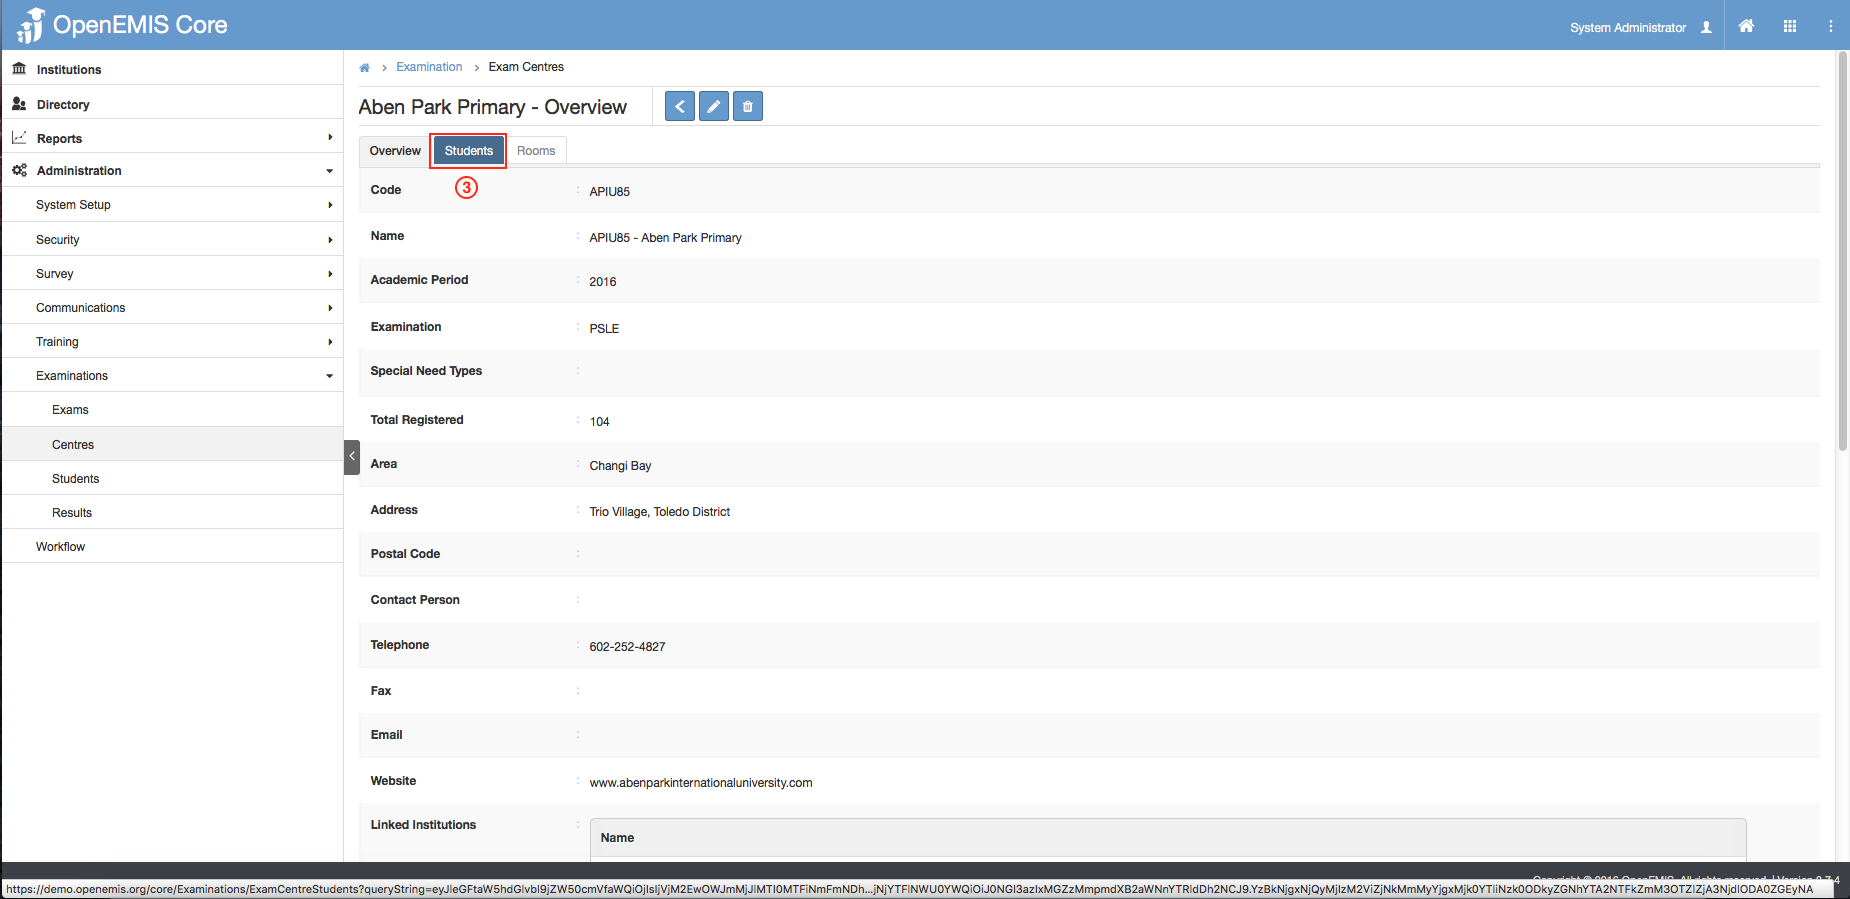
3) Select on the Students tab.
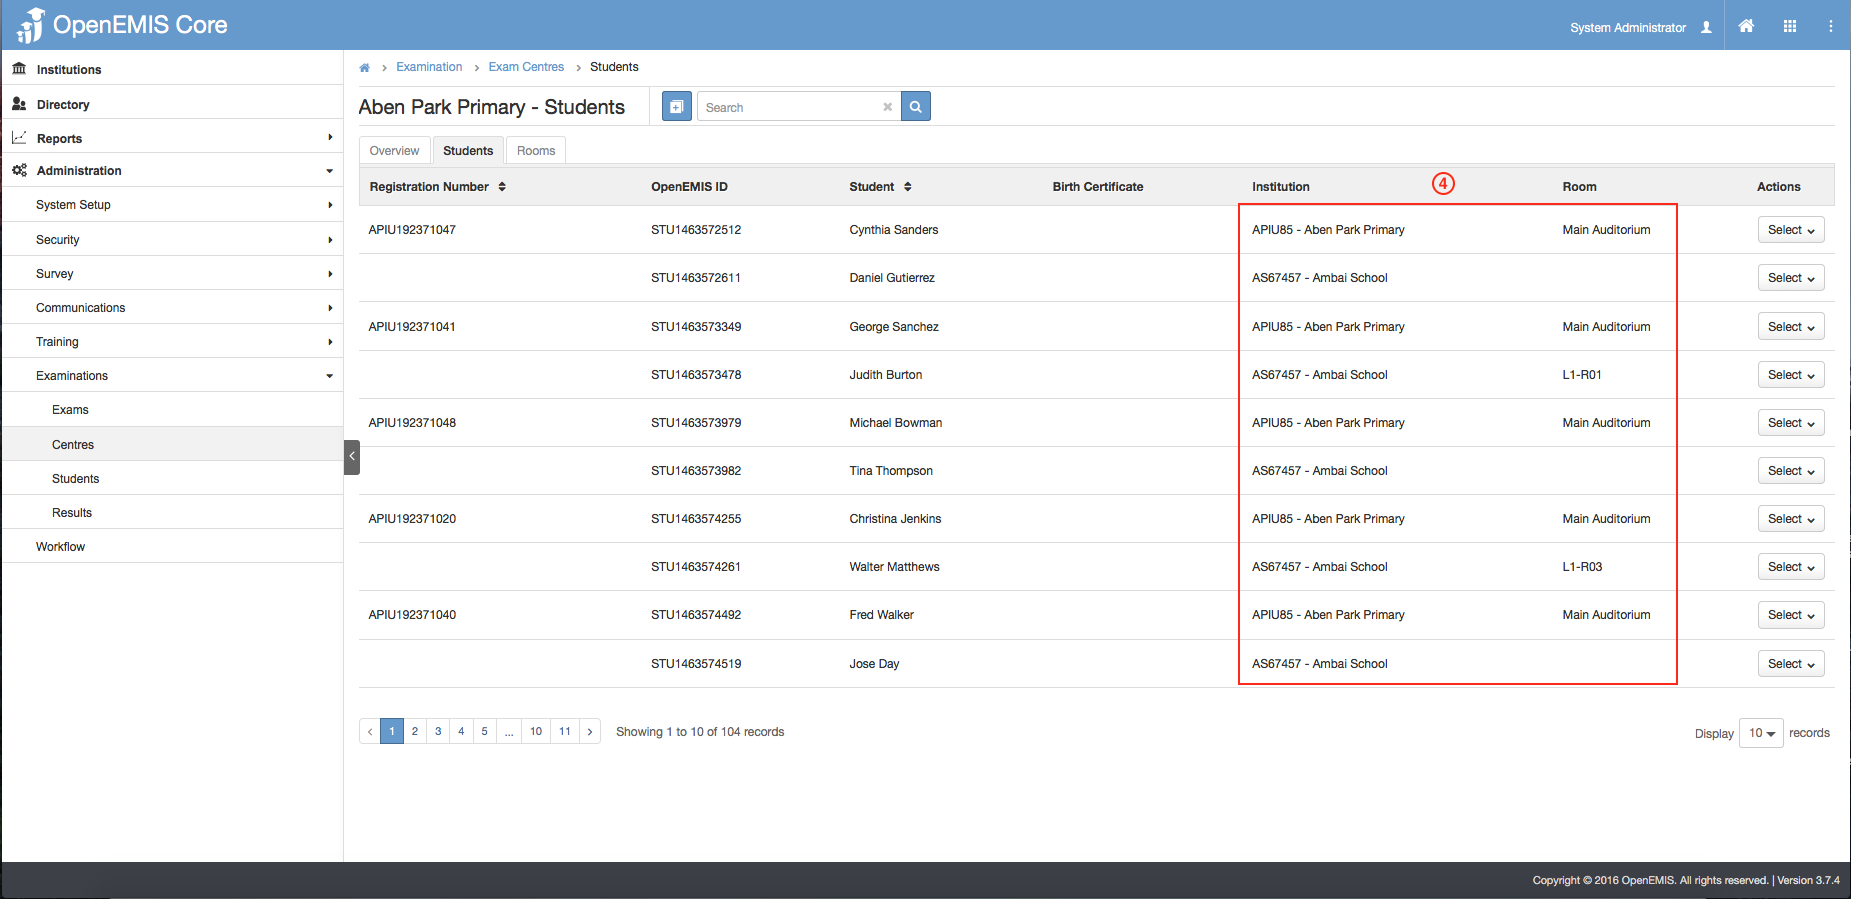
4) You will be able to view all registered students from various Institution assigned to that Exam Center.
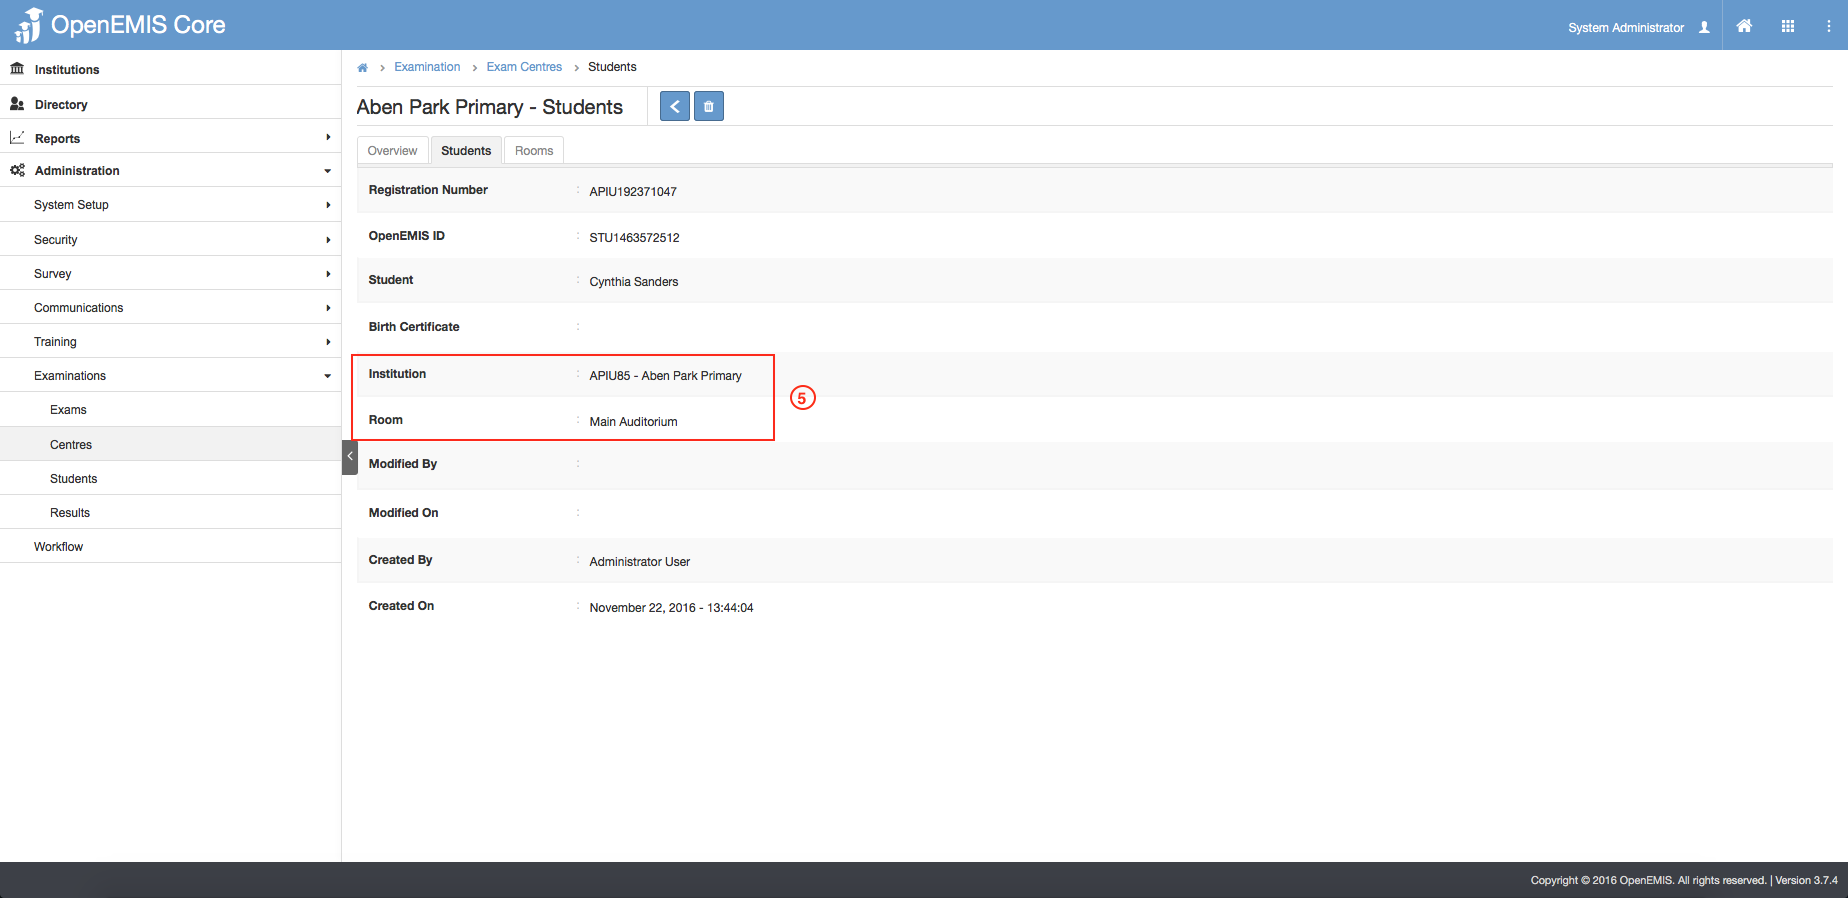
5) If you select on a Student Record, similarly, you will be able to view which Exam Room the Student is assigned to in the Exam Center.
Managing Examination Results:
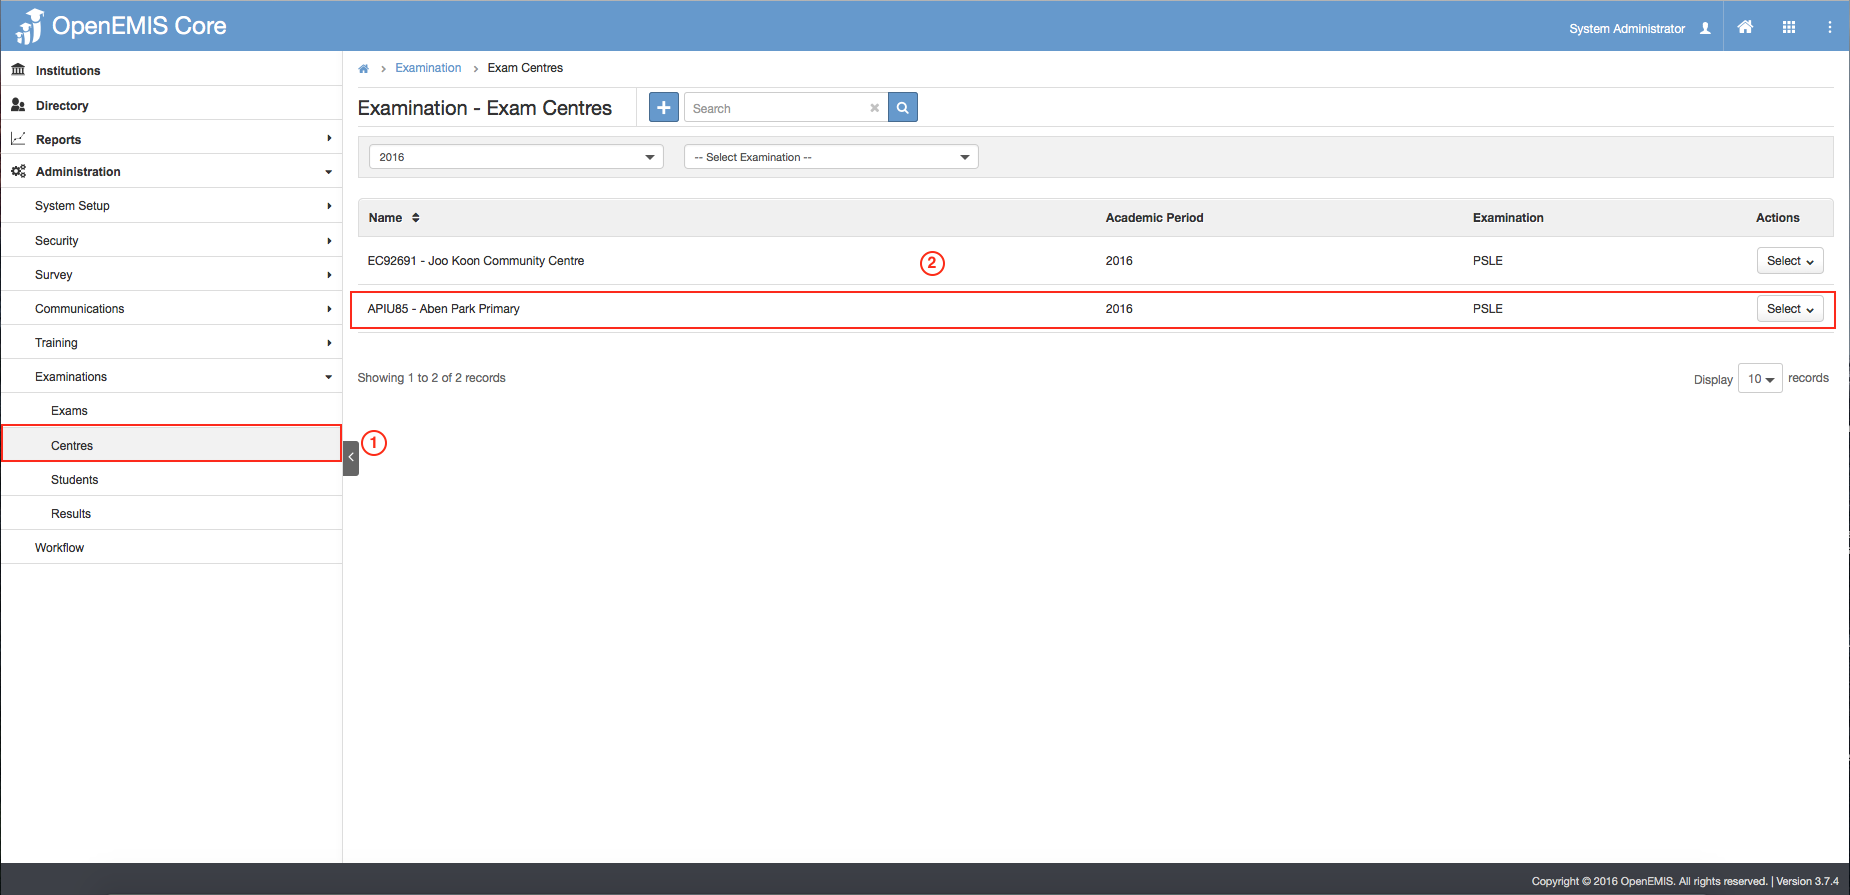
1) Go to Administration > System Setup > Examination > Results.
2) The list will display all the Exam Centres, and Examination that is offered in the respective Exam Centres.
3) Select on a Examination Record, which has a Grade as a Grading Type.
4) You will be able to see the Students Grade, on the particular Examination.
5) Select on the ‘Edit’ icon.
6) Select on the Grade that is displayed in the Dropdown list.
7) Select Save.
8) The Grades will be updated in the system, upon selecting Save.
1) Go to Administration > System Setup > Examination > Results.
2) Select on Exams tab.
3) The list will display all the Exam Centres, and Examination that is offered in the respective Exam Centres.
4) Select on a Examination Record, which has a Marks as a Grading Type.
5) You will be able to see the Students Marks, on the particular Examination.
6) Besides that, you will be to see an additional column which states Total Marks, which will not be seen if your Grading Type is ‘Grades’.
7) Select on the ‘Edit’ icon.
8) Input the Marks for each Student.
9) When you select Enter upon entering the Marks, it will display the Total Marks.
10) Select Save.
11) The Results will be updated in the system, upon selecting Save.
1) Go to Administration > System Setup > Examination > Results.
2) Select on Exams tab.
3) Select on Import icon above the table list.
4) Select on the Download Template to insert the Student’s Results.
5) Enter all the mandatory information in the Excel data, which are (Everything Except Institutions only if the Students are Private Candidates). Refer to the References sheet in the Excel.
6) Save the Excel Spreadsheet.
7) Select on the file > Import
8) System will display Successful message upon selecting Import, assuming the data entered correctly.
9) User will be able to Download Successful Records.
Manage Student Registration:
- Individual Students Exam Registration
This feature caters for private candidate or special need students, where they are to be added individually based on the Exam Centre Facilities or Seats availability.
1) Go to Administration > System Setup > Examinations > Students.
2) Select on Single Register icon.
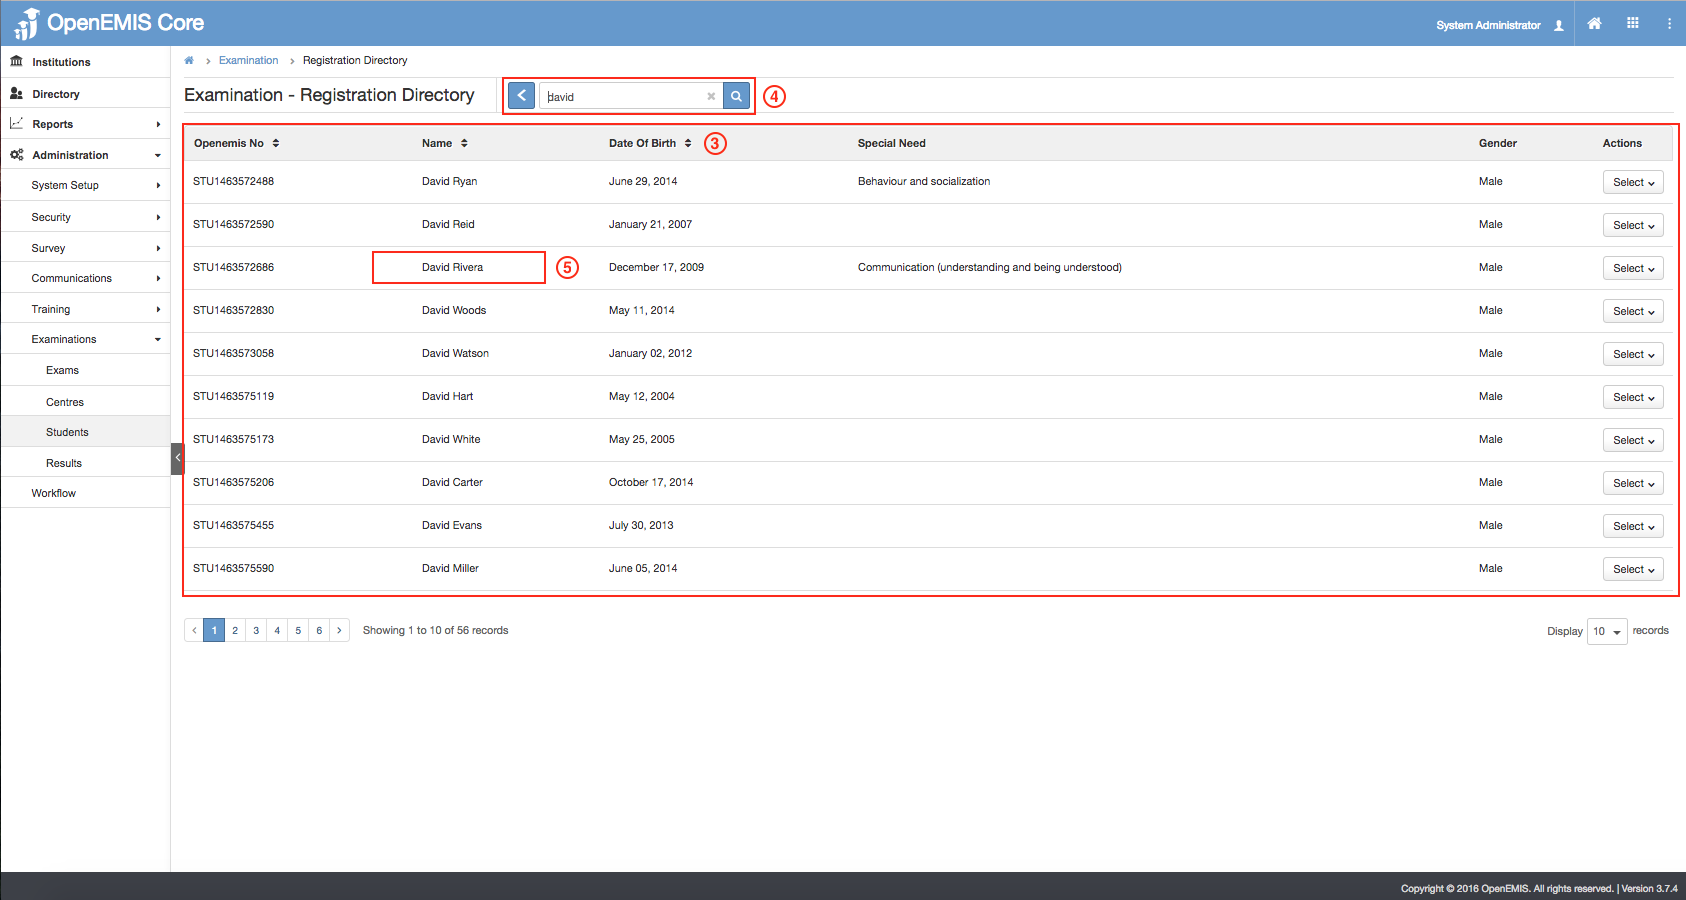
3) This page will bring you to a directory which retrieves all users, where you are able to search and register for a particular candidate. Users can choose to filter by OpenEMIS ID, Name or DOB. The list also indicated the Special needs of the student.
4) Perform search by entering the Student’s Name or OpenEMIS ID.
5) Select on the Student Record to Register for Examination.
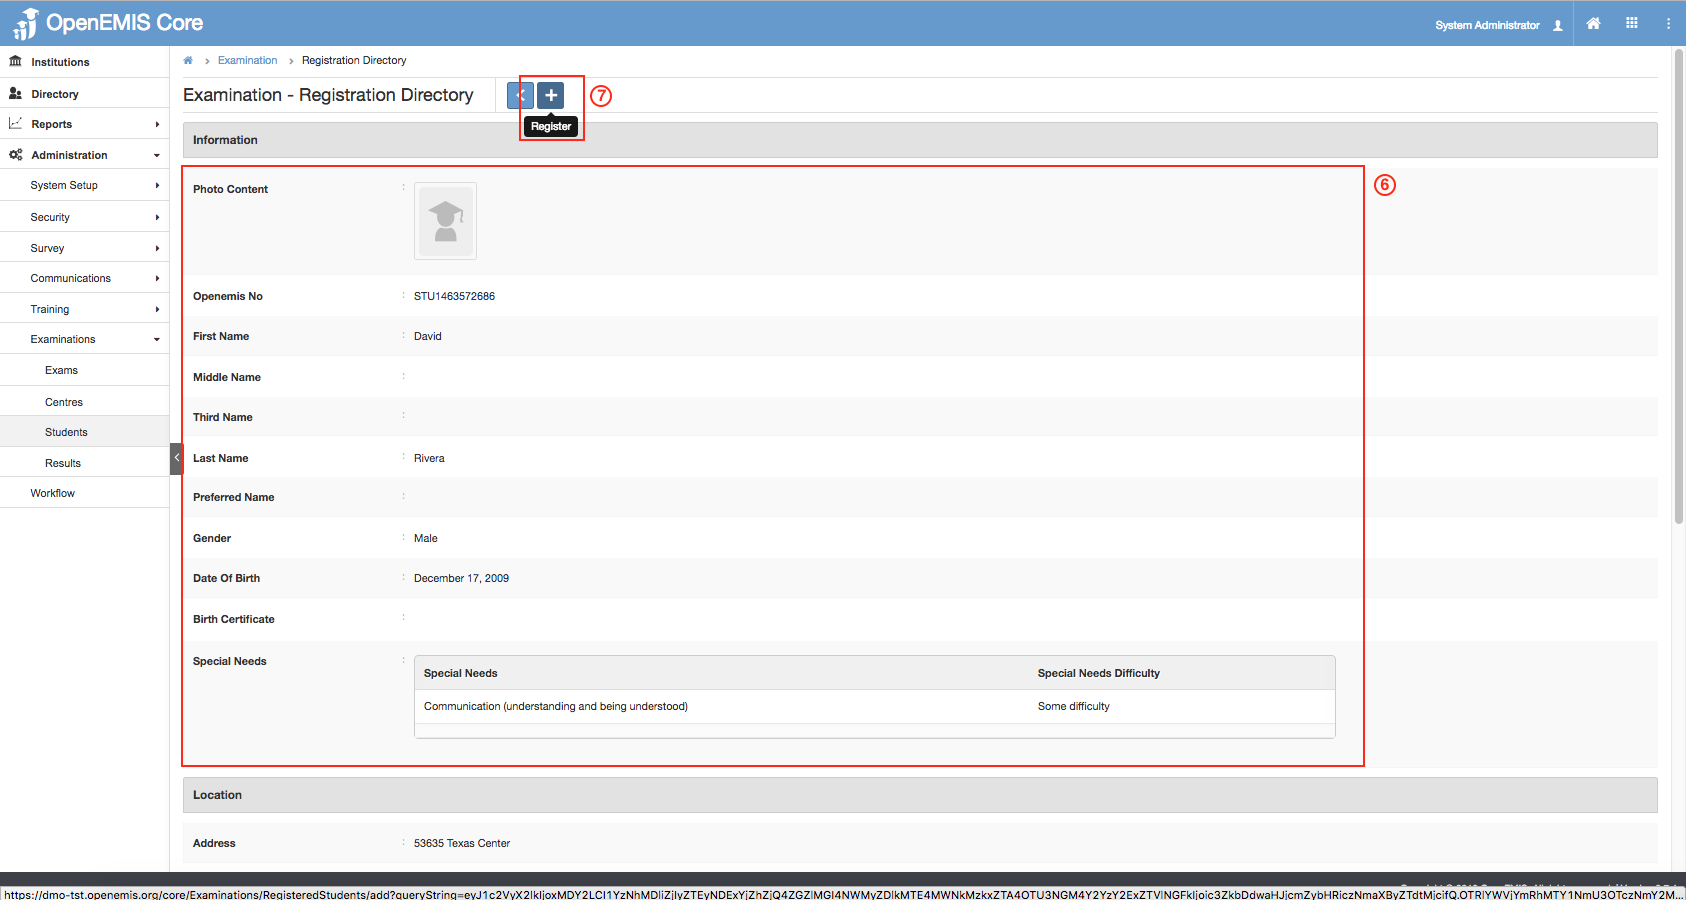
6) Upon selecting on the Student, you will be able to view the student details.
7) Select on the Register icon.
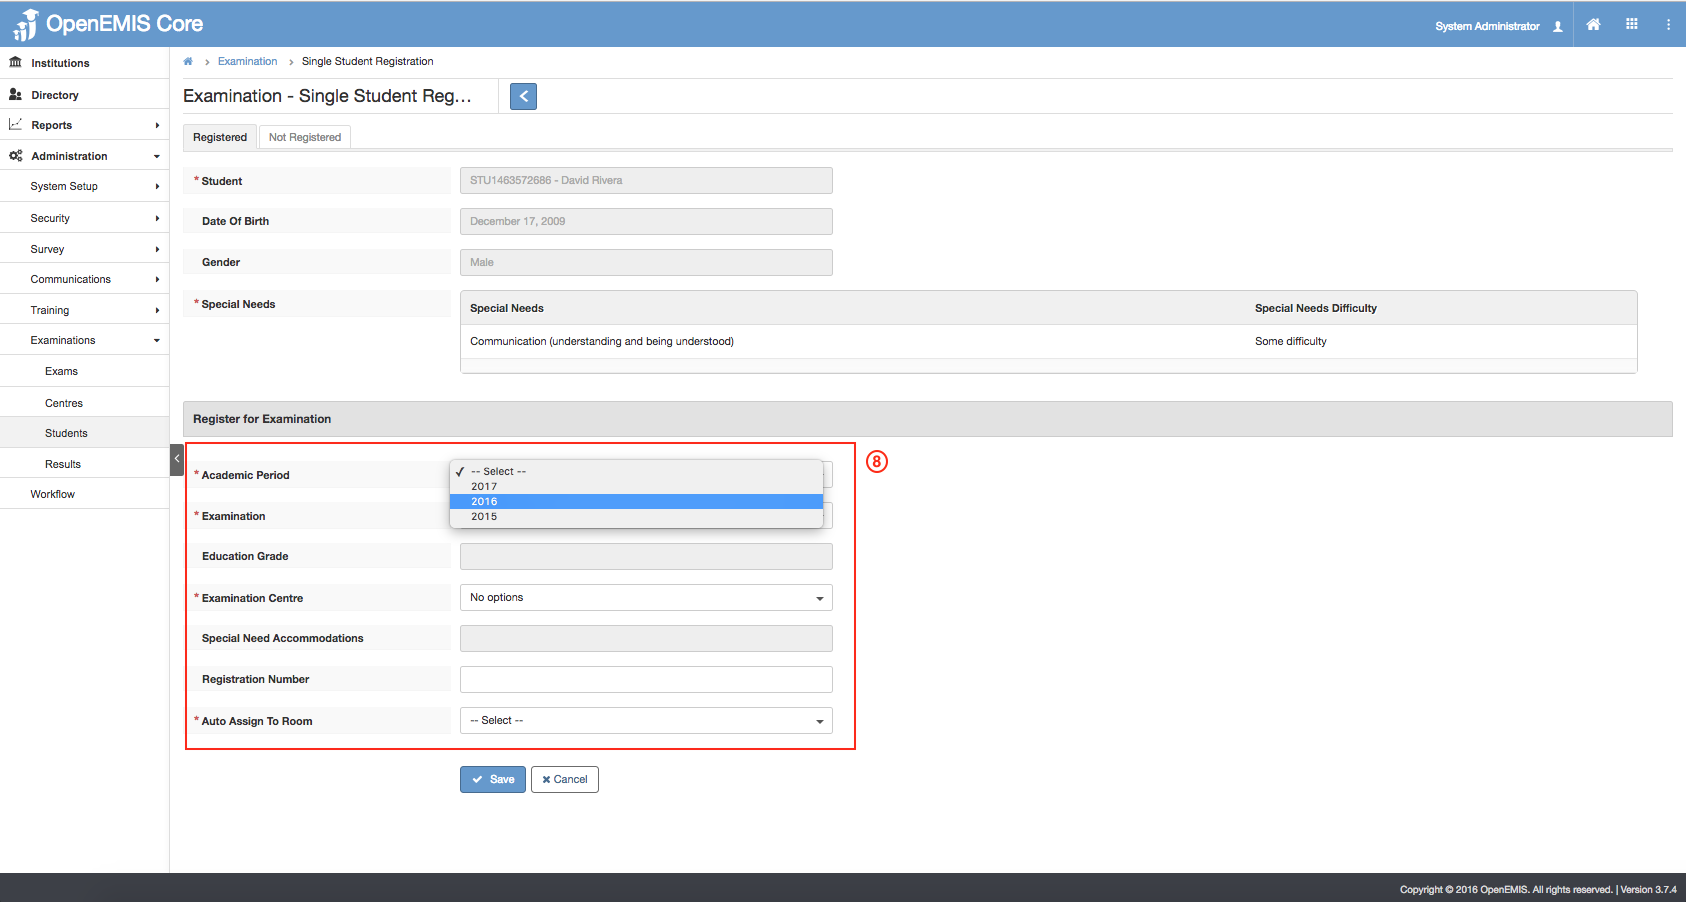
8) This will direct you to Student Registration page as shown in the screenshot above. Based on the Academic Period selected, it will retrieve all the Examination.
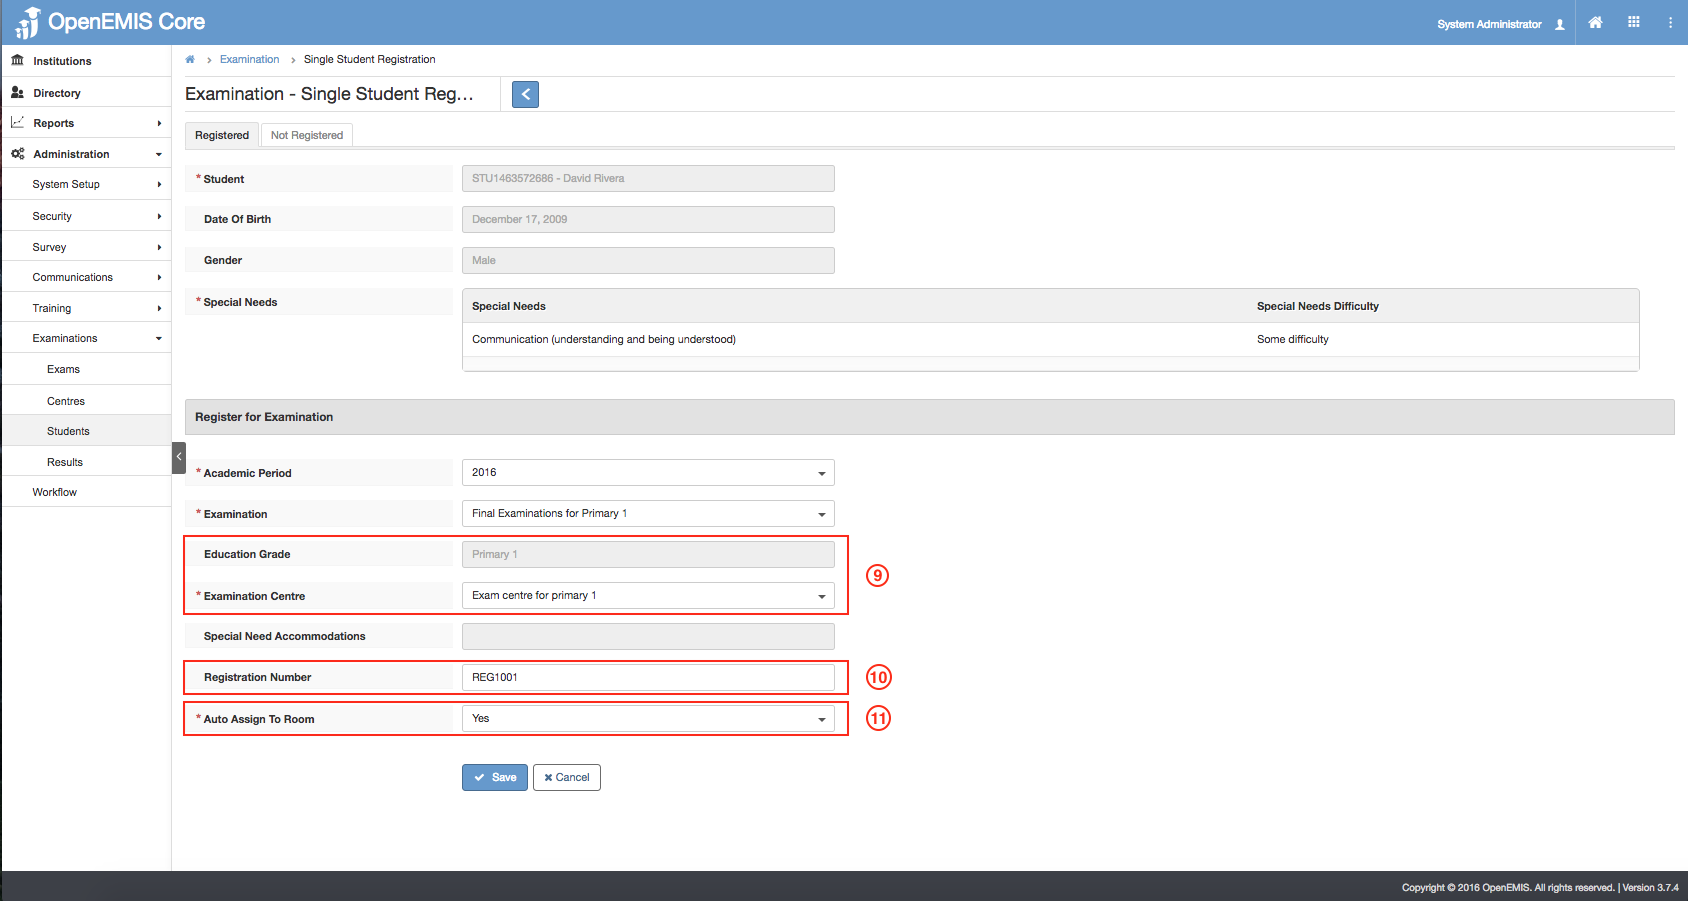
9) System will auto-display the Grade once the Examination is selected. The Exam Centre will be filtered according to the availability of Seats.
10) Registration Number is not mandatory, however it must be unique to the Exam. This field will validate if its an unique ID.
11) The Auto Assign to Room is a feature where they will be automatically assigned to the first room if the seats are available.
if Auto Assign to Room = YES
if Auto Assign to Room = NO
12) Select Save.
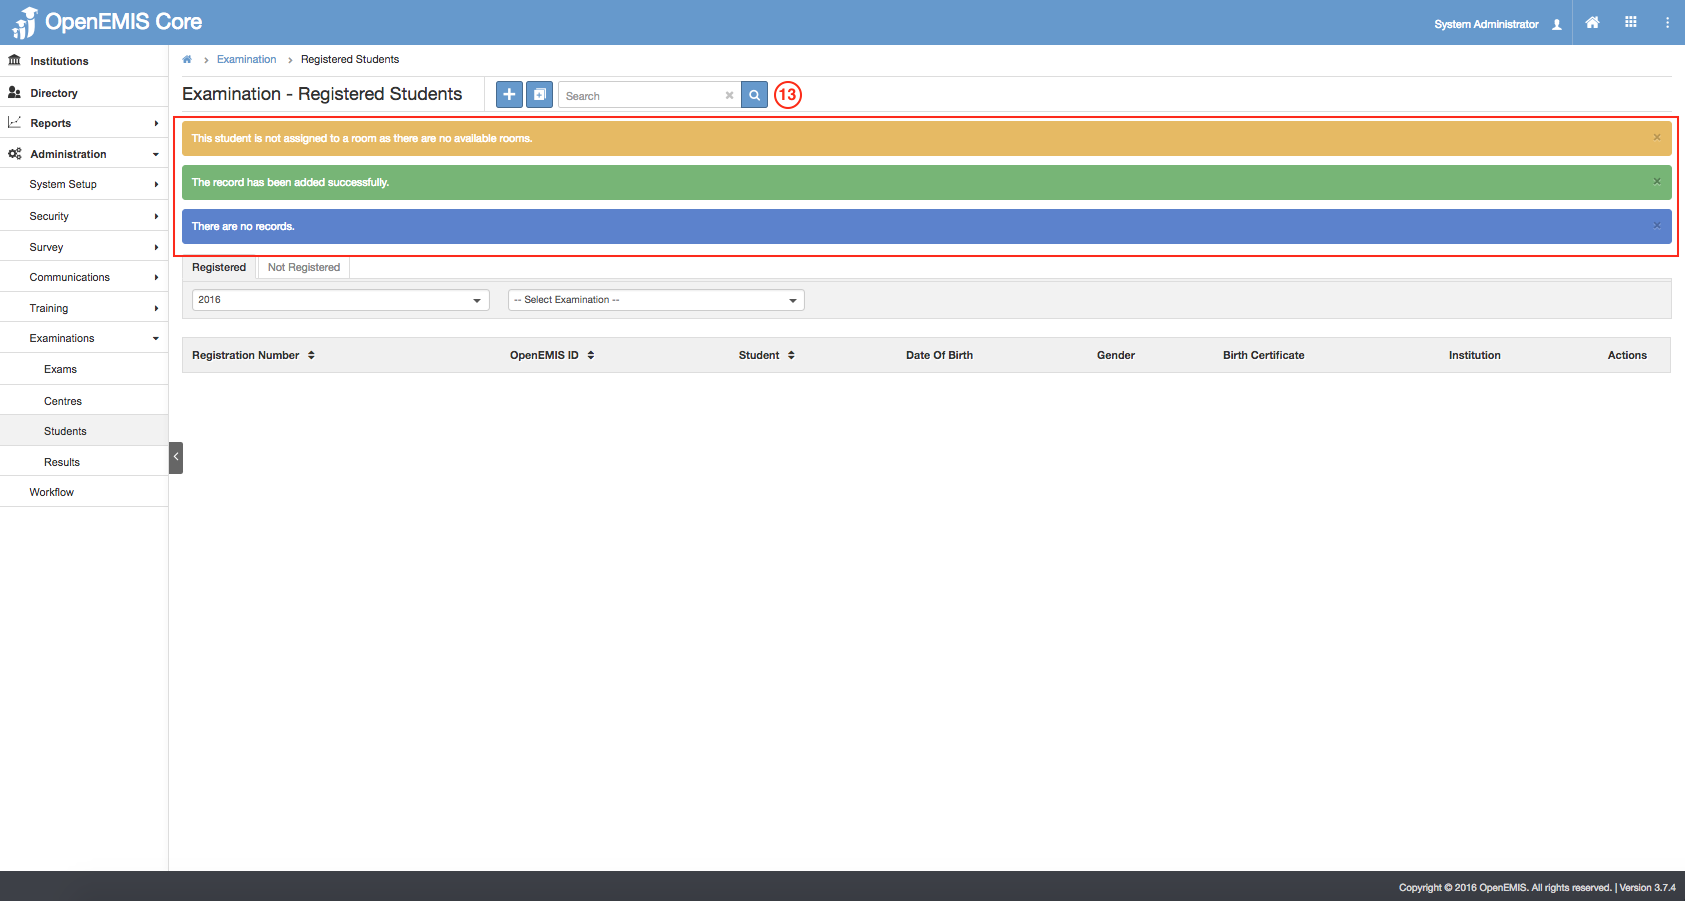
13) Upon Selecting Save, it will display a Successful Message.
- Bulk Students Exam Registration
This feature caters for candidates who are based in an Institution, where they are to be bulk register all students together.
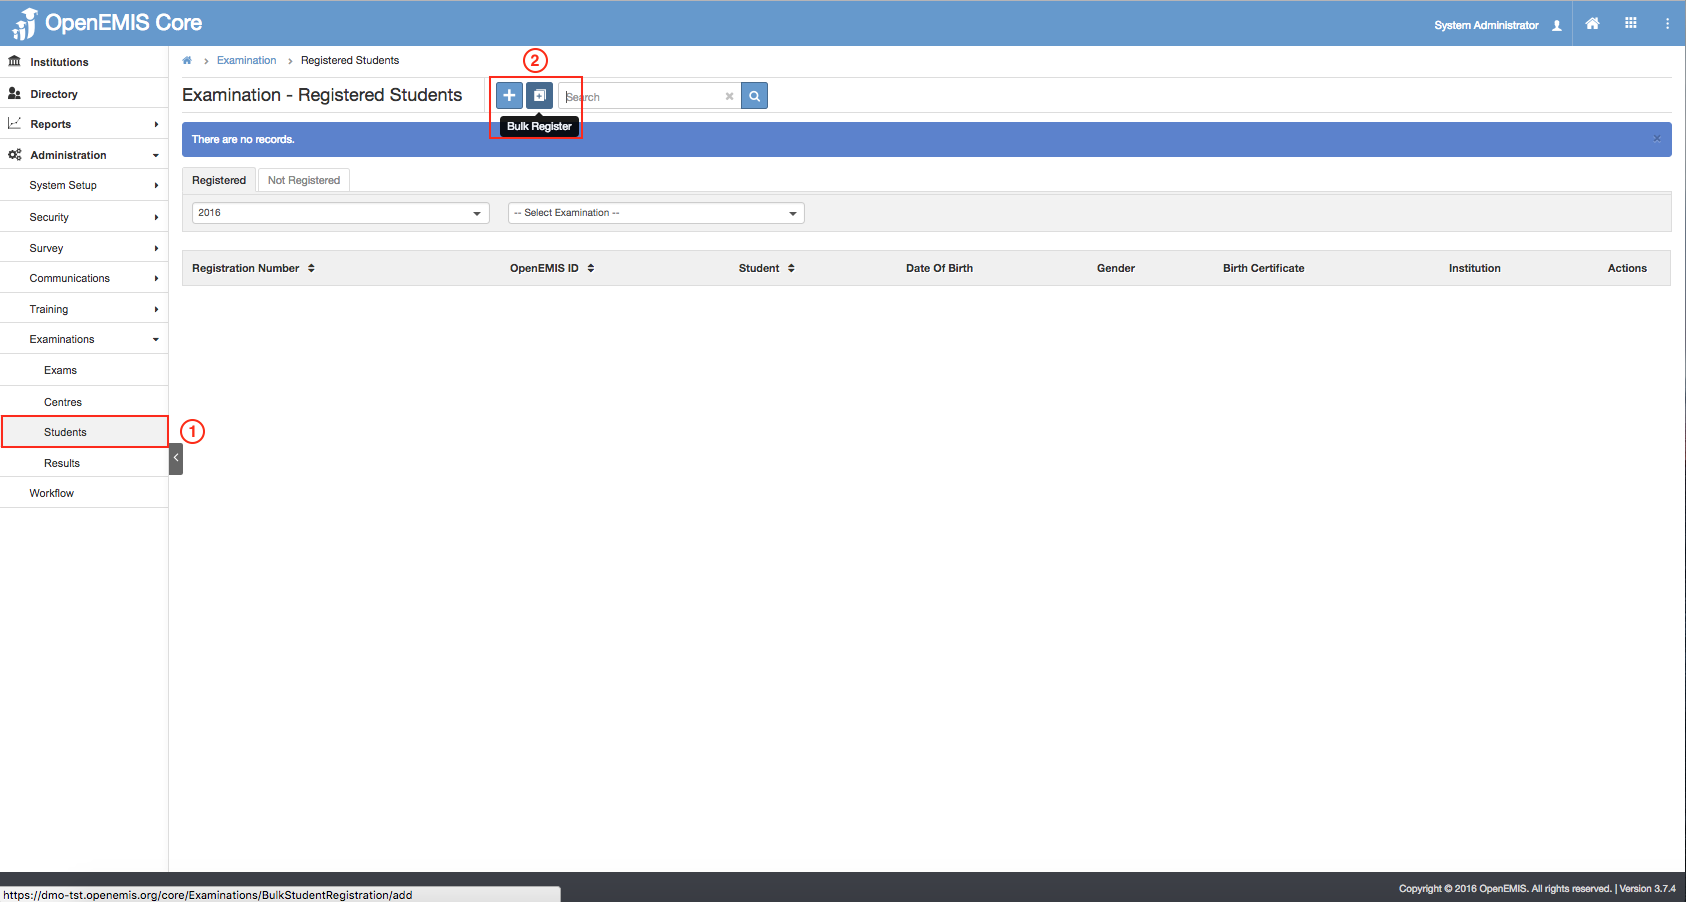
1) Go to Administration > System Setup > Examinations > Students.
2) Select on Bulk Register icon.
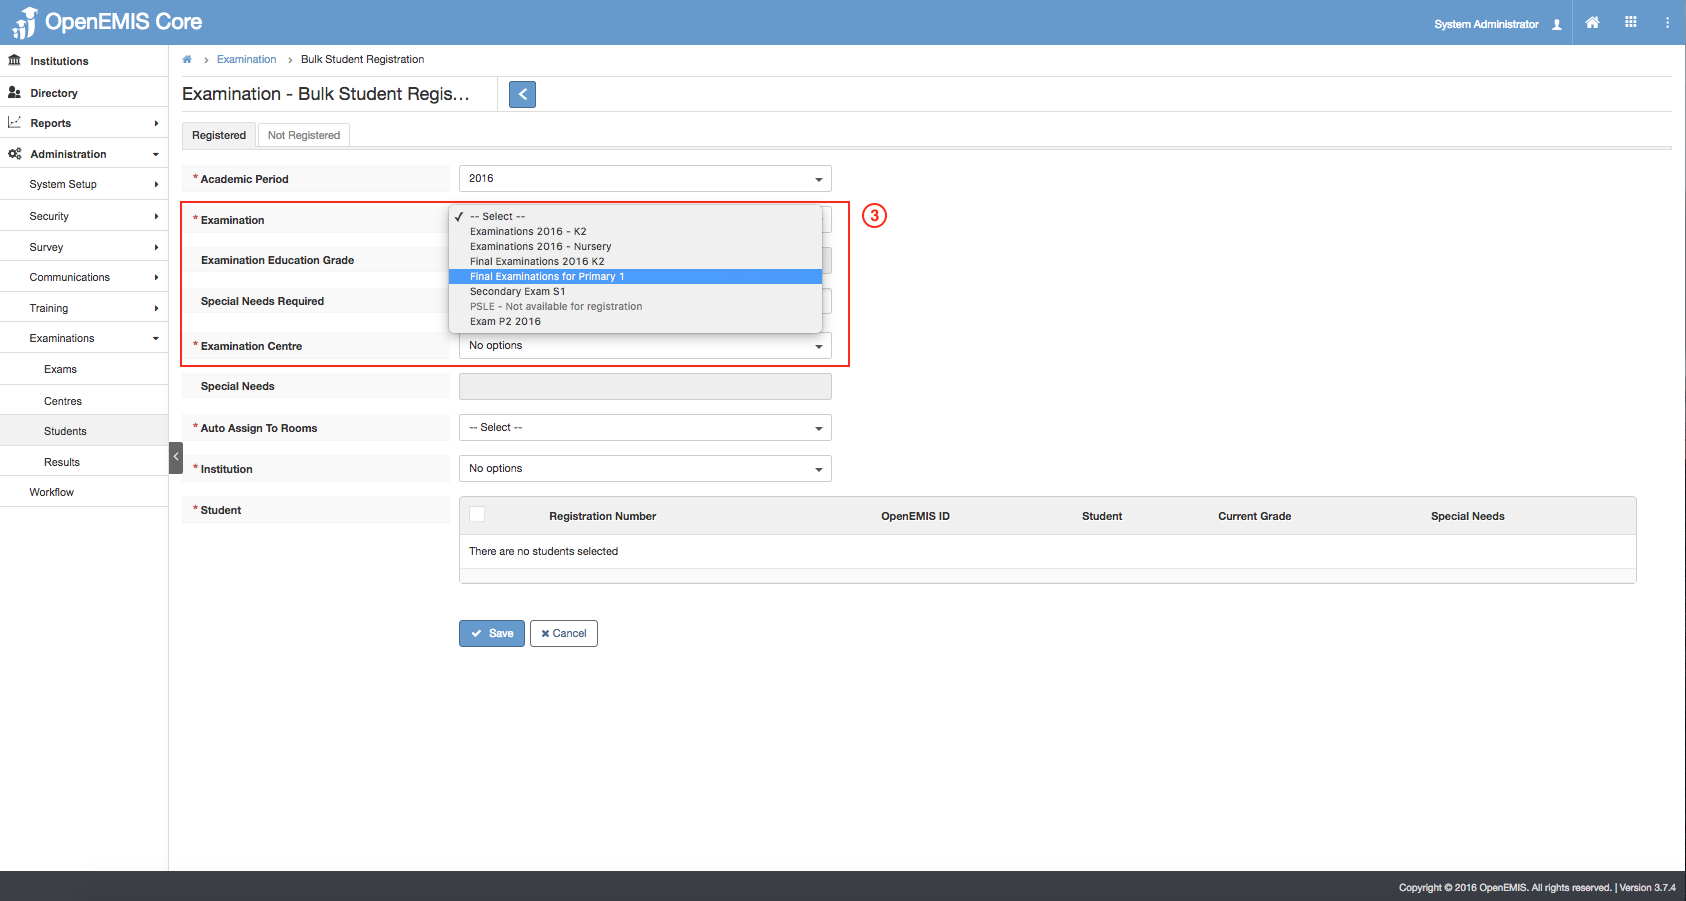
3) This will direct you to the Bulk Registeration page as shown in the screenshot above. Based on the Academic Period selected, it will retrieve all the Examination.
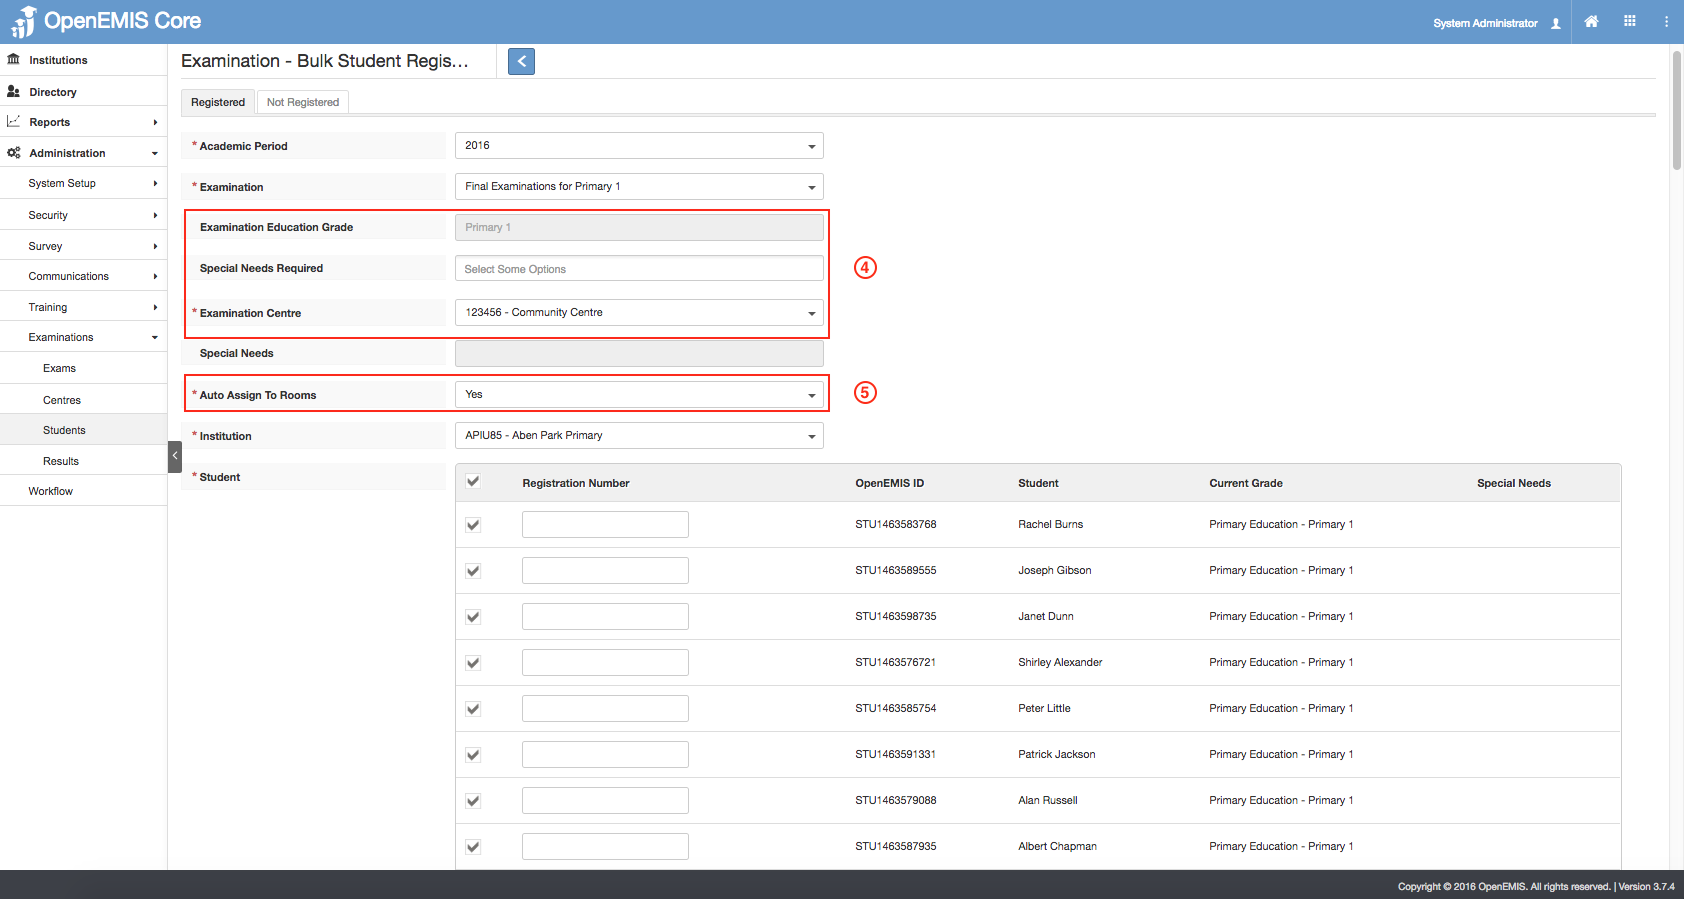
4) System will auto-display the Grade once the Examination is selected. The Exam Centre will be filtered according to the Special Needs Specified.
5) The Auto Assign to Room is a feature where they will be automatically assigned to the first room if the seats are available.
if Auto Assign to Room = YES
if Auto Assign to Room = NO
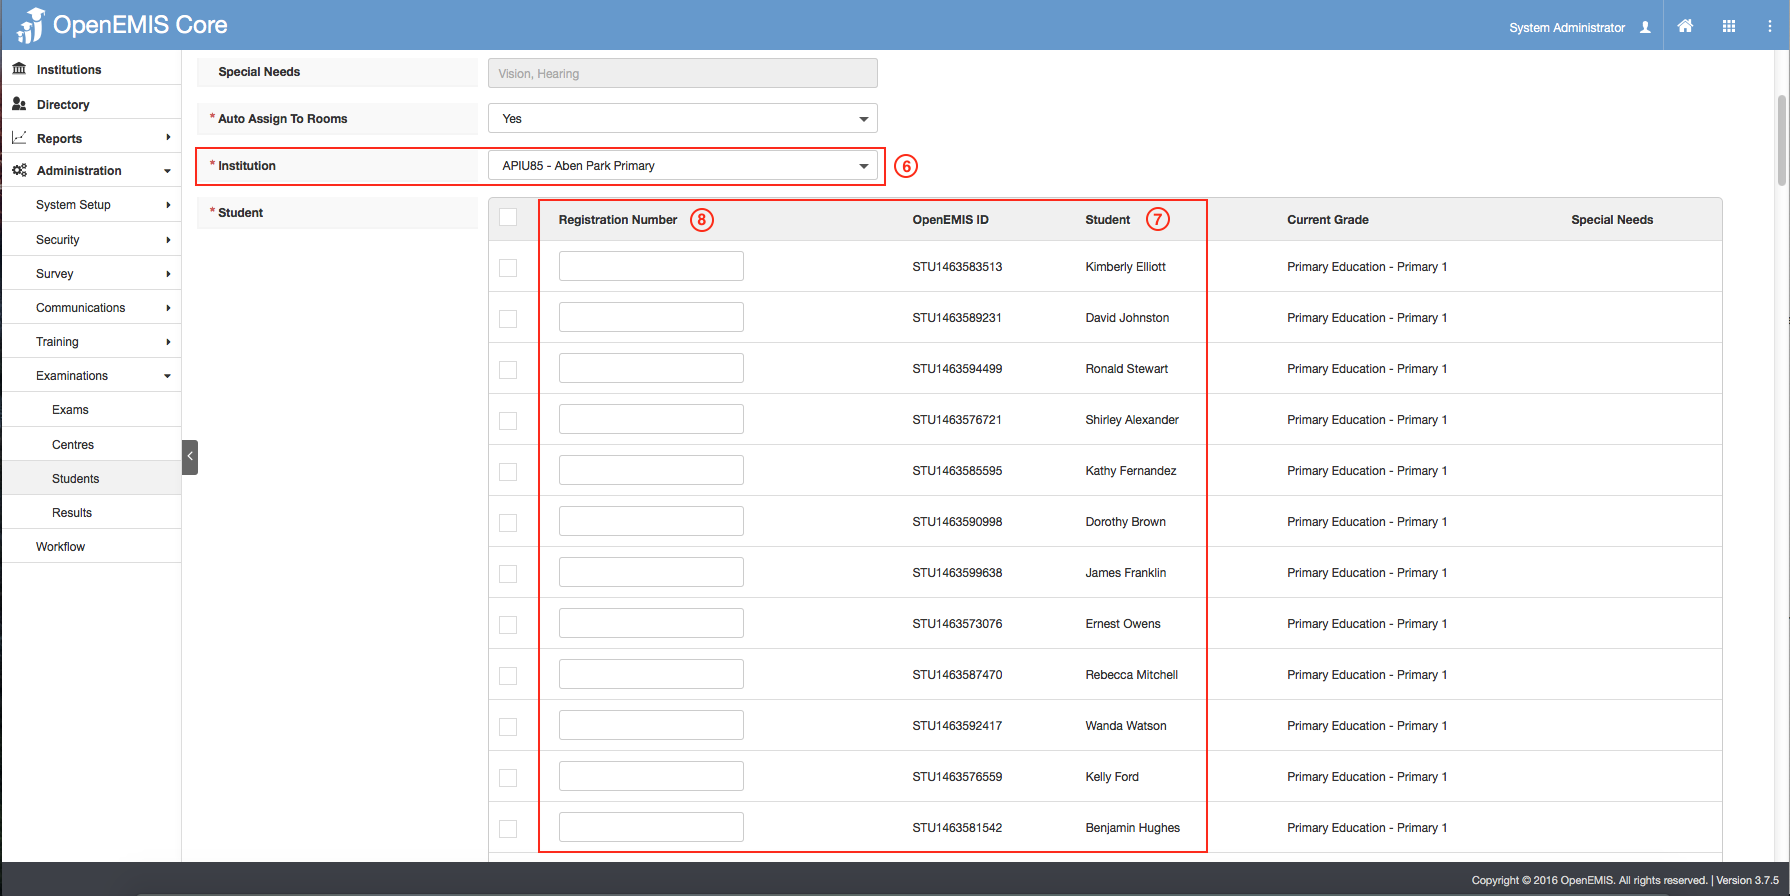
6) Select on the Institutions that you would like to Bulk Register the Students.
7) Upon selection, it will retrieve all students who are currently in the Grade.
8) Registration Number is not mandatory, however it must be unique to the Exam. This field will validate if its an unique ID.
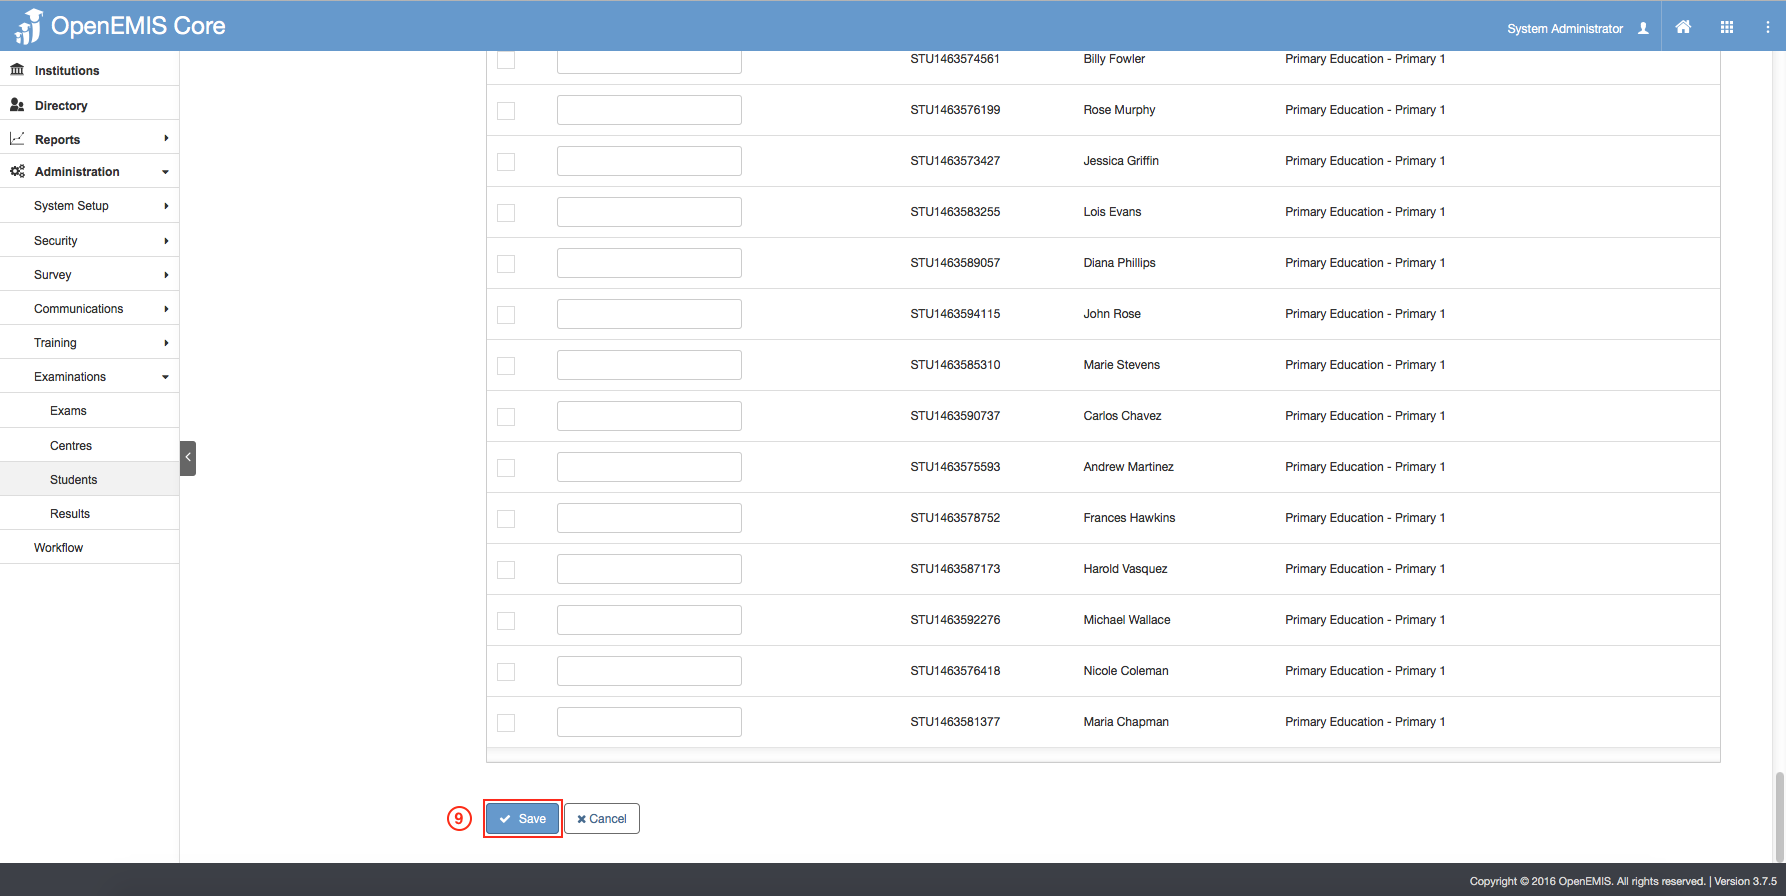
9) Select Save.
- View Registered Students
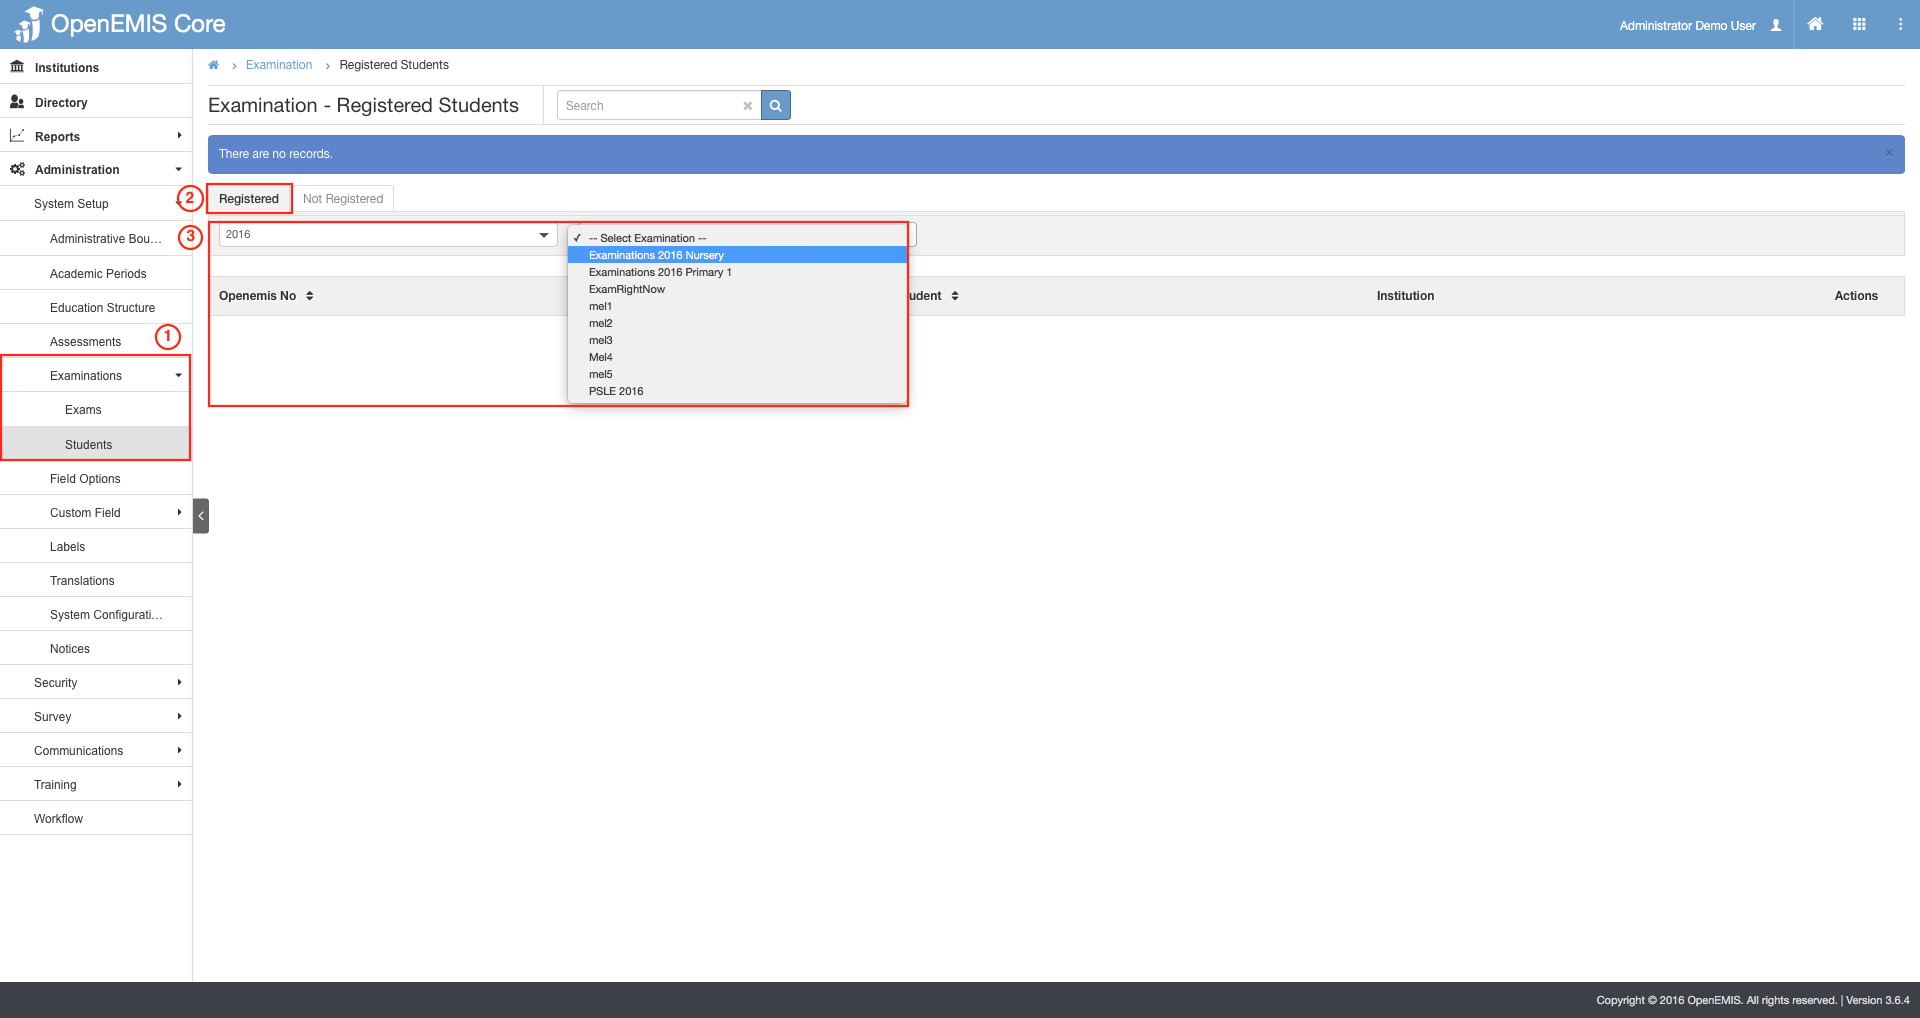
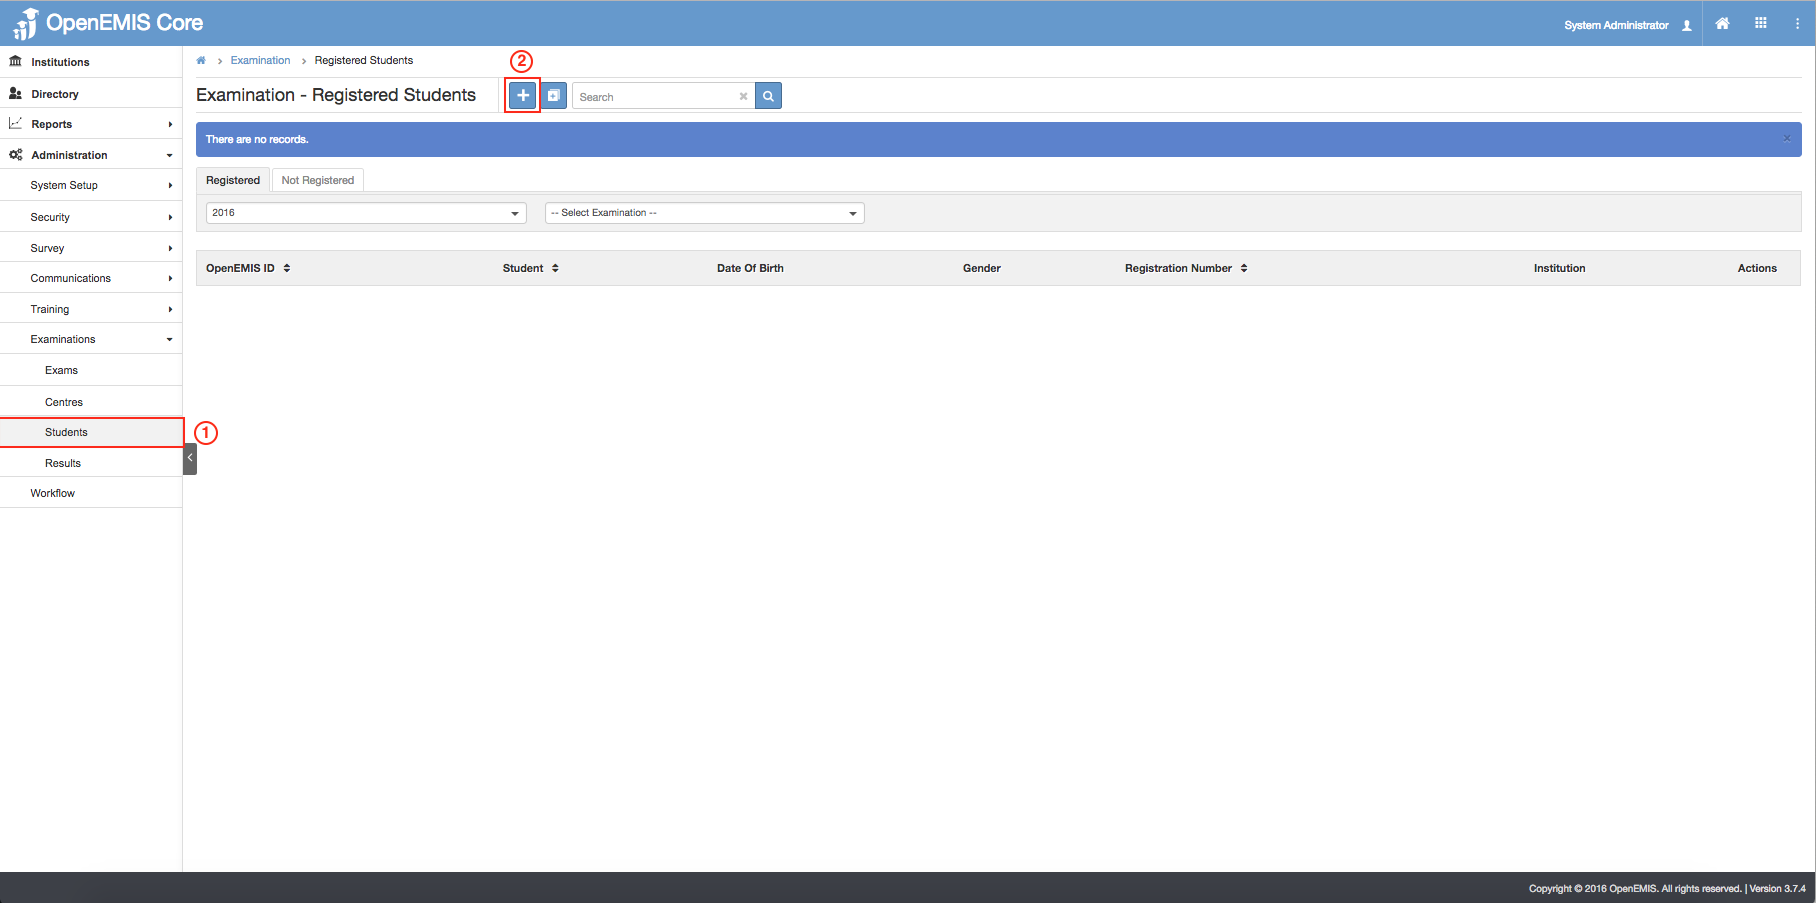
1) Go to Administration > System Setup > Examination > Students.
2) By default, the Registered tab is selected.
3) You can filter according to Academic Period and Examinations.

4) Records will be displayed according to the filtered options.
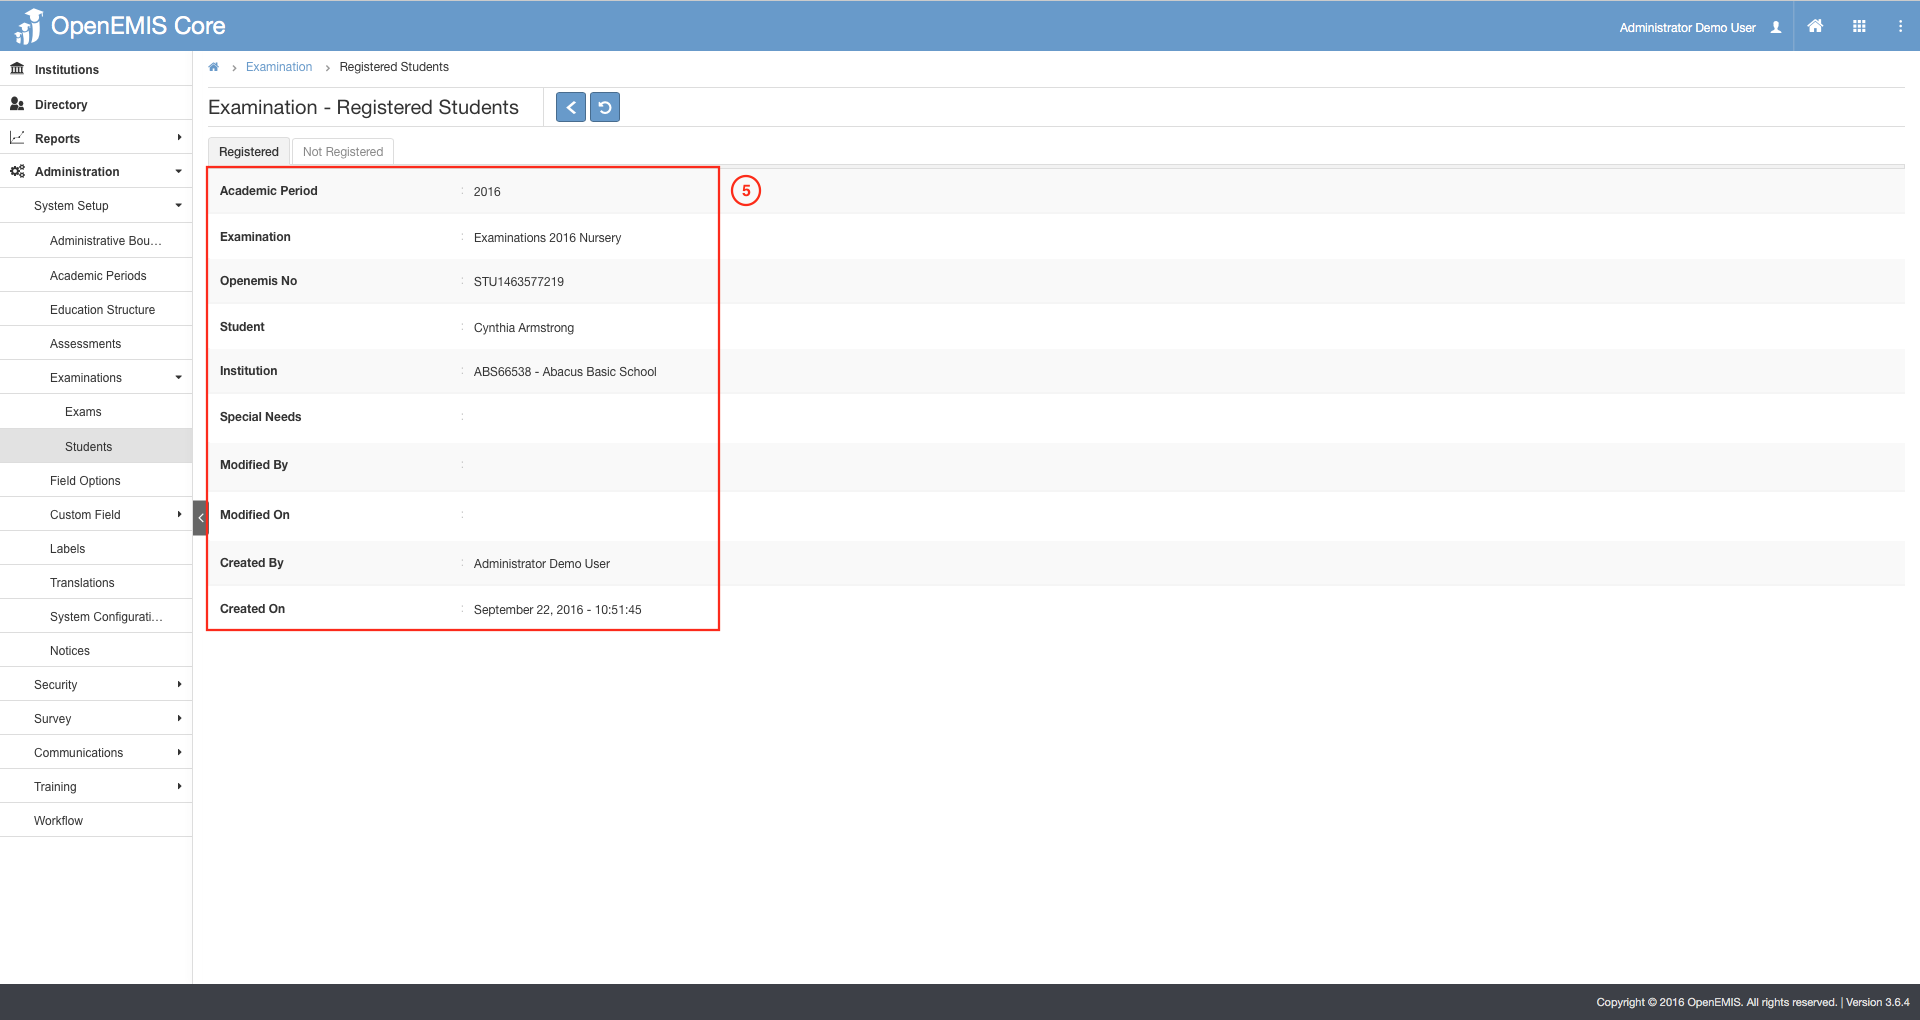
5) For detailed student information, select on the record.
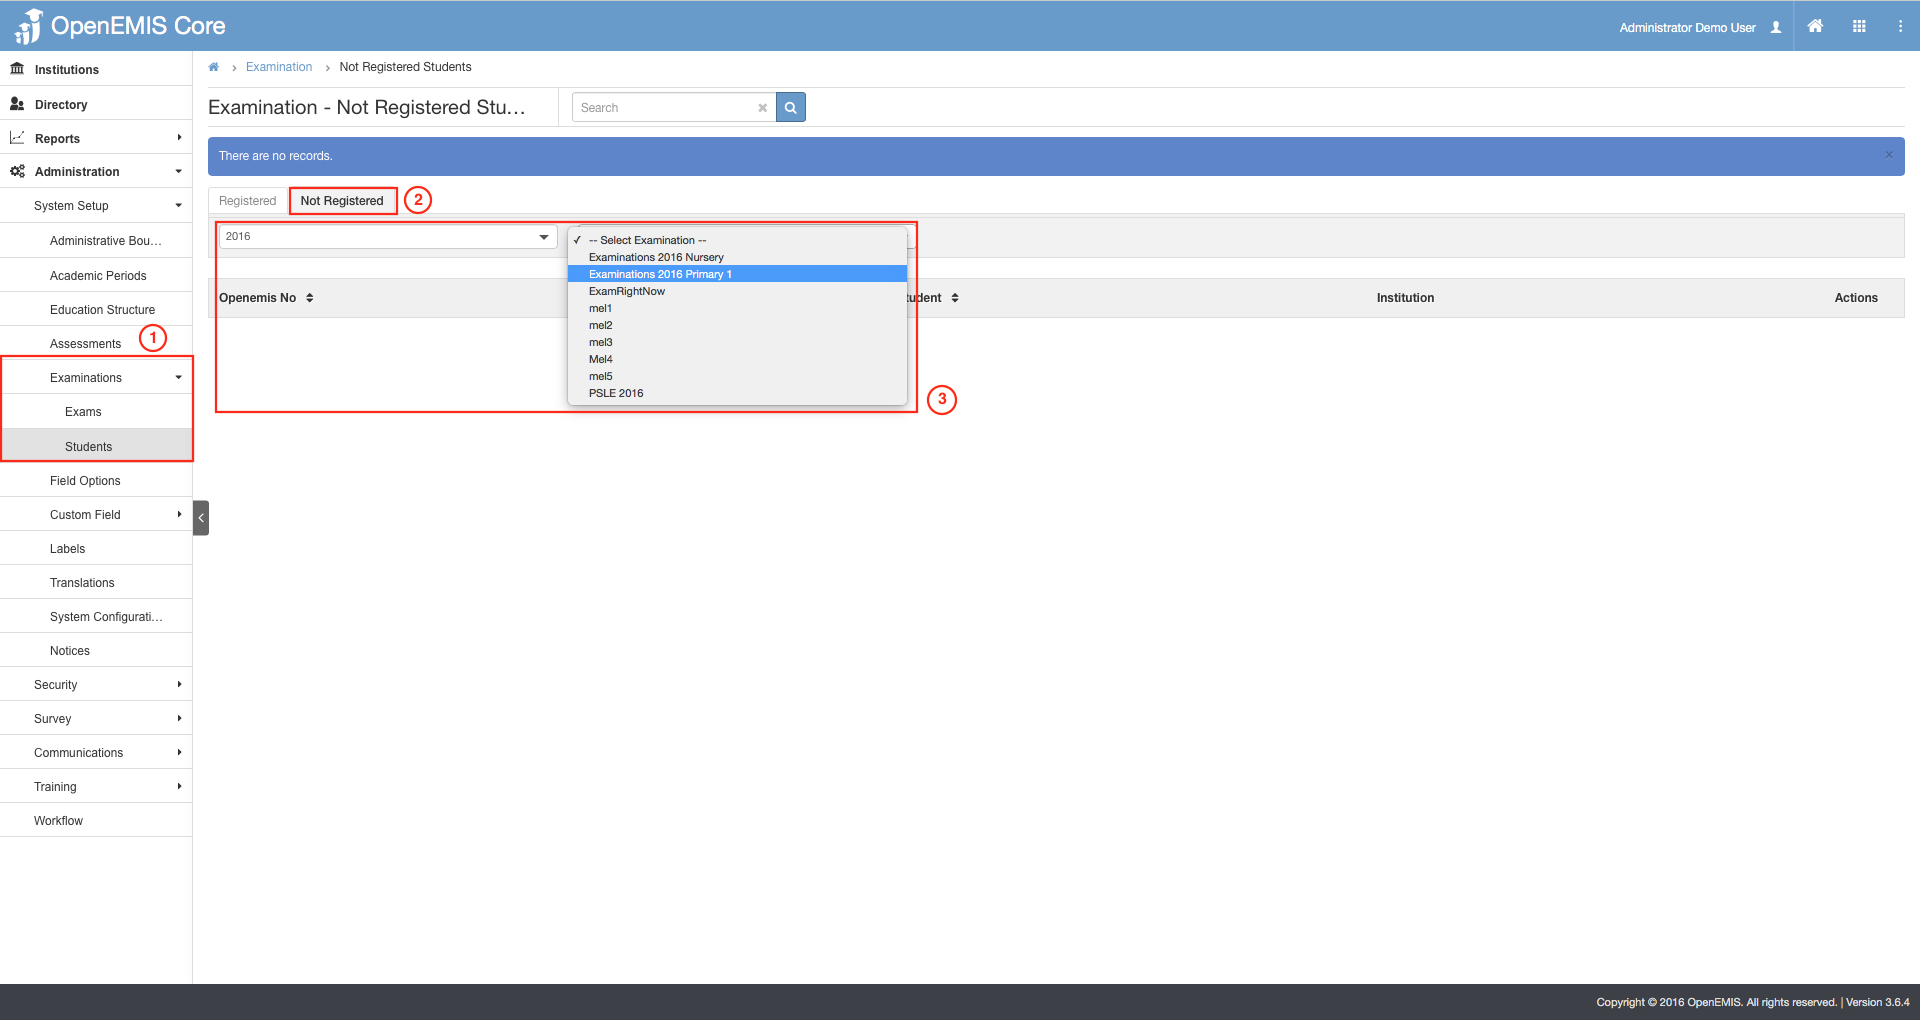
1) Go to Administration > System Setup > Examination > Students.
2) Select the Not Registered tab.
3) You can filter according to Academic Period and Examinations.
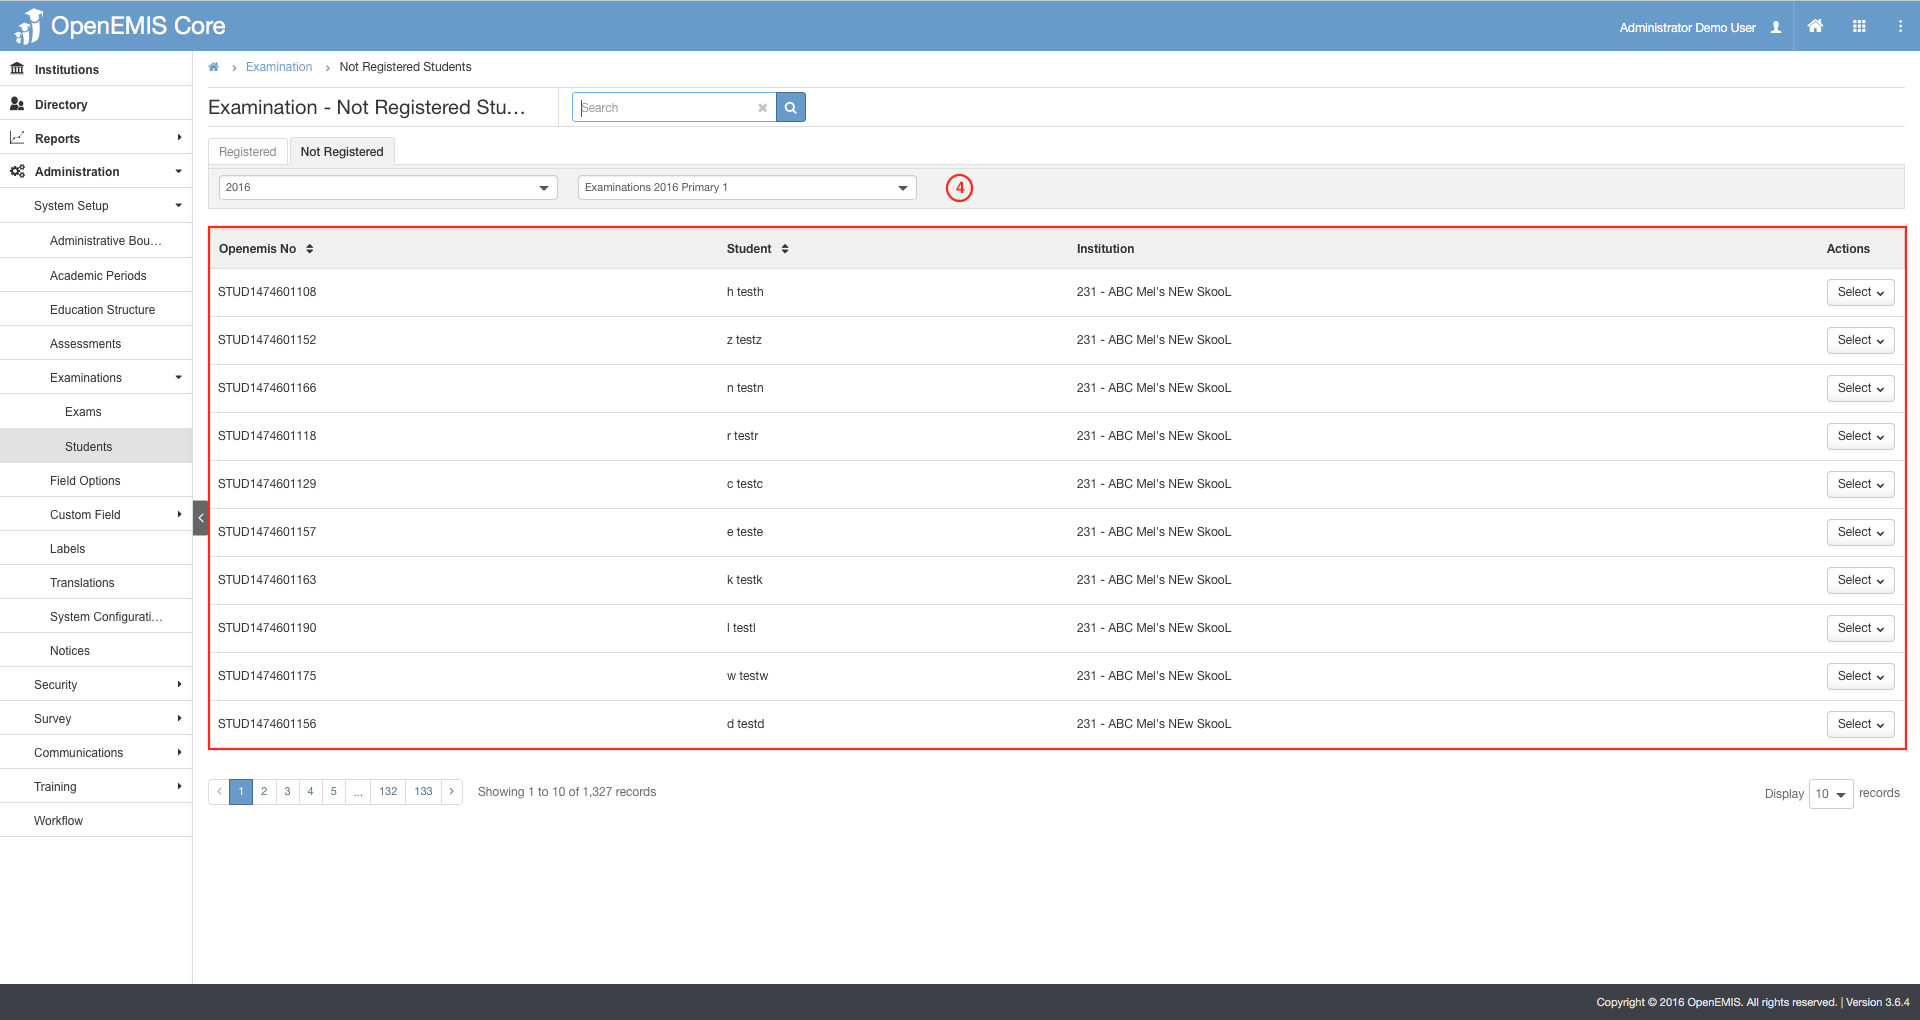
4) Records will be displayed according to the filtered options.

5) For detailed student information, select on the record.