Article Name: Examination
Category/Module: Examinations
Tags: Examination, Exam, Register, Grades
Version: 3.6.4
Date Updated: 23 Sep 2016
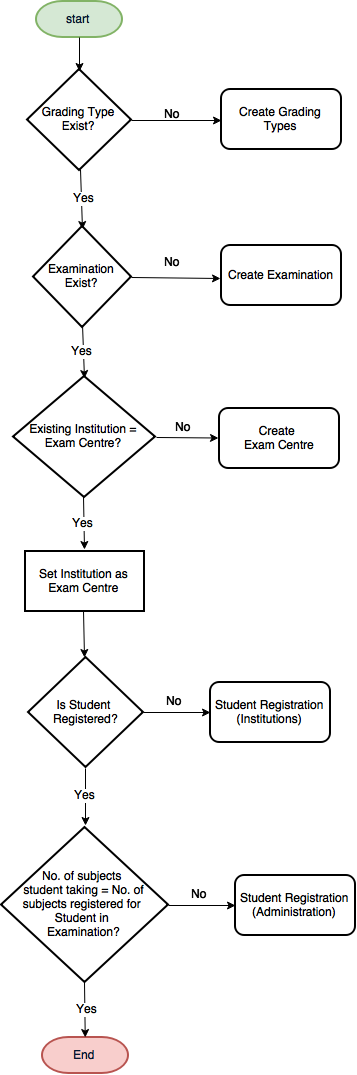
The examinations feature enables you to coordinate the national level examinations for Institutions. They are also responsible for creating registration for students, setting up exam centers, and assigning students to exam centers.
The following section will address the following features found in the Examinations.
Administrator
Managing Grading Types:

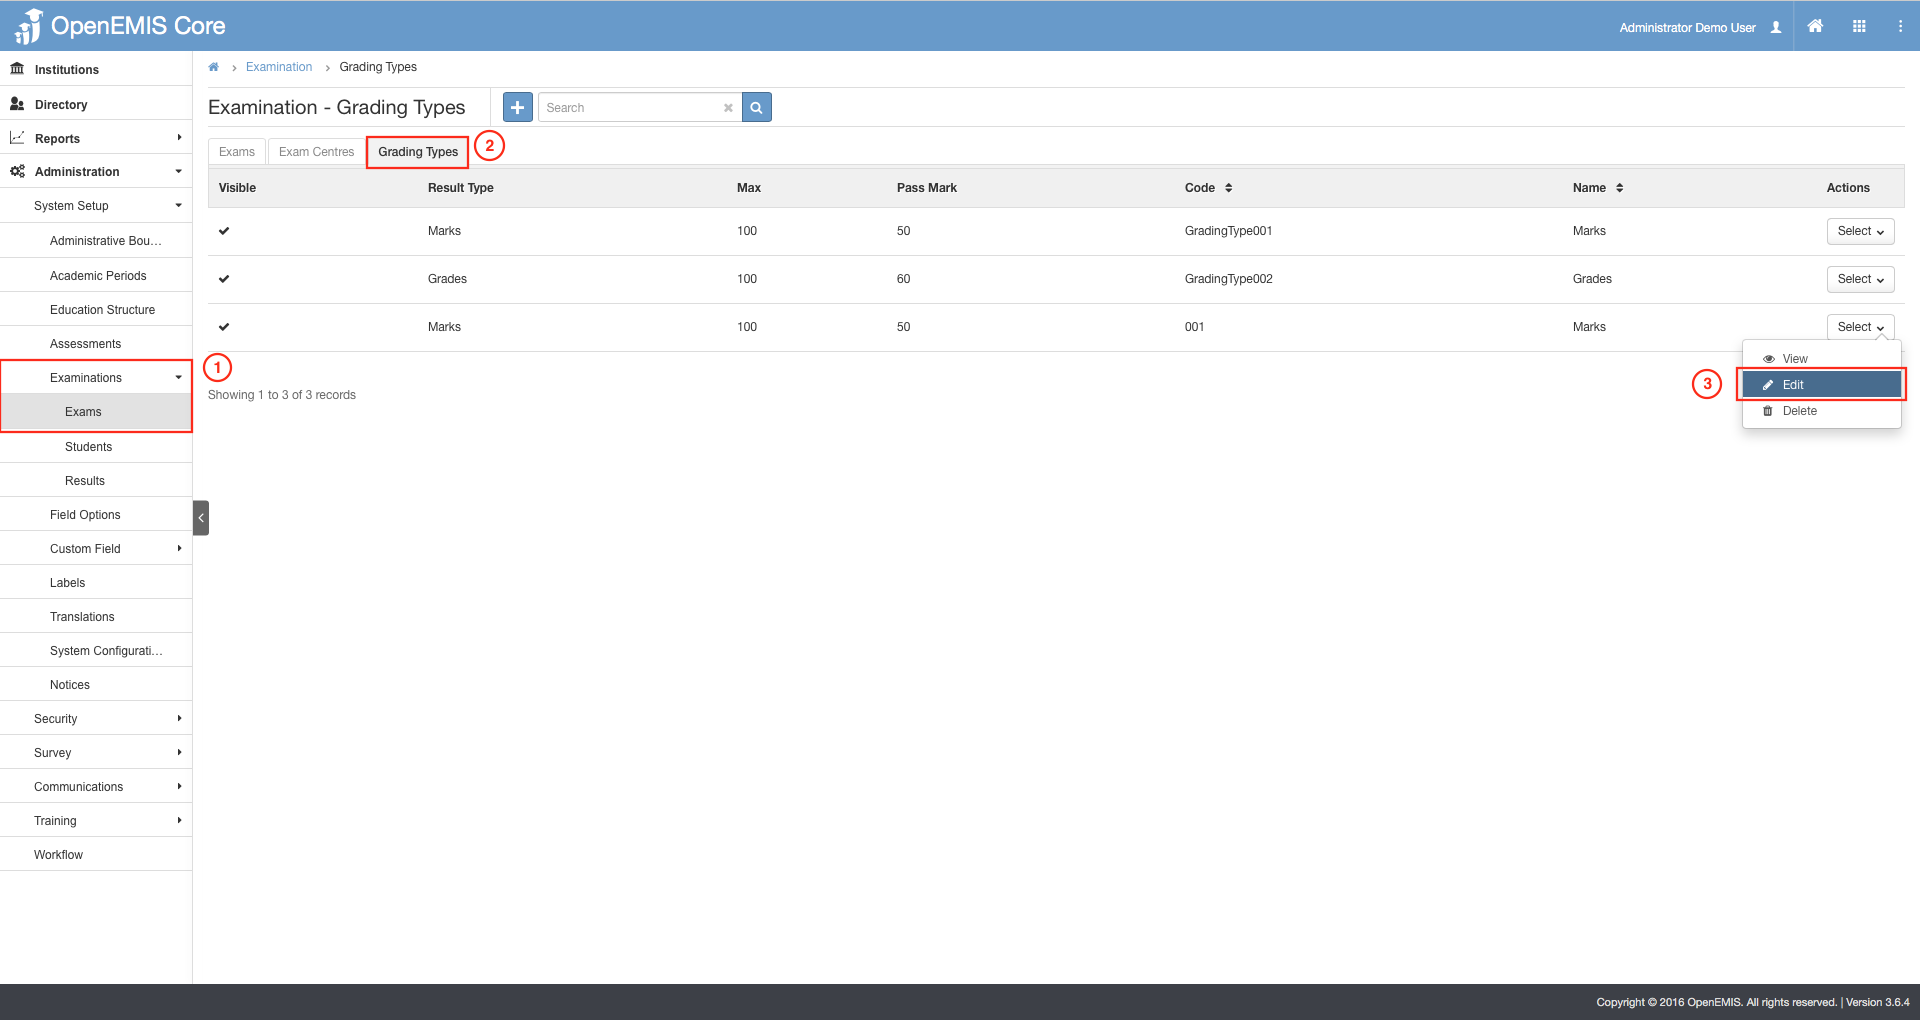
1) Go to Administration > System Setup > Examination > Exams.
2) Select on the Grading Types tab.
3) Select on the Actions Bar > View
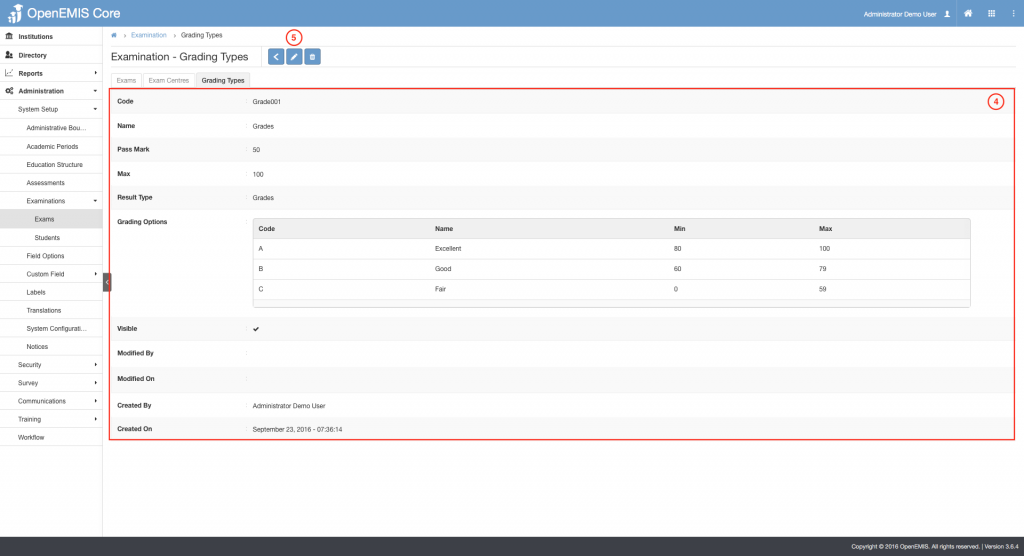
4) A detailed version of the Examination will be displayed.
5) Similarly, you can edit the data on the page.

1) Go to Administration > System Setup > Examination > Exams.
2) Select on the Add button.

3) Insert the required input such as Name, Result Type, Grading Options and etc.
4) Select Add New Option for Grading Options.
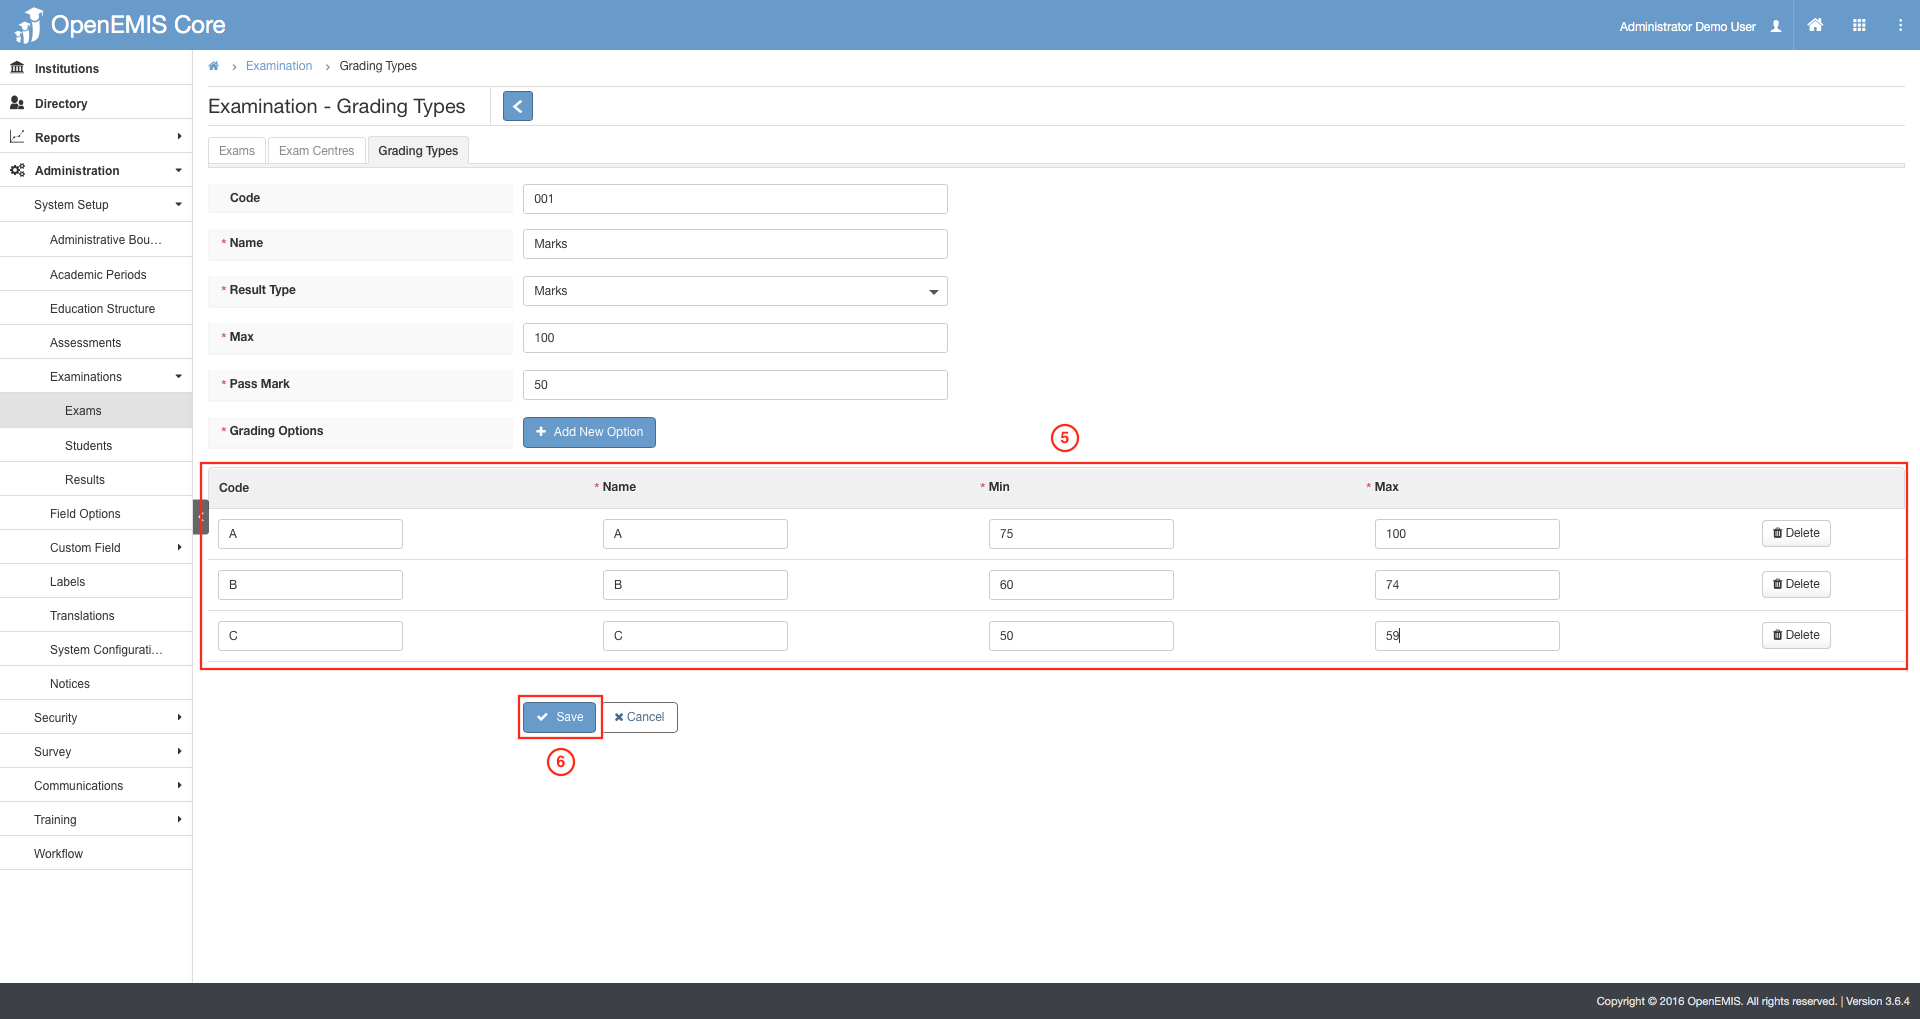
5) Fill in the required fields for the Grade Options.
6) Select on Save.
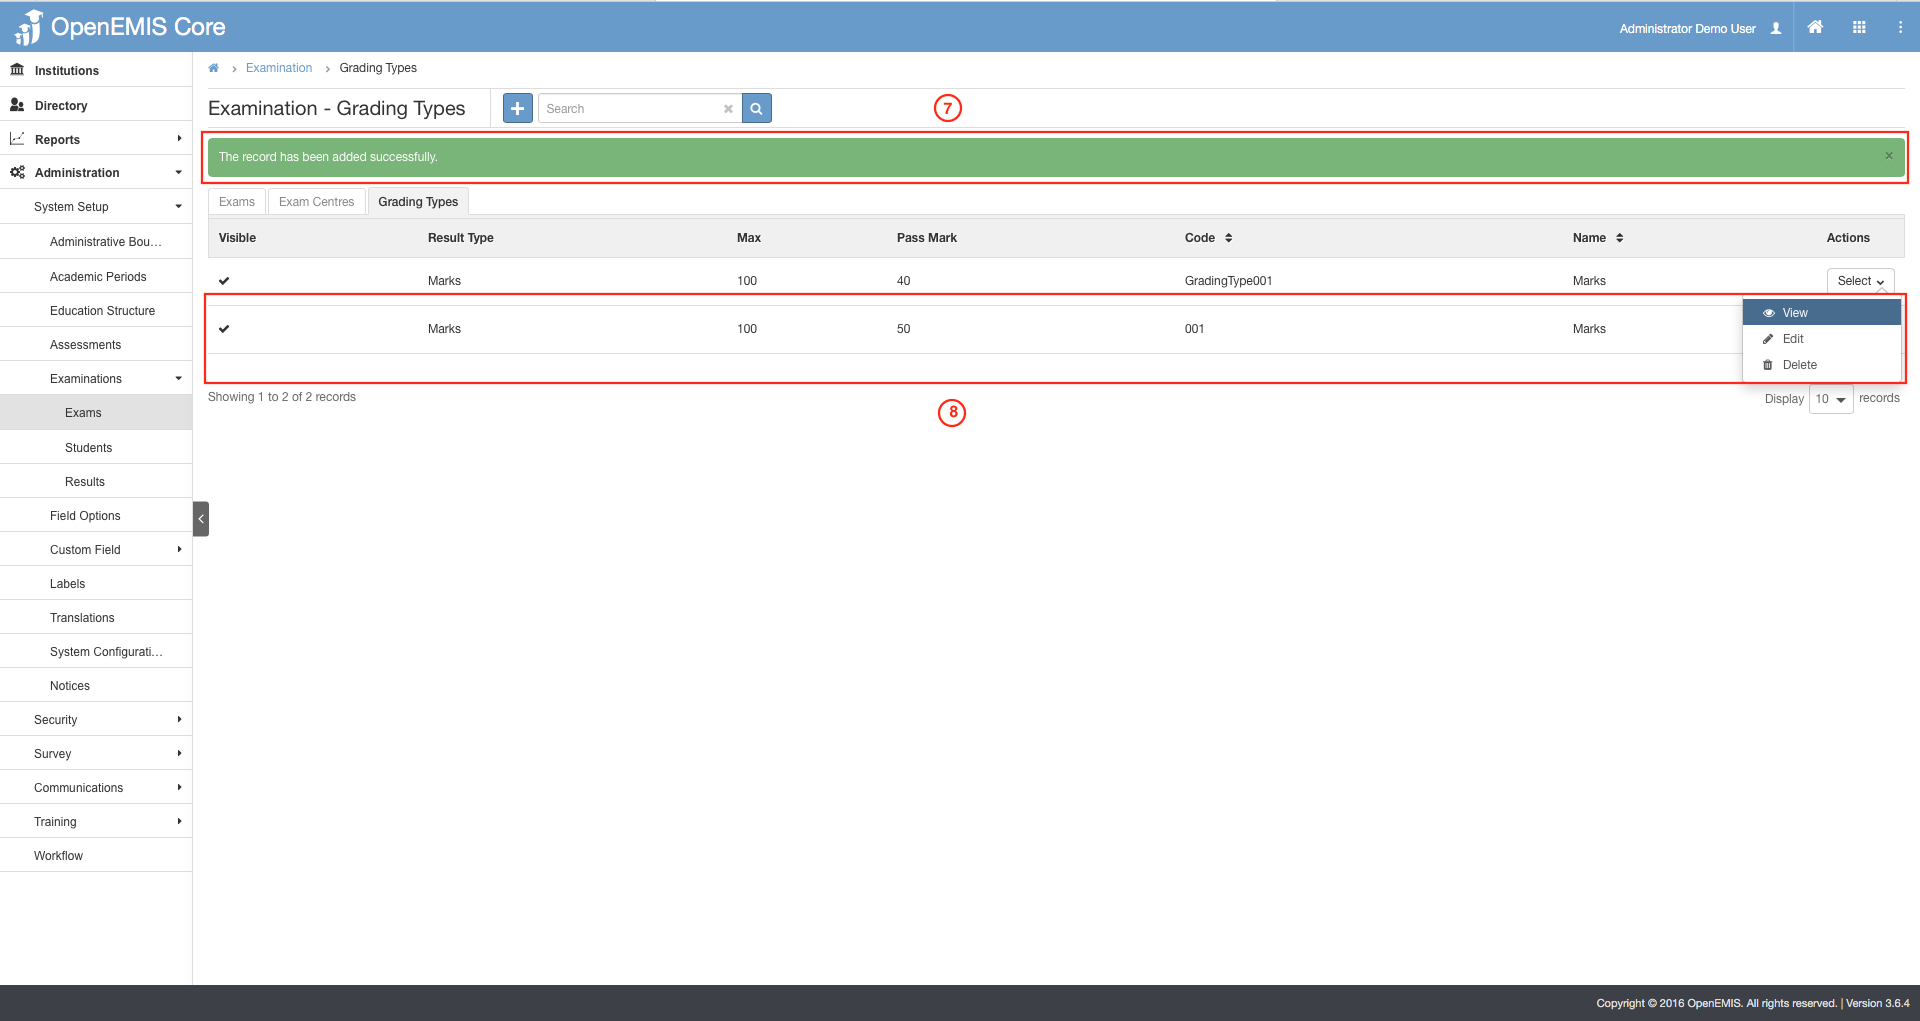
7) A successful message will be displayed upon a new record added.
8) You can view the record added in the table shown.
1) Go to Administration > System Setup > Examination > Exams.
2) Select on the Grading Types tab.
3) Select on the Actions Bar > Edit.
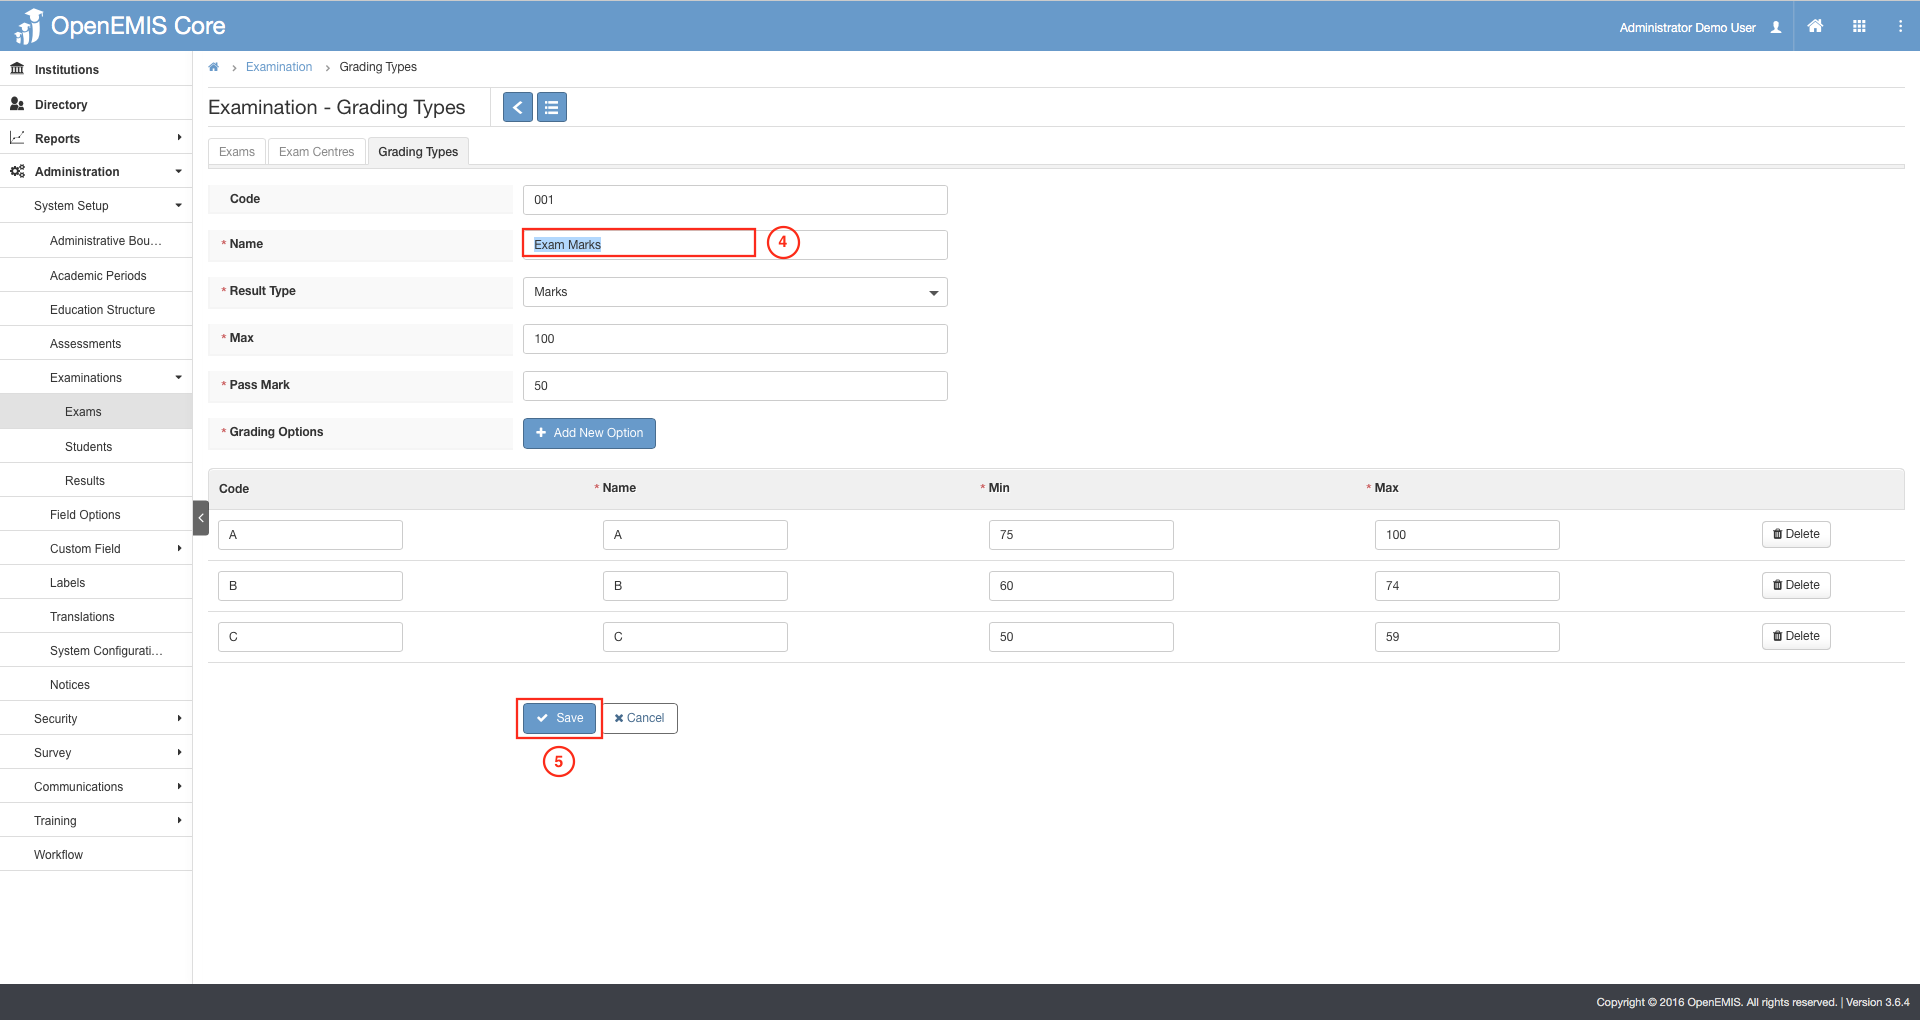
4) Make your changes.
5) Select on Save.
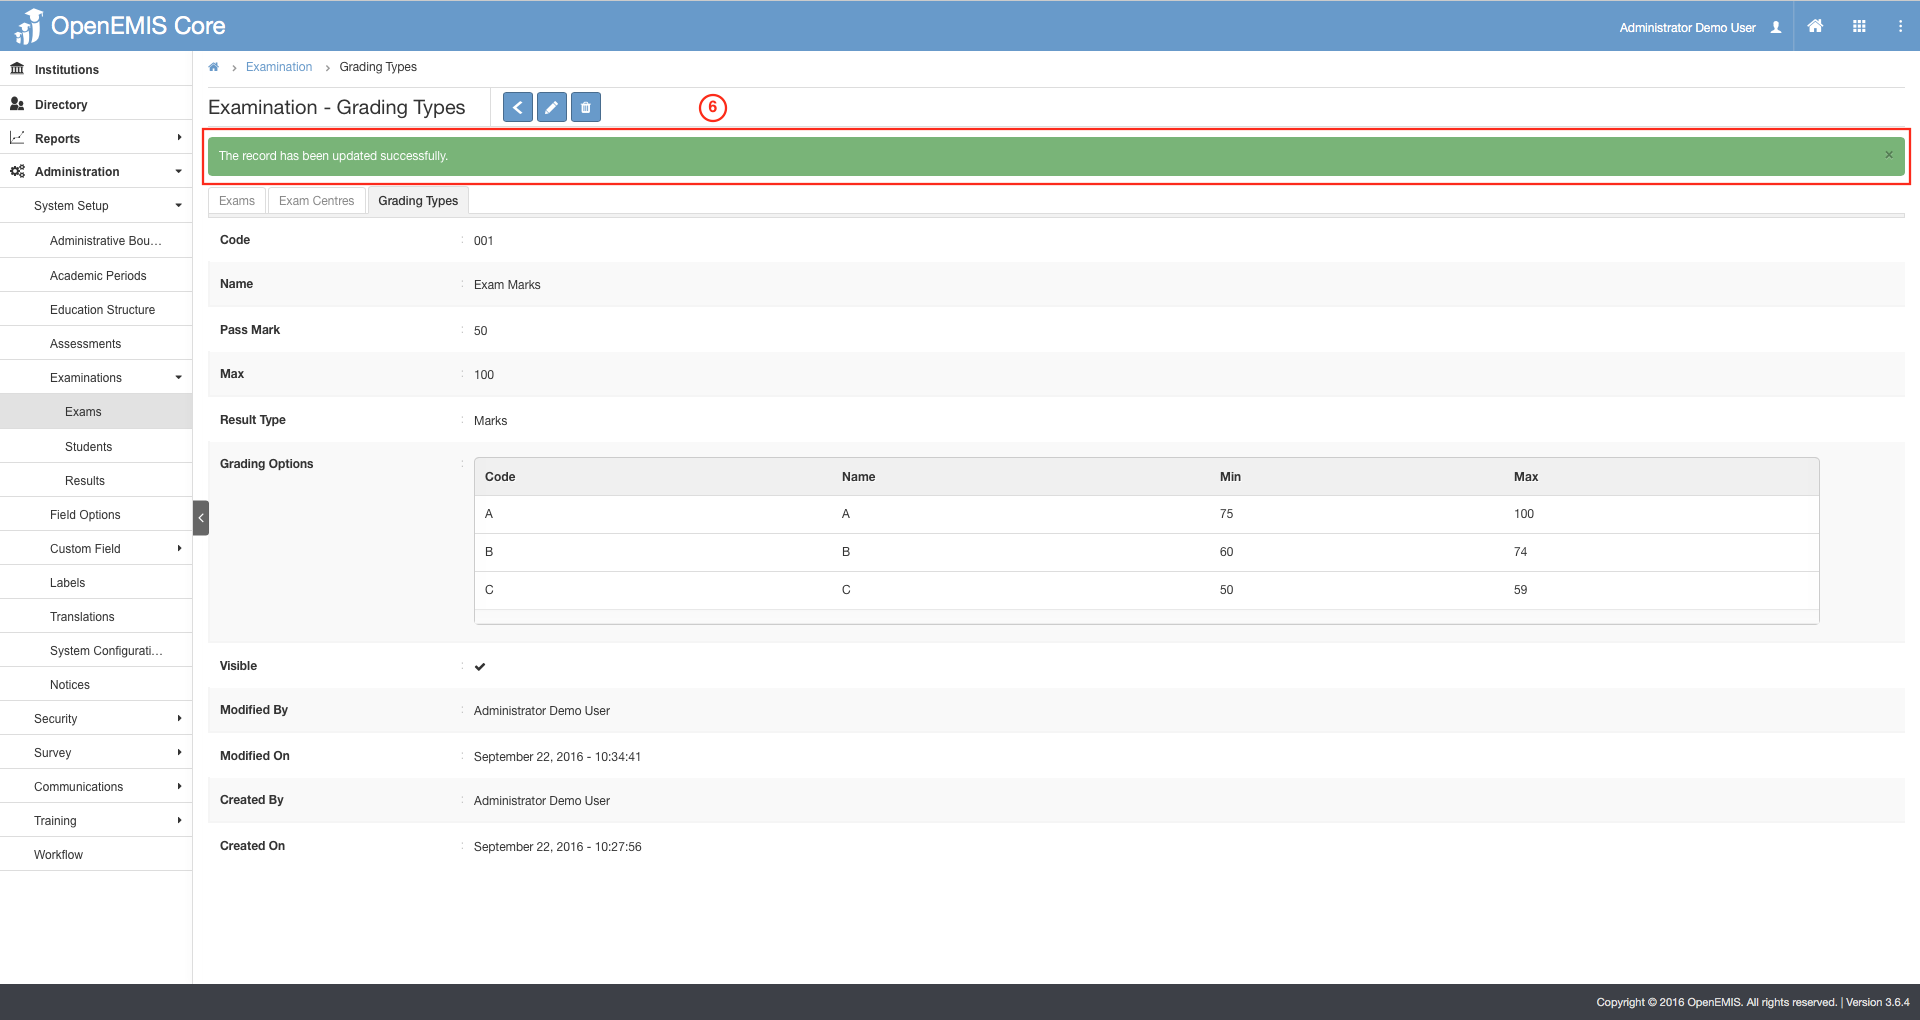
6) A message will be displayed upon record updated successfully.
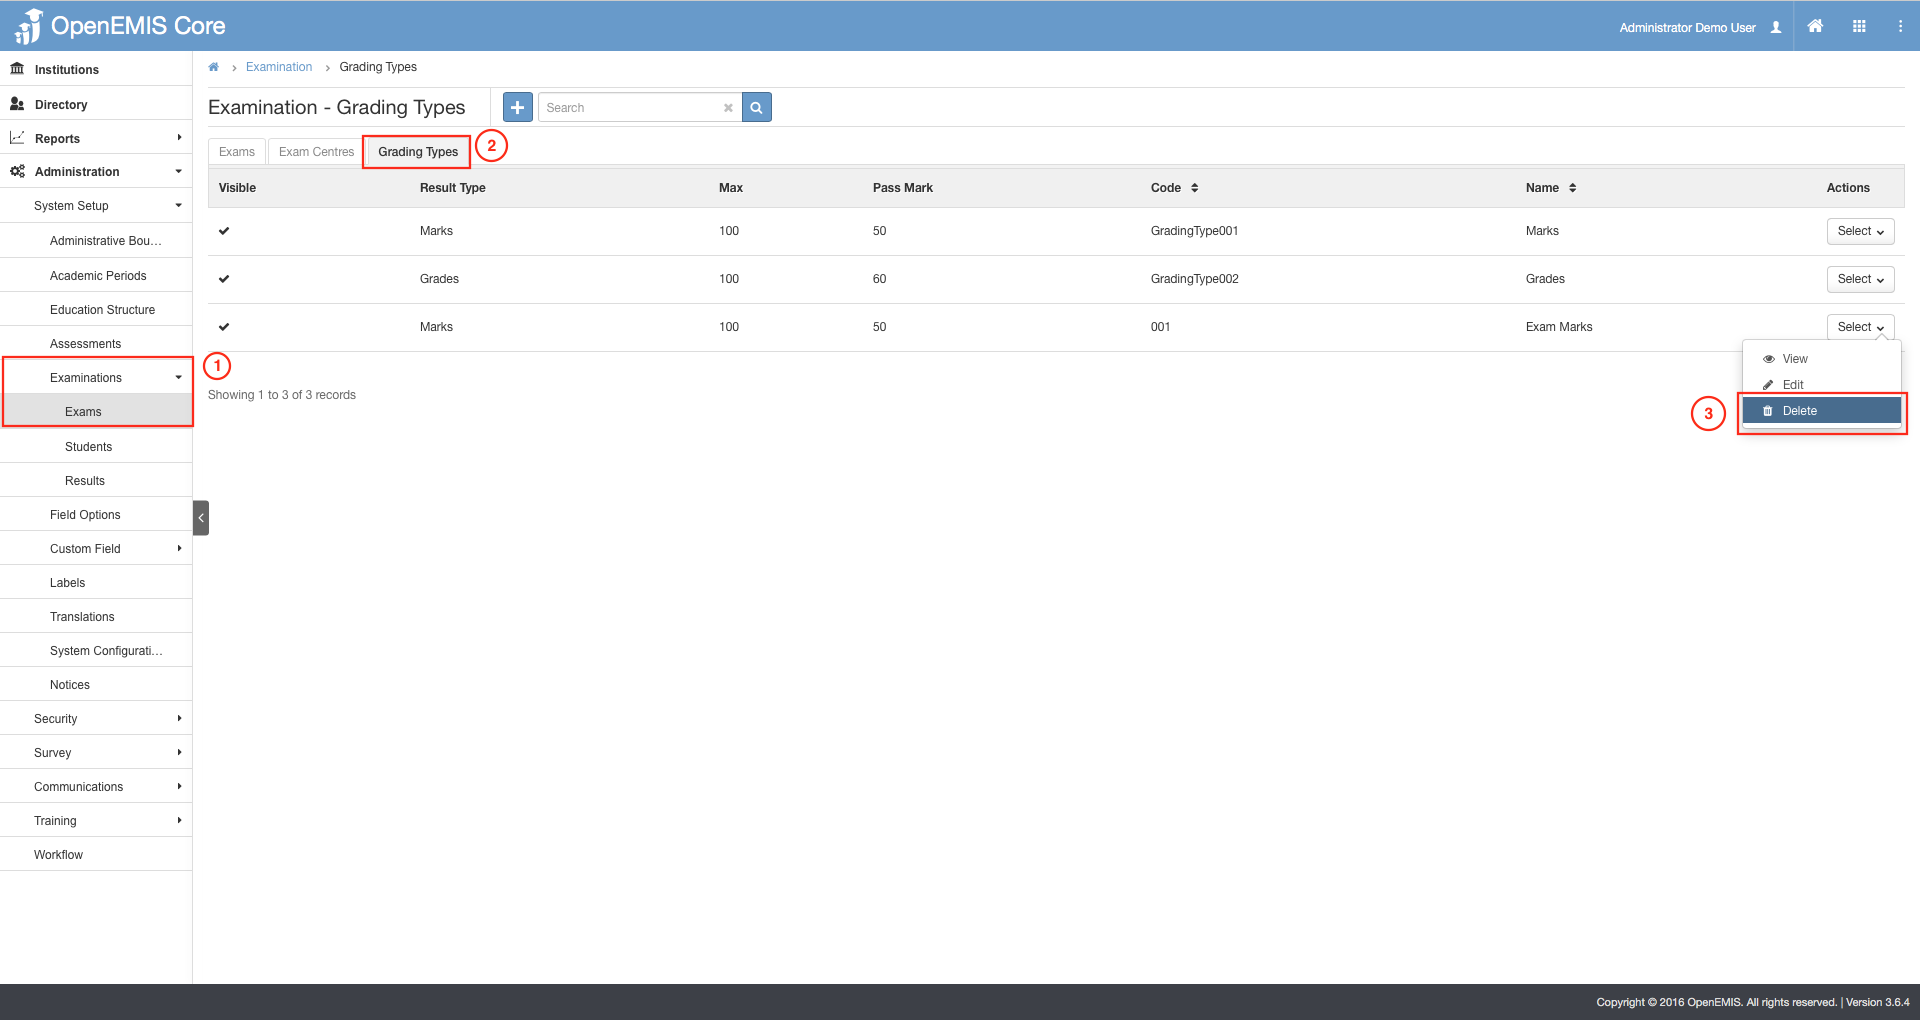
1) Go to Administration > System Setup > Examination > Exams.
2) Select on the Grading Types tab.
3) Select on the Actions Bar > Delete.
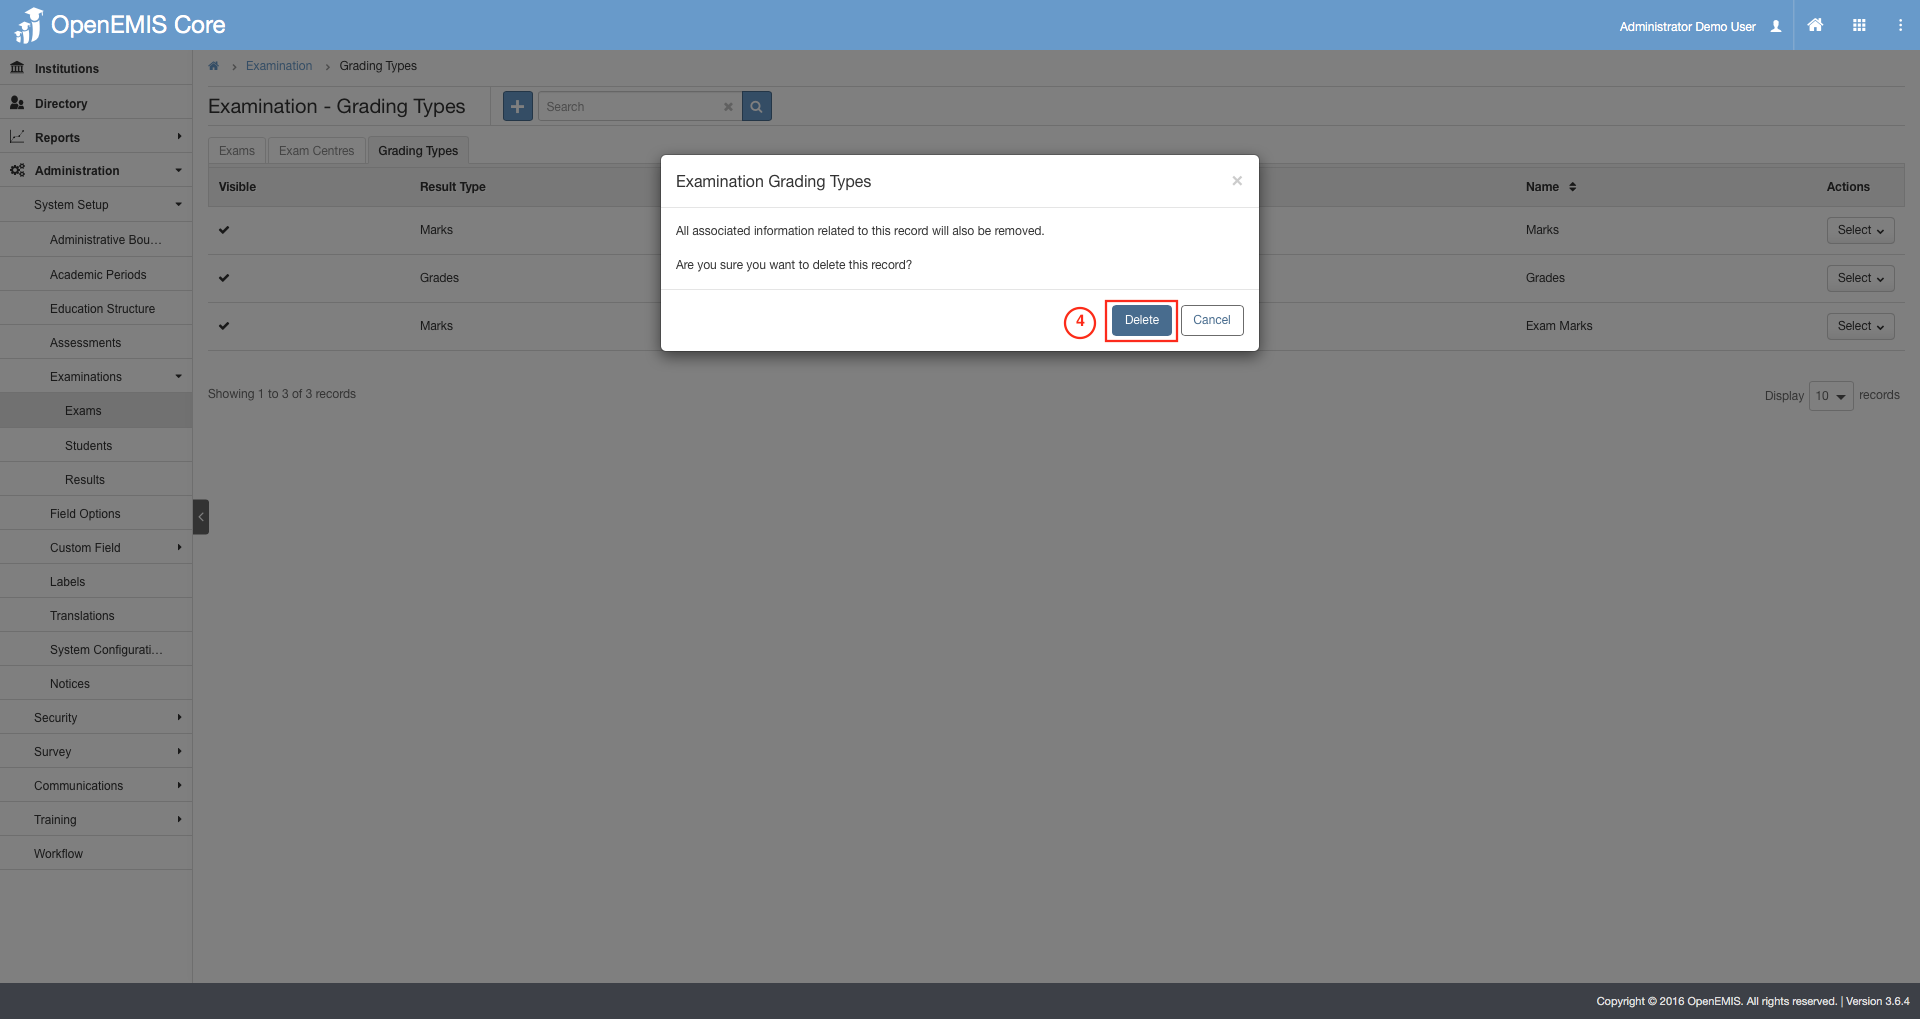
4) Confirmation prompt appears, select Delete.
Managing Examination:
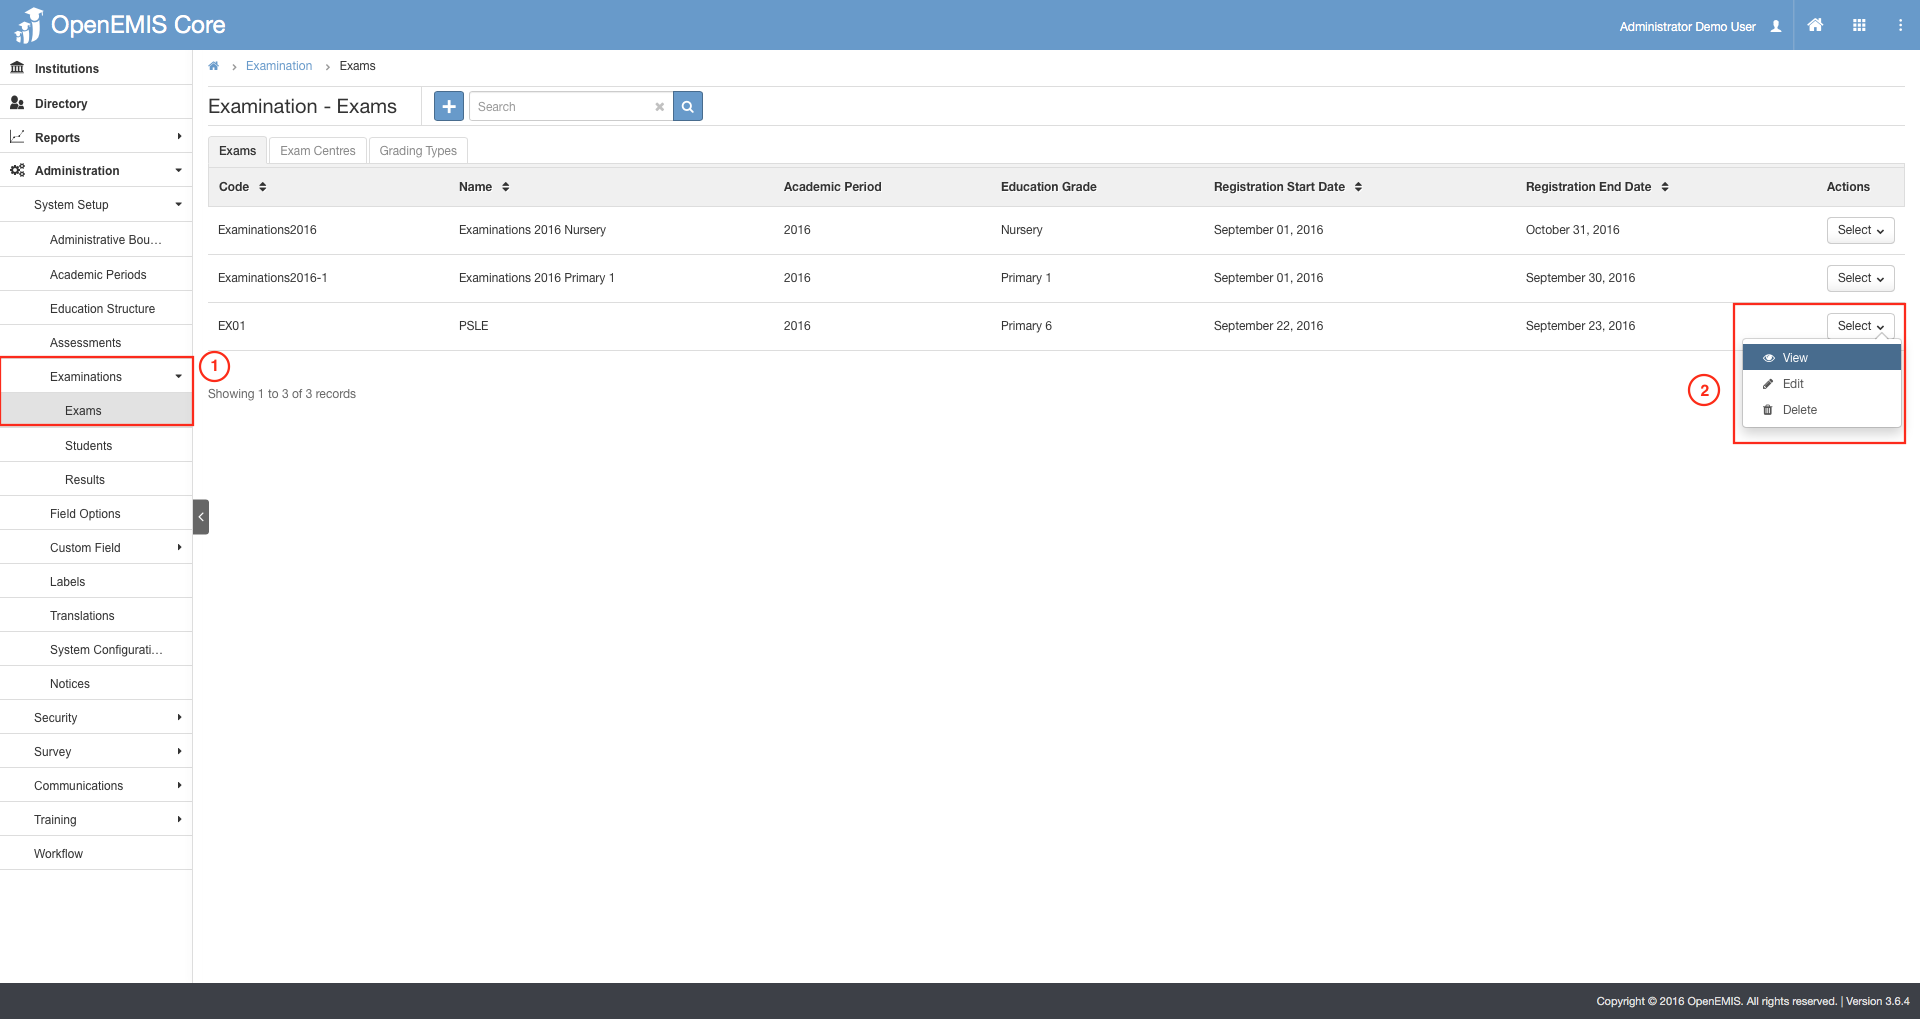
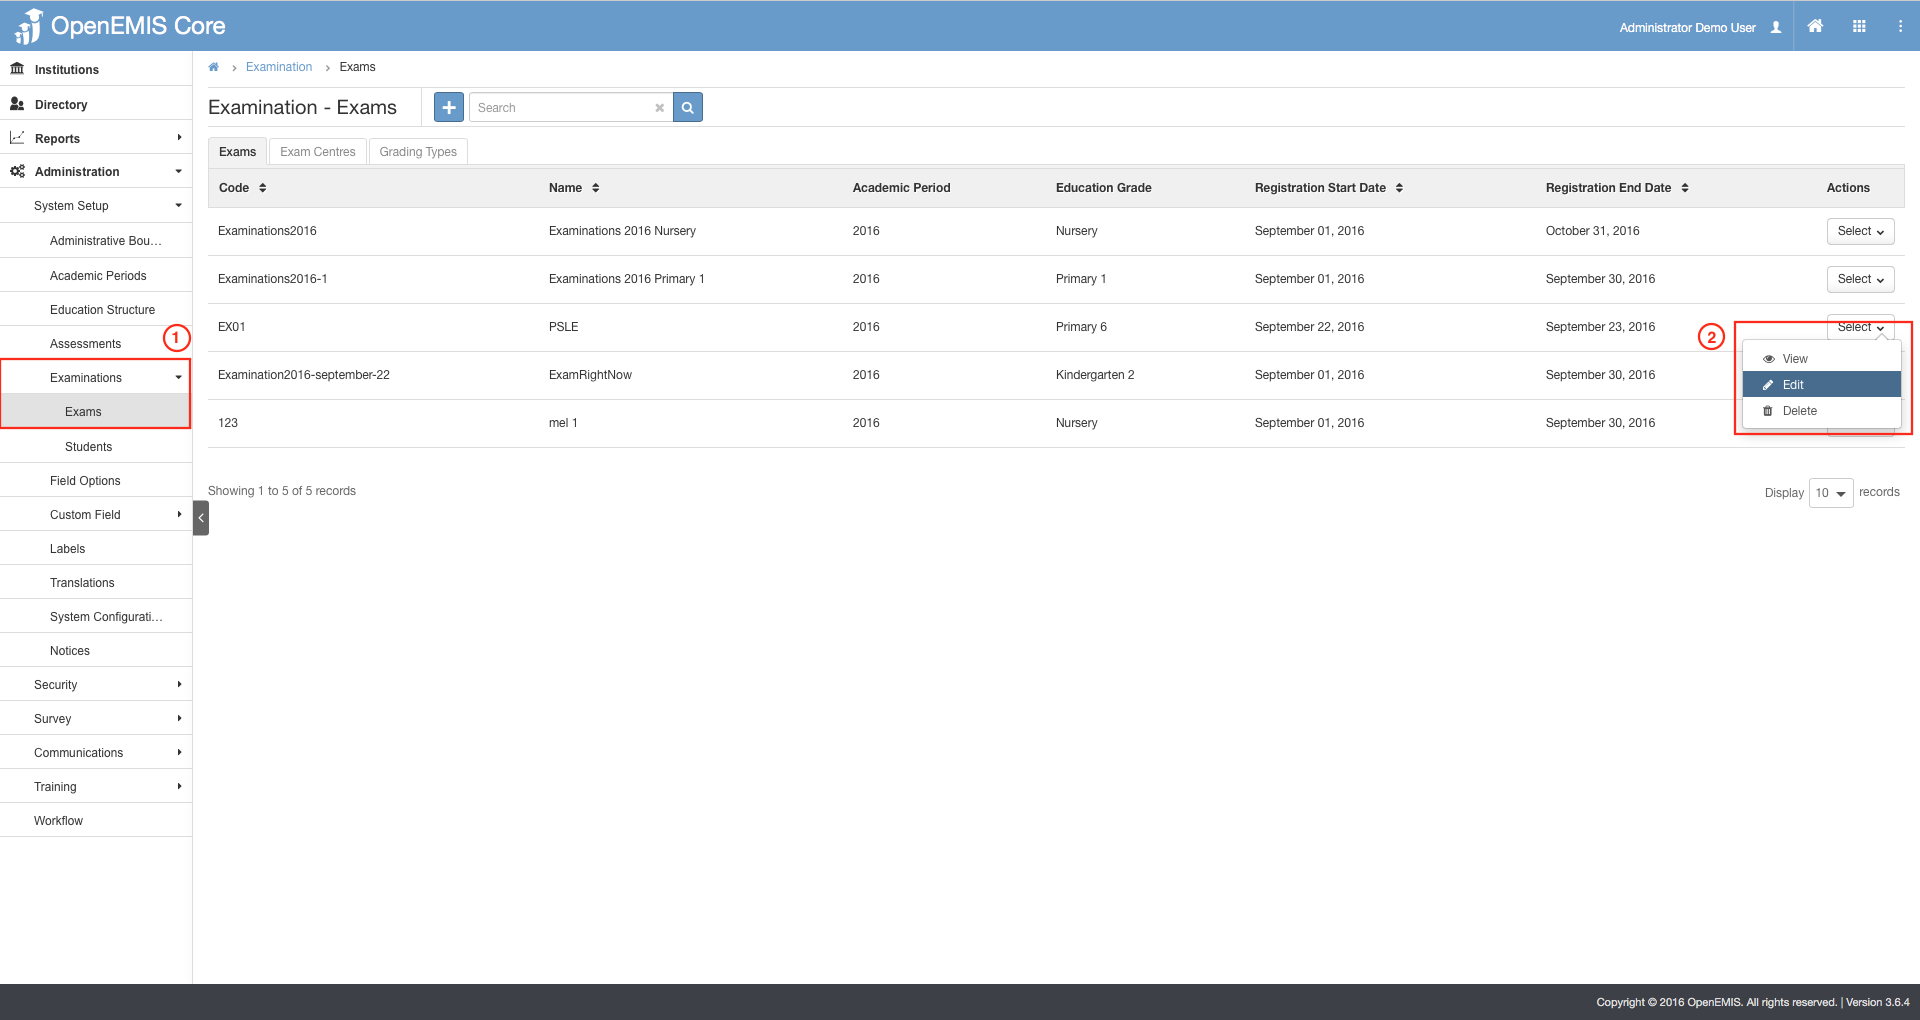
1) Go to Administration > System Setup > Examination > Exams.
2) Select on the Actions Bar > View.
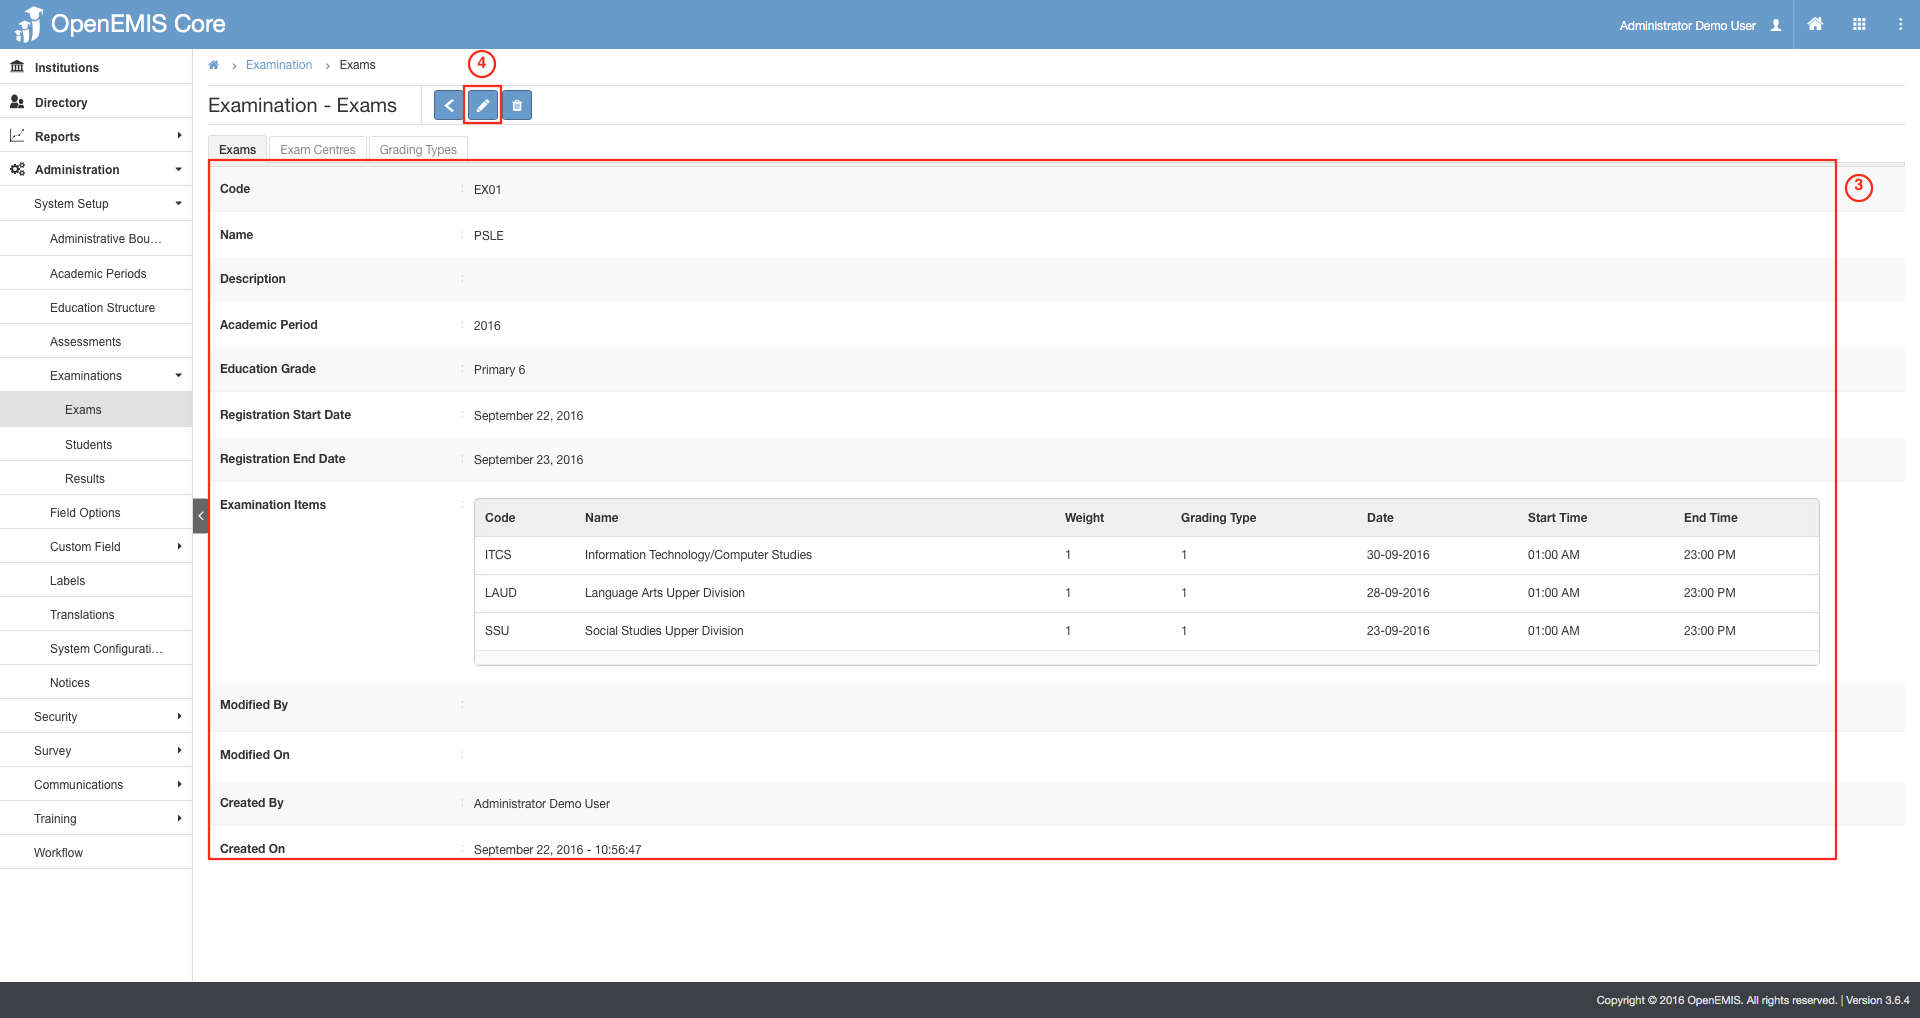
3) A detailed version of the Examination will be displayed.
4) Similarly, you can edit the data on the page

1) Go to Administration > System Setup > Examination > Exams.
2) Select on the Add button.
3) Insert the required input such as Code, Name, Academic Period, Exam Items and etc.
4) Select on Save.
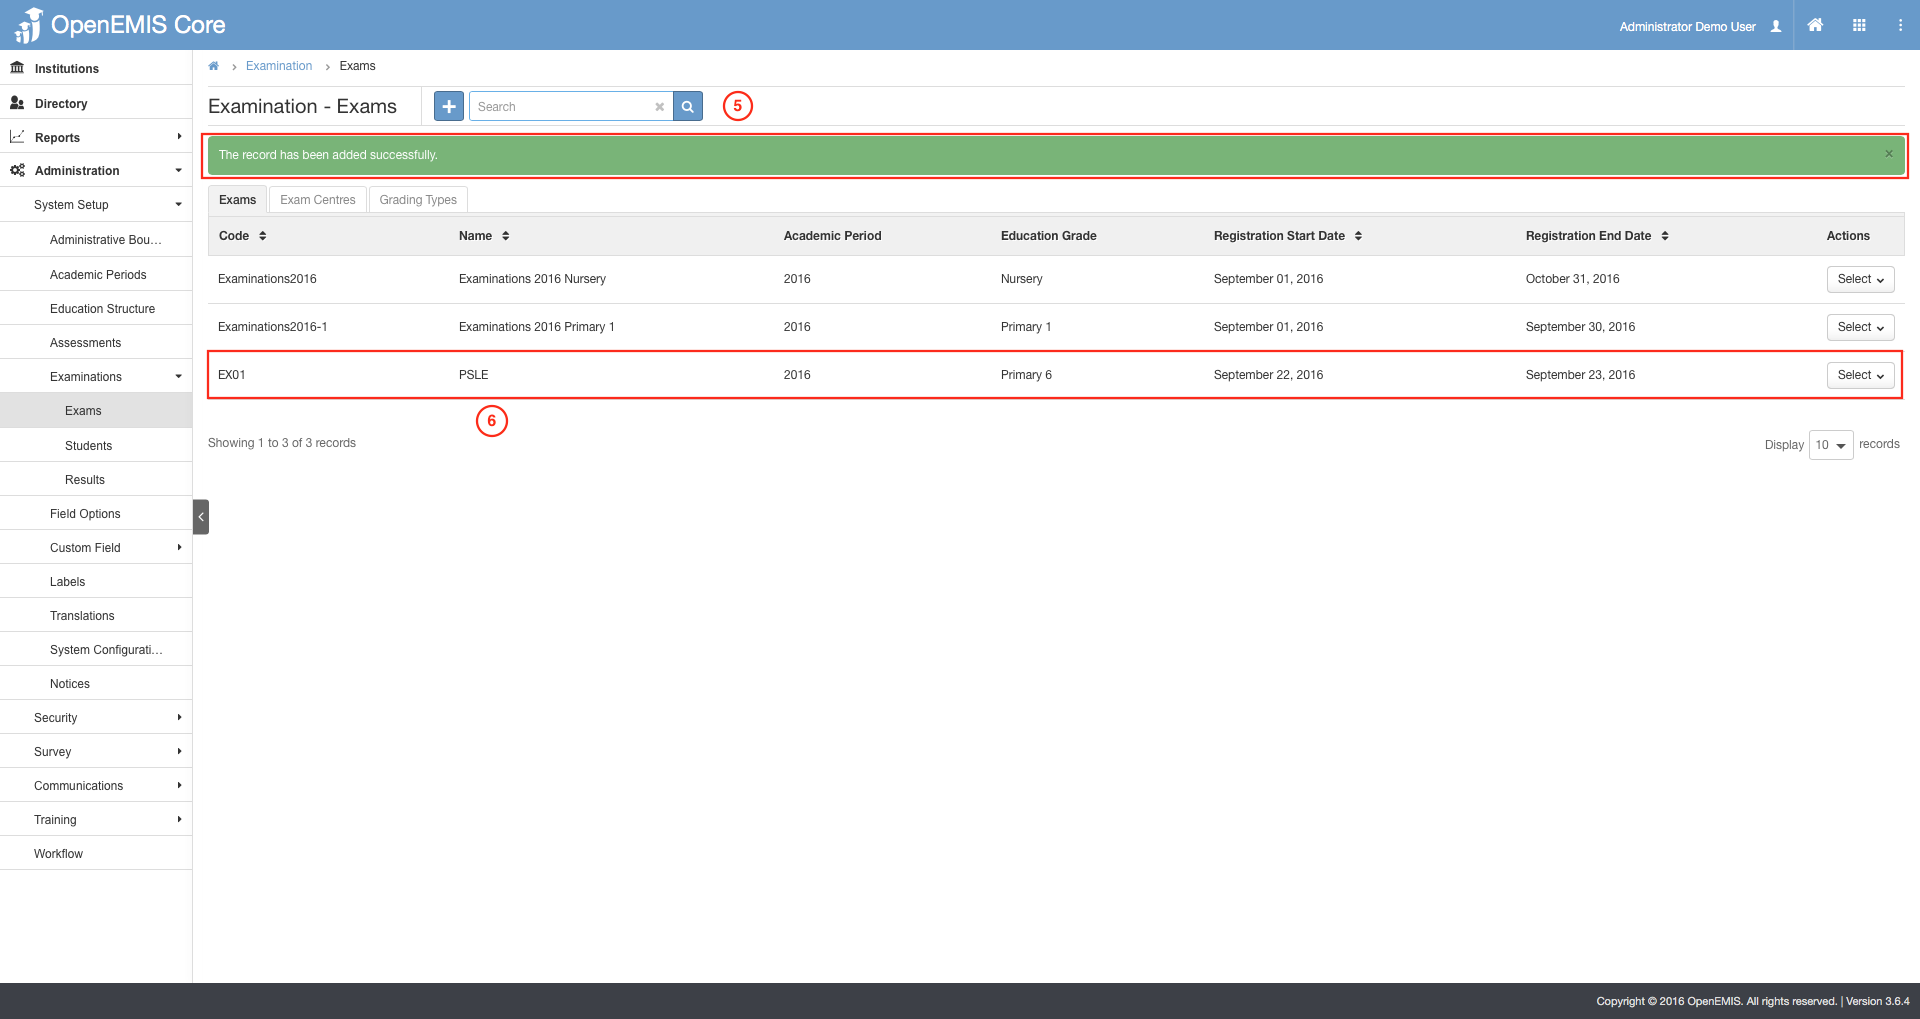
5) A successful message will be displayed upon a new record added.
6) You can view the record added in the table shown.
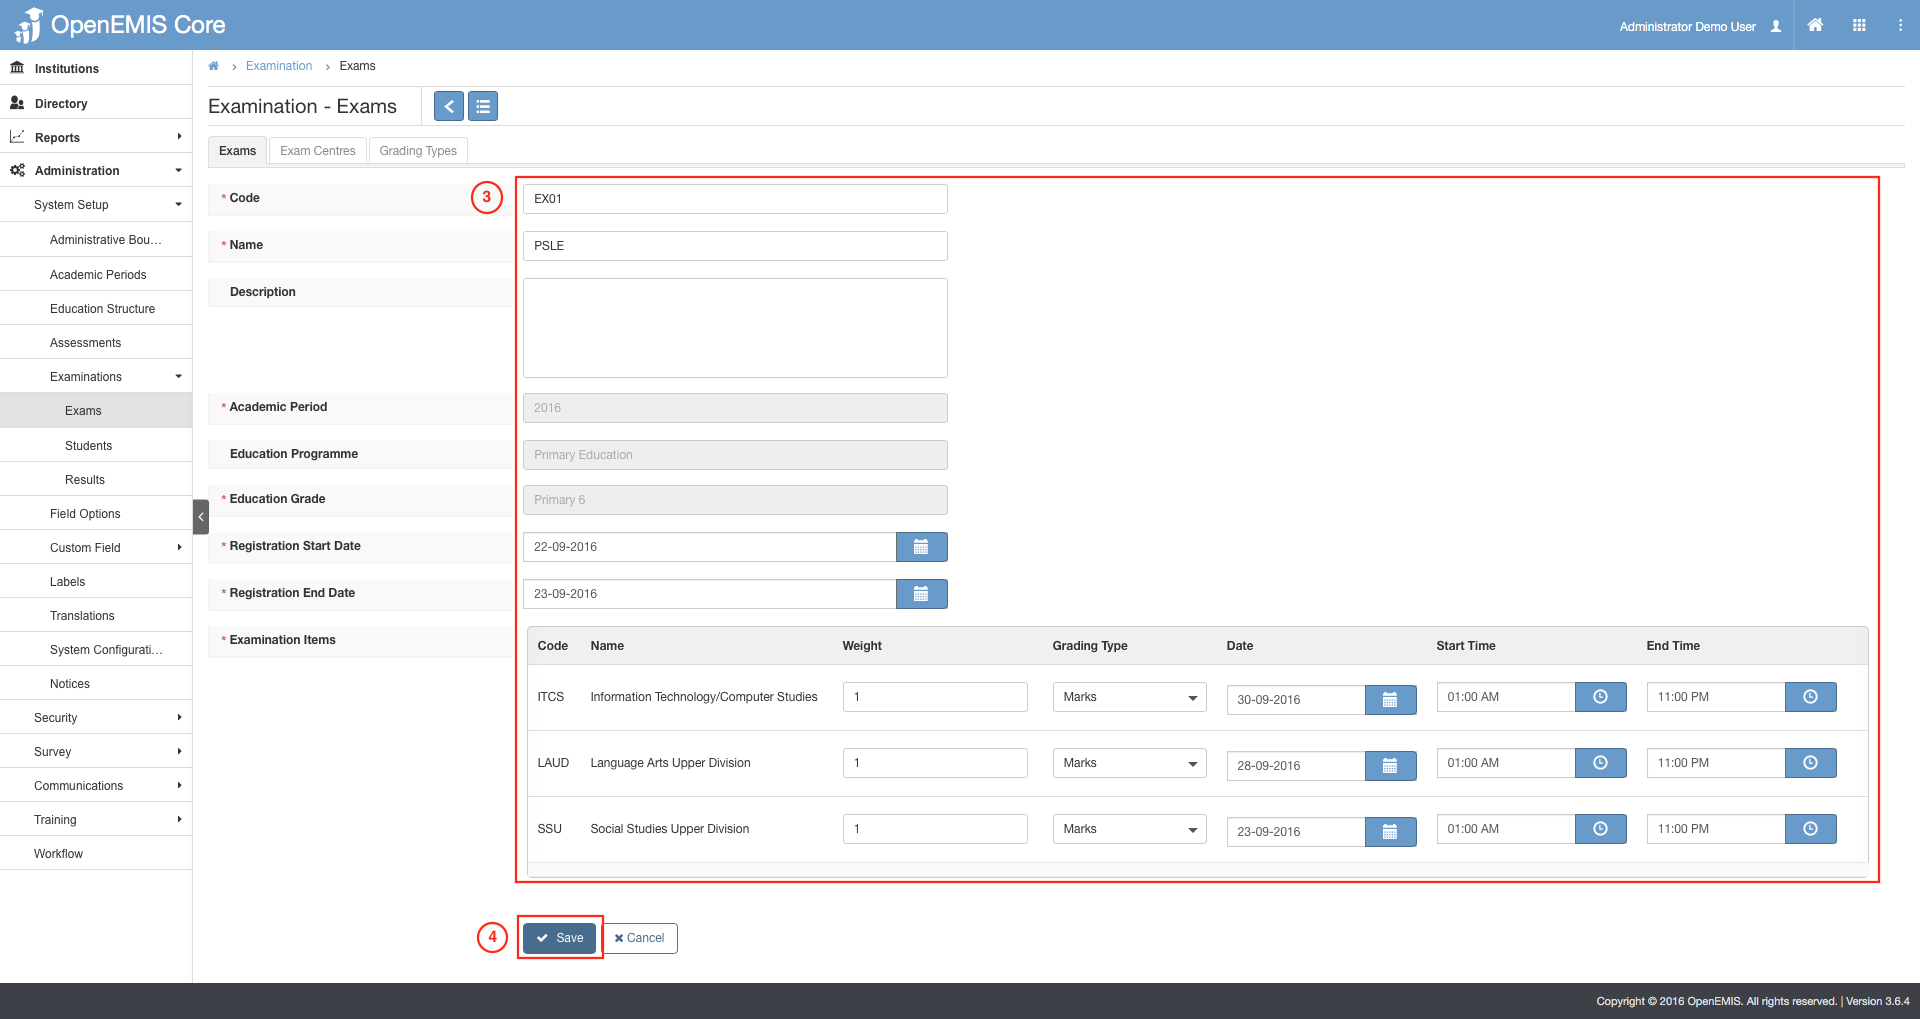
1) Go to Administration > System Setup > Examination > Exams.
2) Select on the Actions Bar > Edit.
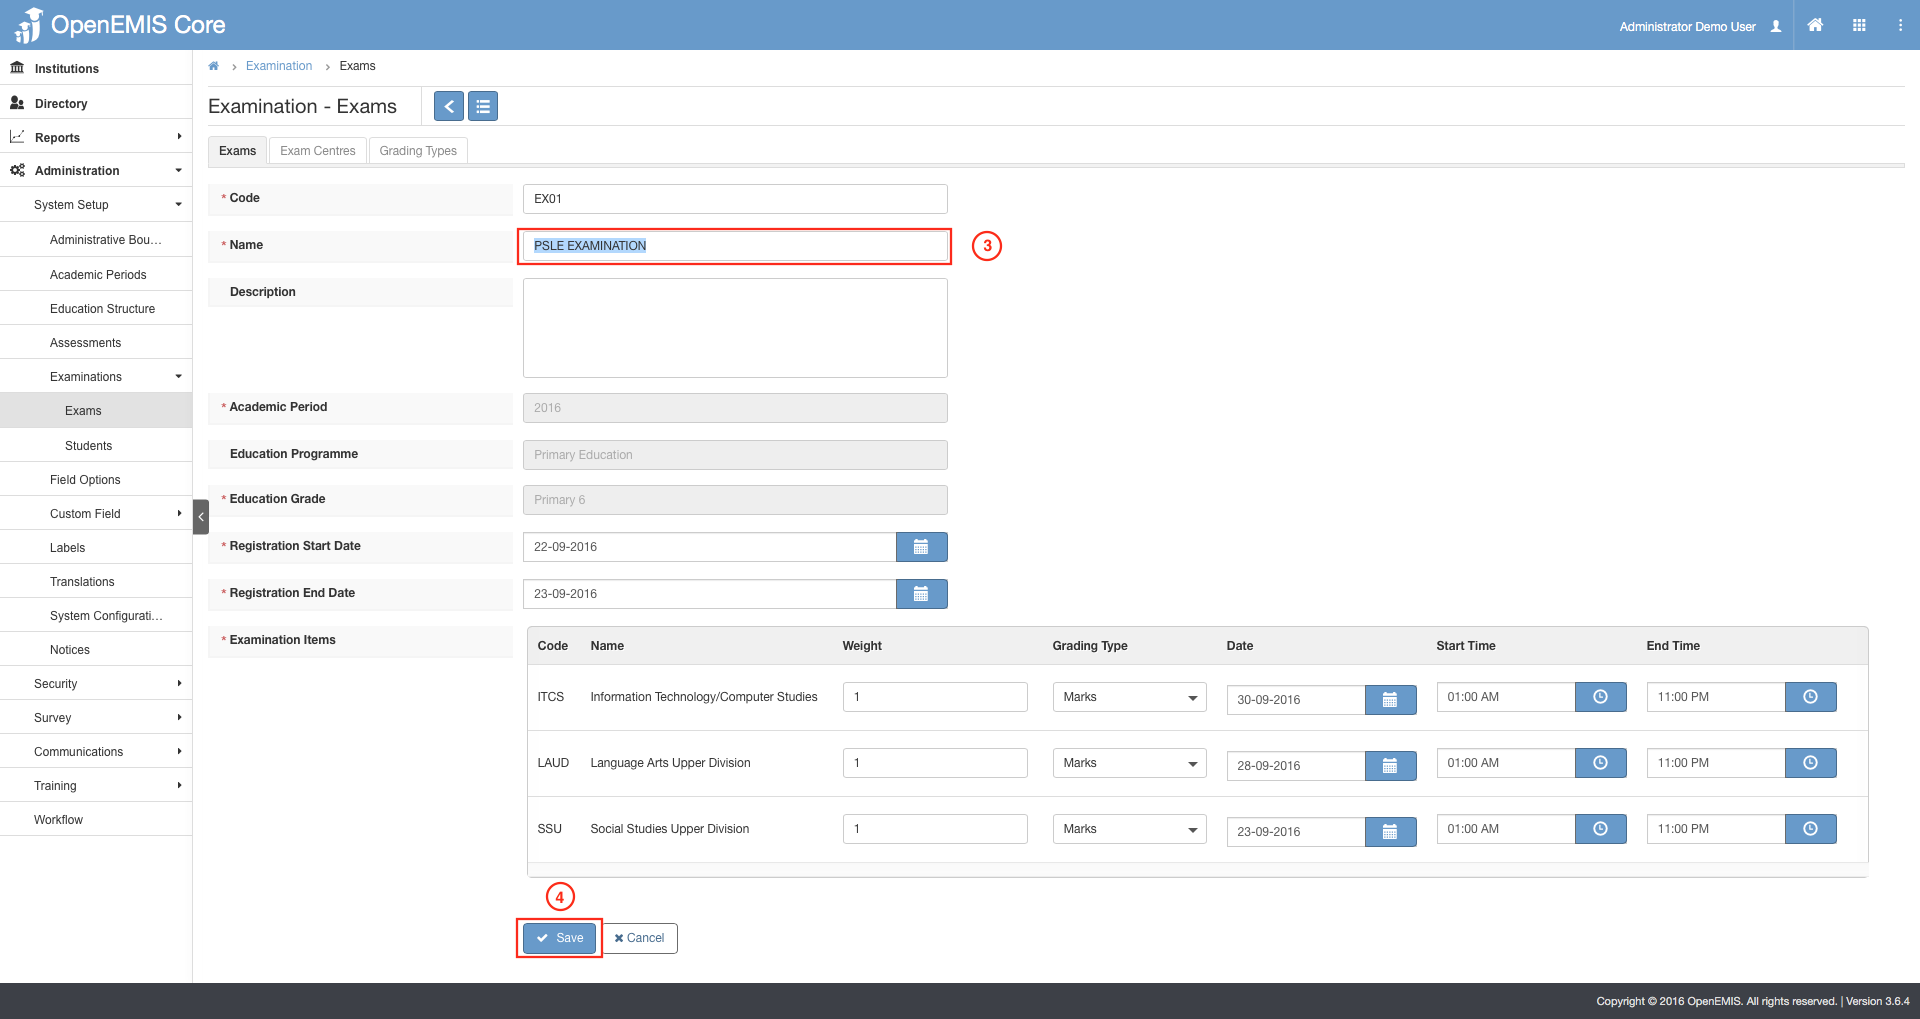
3) Make your amendments.
4) Select on Save.
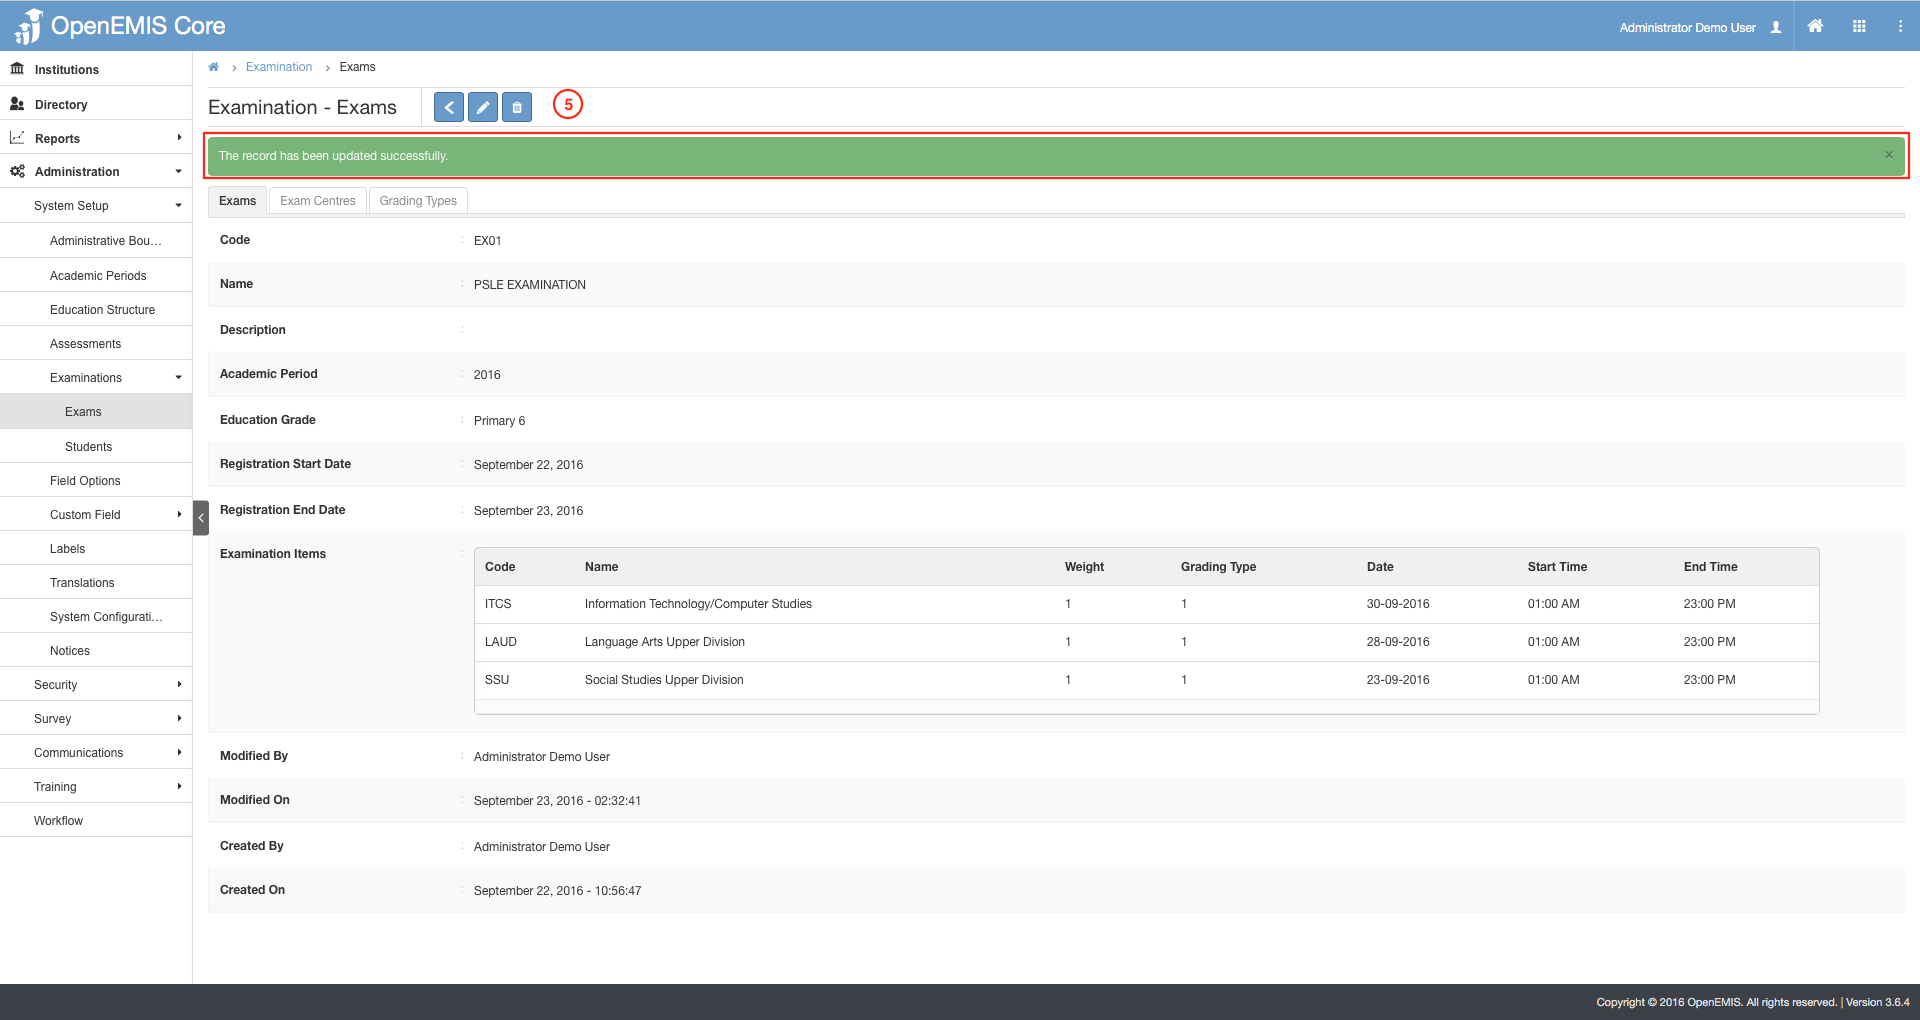
5) Successful message will be displayed upon the record has been updated.

1) Go to Administration > System Setup > Examination > Exams.
2) Select on the Actions Bar > Delete.
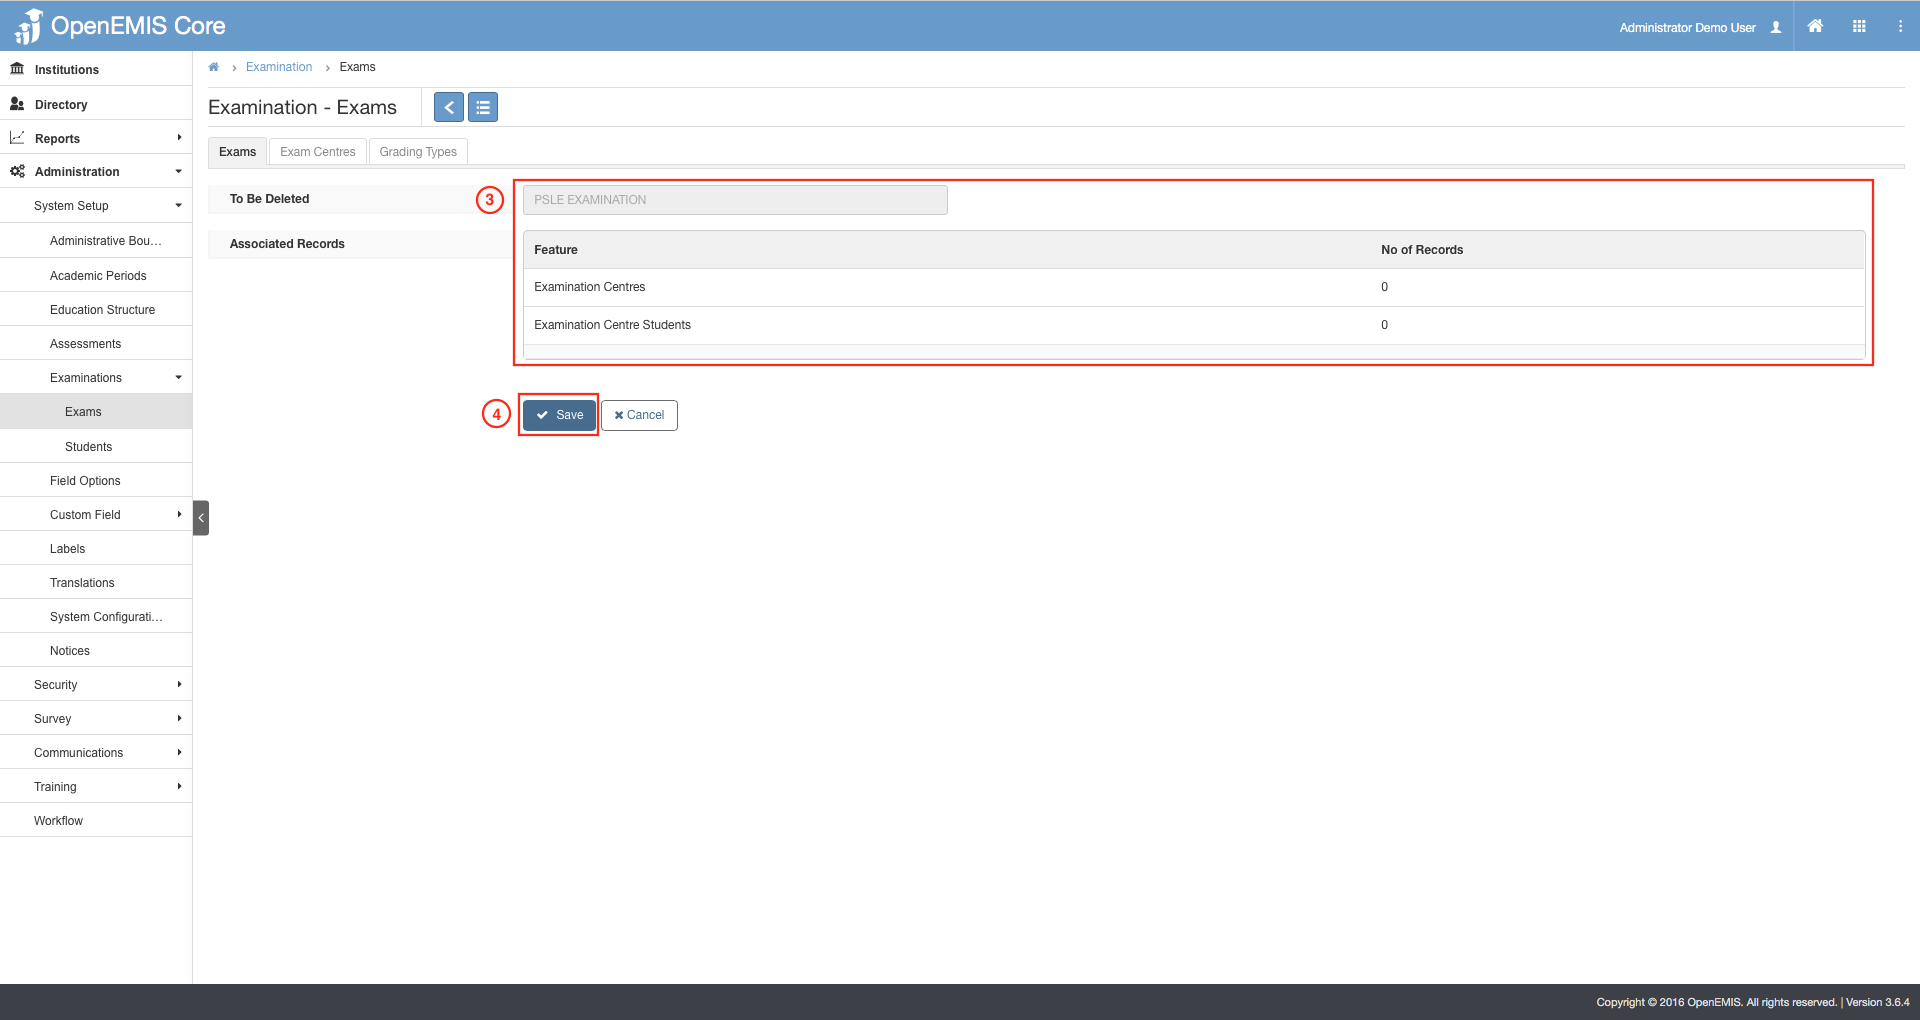
3) It will display all the associated records that is link to the deleted exam record.
4) Select on Save.
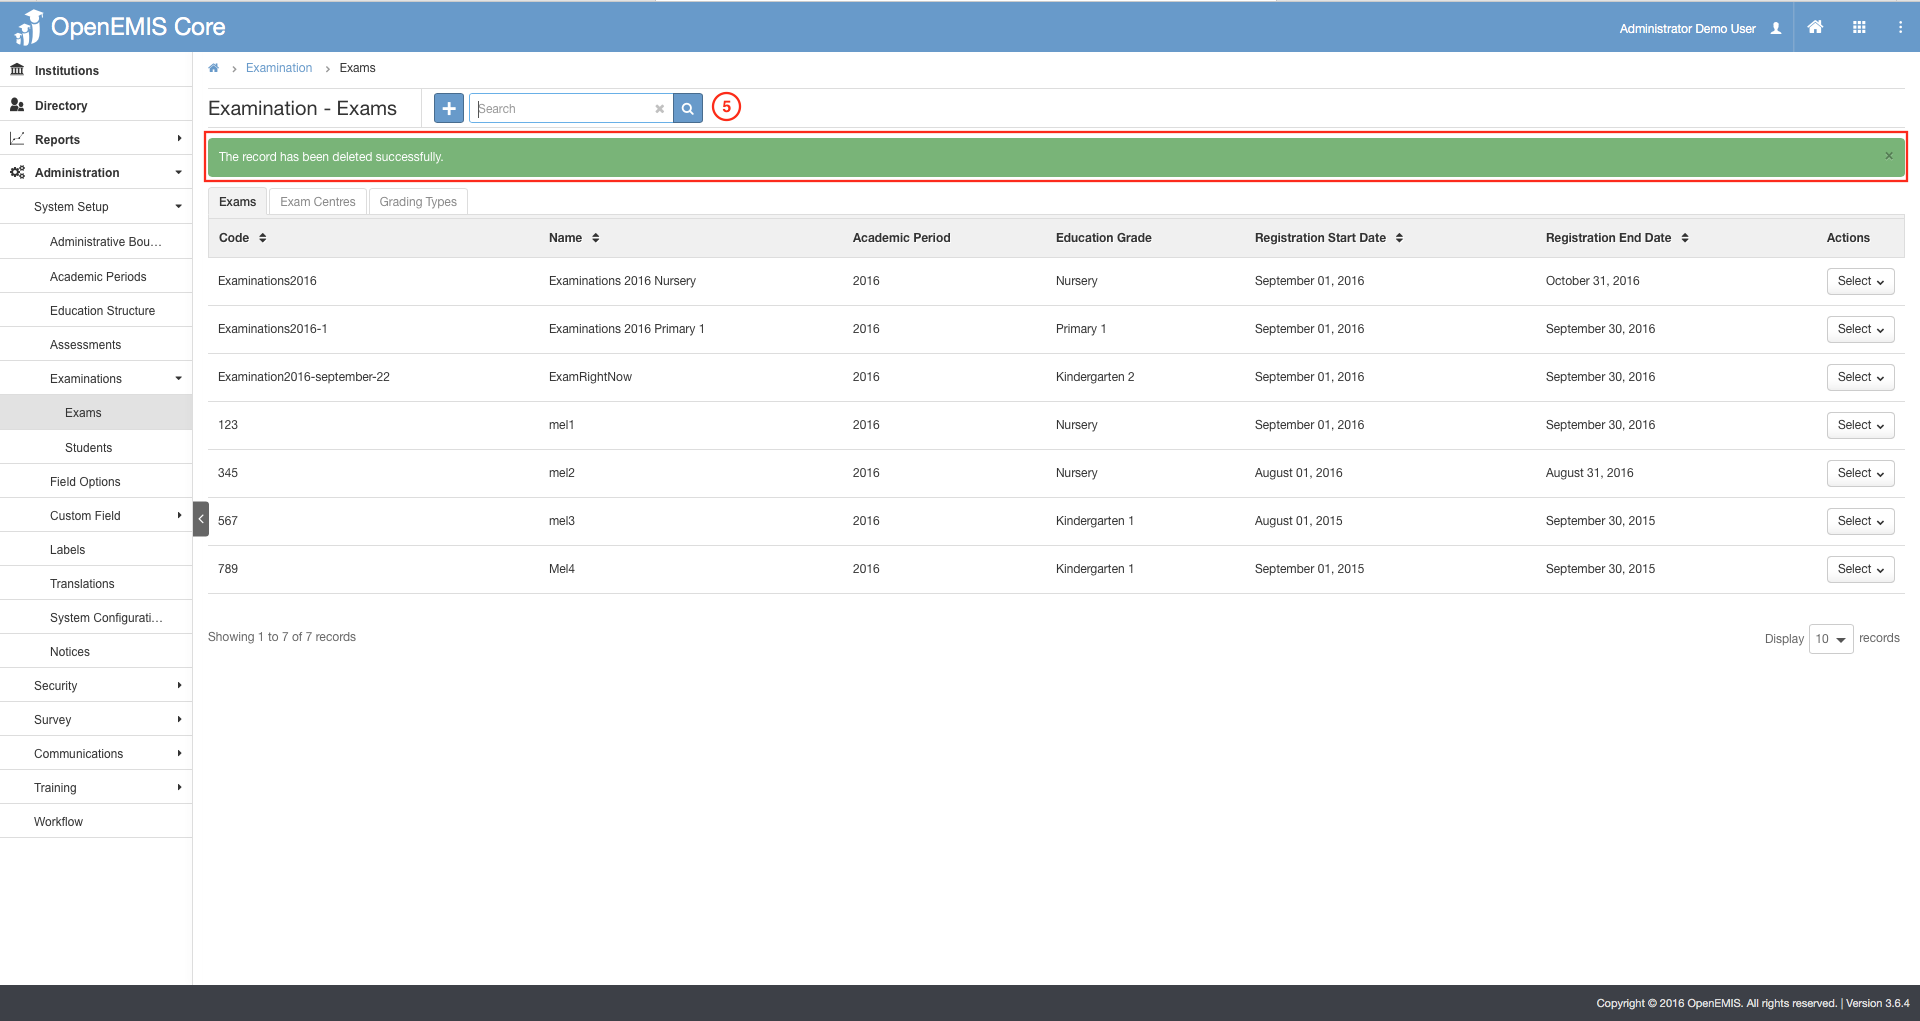
5) A successful message will be displayed upon deletion.
Managing Exam Centers:
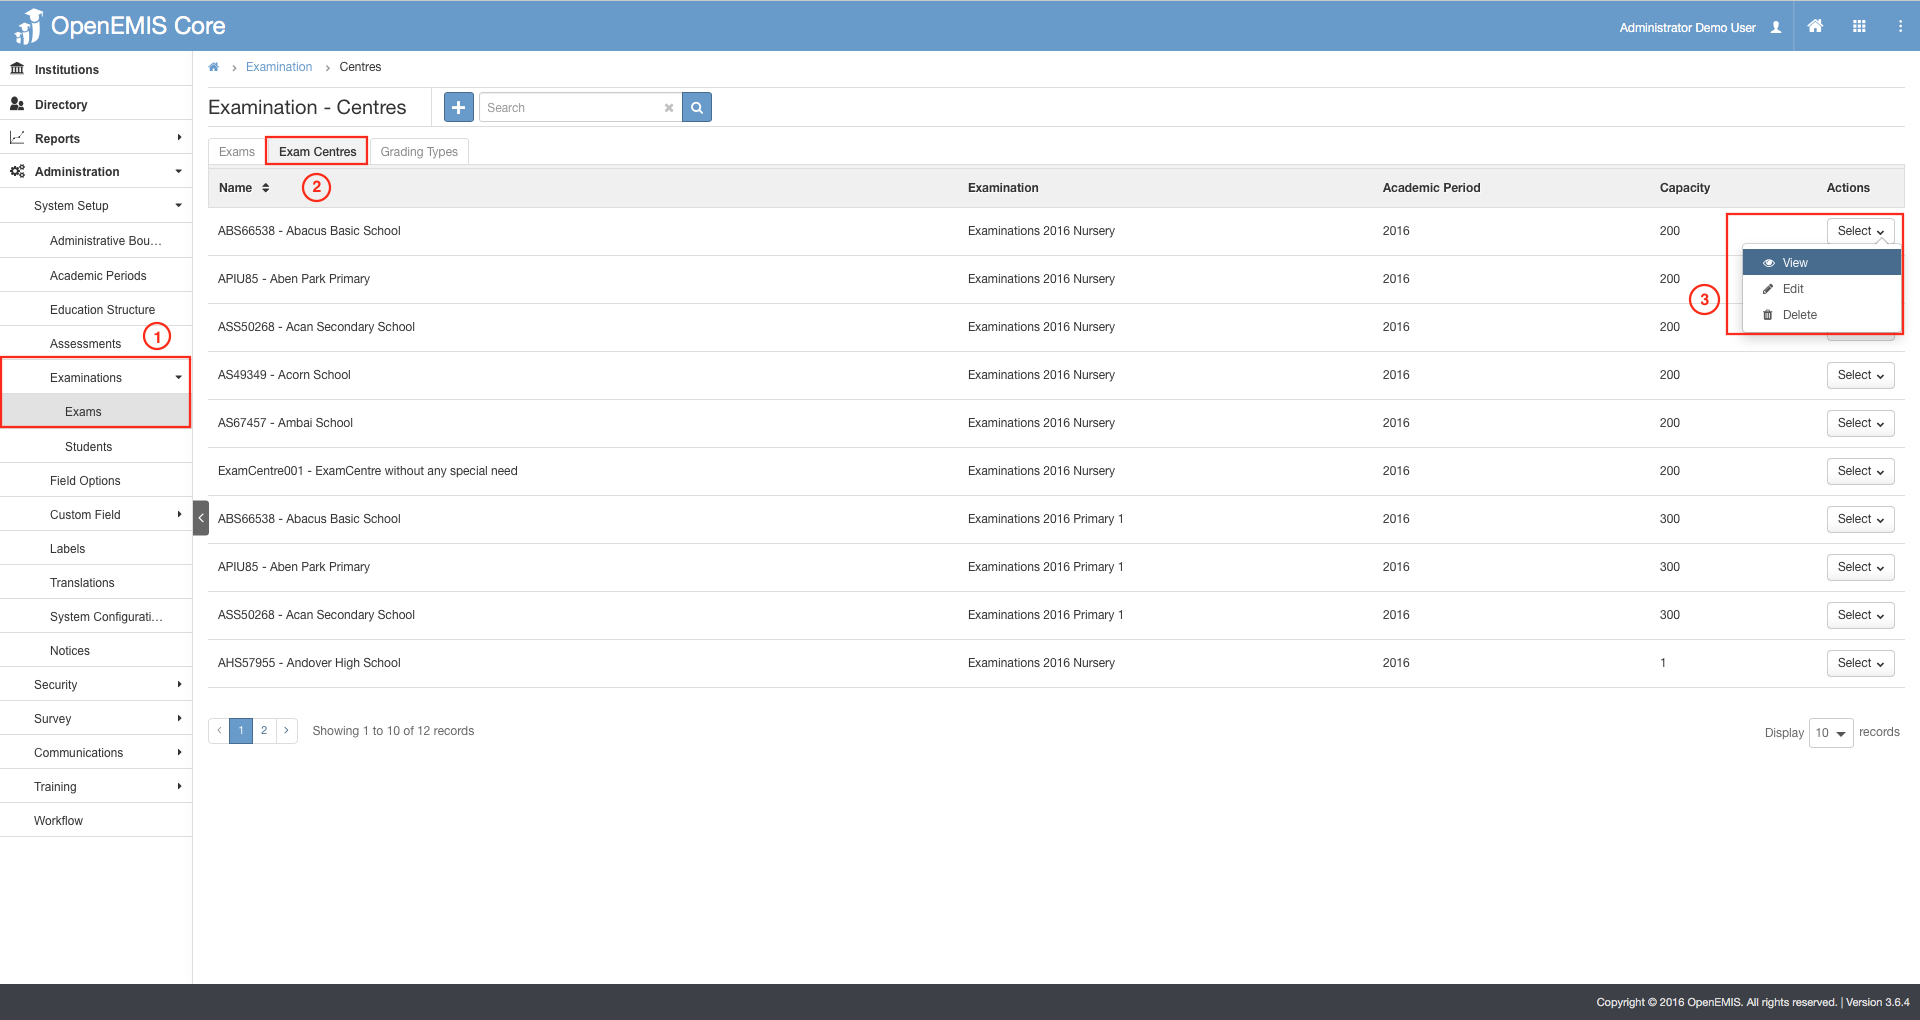
1) Go to Administration > System Setup > Examination > Exams.
2) Select on the Exam Centers tab.
3) Select on the Actions Bar > View.
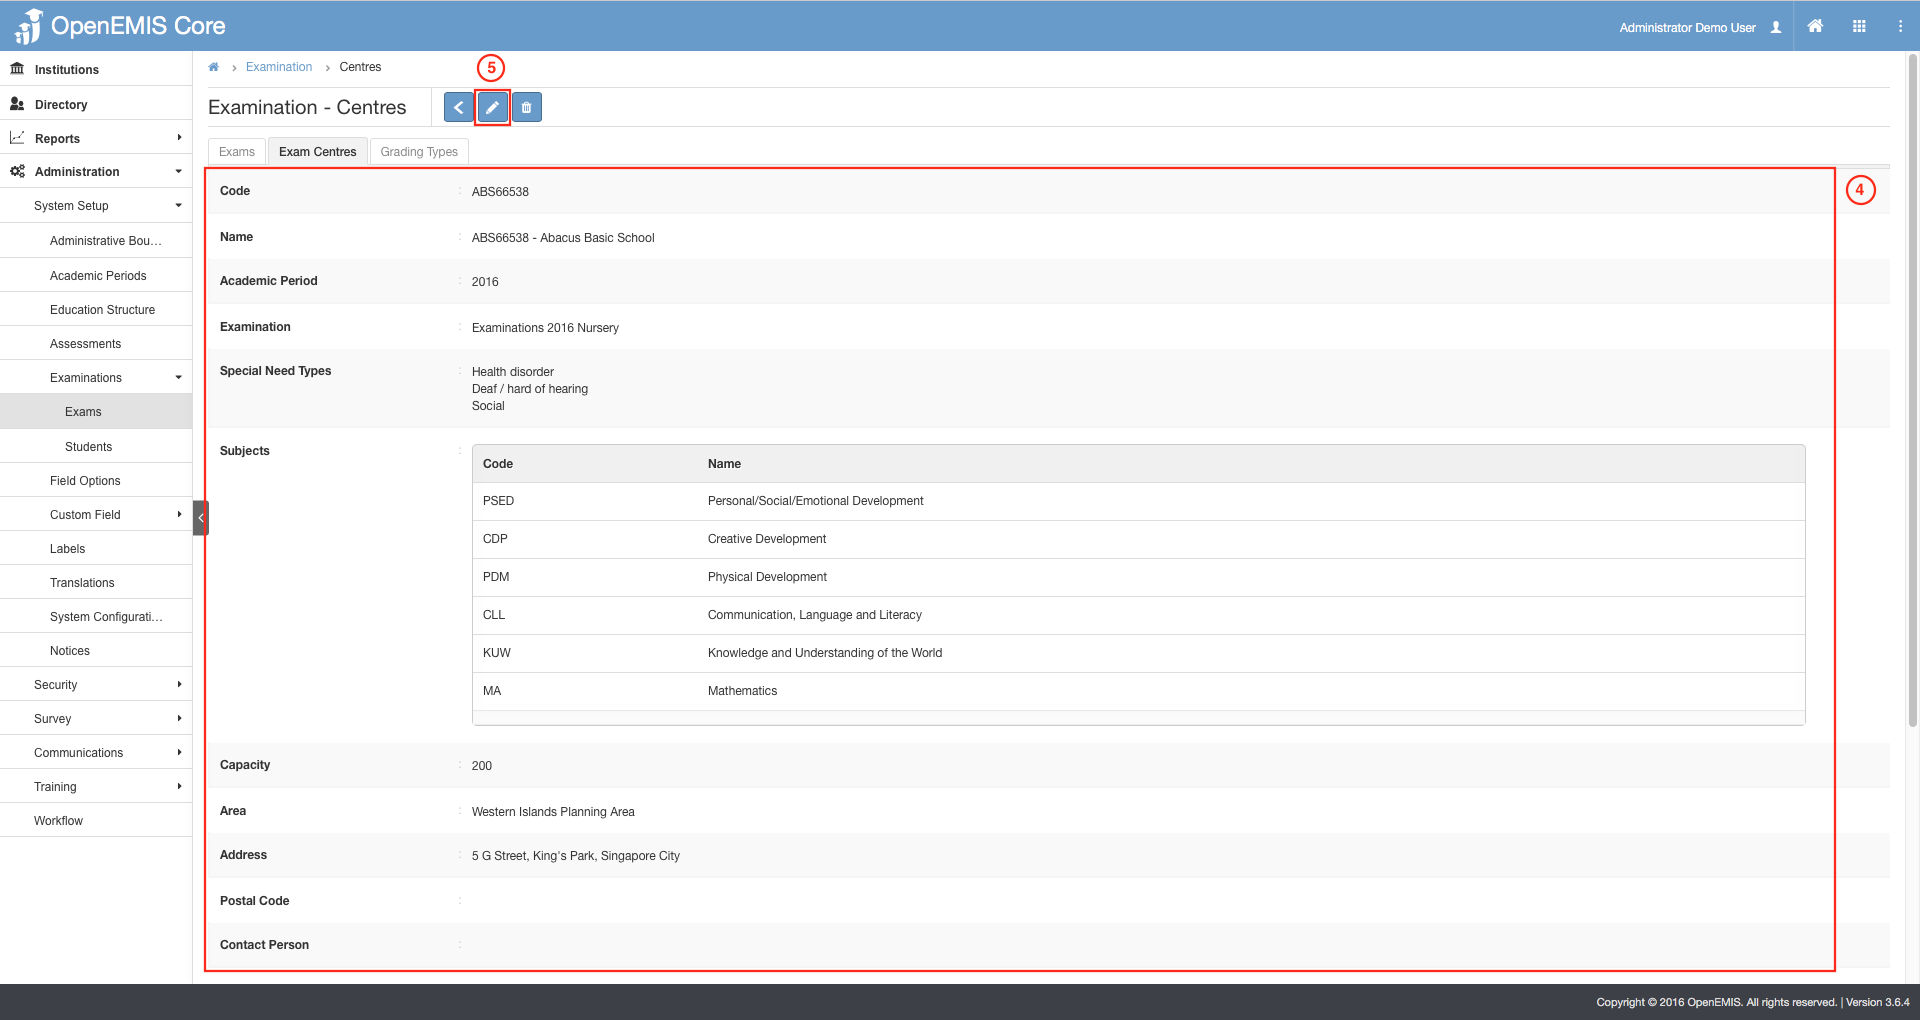
4) A detailed version of the Exam Center will be displayed.
5) Similarly, you can edit the data on the page

1) Go to Administration > System Setup > Examination > Exams.
2) Select on the Exam Centers tab.
3) Select on the Add button.
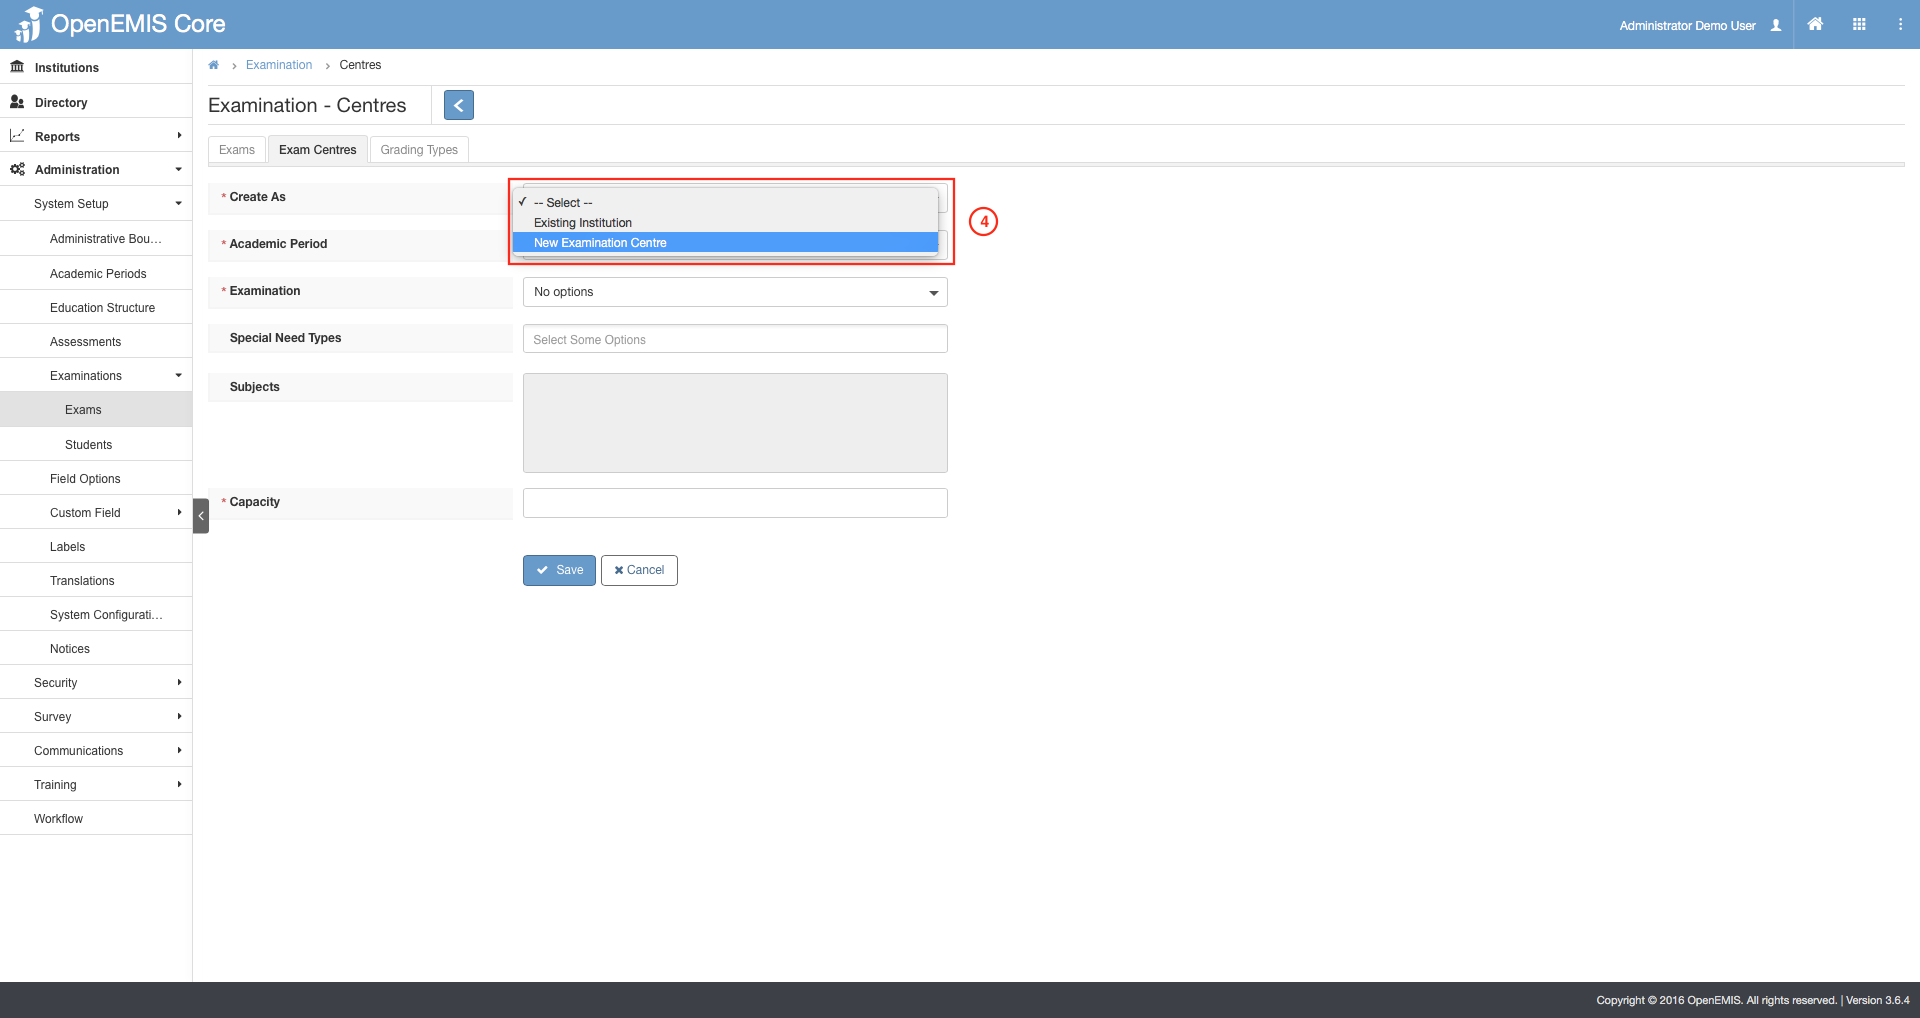
4) Select the New Examination Center option.
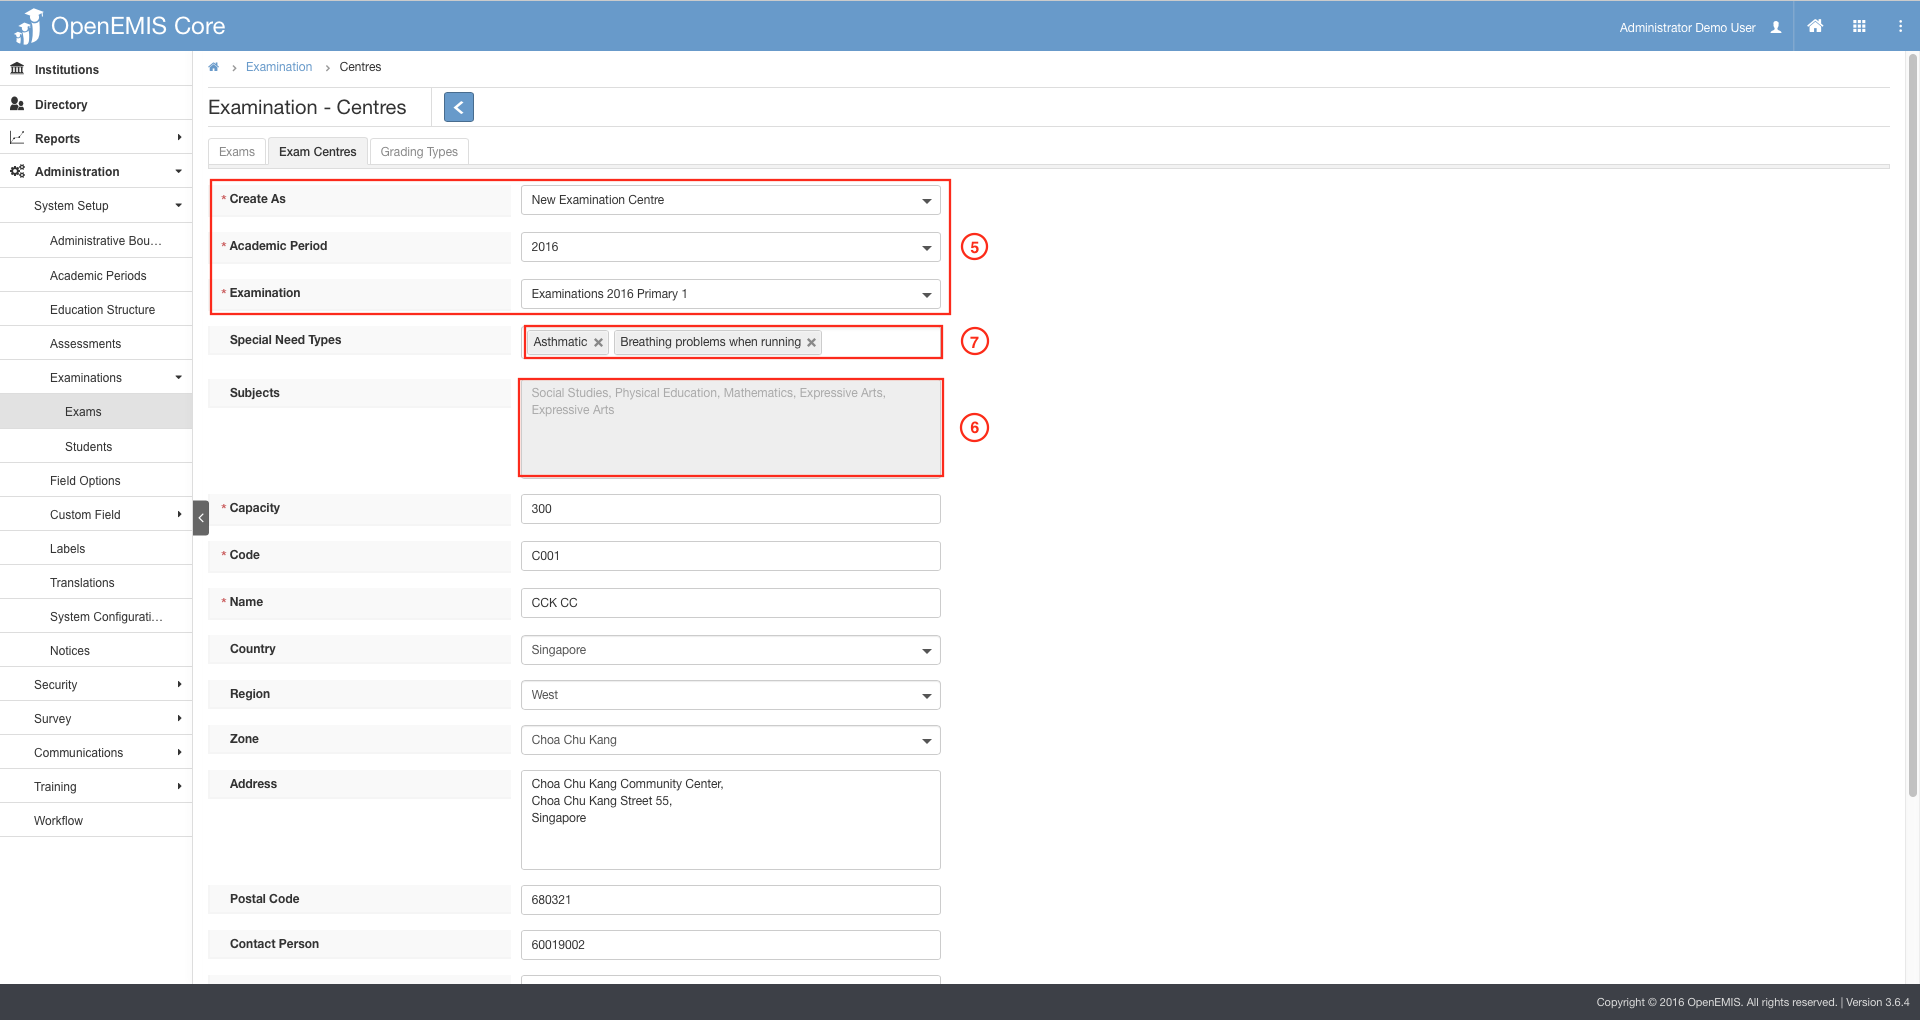
5) Insert the required input such as Academic Period, Examination, Code and etc.
6) Subjects will be auto-displayed upon selection of Examination.
7) You can select the Special Needs Options that the Exam Center provides.
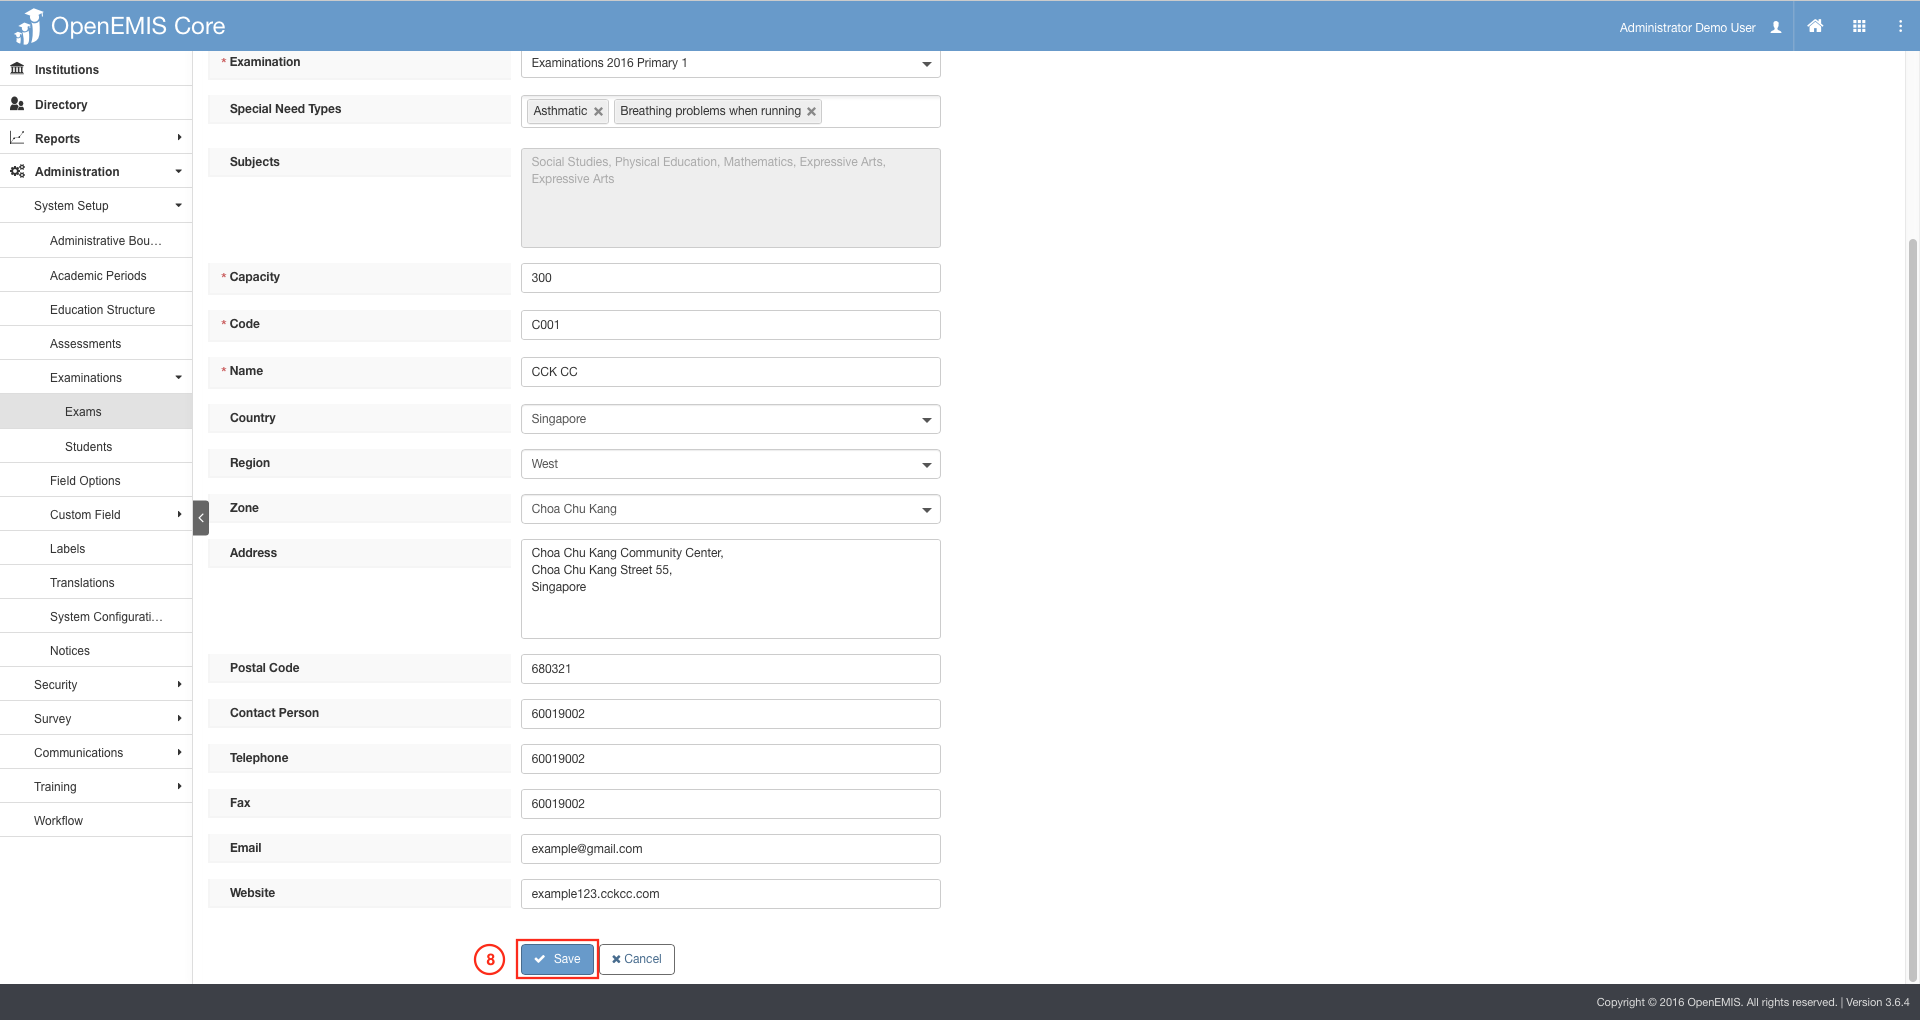
8) Select on Save.
9) You can view the record added successfully in the table shown.
1) Go to Administration > System Setup > Examination > Exams.
2) Select on the Exam Centers tab.
3) Select on the Add button.
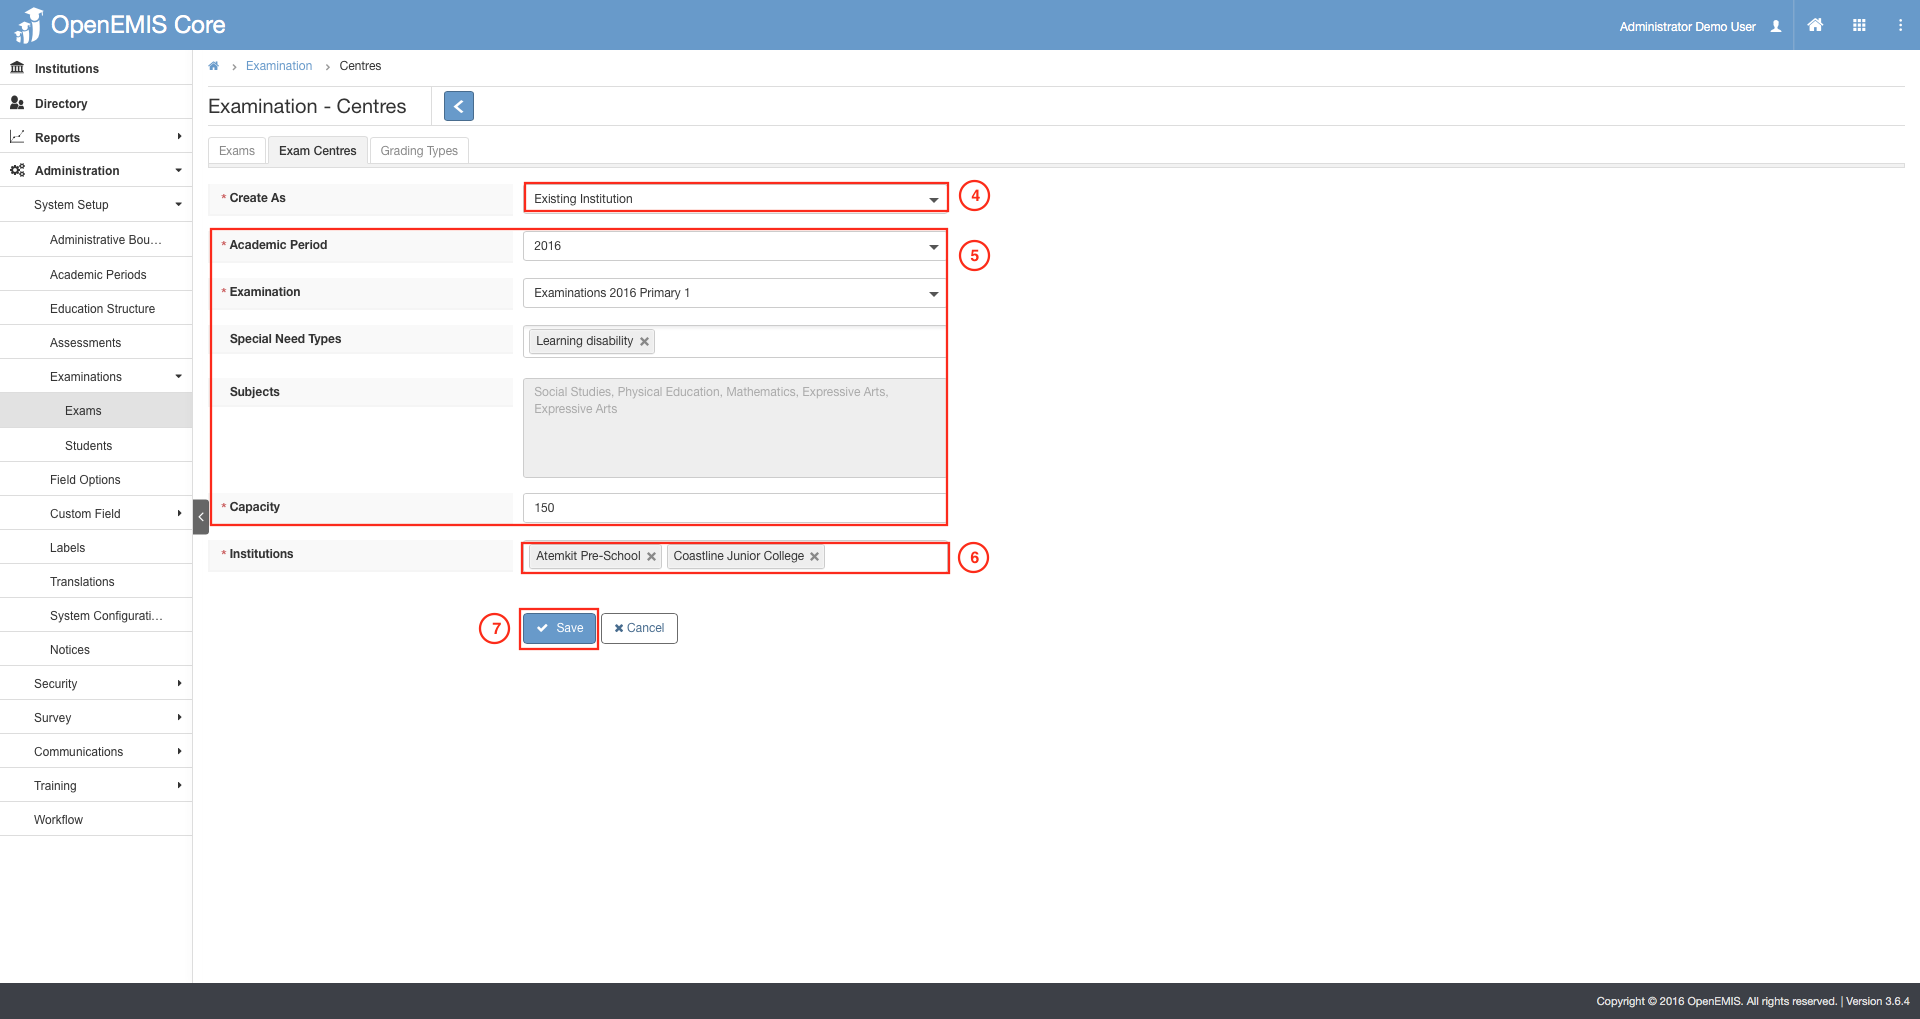
4) Select the Existing Institution option.
5) Insert the required input such as Academic Period, Examination, Capacity and etc.
6) Select the Institutions that filters according to Special Needs.
7) Select on Save.
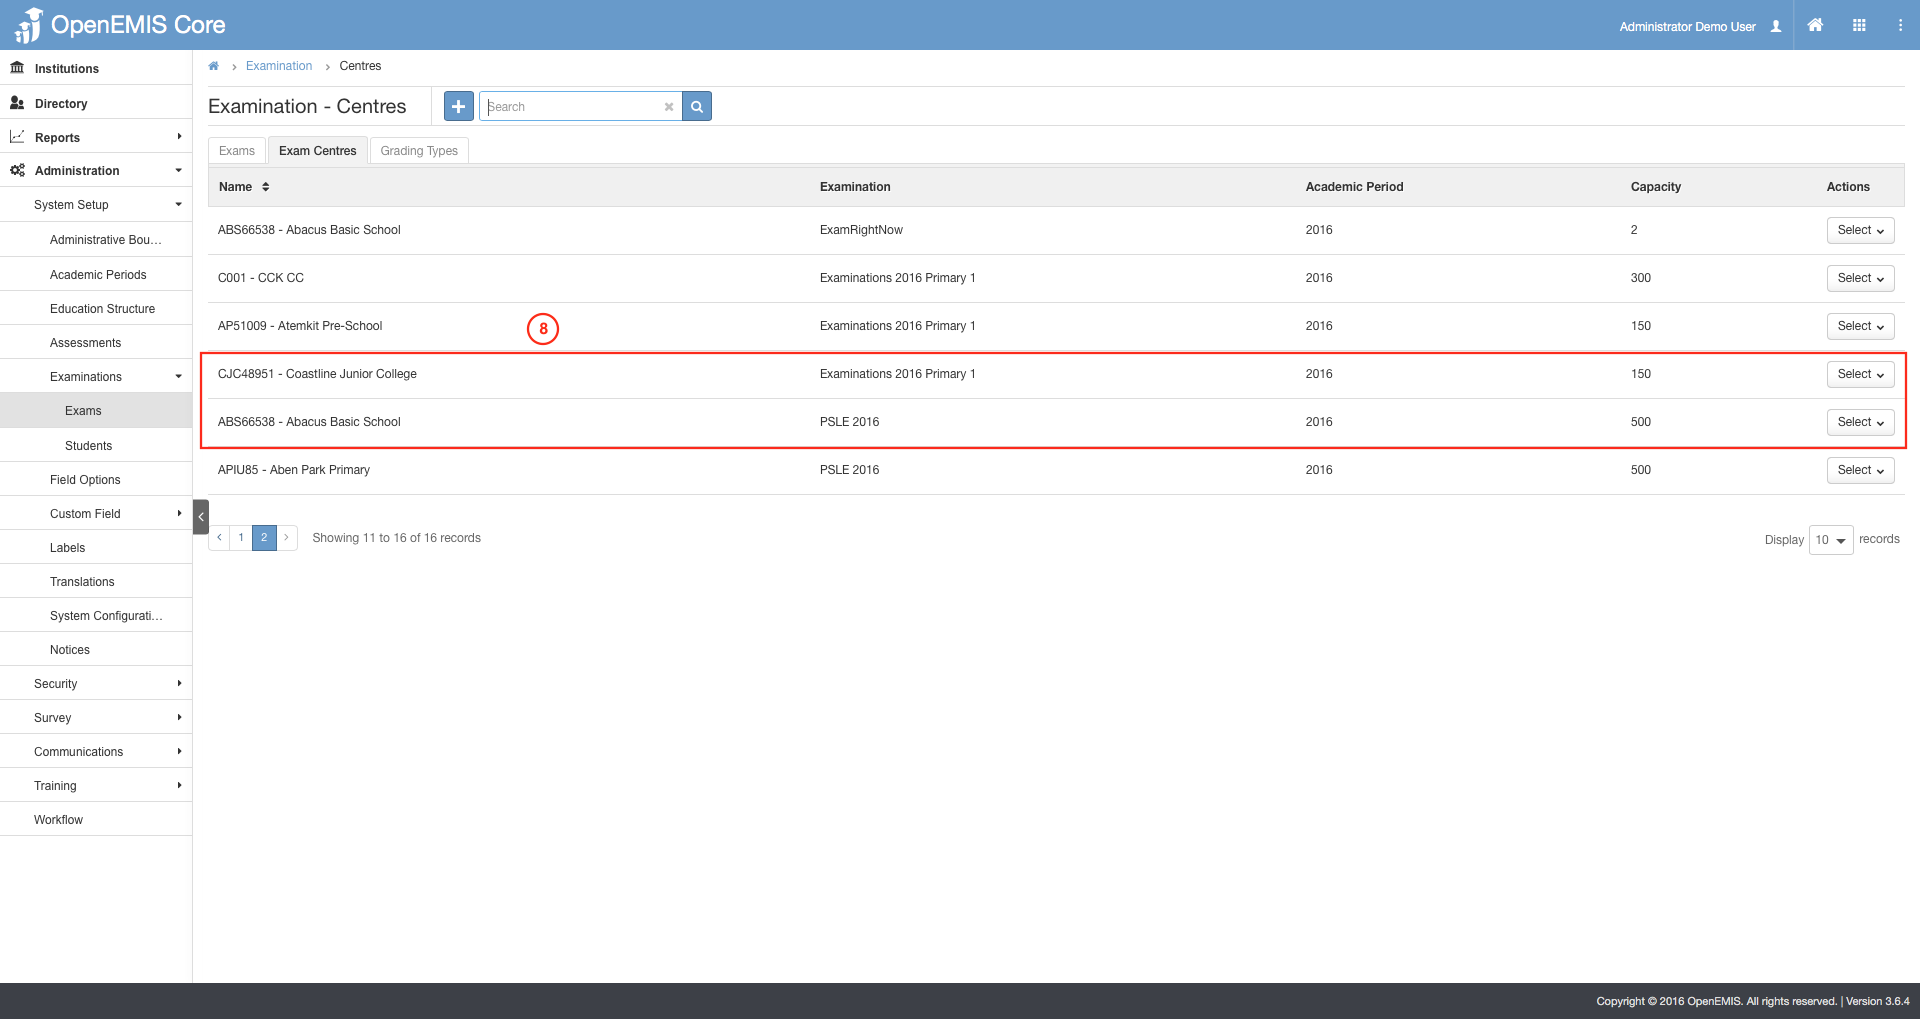
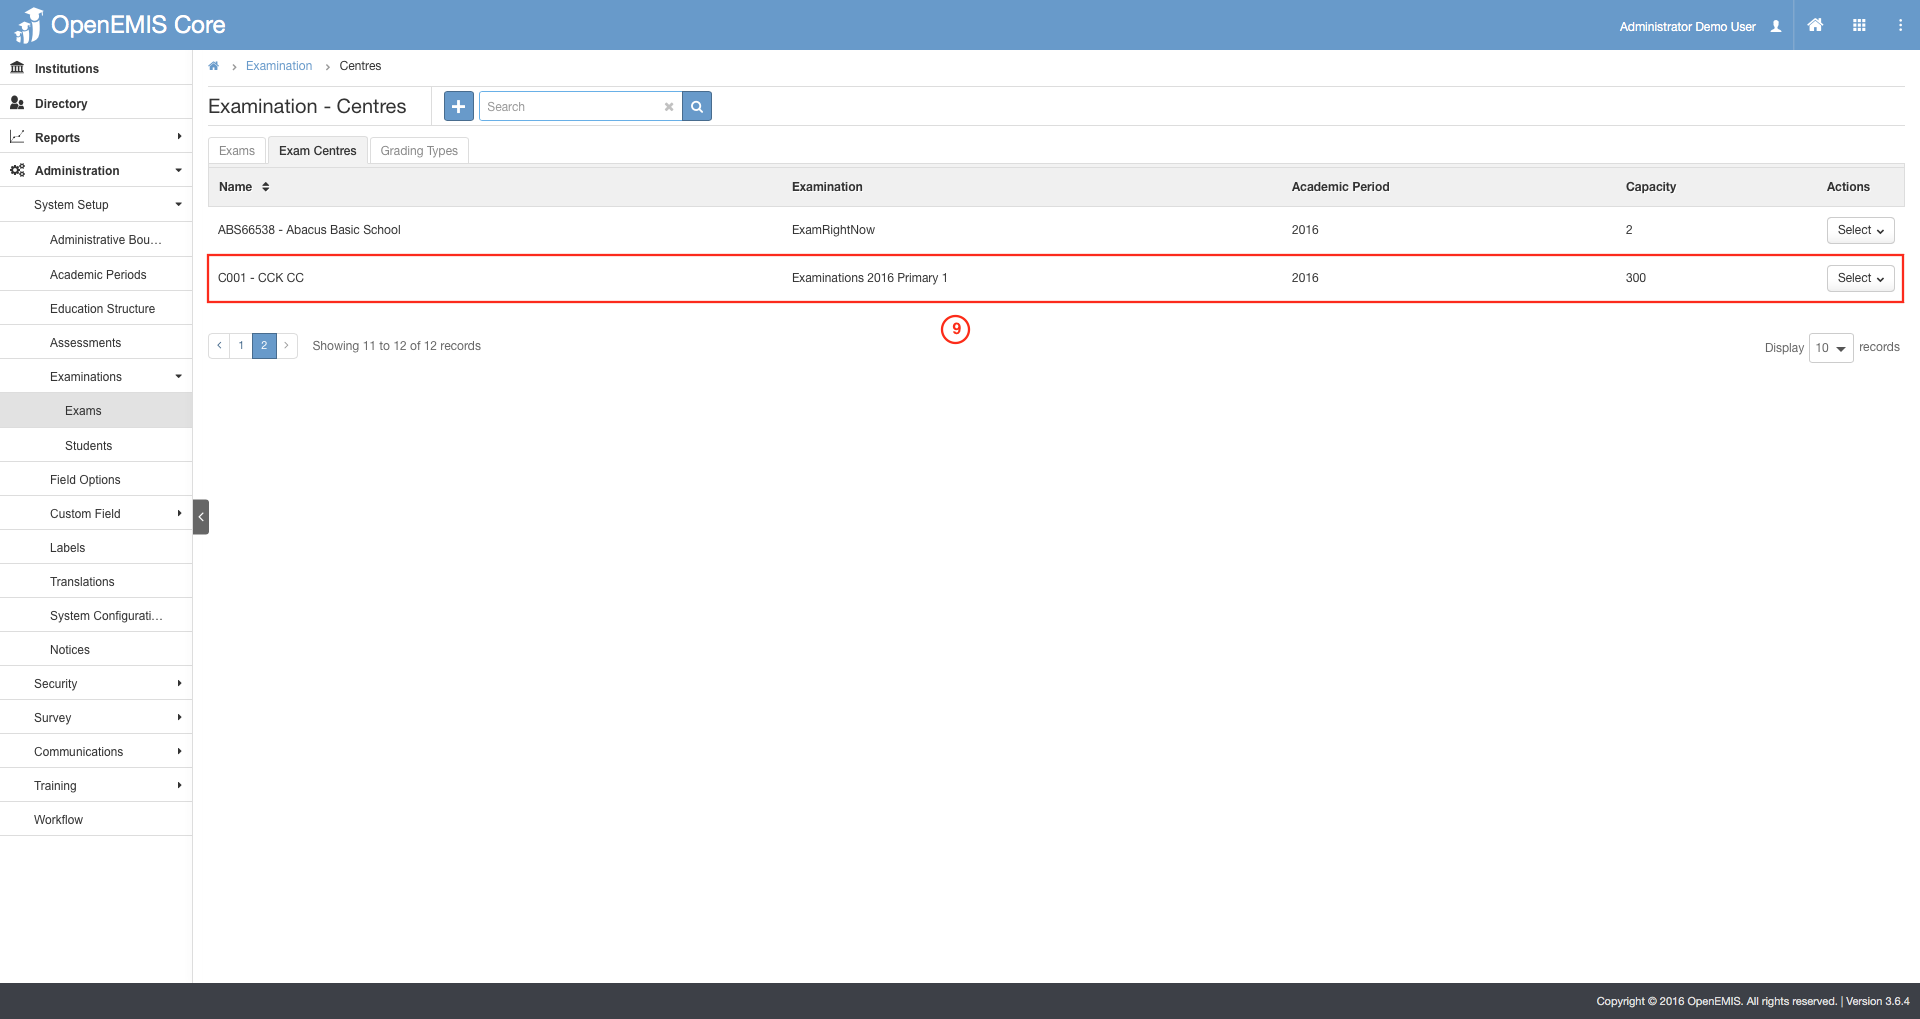
8) You can view the record added in the table shown.
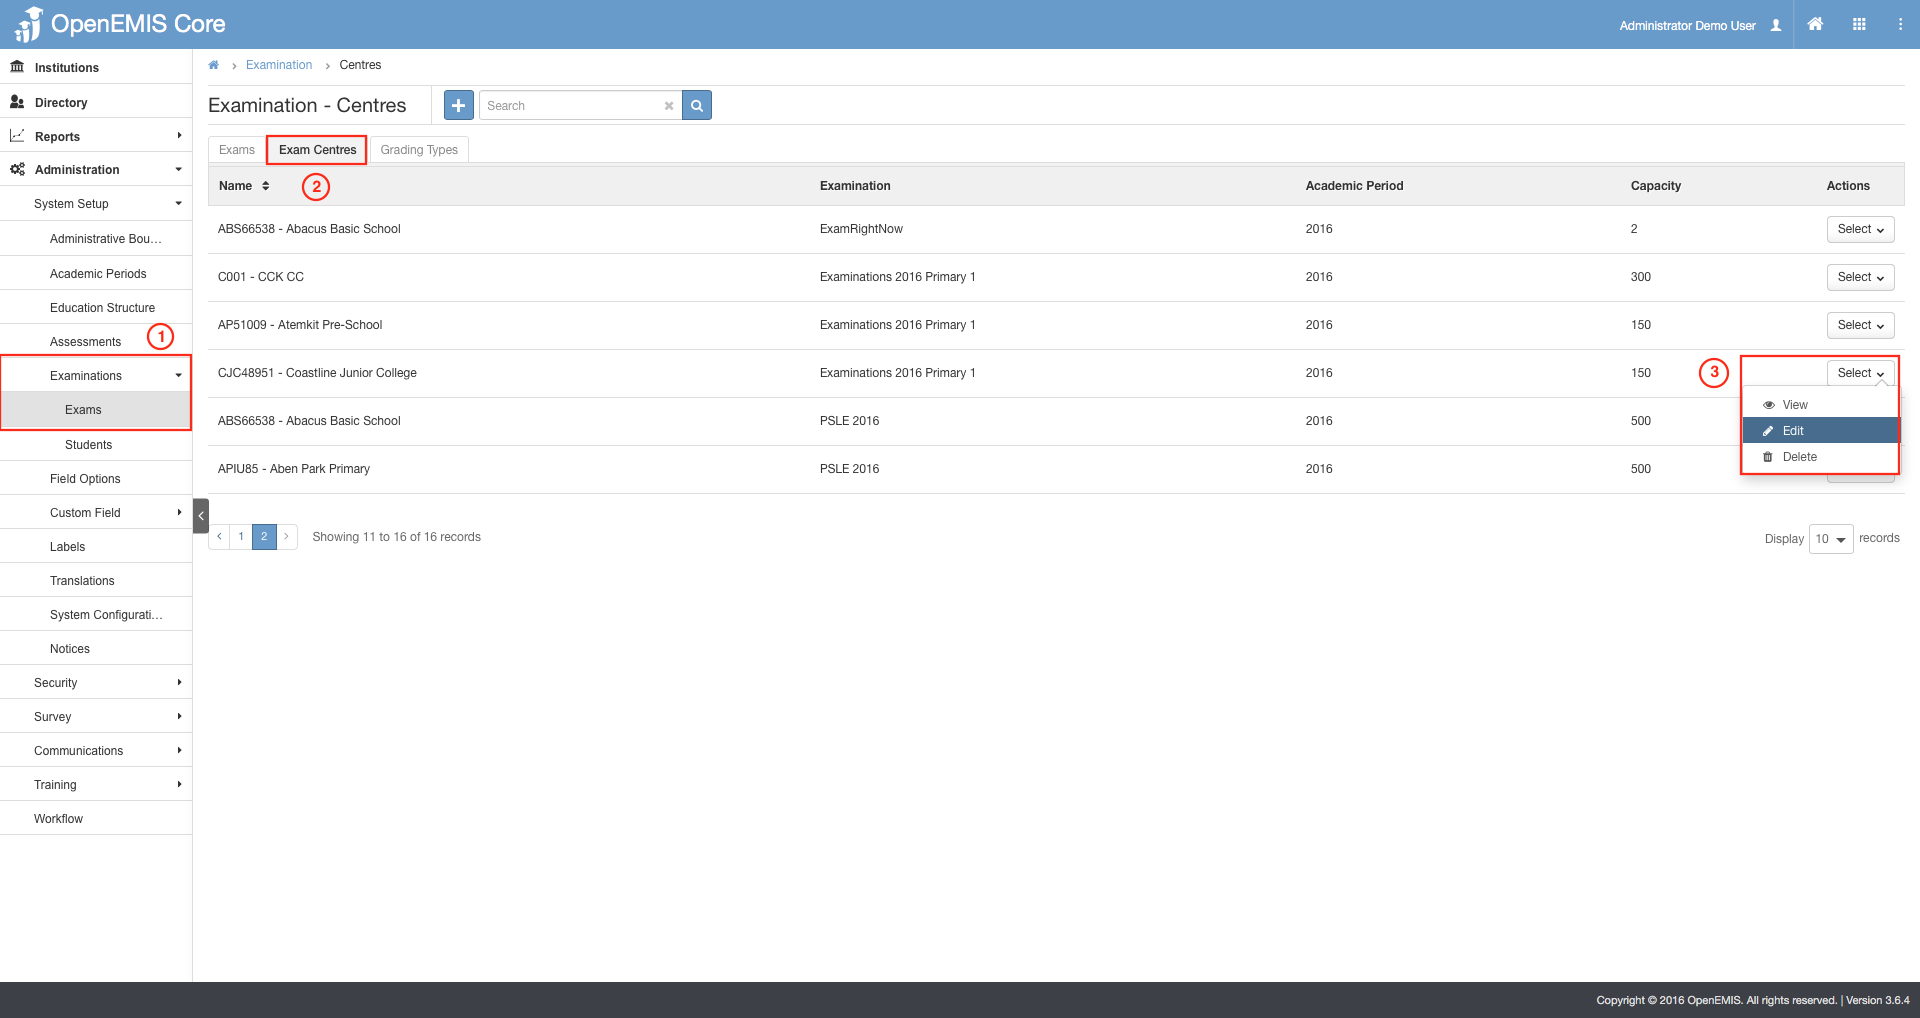
1) Go to Administration > System Setup > Examination > Exams.
2) Select on the Exam Centers tab.
3) Select on the Actions Bar > Edit.
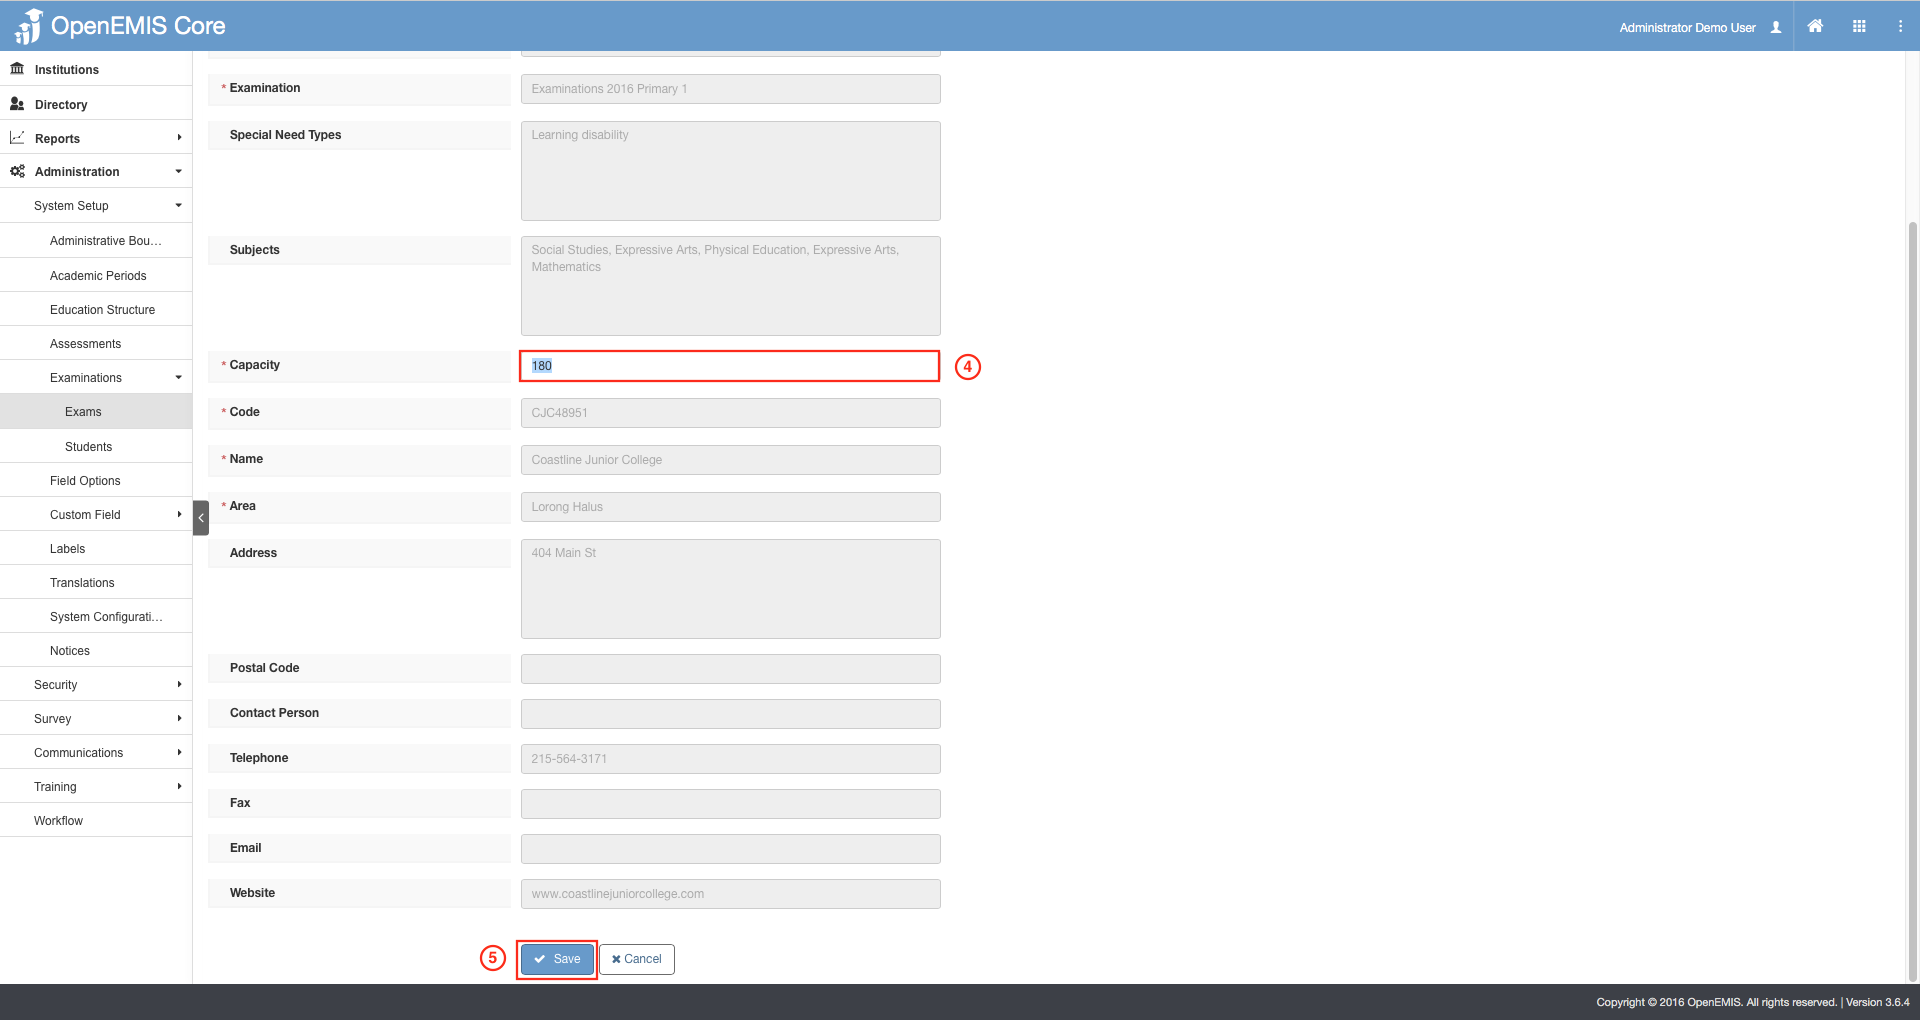
4) Make your amendments.
5) Select on Save.
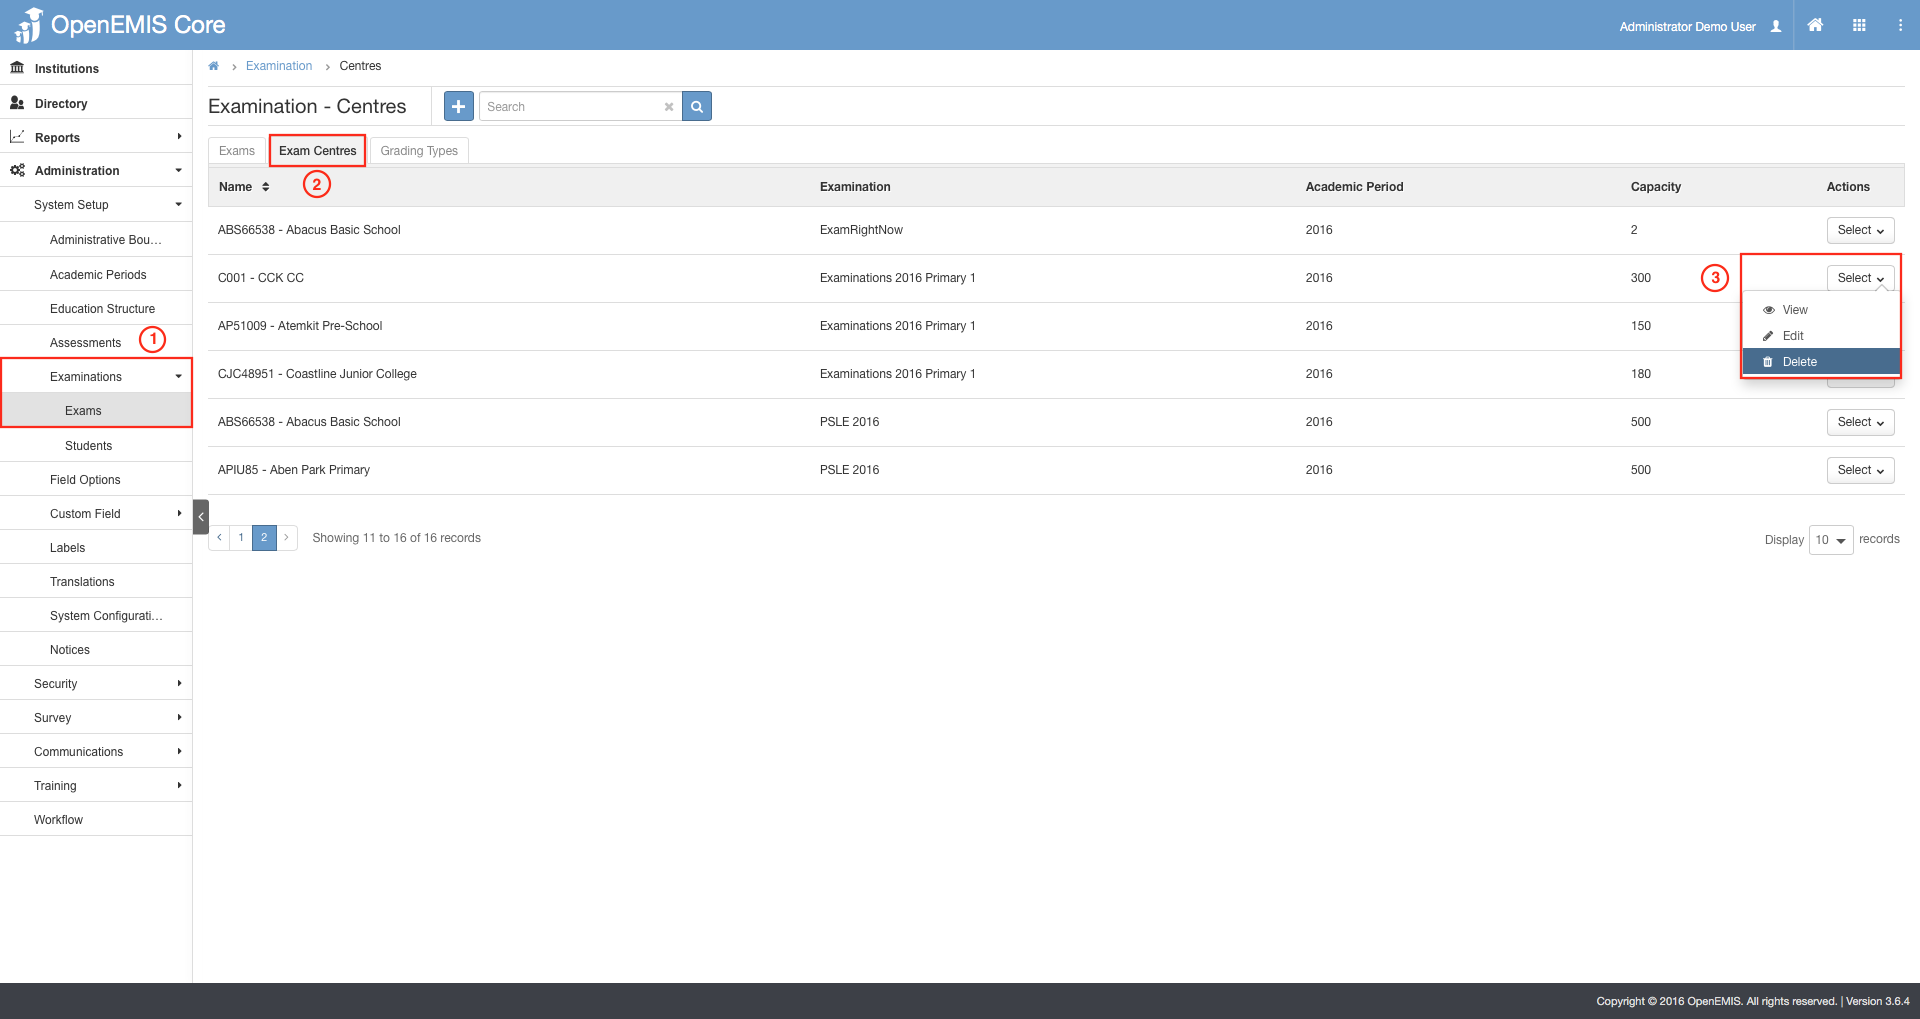
1) Go to Administration > System Setup > Examination > Exams.
2) Select on Exam Centers tab.
3) Select on the Actions Bar > Delete.

4) It will display all the associated records that is link to the deleted exam record.
5) Select on Save.
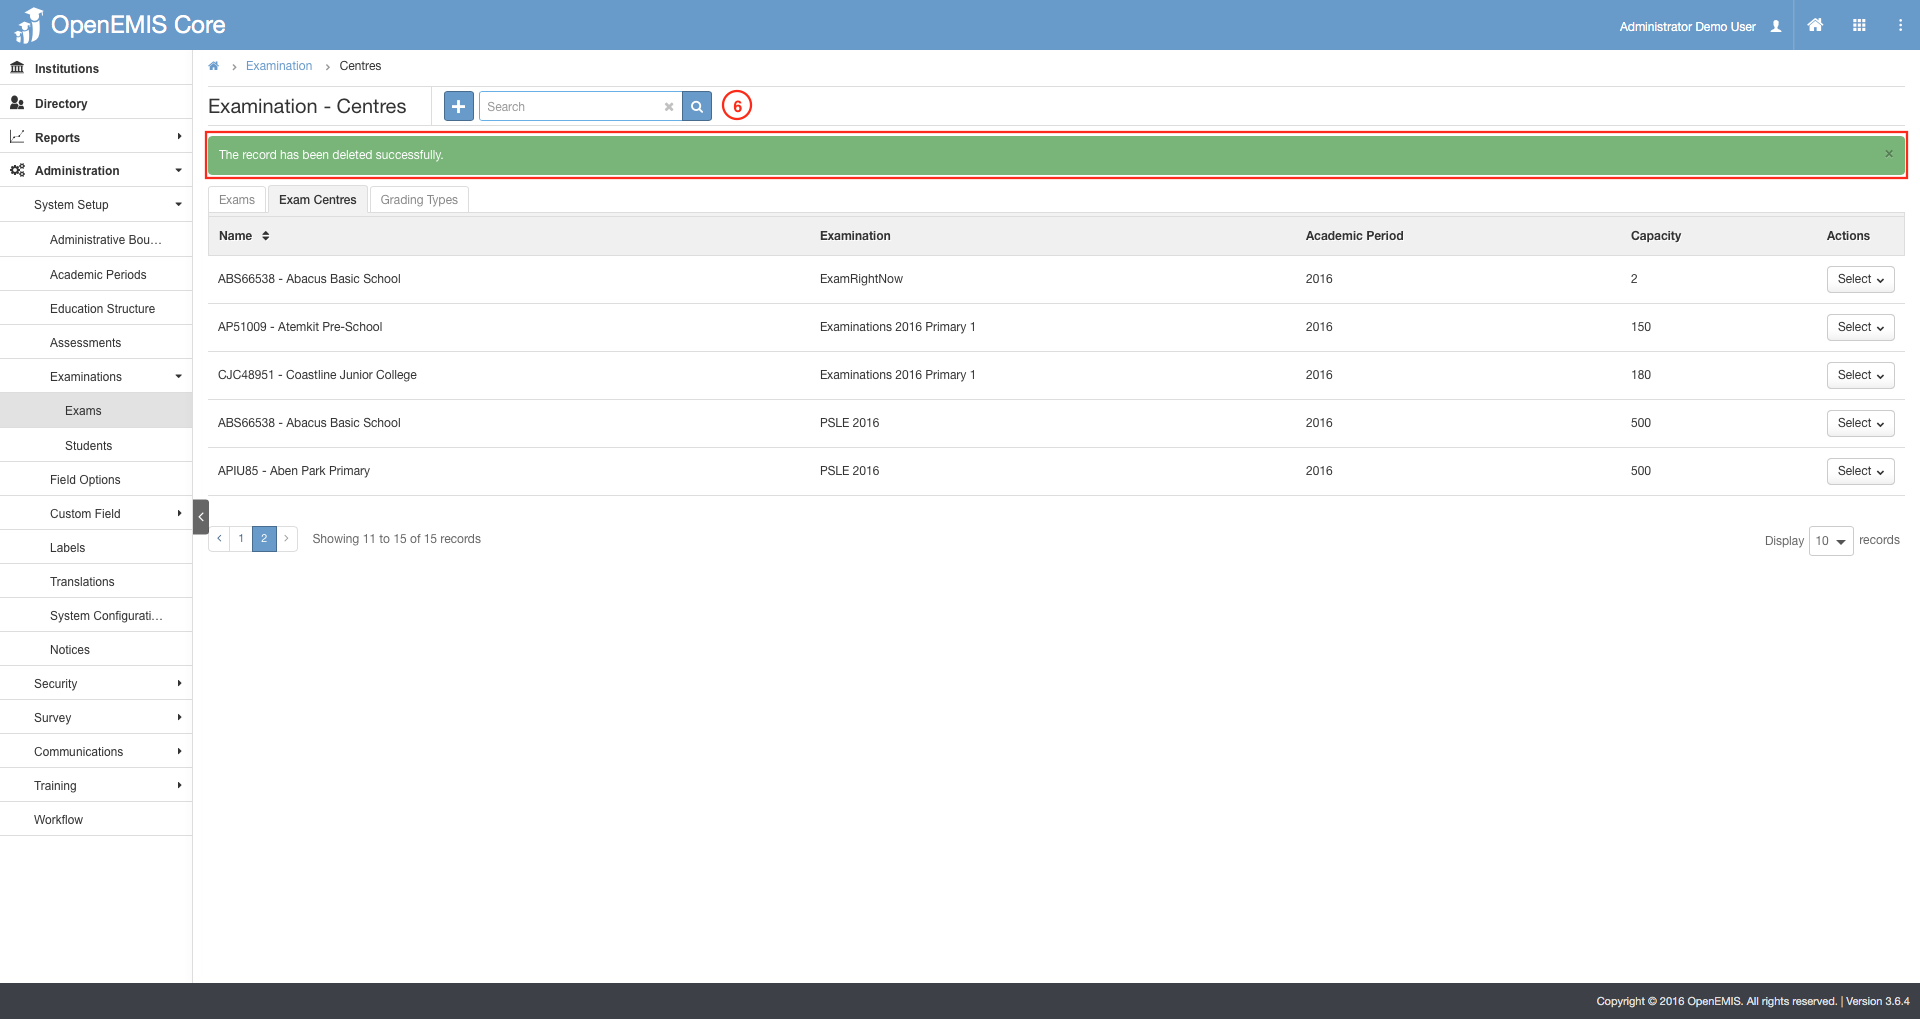
6) A successful message will be displayed upon deletion.
View Registered/Unregistered Students:
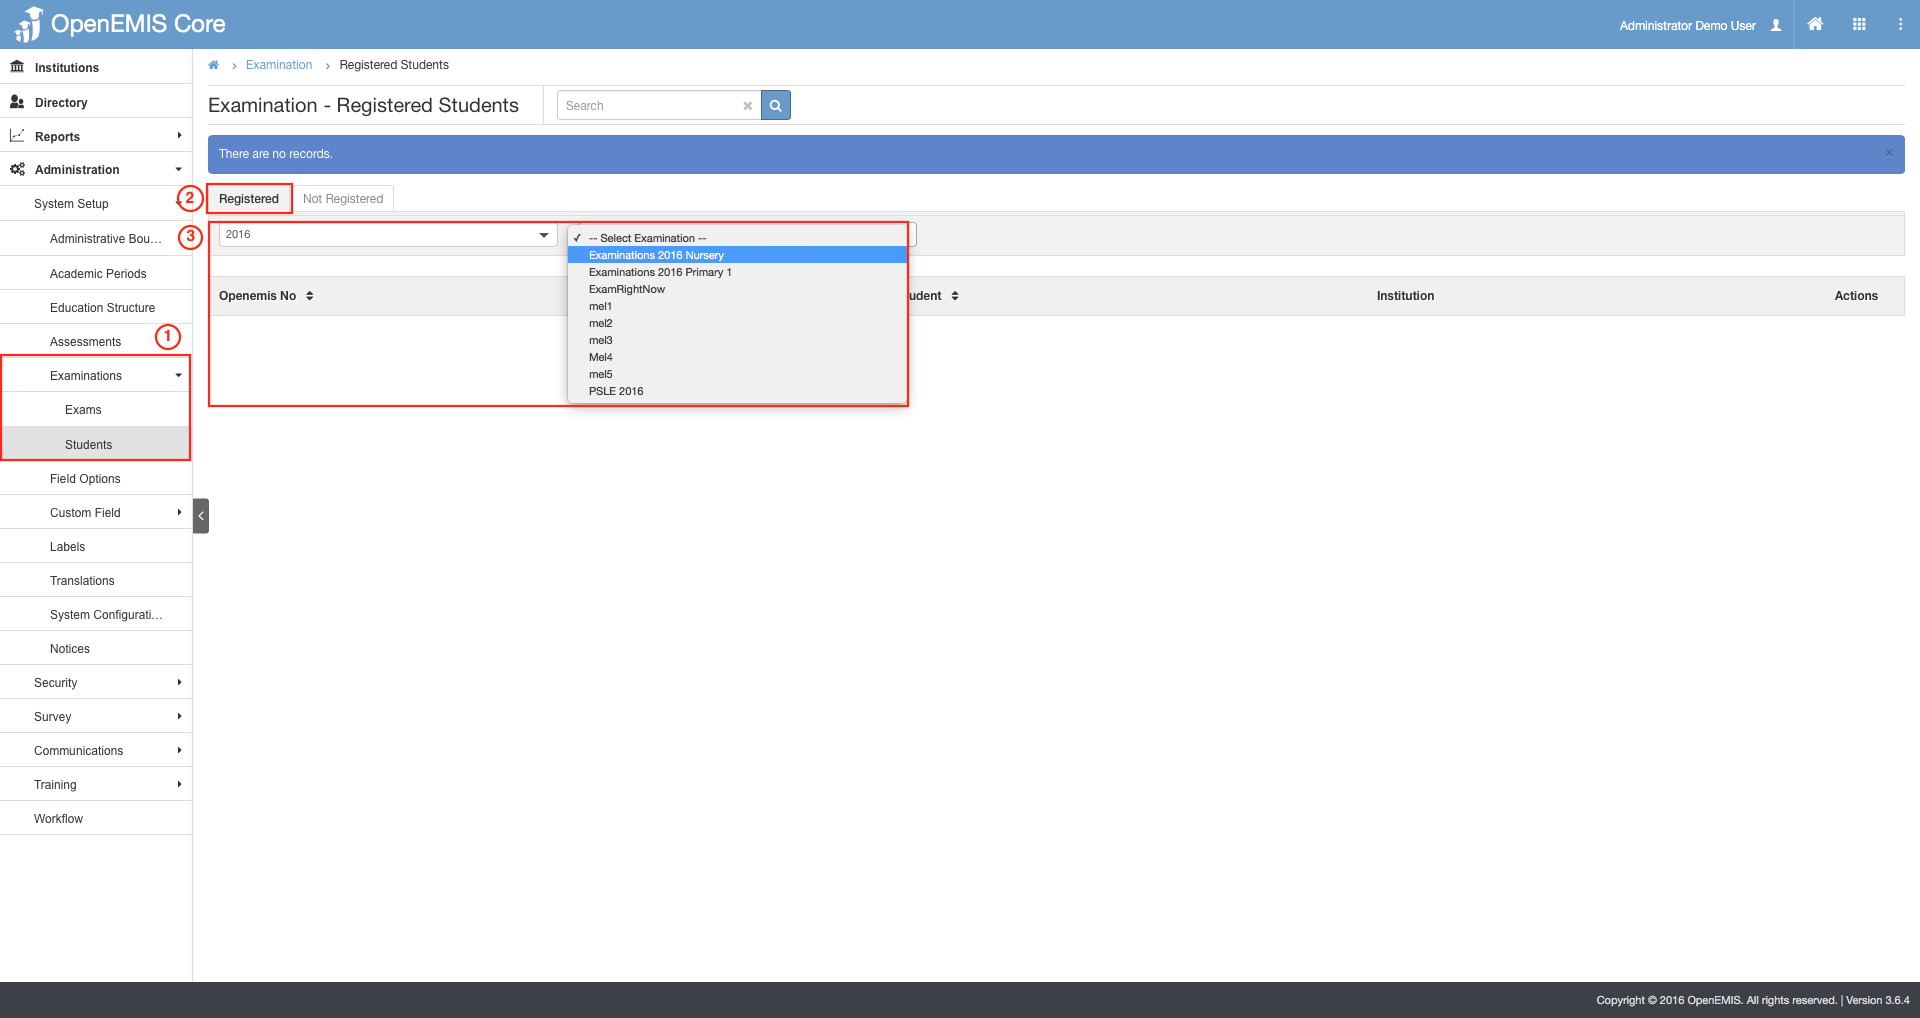
1) Go to Administration > System Setup > Examination > Students.
2) By default, the Registered tab is selected.
3) You can filter according to Academic Period and Examinations.

4) Records will be displayed according to the filtered options.
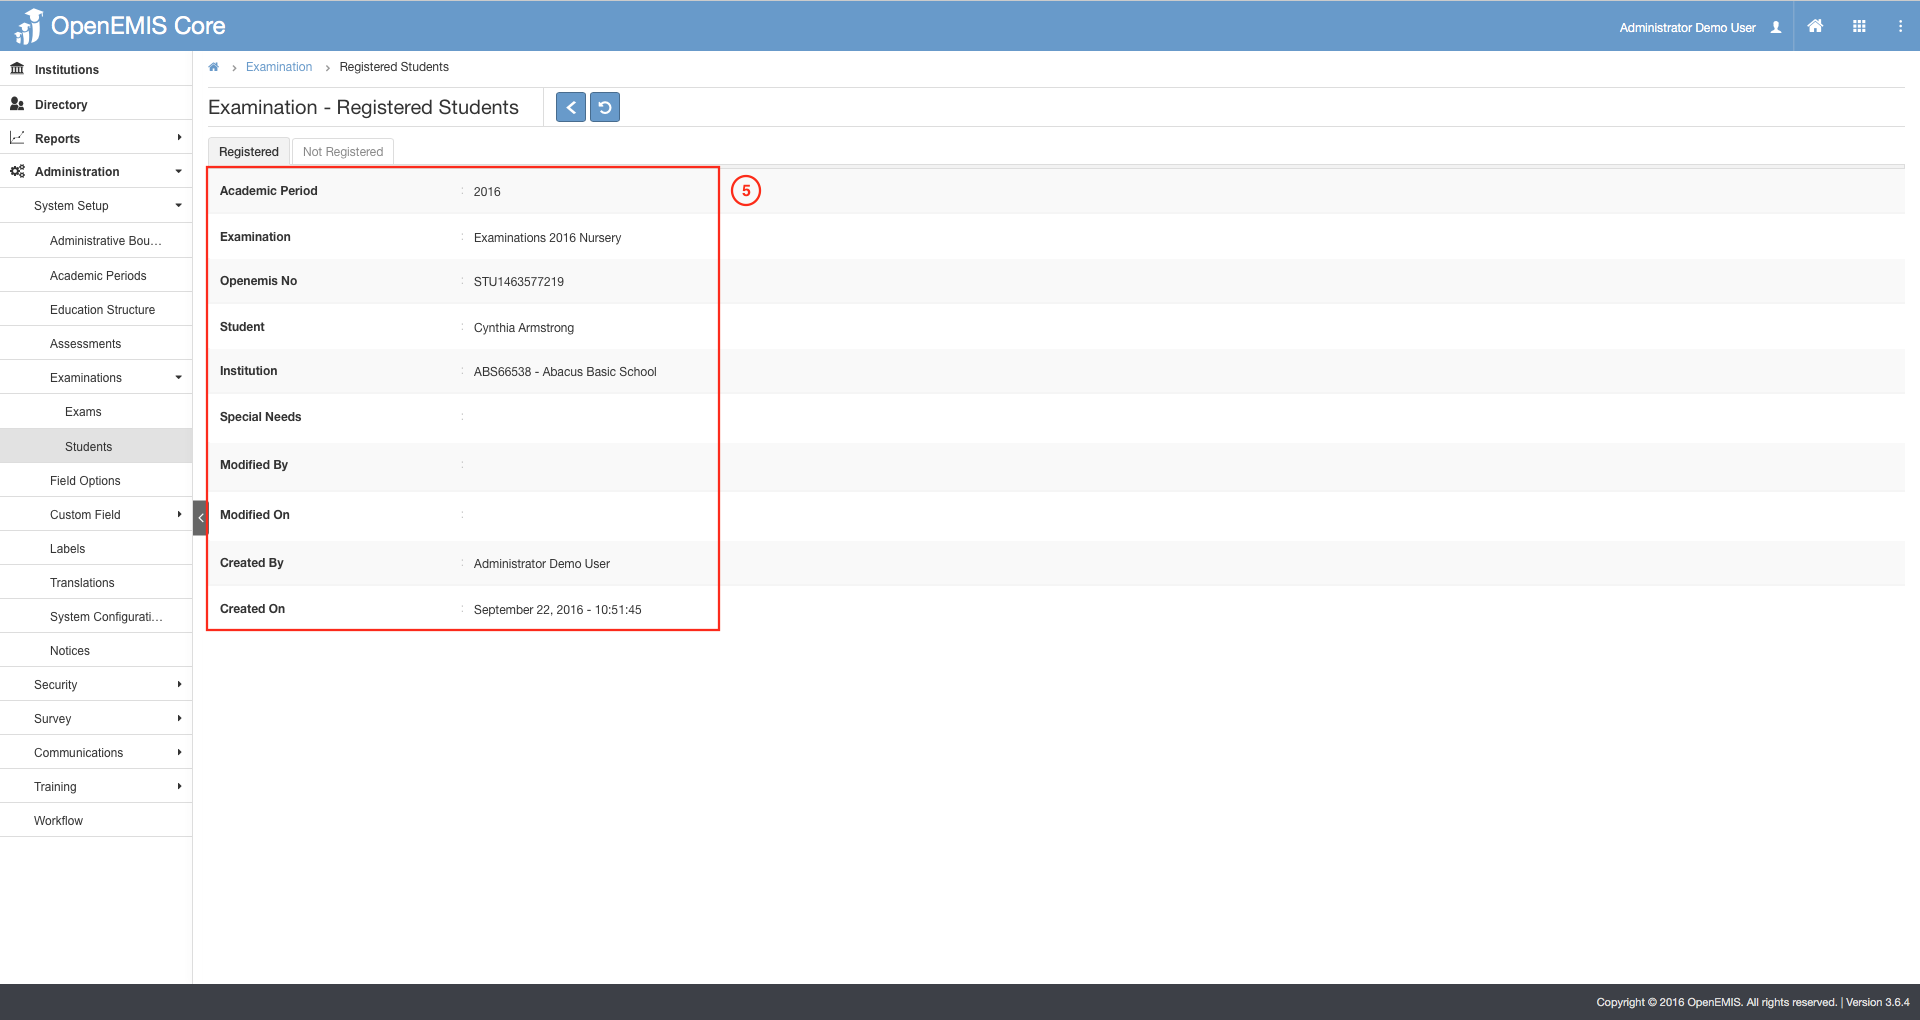
5) For detailed student information, select on the record.
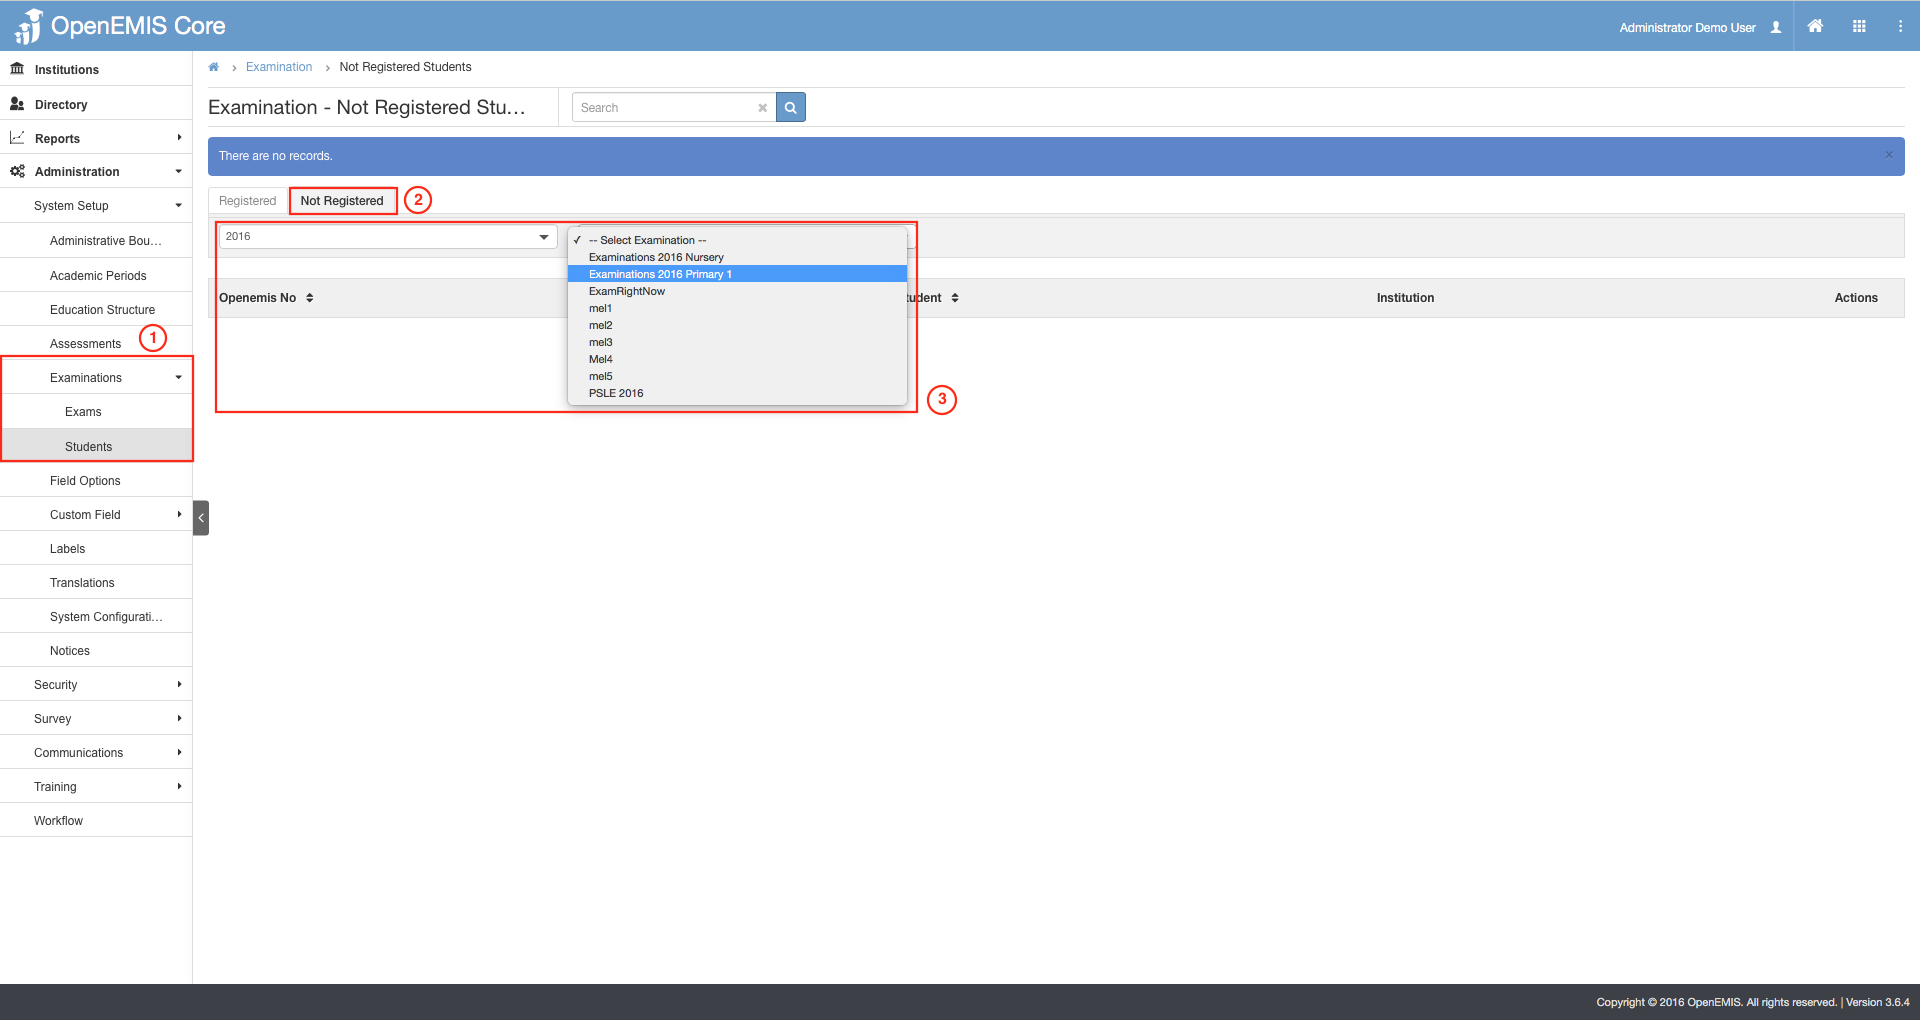
1) Go to Administration > System Setup > Examination > Students.
2) Select the Not Registered tab.
3) You can filter according to Academic Period and Examinations.
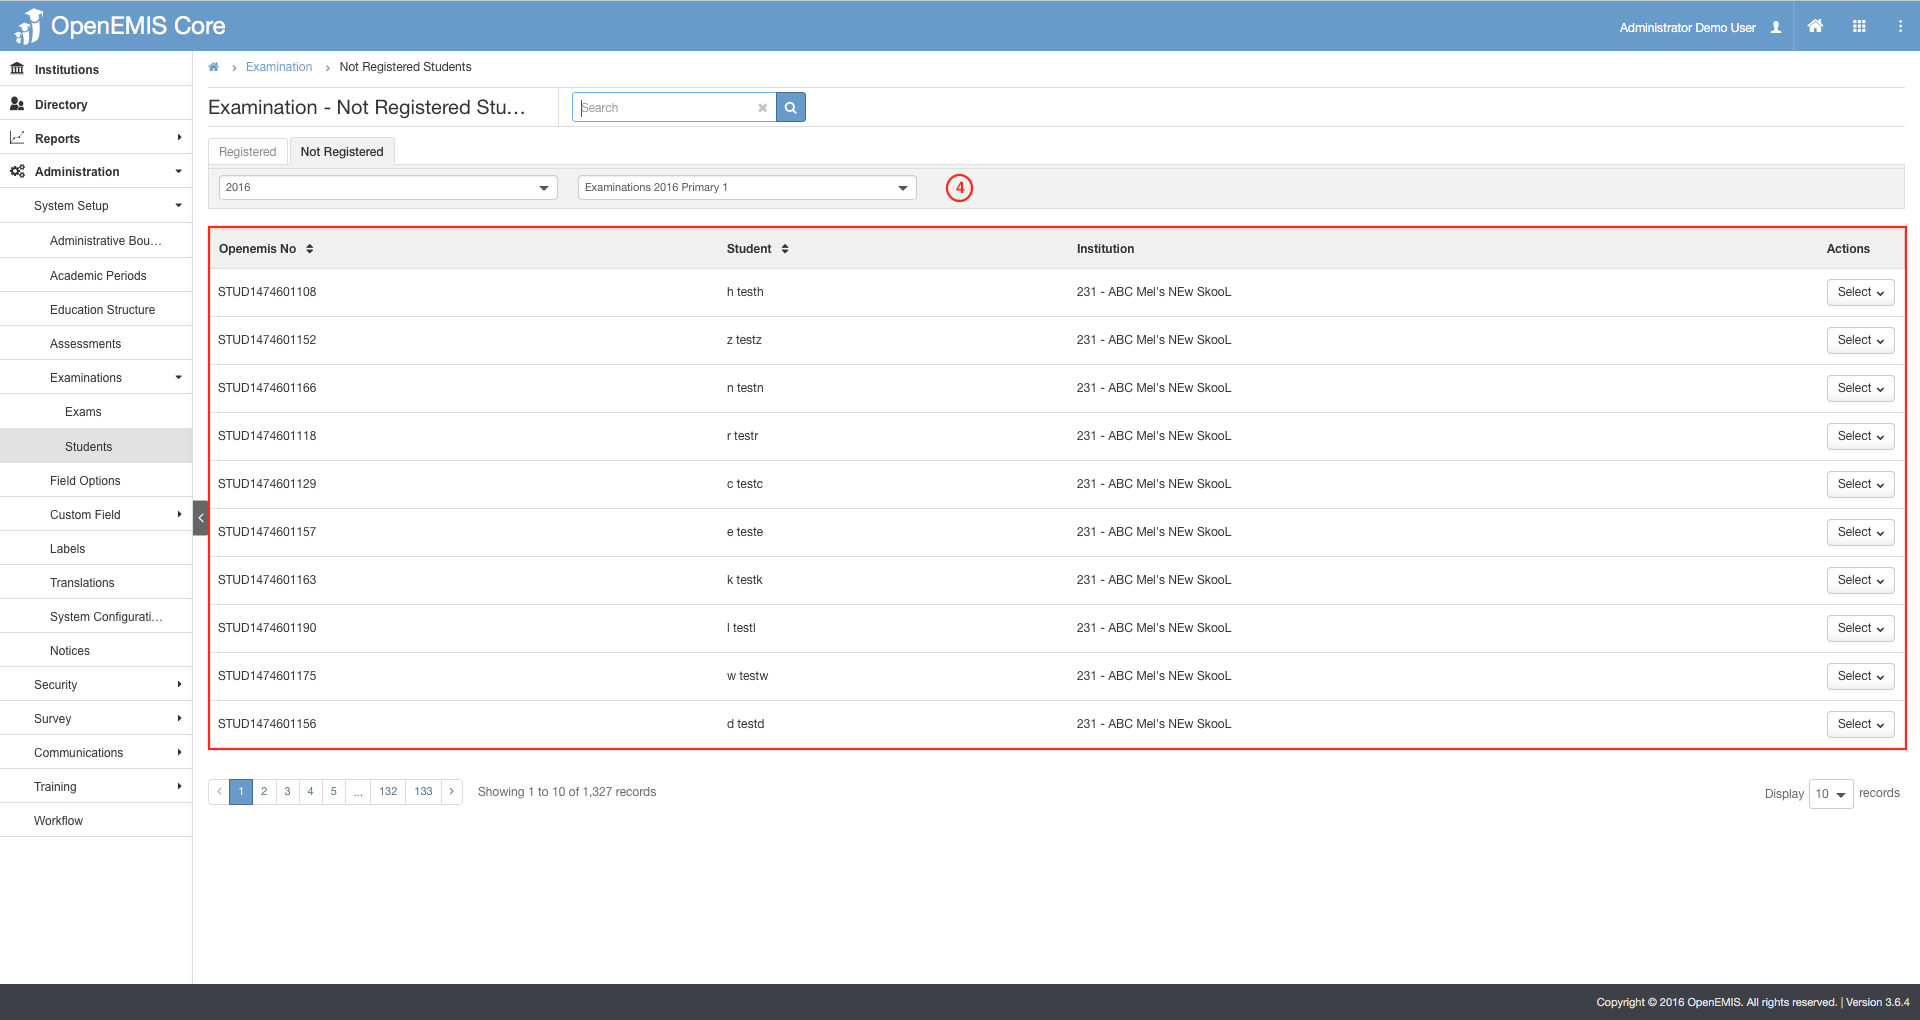
4) Records will be displayed according to the filtered options.

5) For detailed student information, select on the record.
Staff
Examination Records

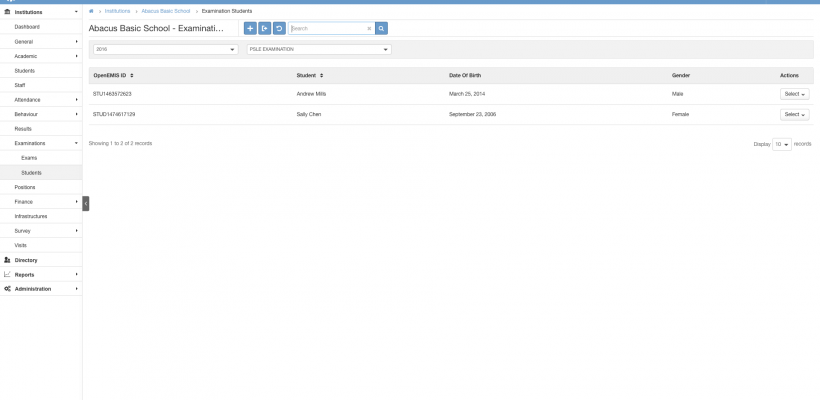
1) Go to Institutions > (Search and select your institution) > Examination > Exams.
2) All the Exam Records are being displayed in the table.
3) You can filter the records by the Academic Period and Examination.
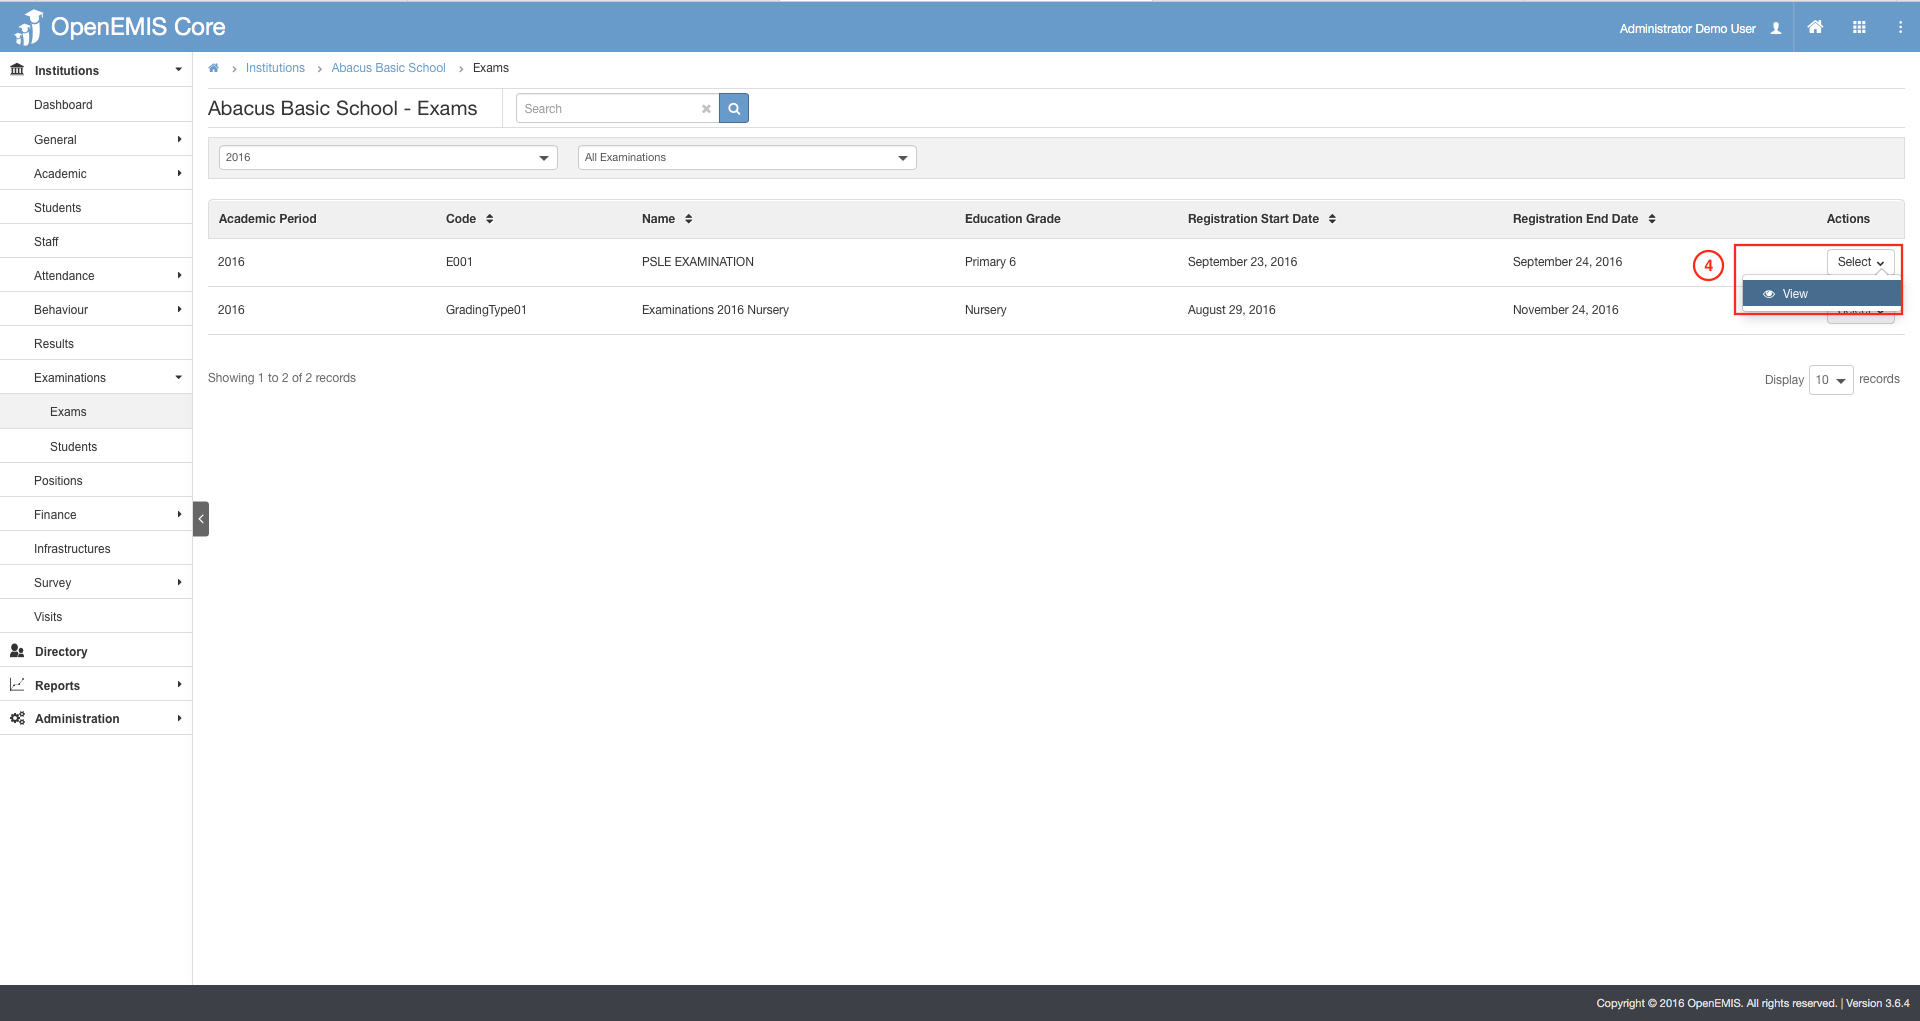
4) To view additional information, Go to Action Bar > View

5) Details of the Examination will be displayed.
Student Registration
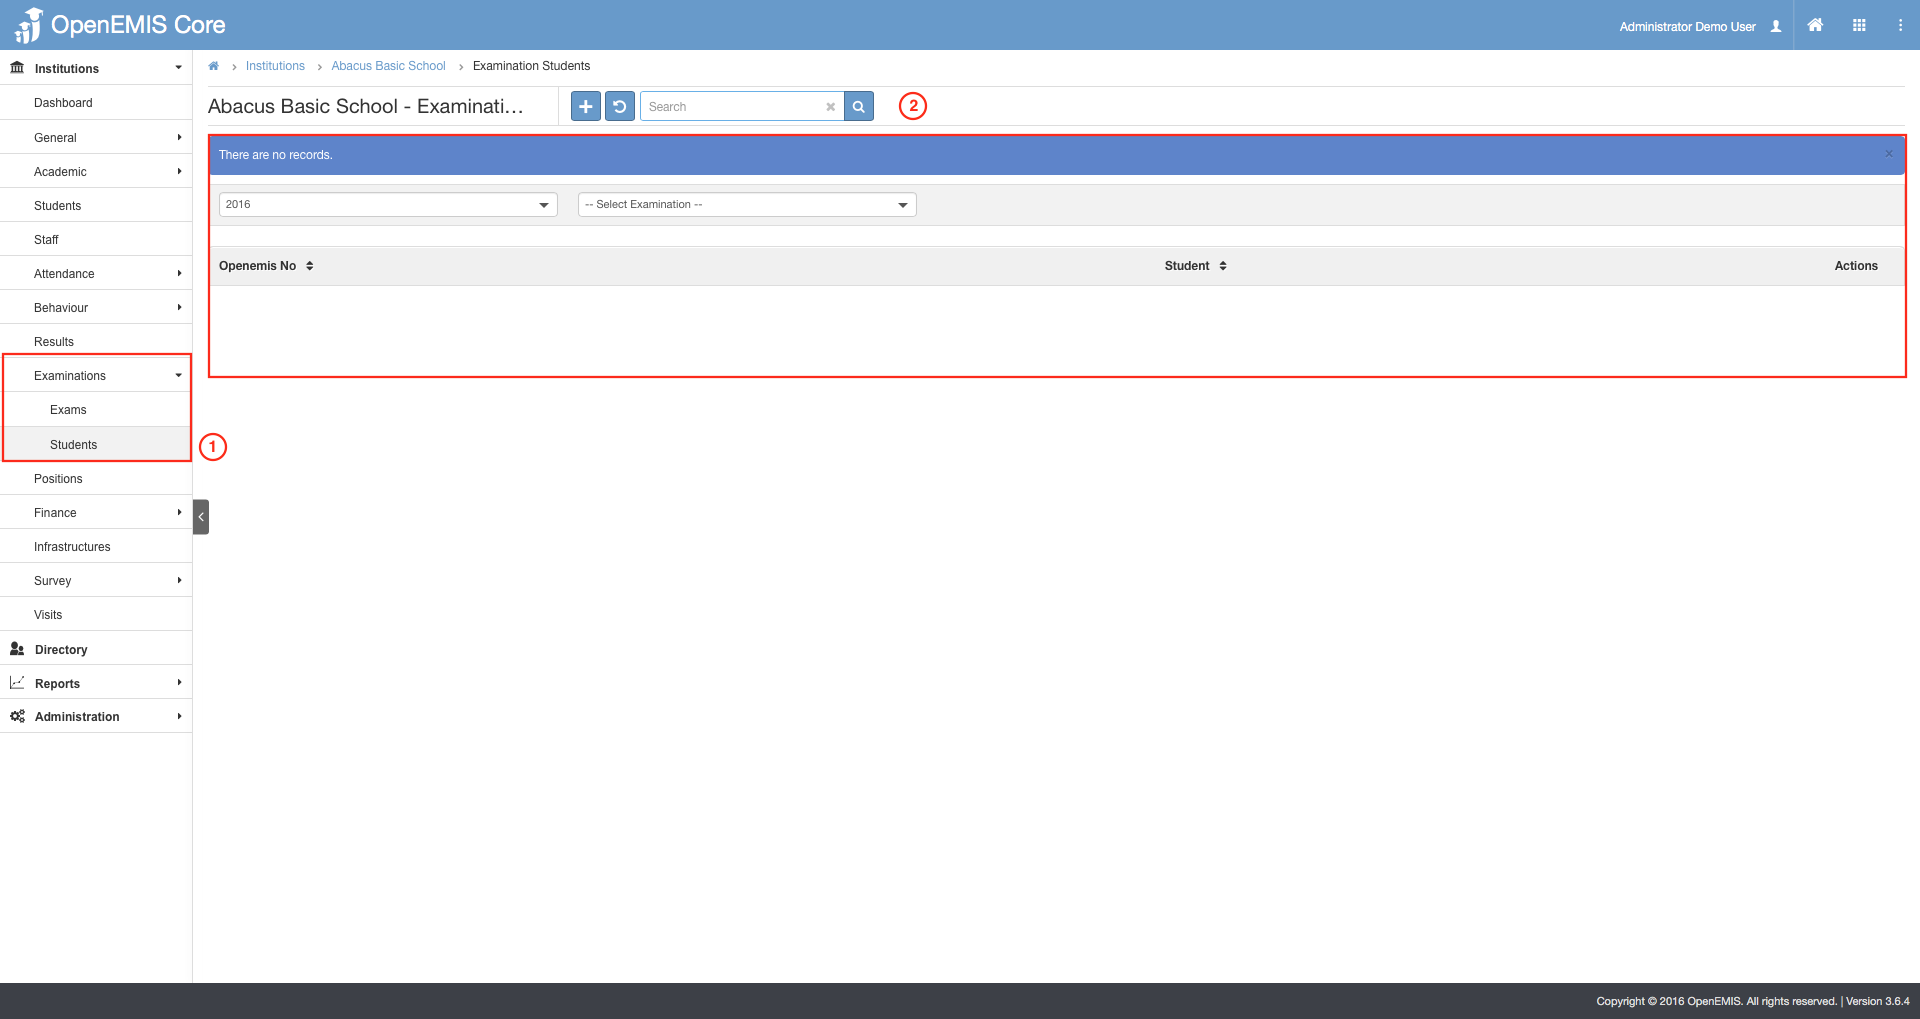
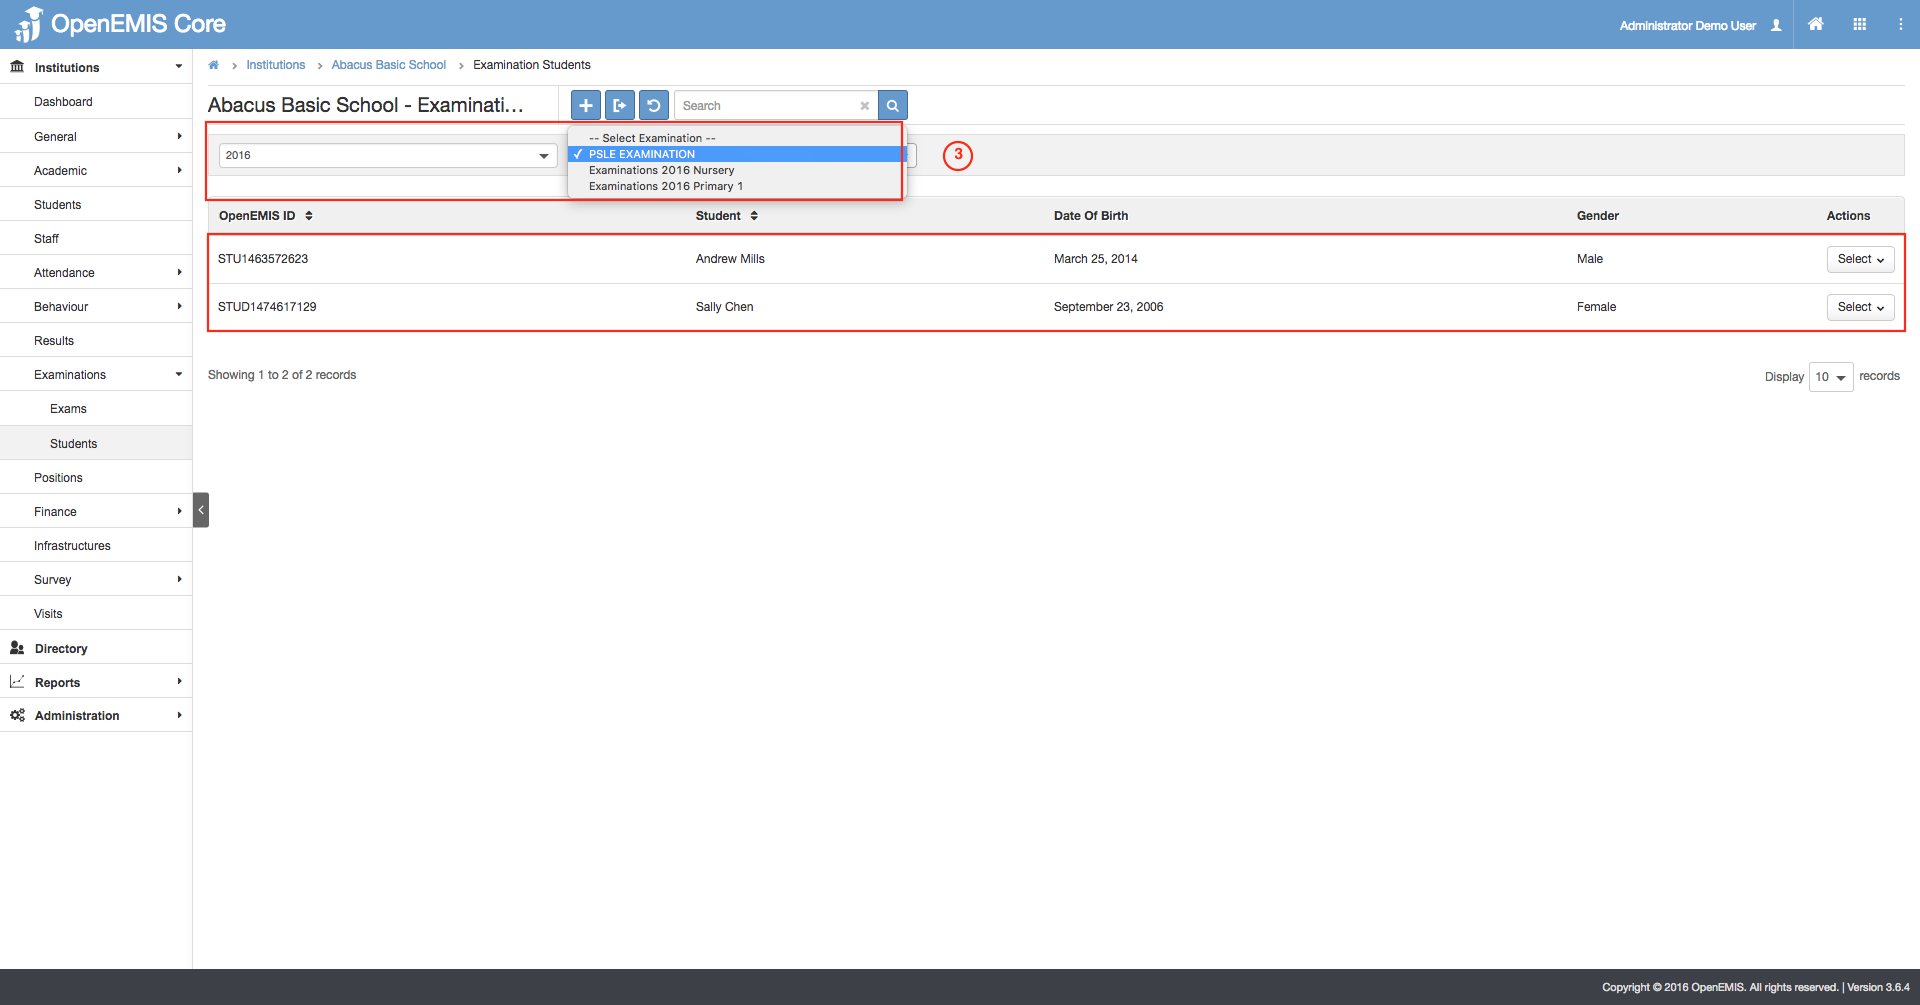
1) Go to Institutions > (Search and select your institution) > Examination > Students.
2) By default, no records will be shown.
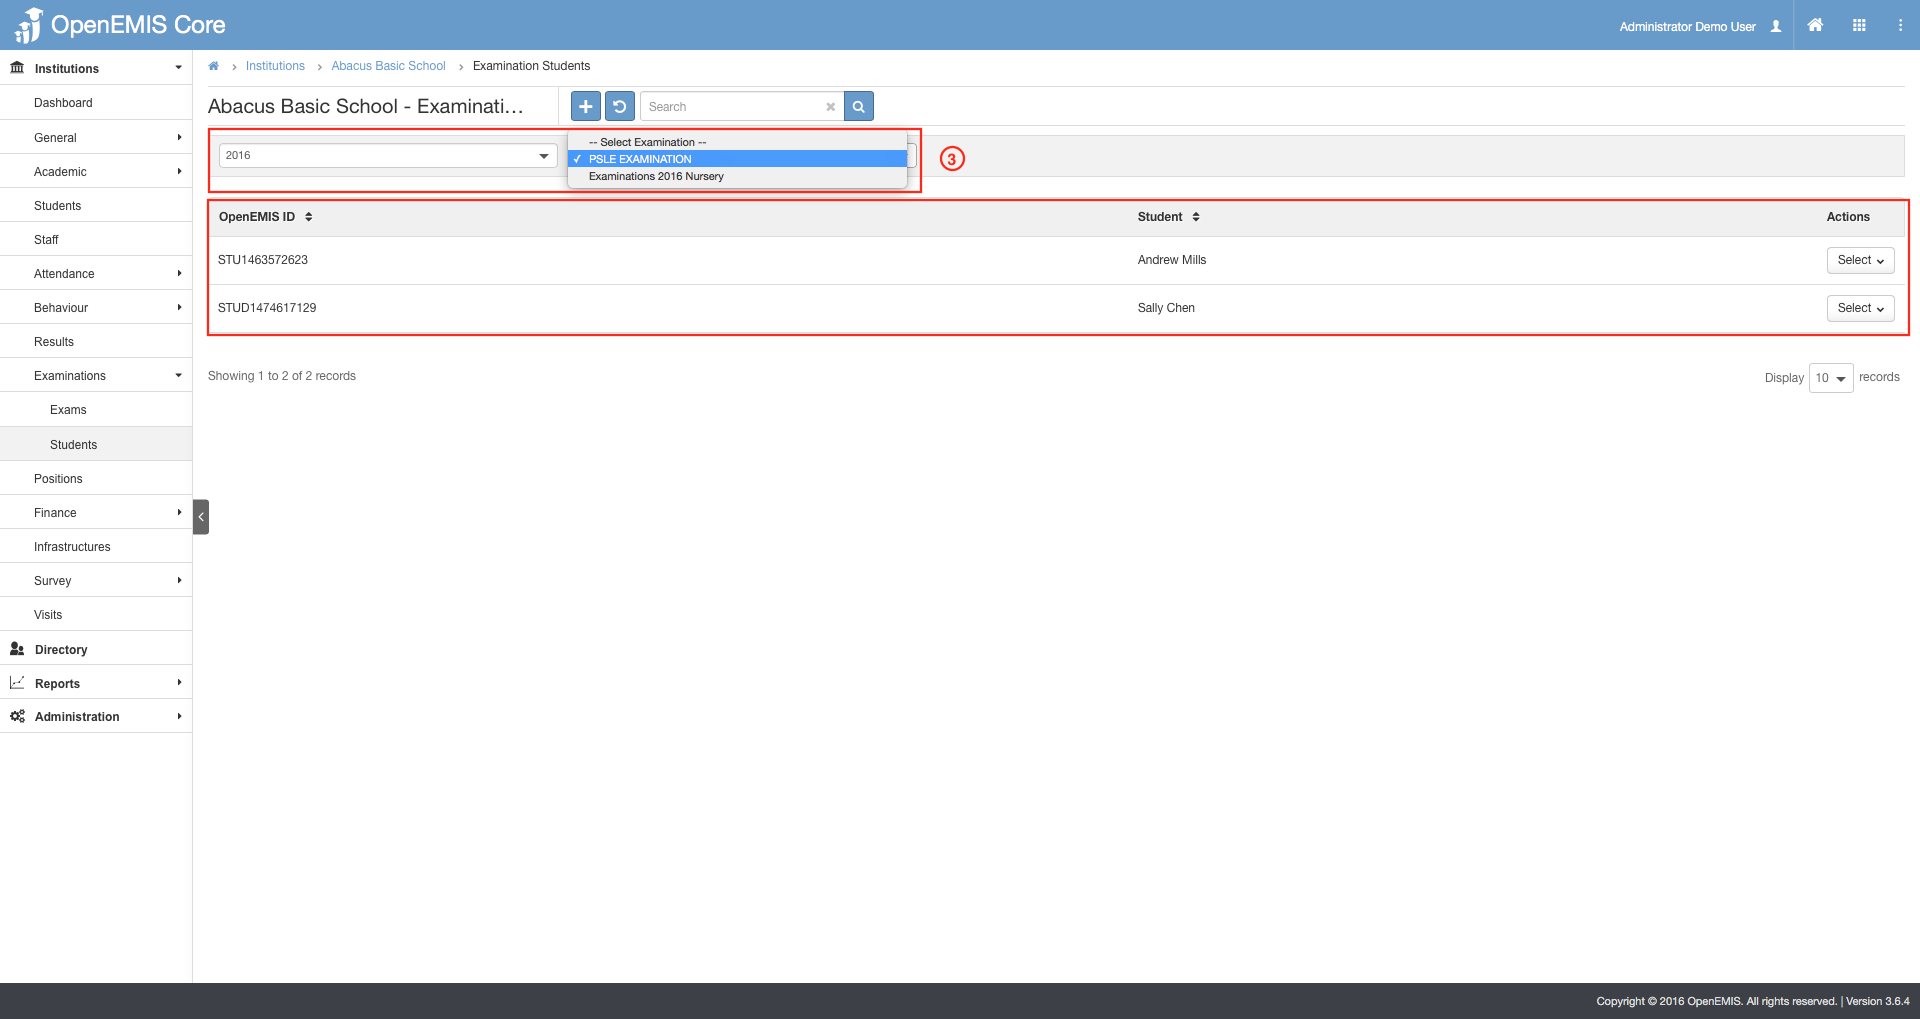
3) To view records, filter according to the Academic Period and Examination.
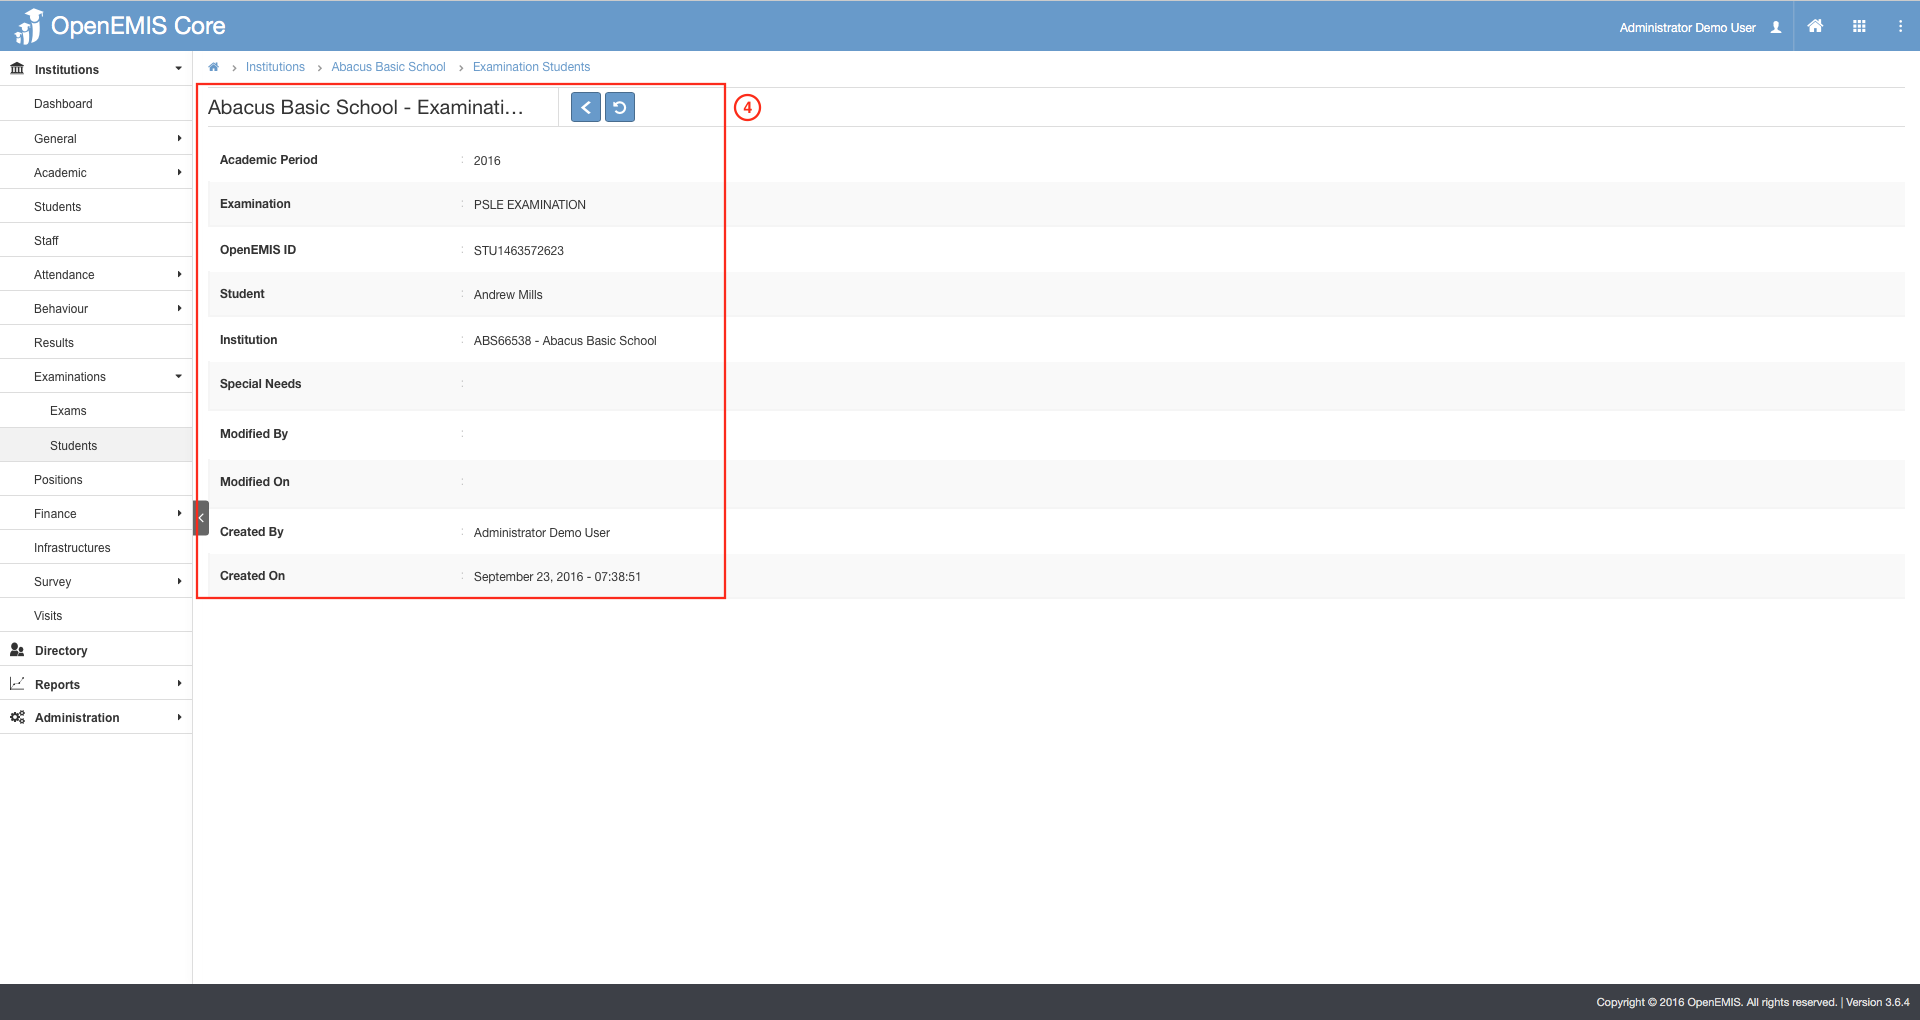
4) View Students Examination Details
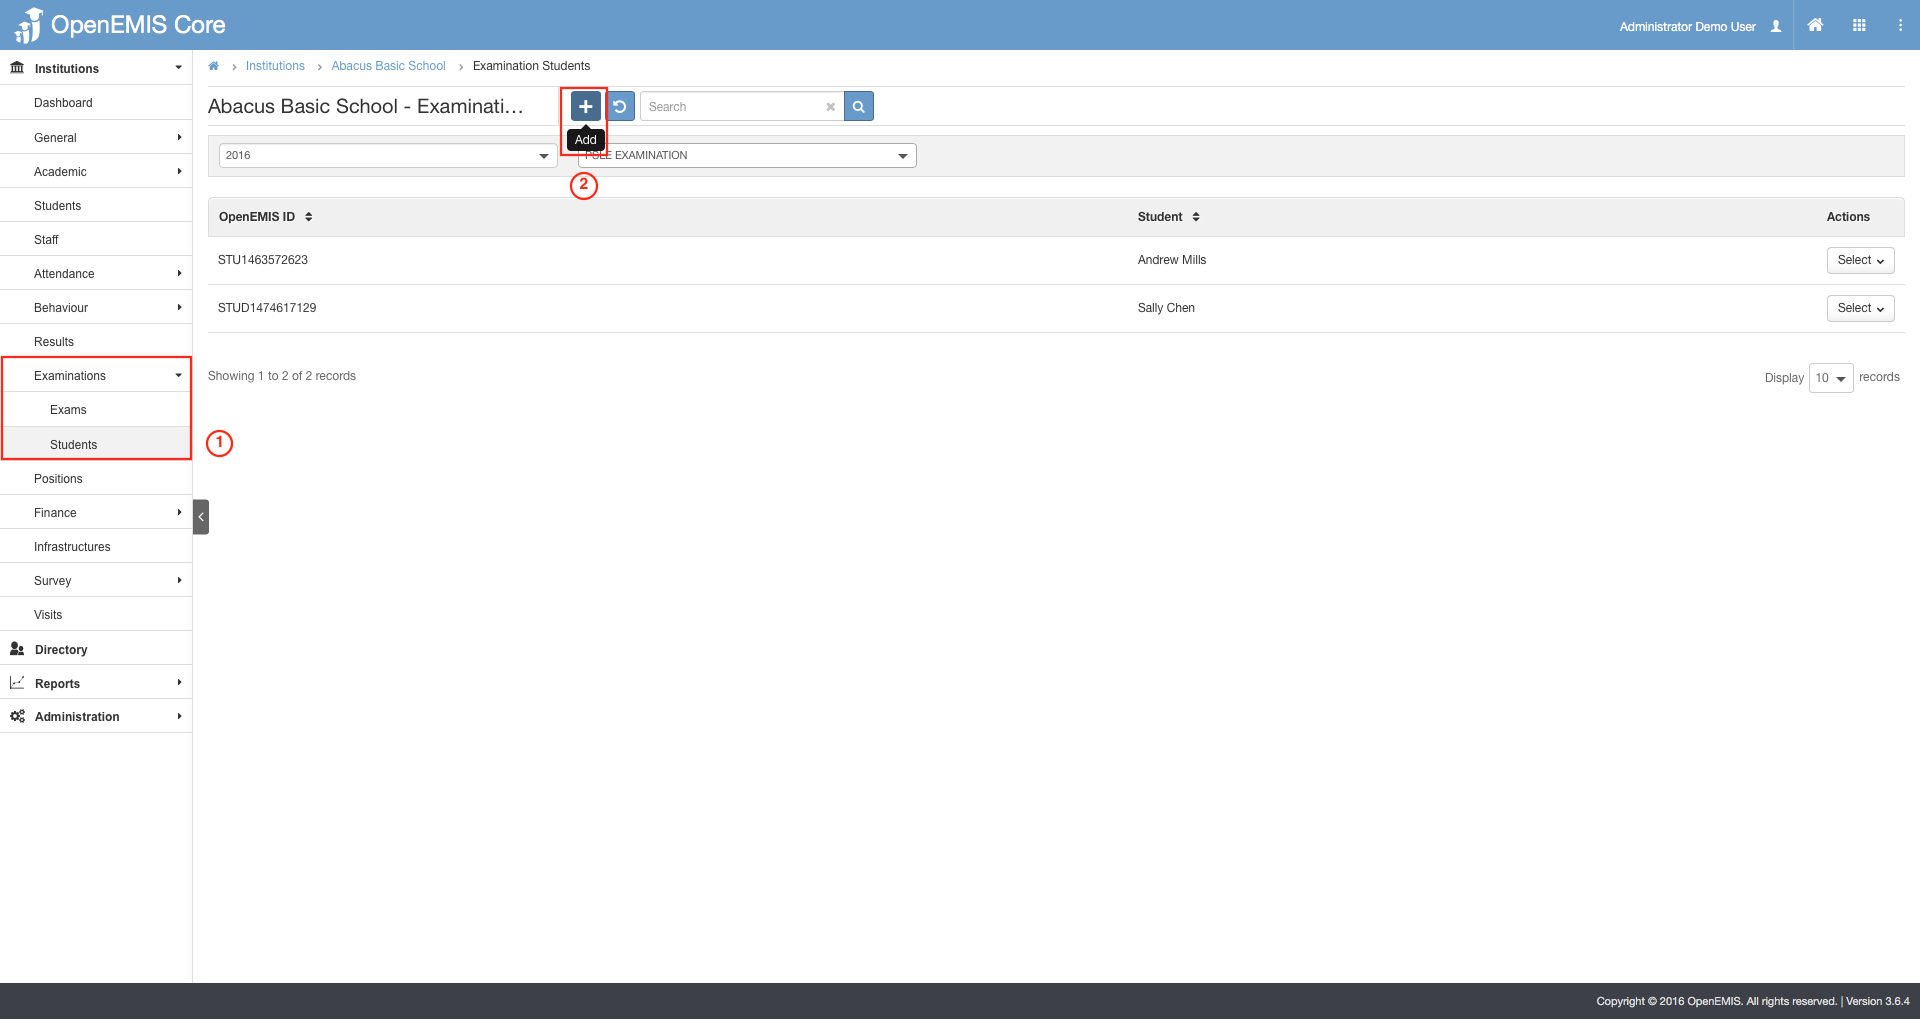
1) Go to Institutions > (Search and select your institution) > Examination > Students.
2) Select on the Add button.
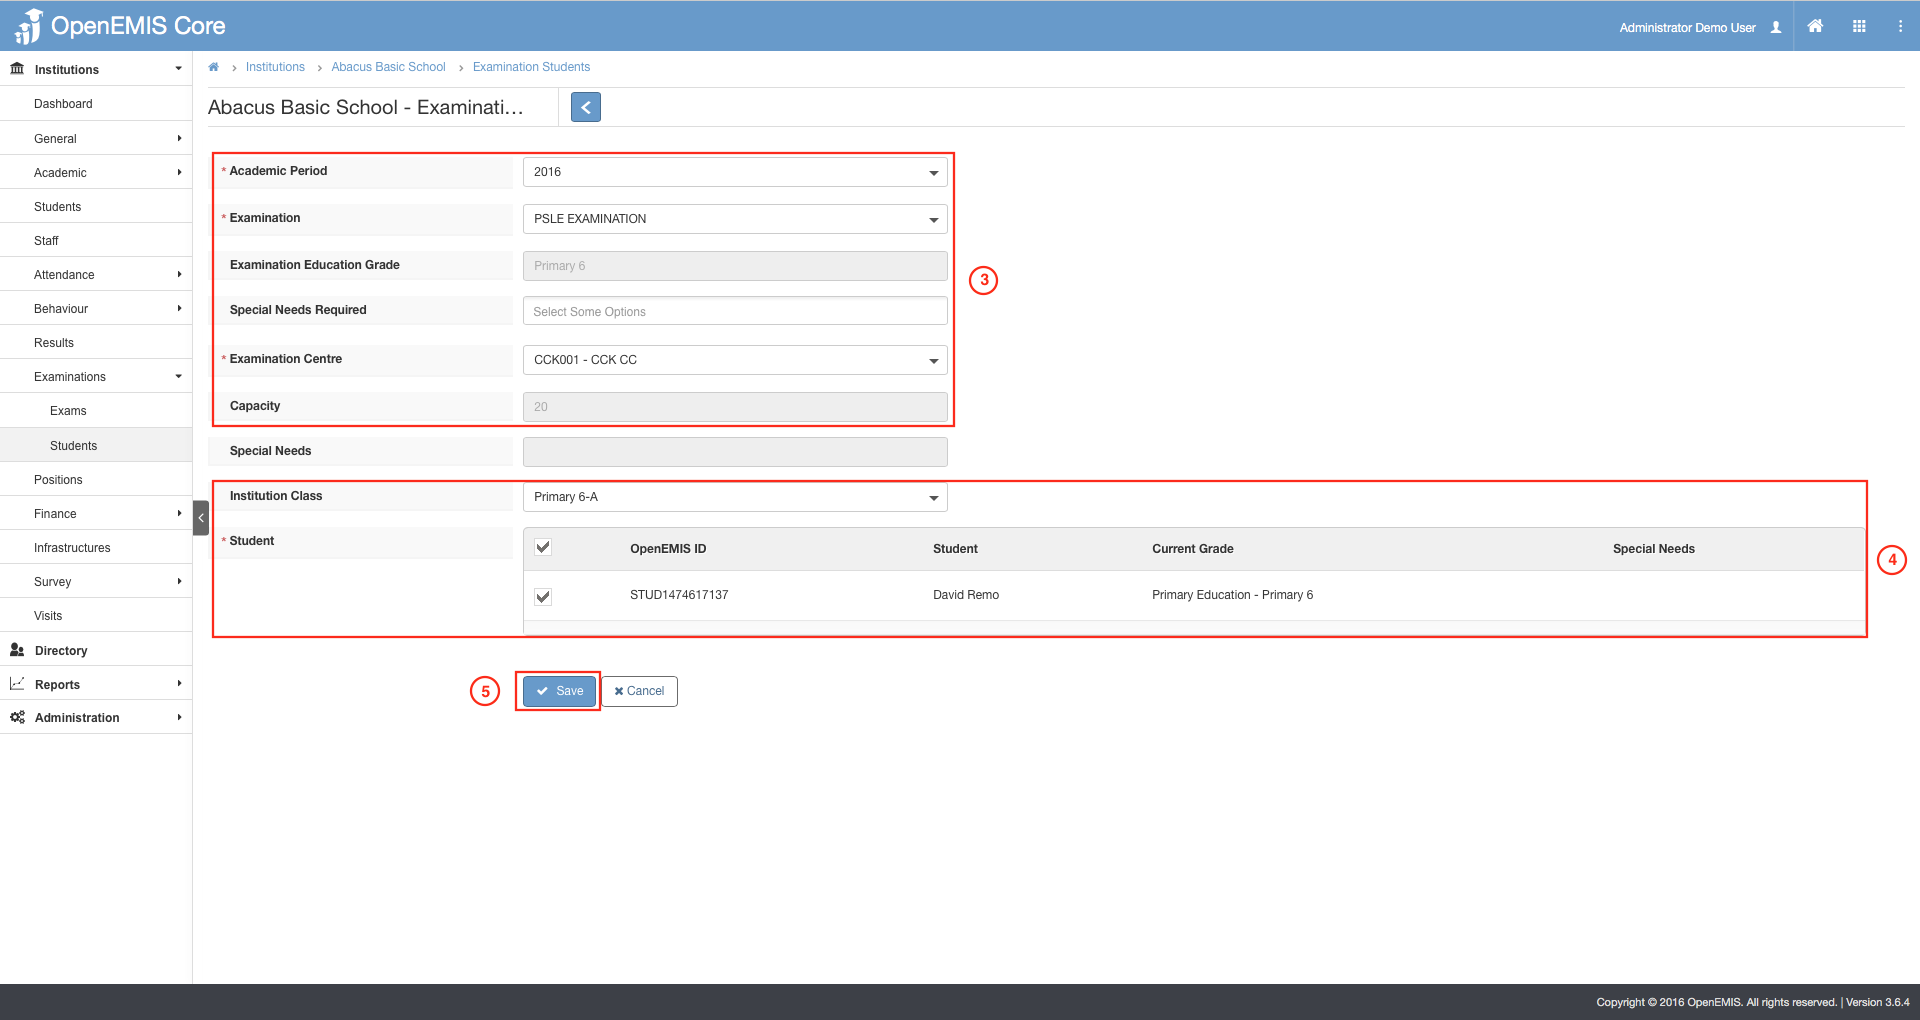
3) Specify the Academic Period, Examination,Examination Center and etc. The Education Grade and Capacity will be auto-displayed accordingly to the fields specified.
4) The Students will be displayed upon the selection of Institution Class. Select the Students that are to be registered.
5) Click on Save.
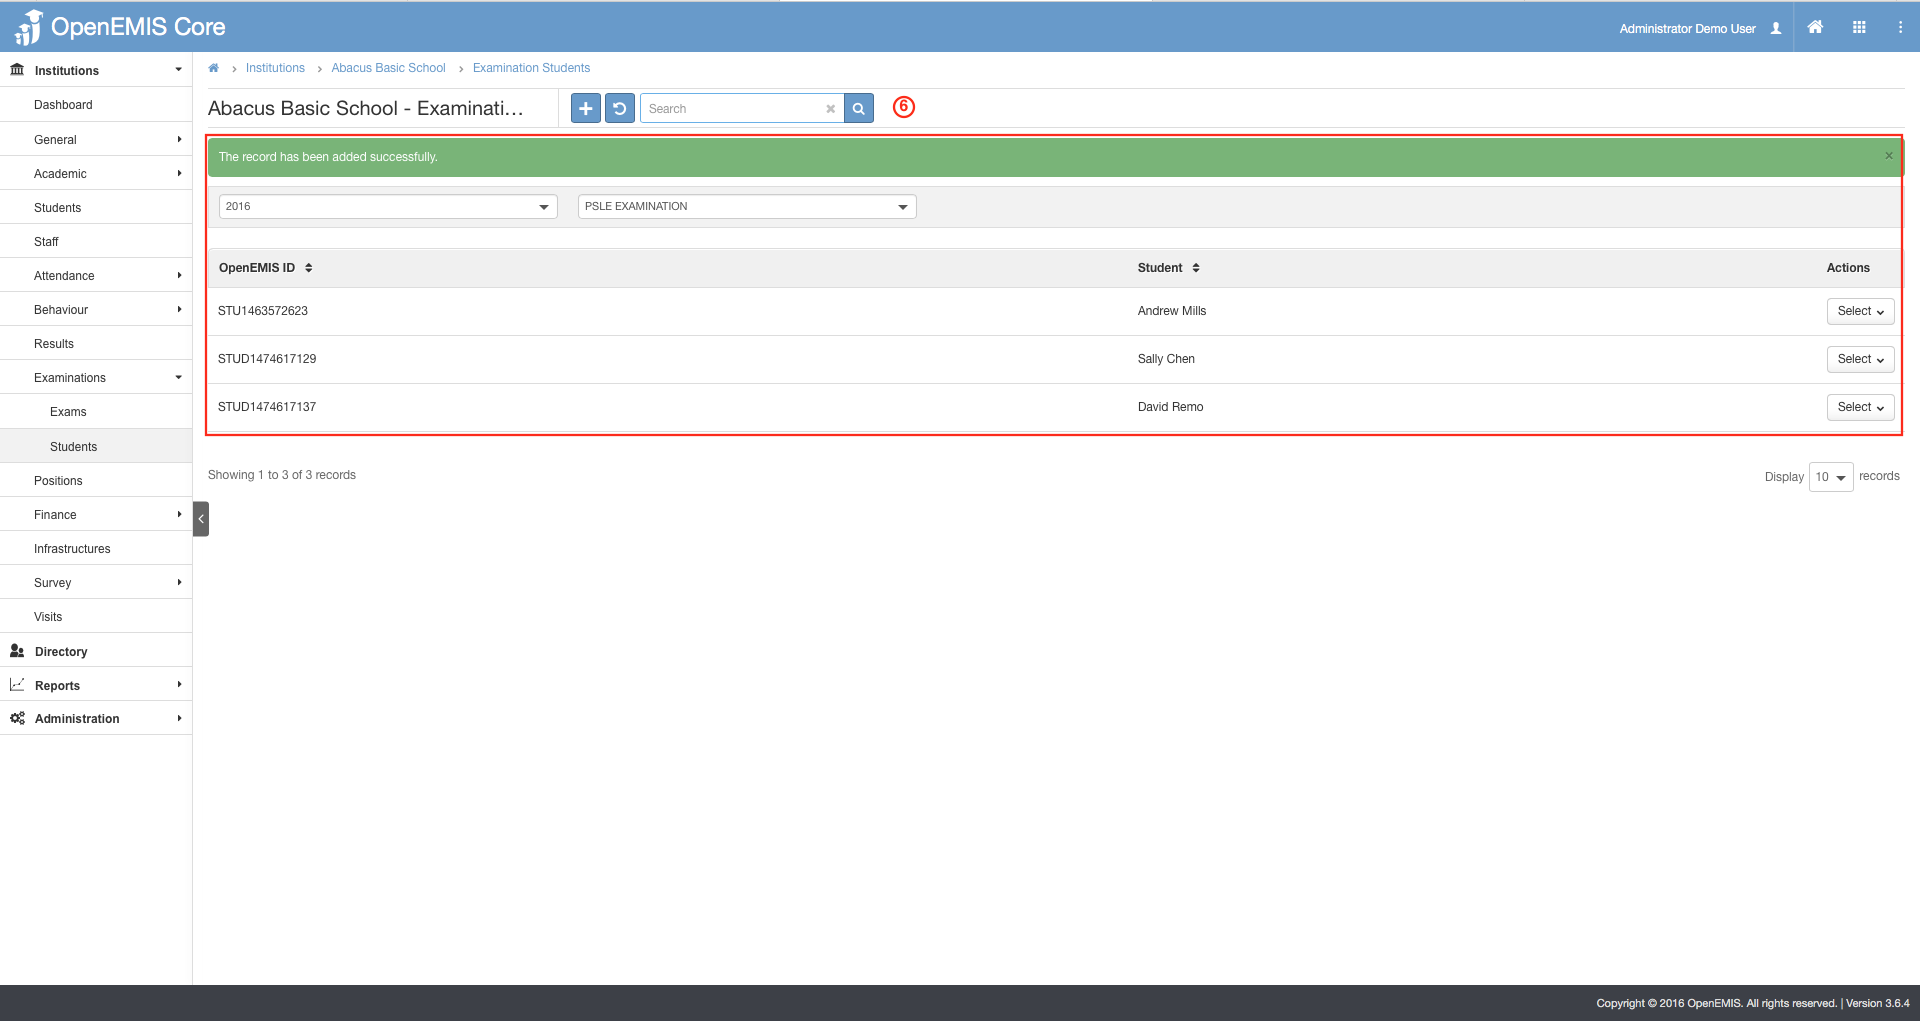
6) Successful message will be displayed upon student registered successfully.
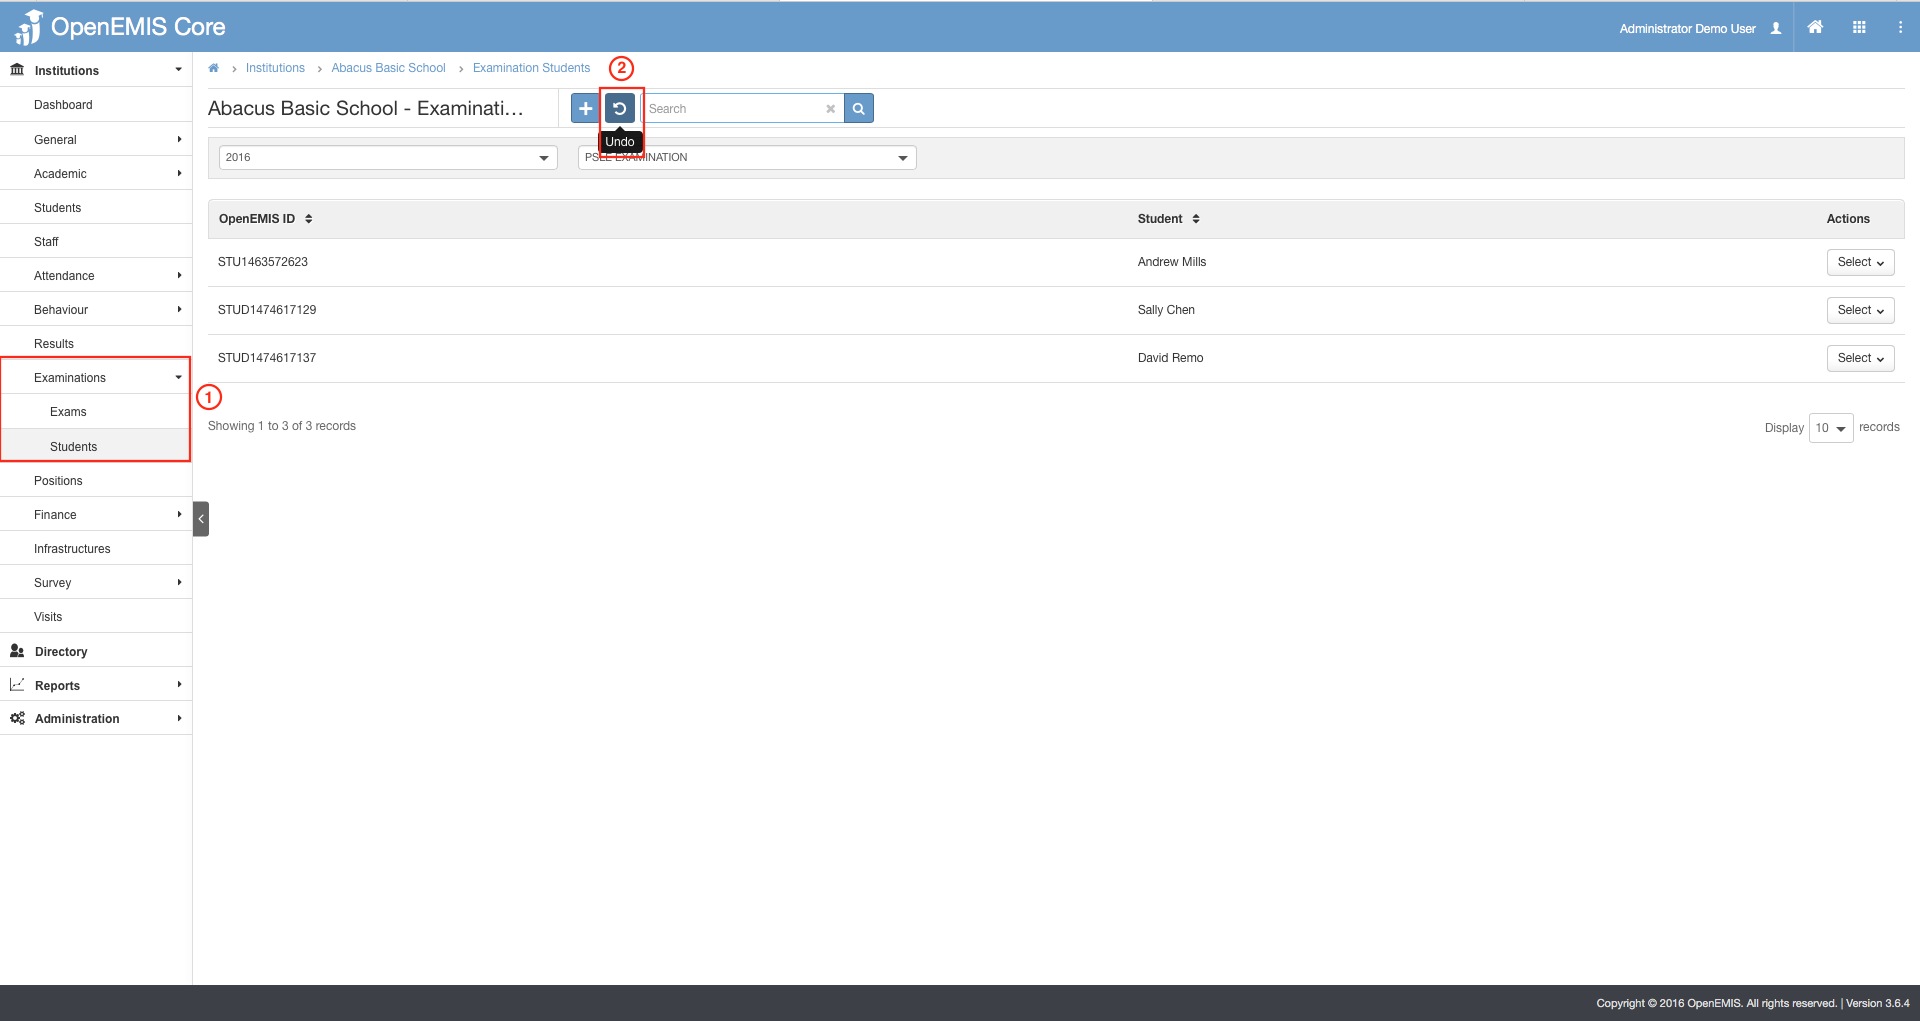
1) Go to Institutions > (Search and select your institution) > Examination > Students.
2) Select on the Undo button.
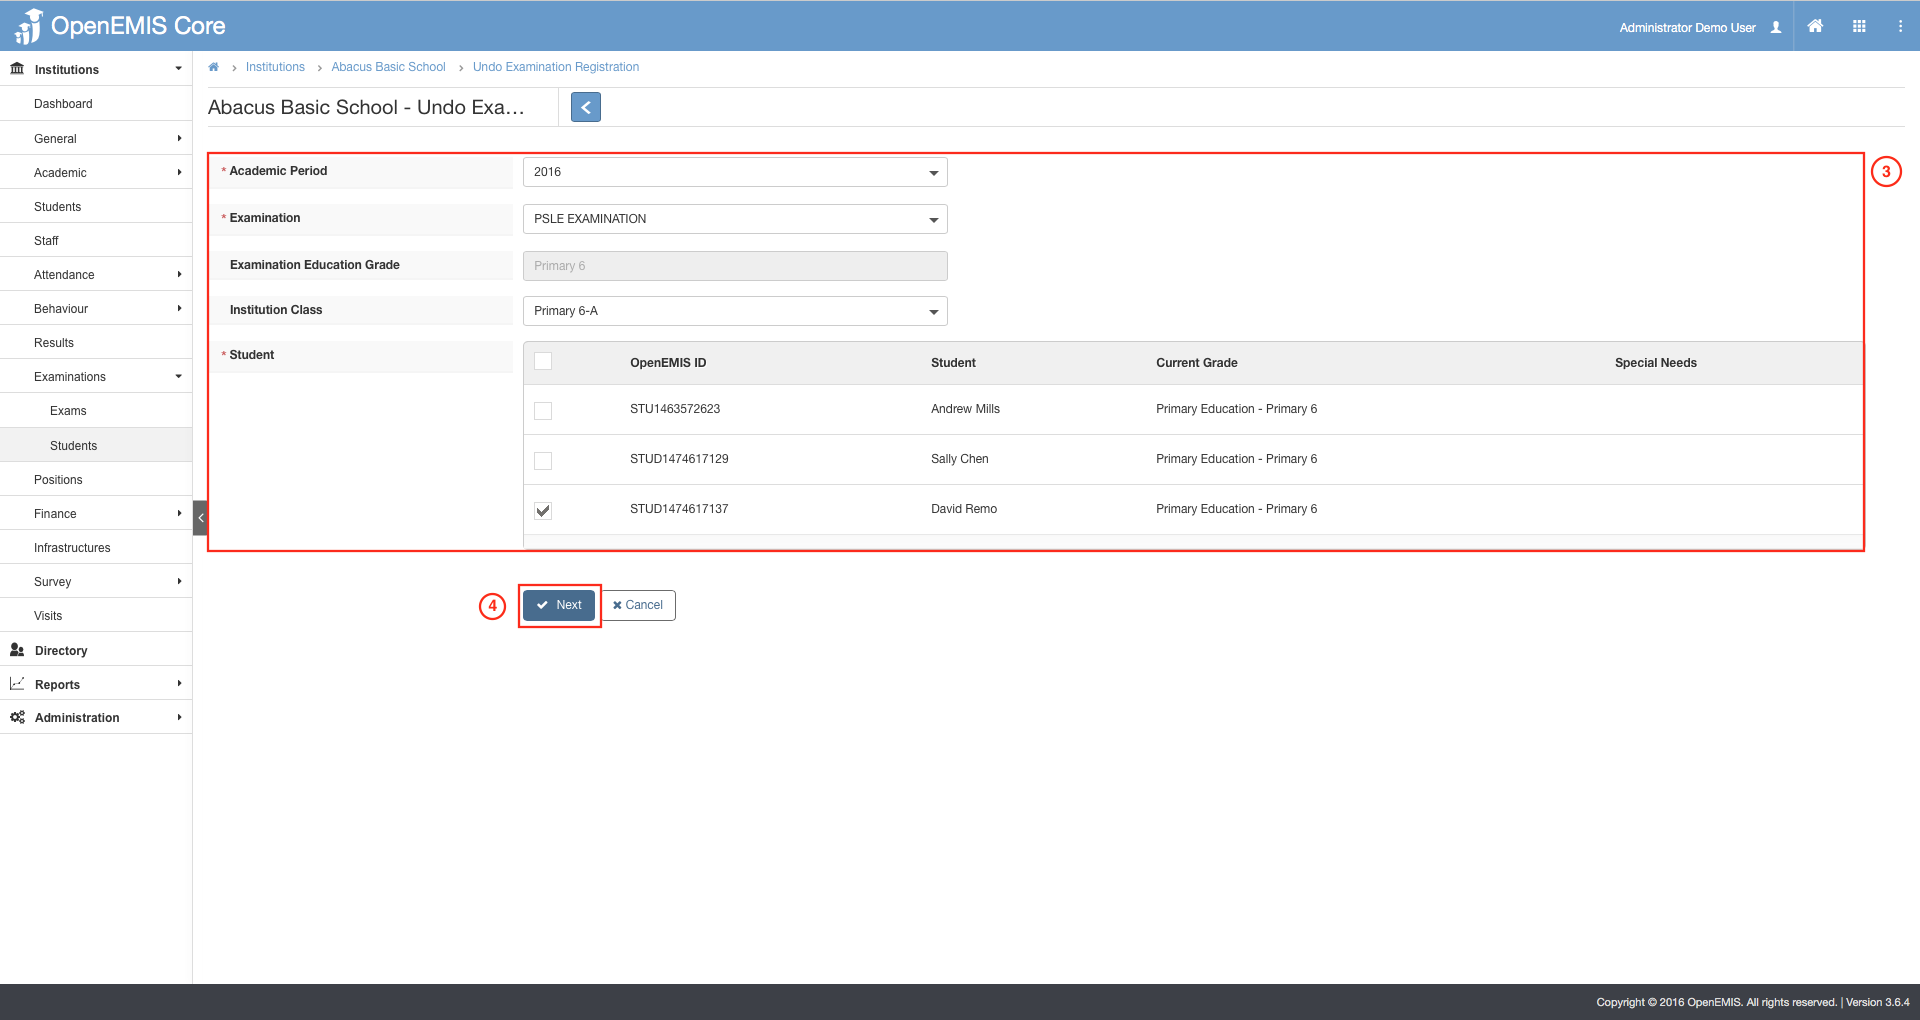
3) Specify the Academic Period, Examination and Students to un-register.
4) Select on Next.
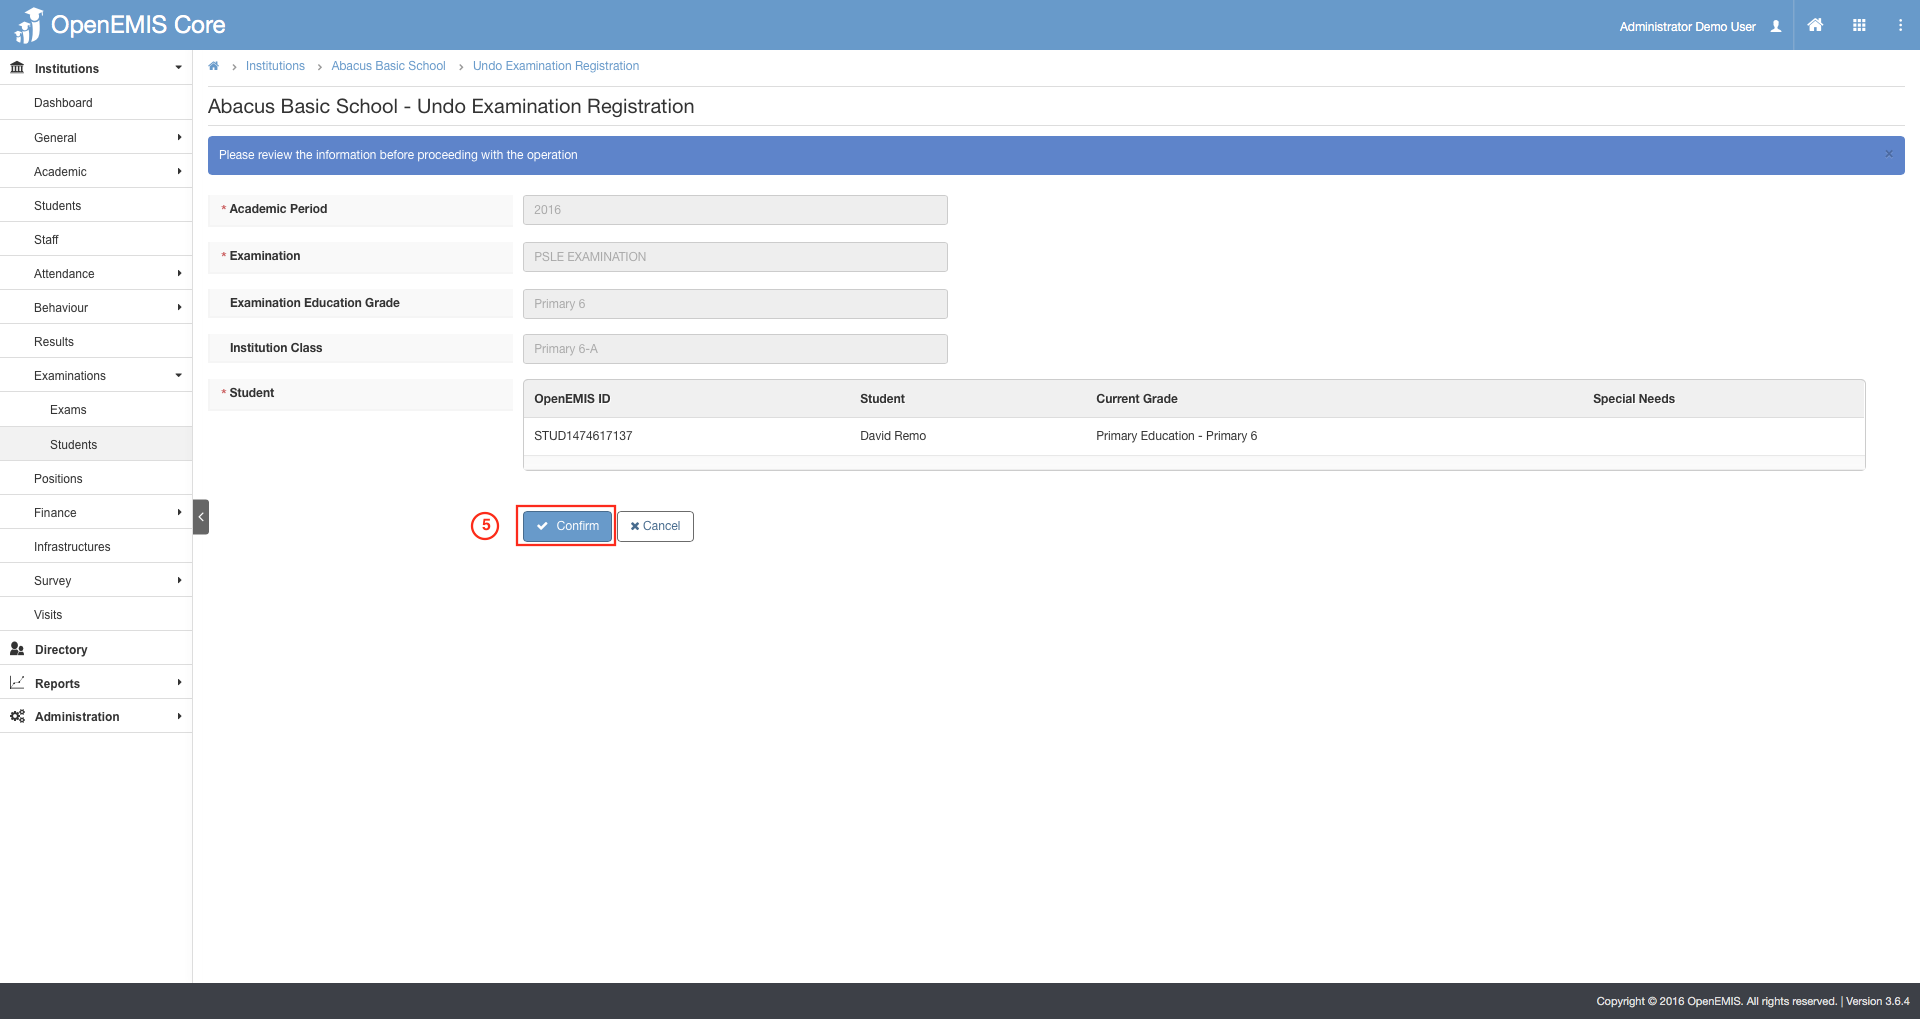
5) Select Confirm to undo the registration process.
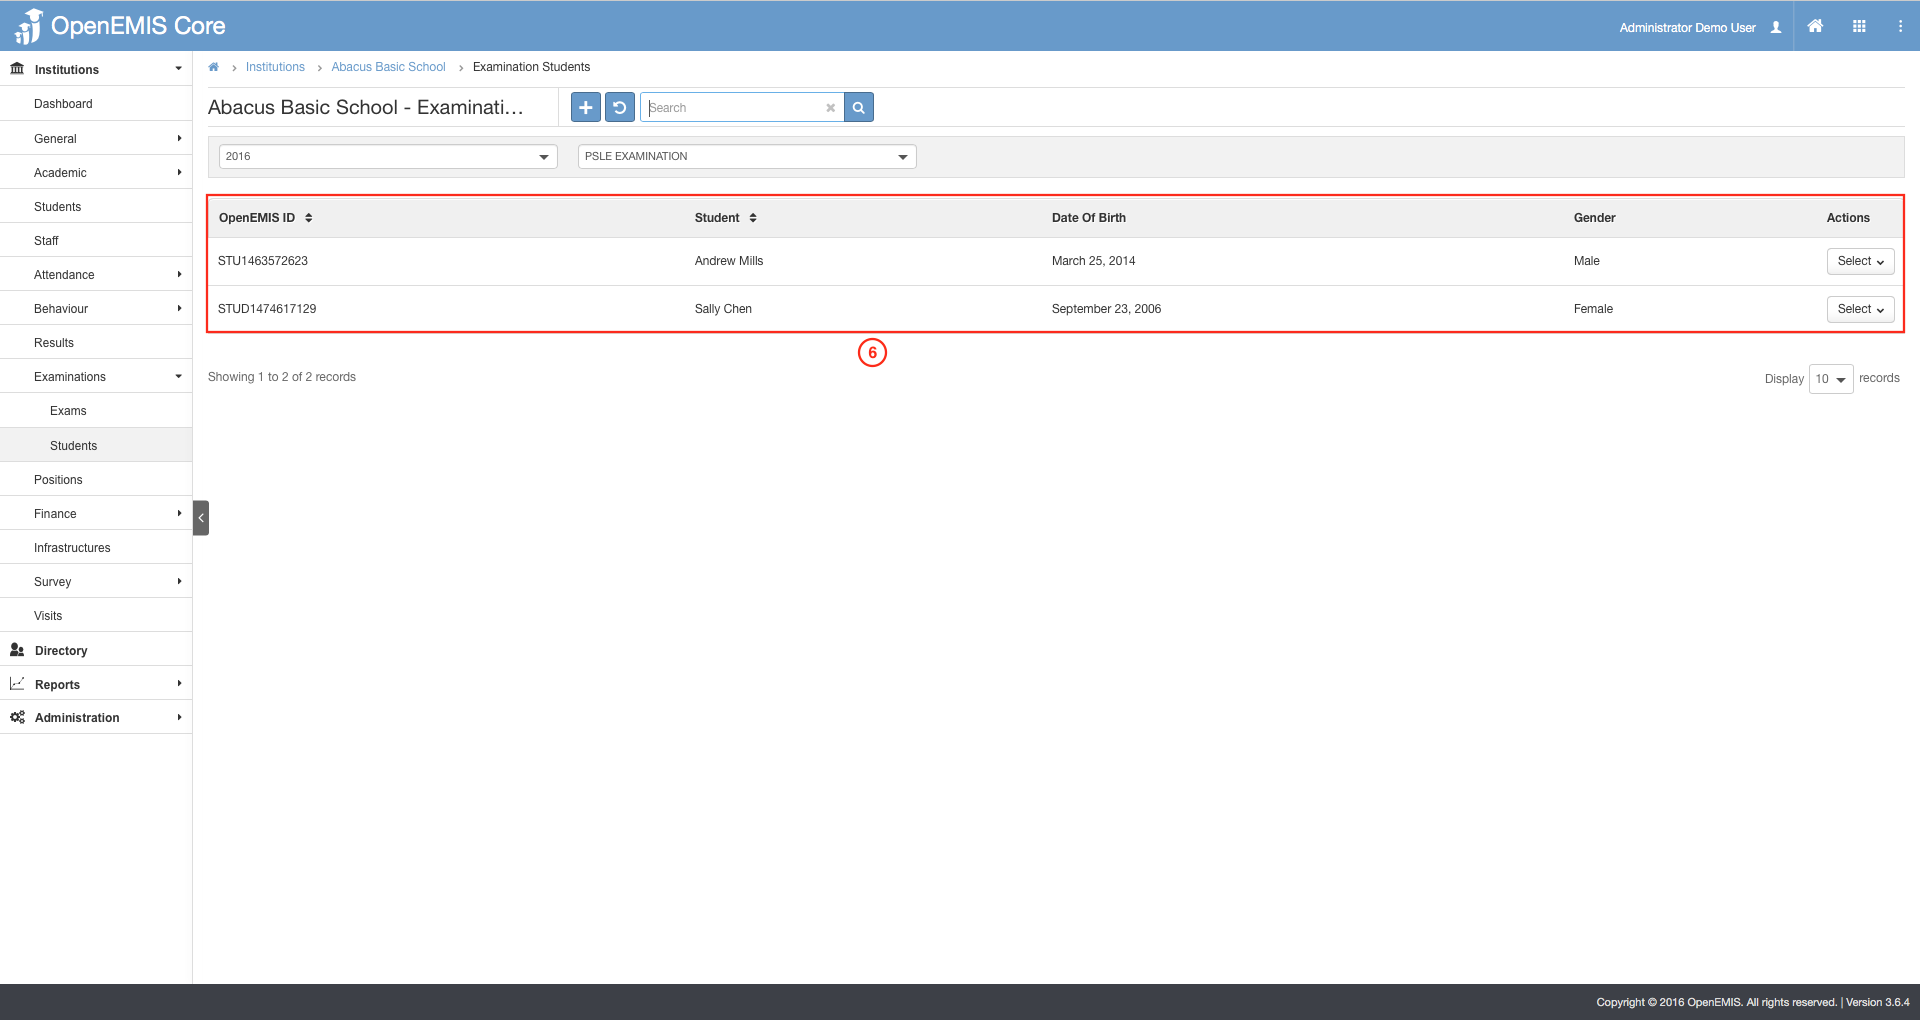
6) As shown in the image, the record has been removed in the registered student list.
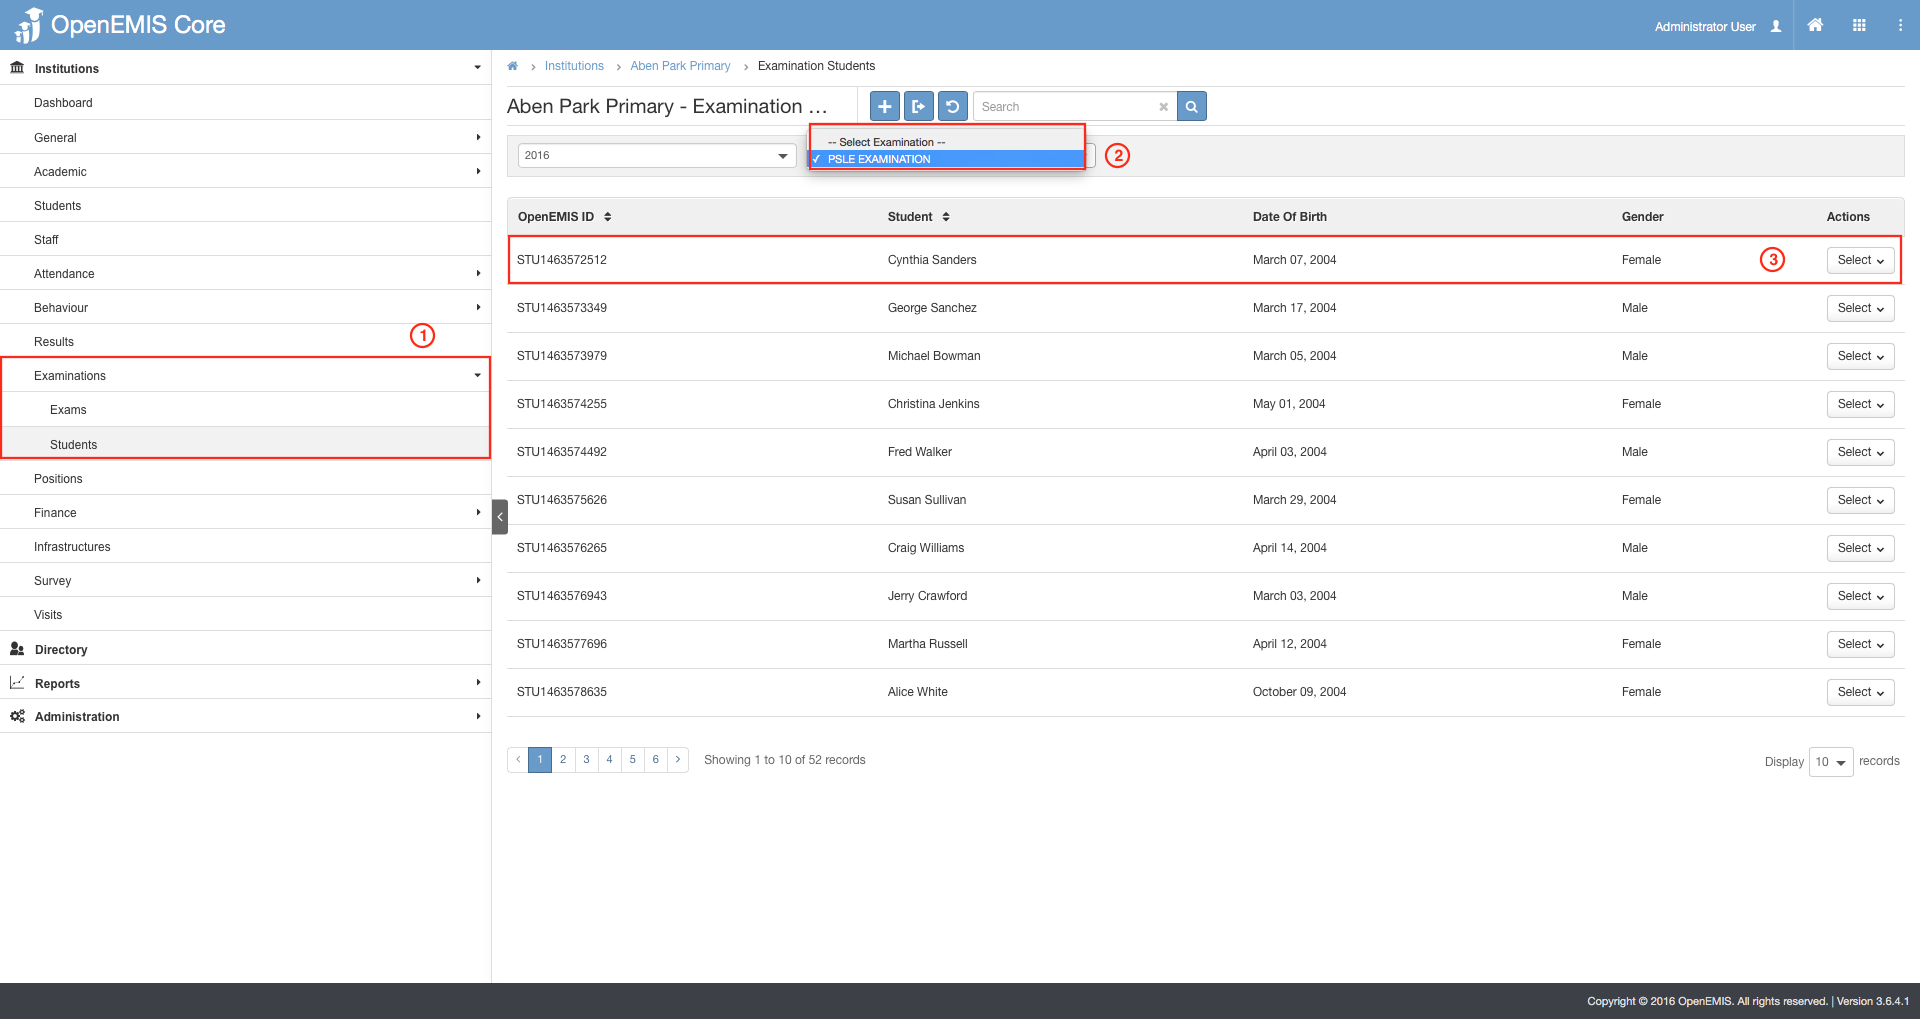
1) Go to Institutions > (Search and select your institution) > Examination > Students.
2) Choose the Examination you would like to view on the dropdown list.
3) Select on the Student, and the detailed view of the student will be displayed.
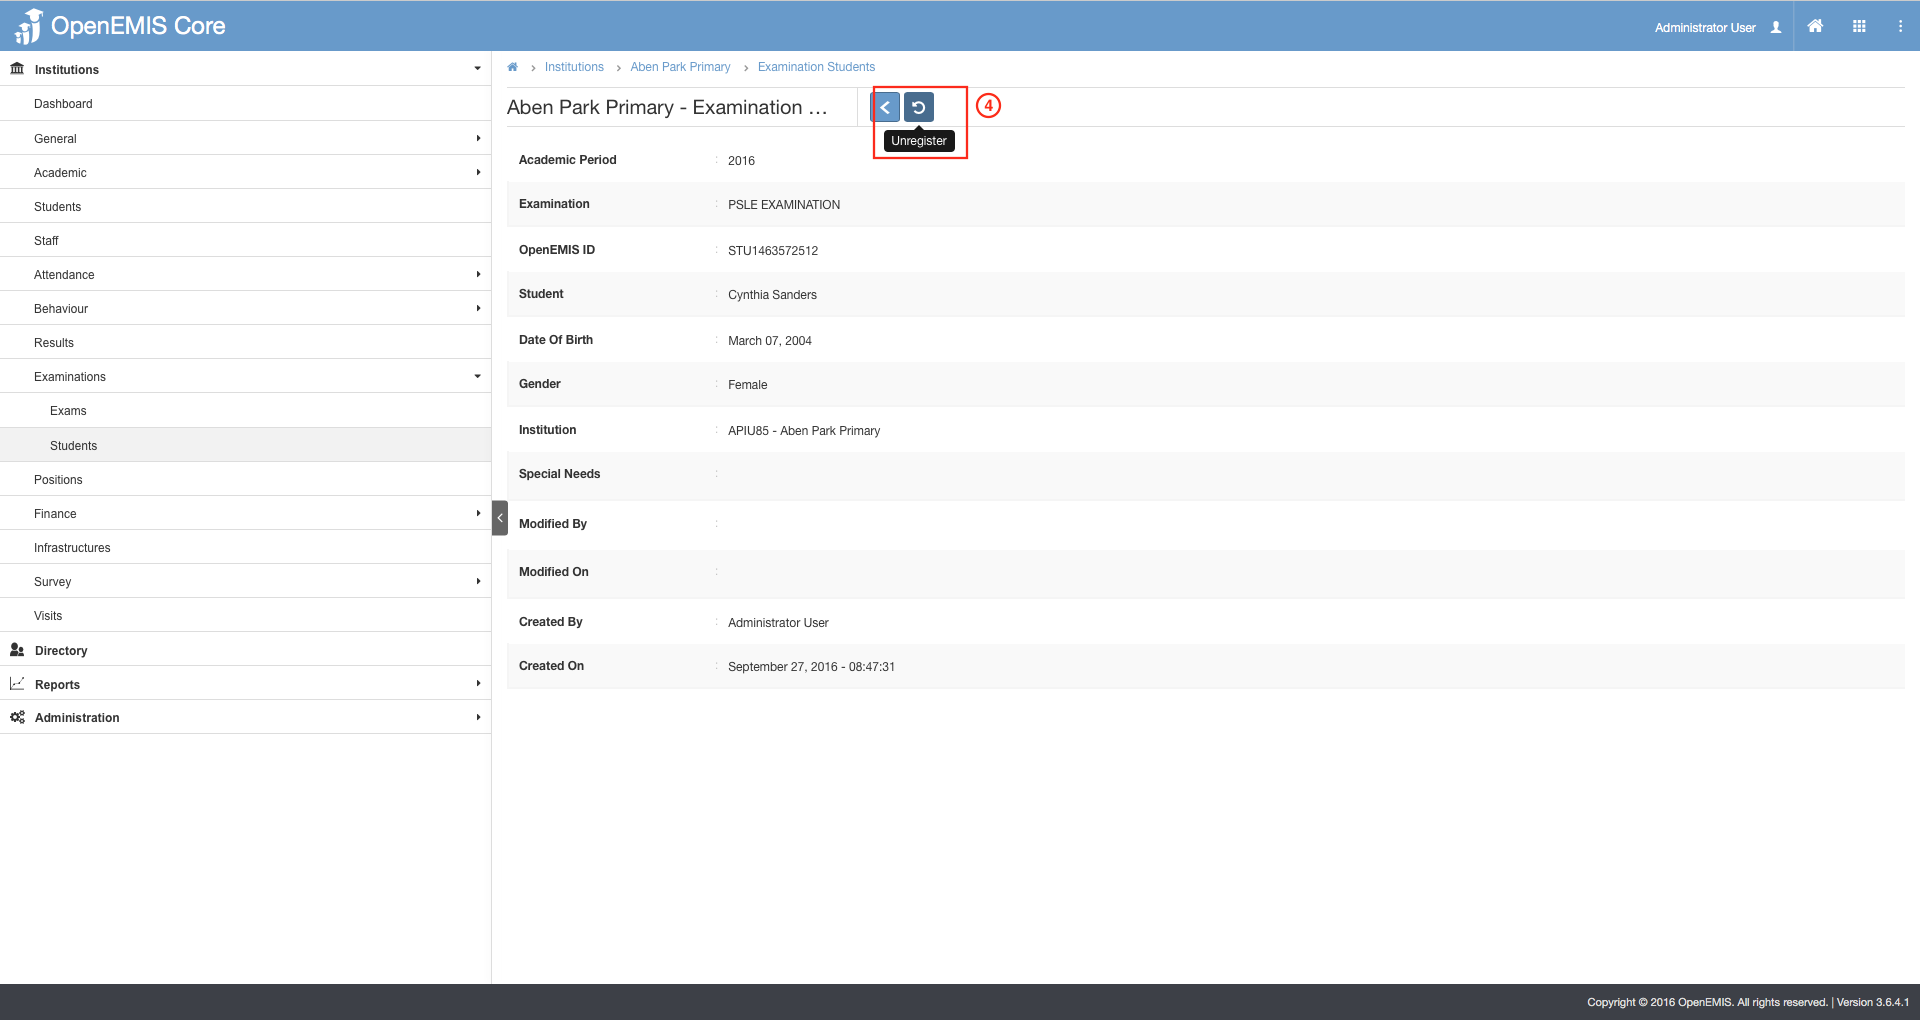
4) Click on the ‘Unregister’ button.
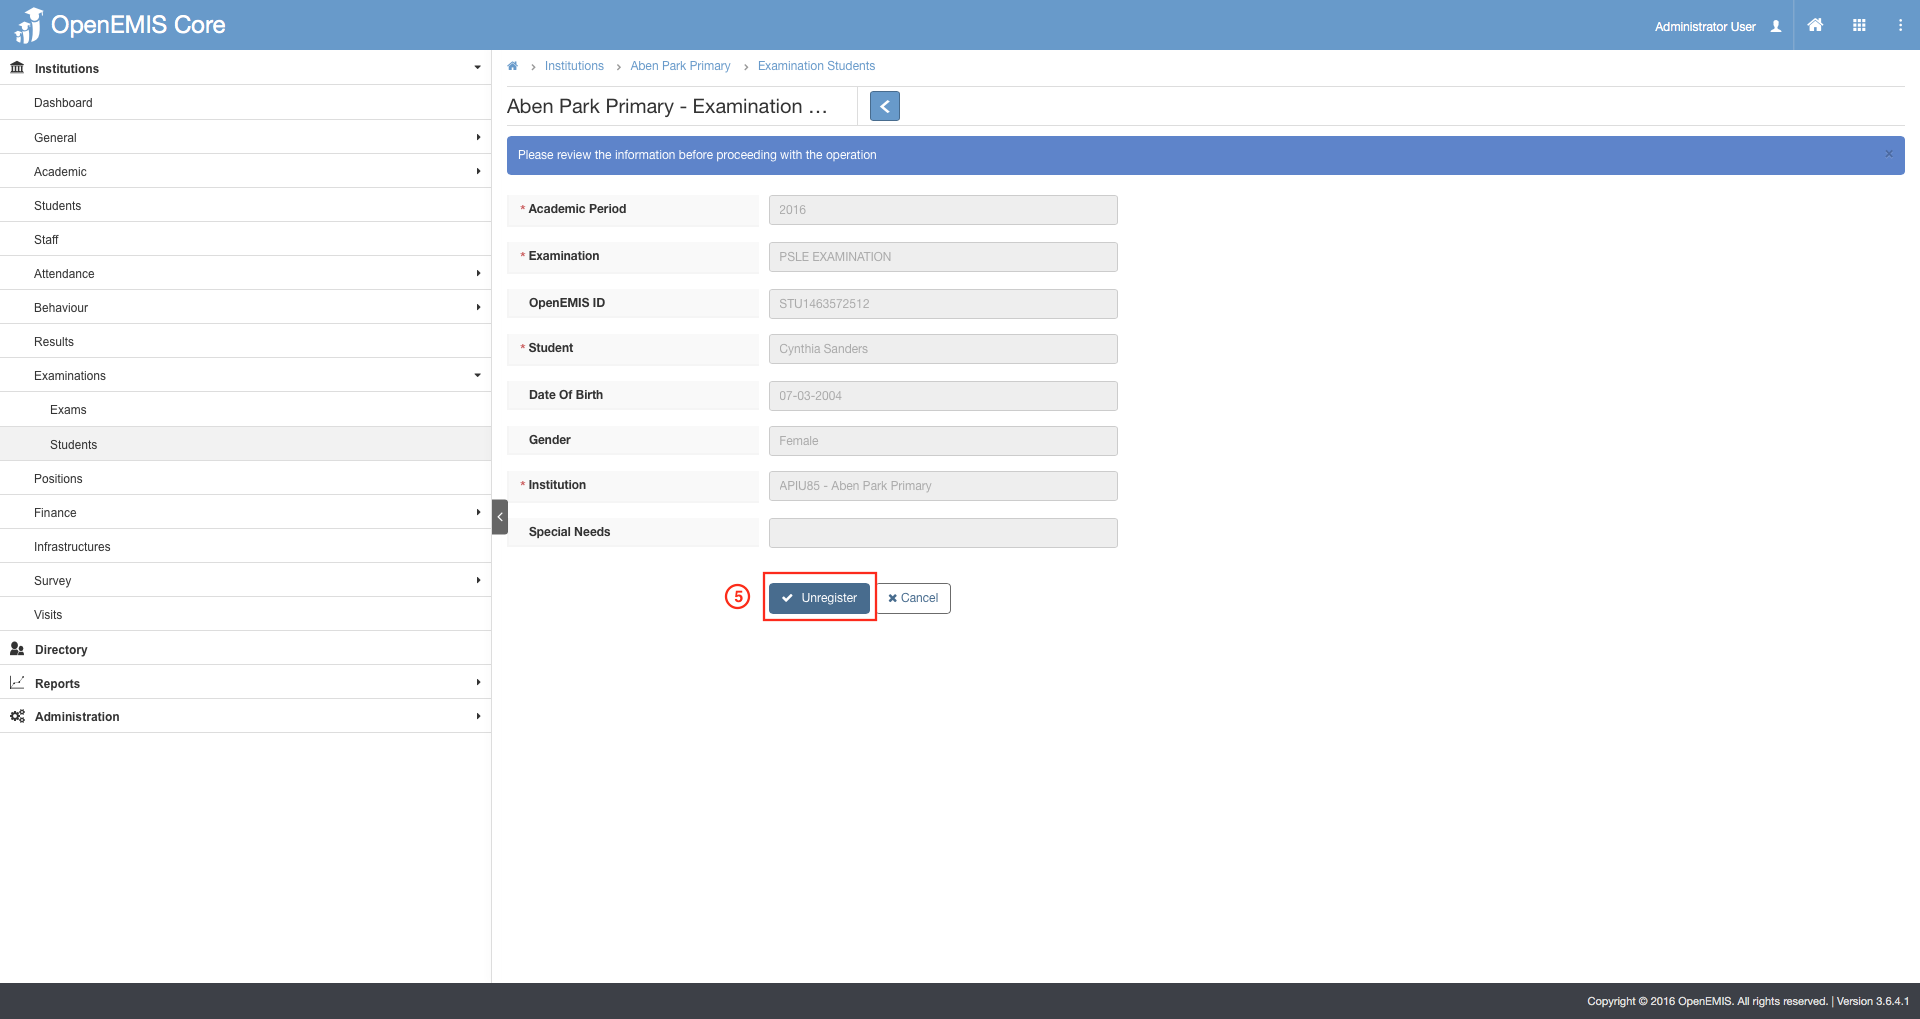
5) To confirm the process, select ‘Unregister’.
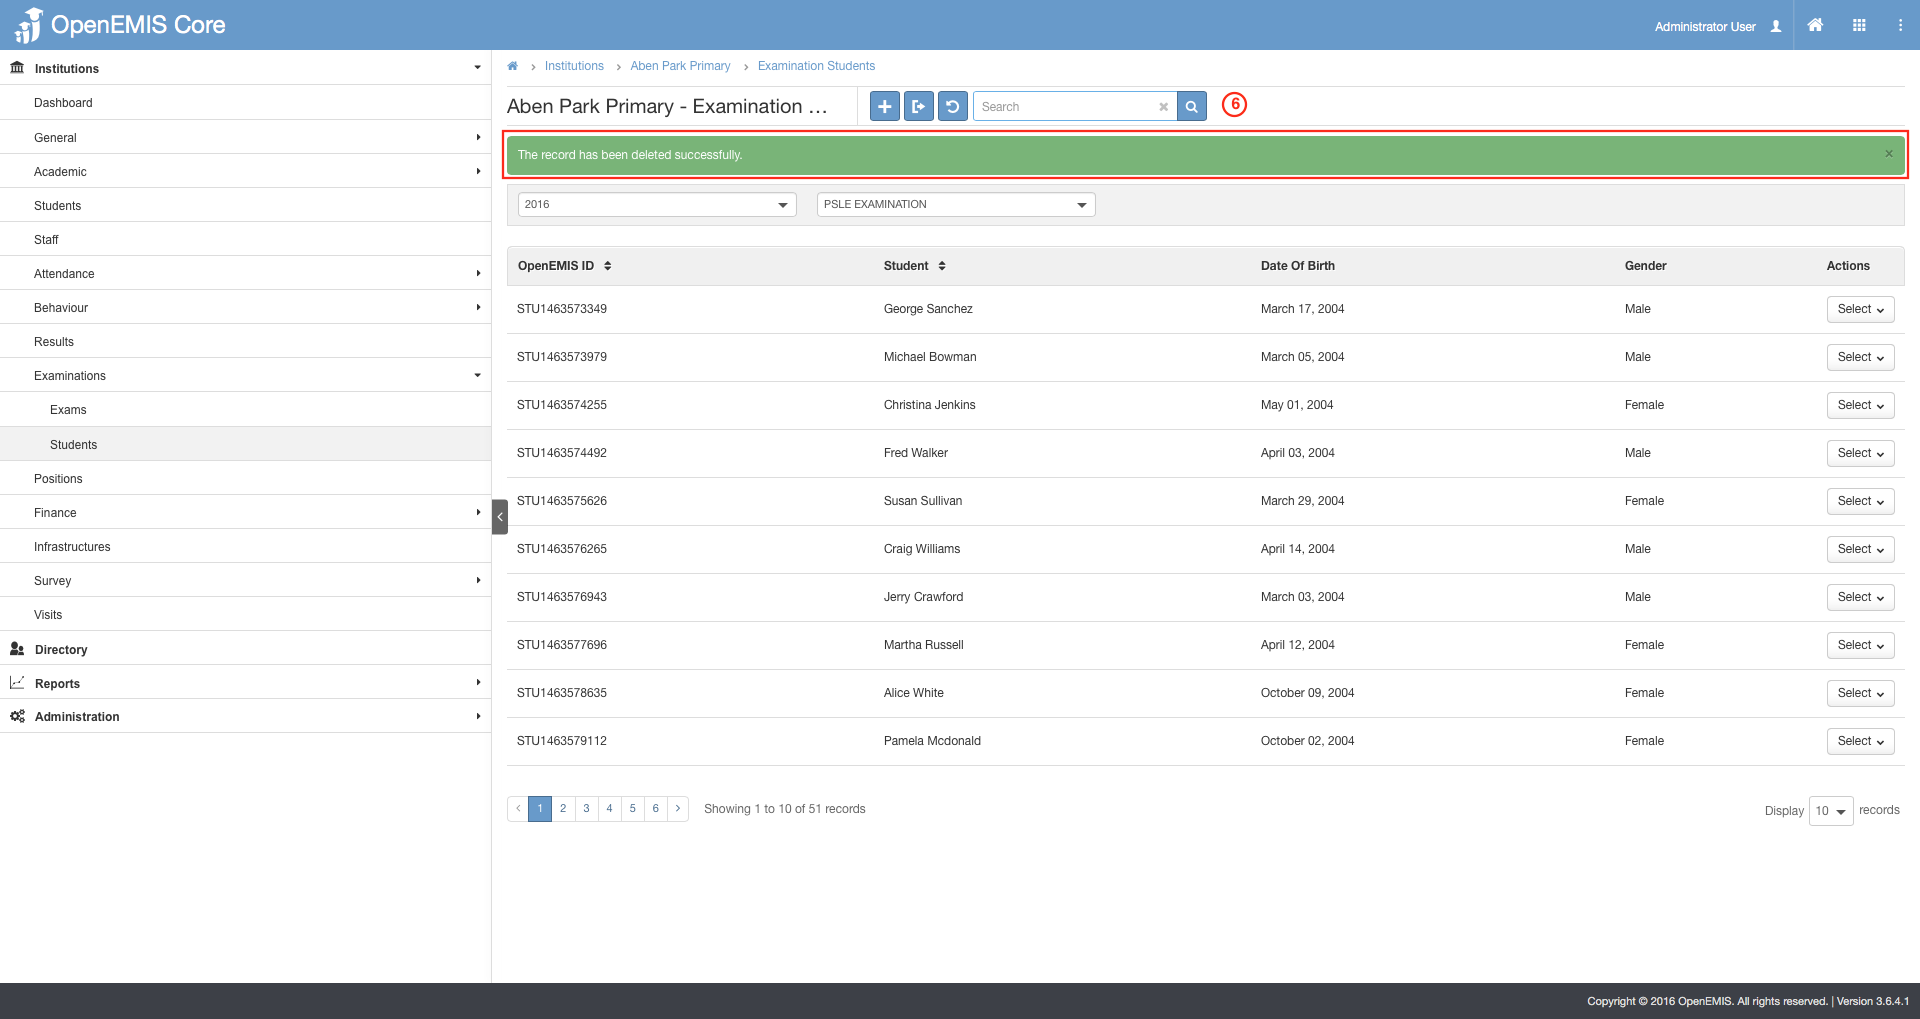
6) Successful message will be displayed upon unregistering the student.
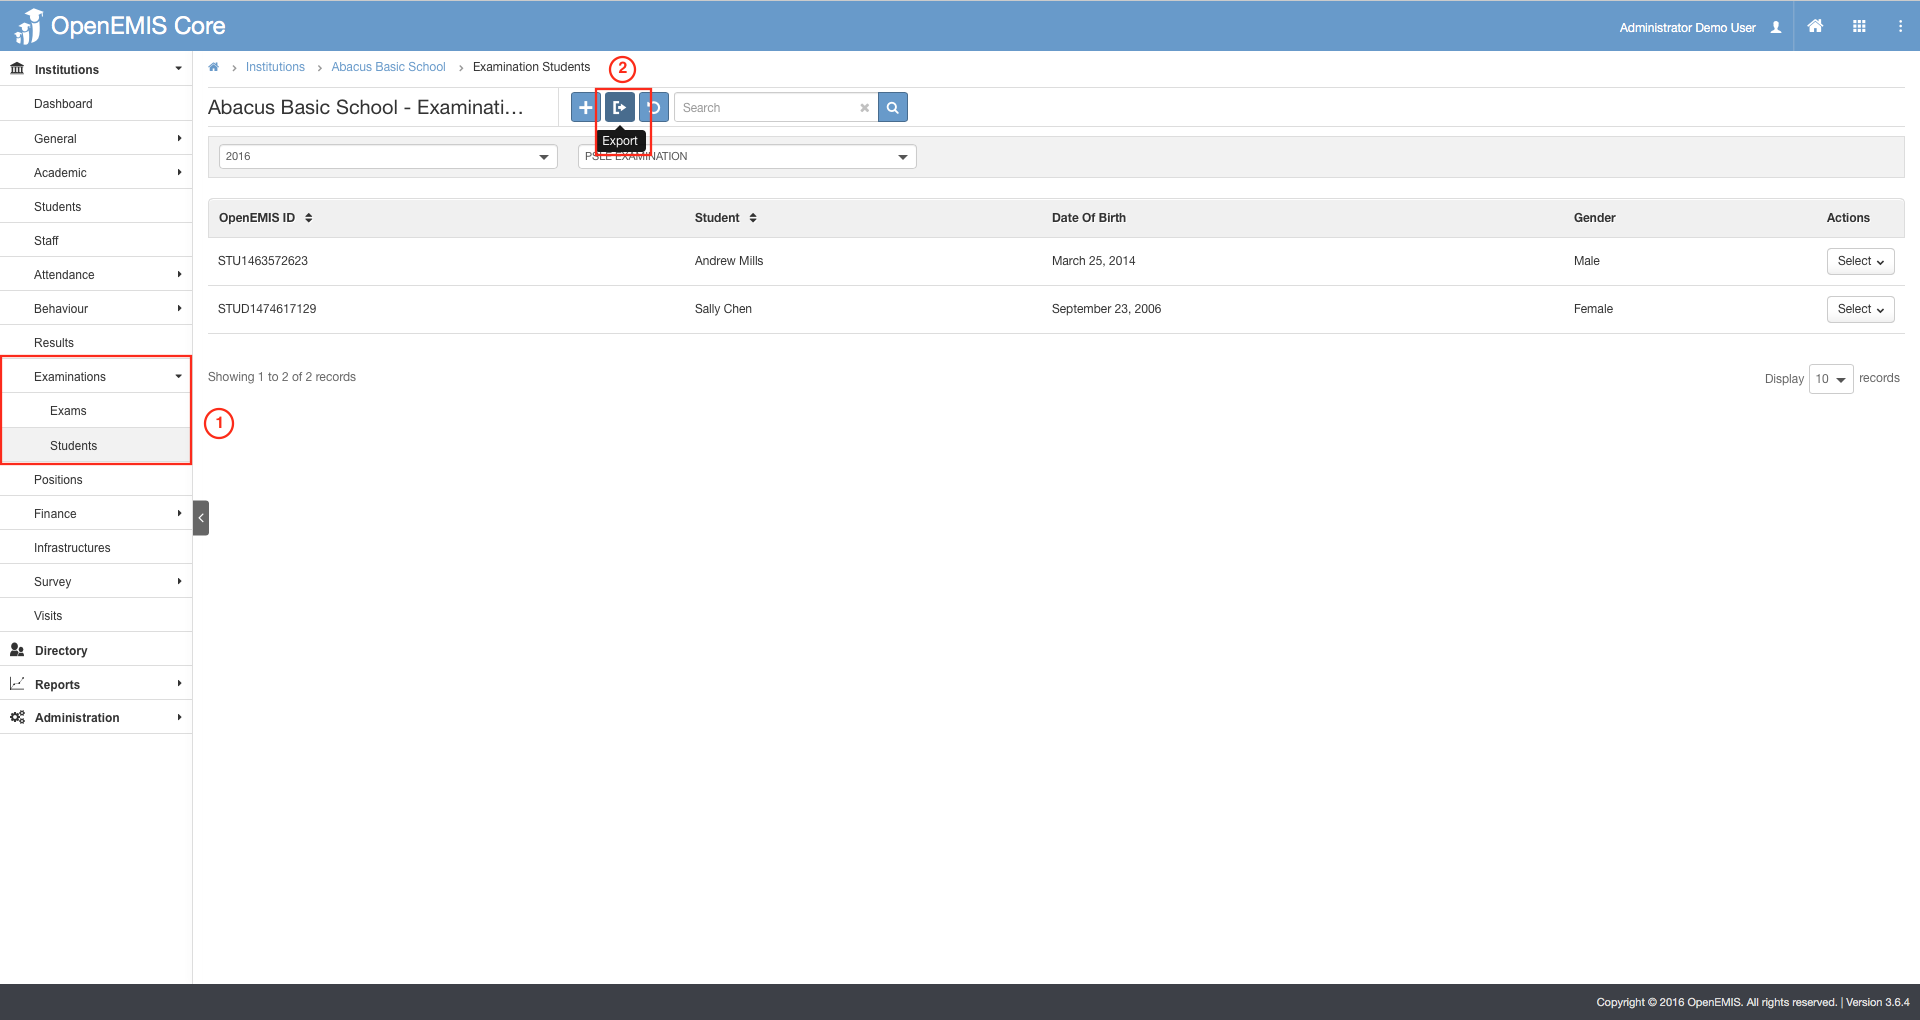
1) Go to Institutions > (Search and select your institution) > Examination > Students.
2) Select on the Export button.
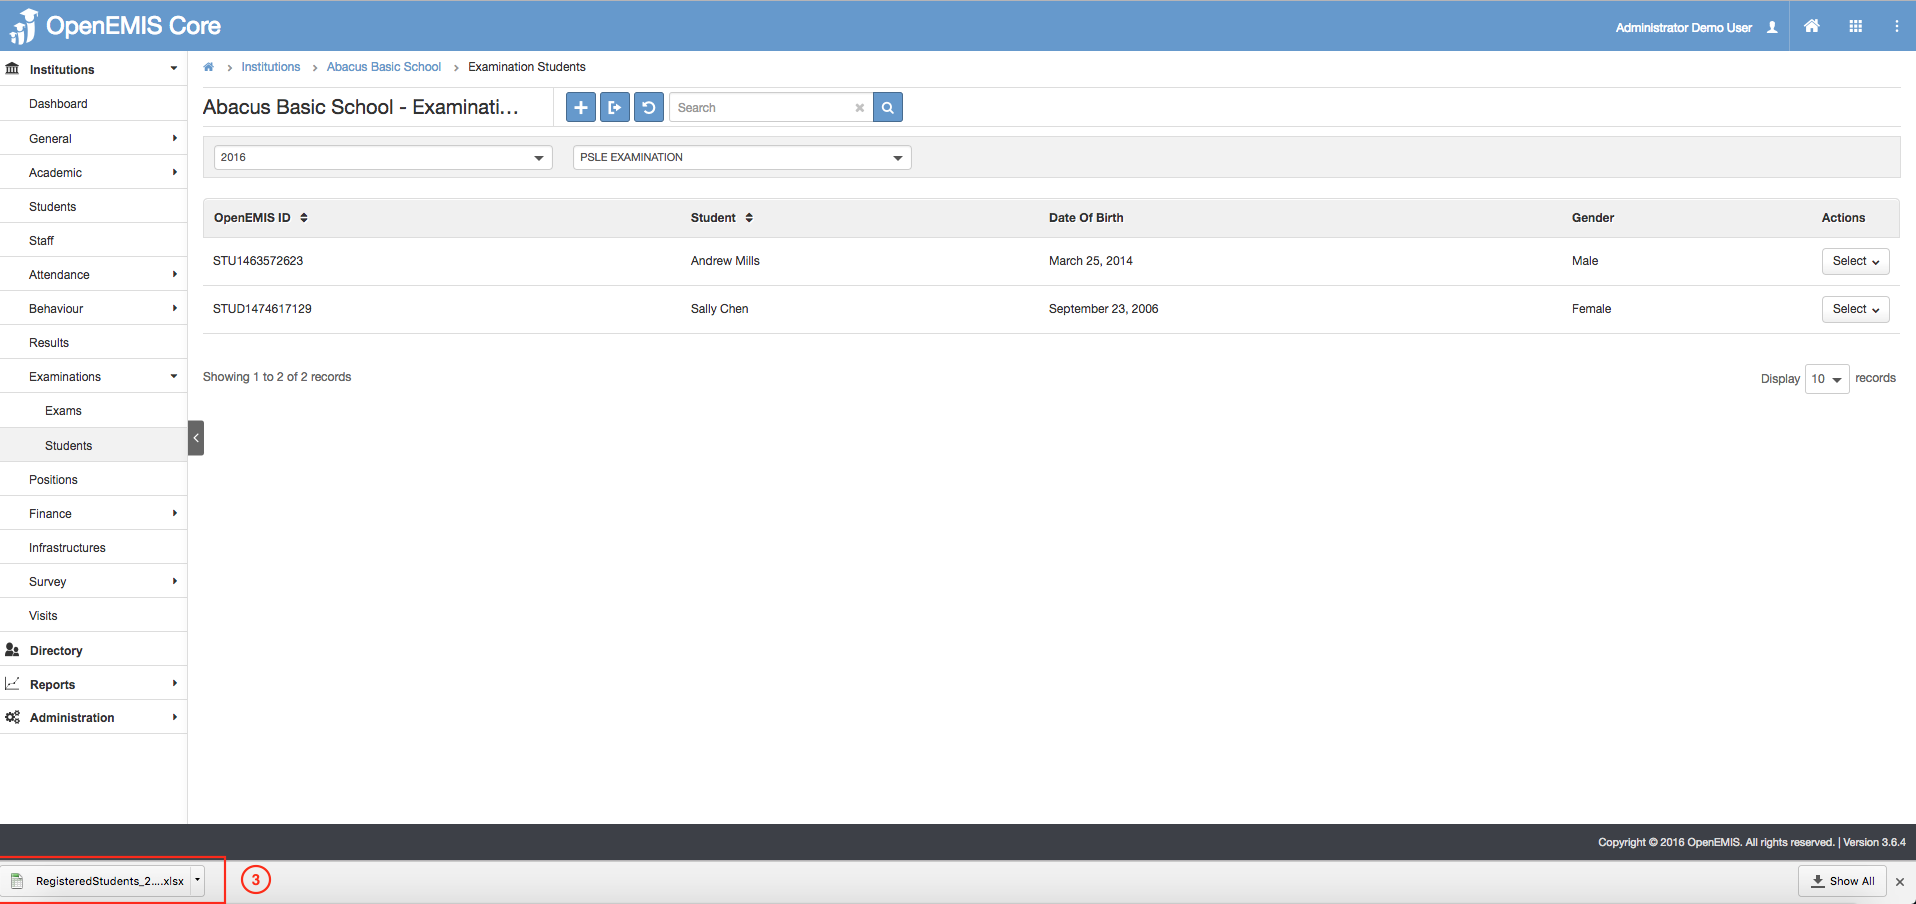
3) Student Exam Registration Report will be downloaded.