Name: OpenEMIS DataManager
Article Name: Data
Category/Module: DataManager Data Entry
Tags: Data, Data Entry
Version: 1.9.1
Date Updated: 12 June 2017
Article Name: Data
Category/Module: DataManager Data Entry
Tags: Data, Data Entry
Version: 1.9.1
Date Updated: 12 June 2017
Purpose: In the Data section of DataManager you can find data using the search functions, edit the information for specific data values, and add footnotes to specific data values. Here you will find all the data that has been uploaded to DataManager organized by area, indicator, time period, and source.
Search For Data:
To find data you are looking for you must first ensure that all of the information required to find it is inputted correctly.
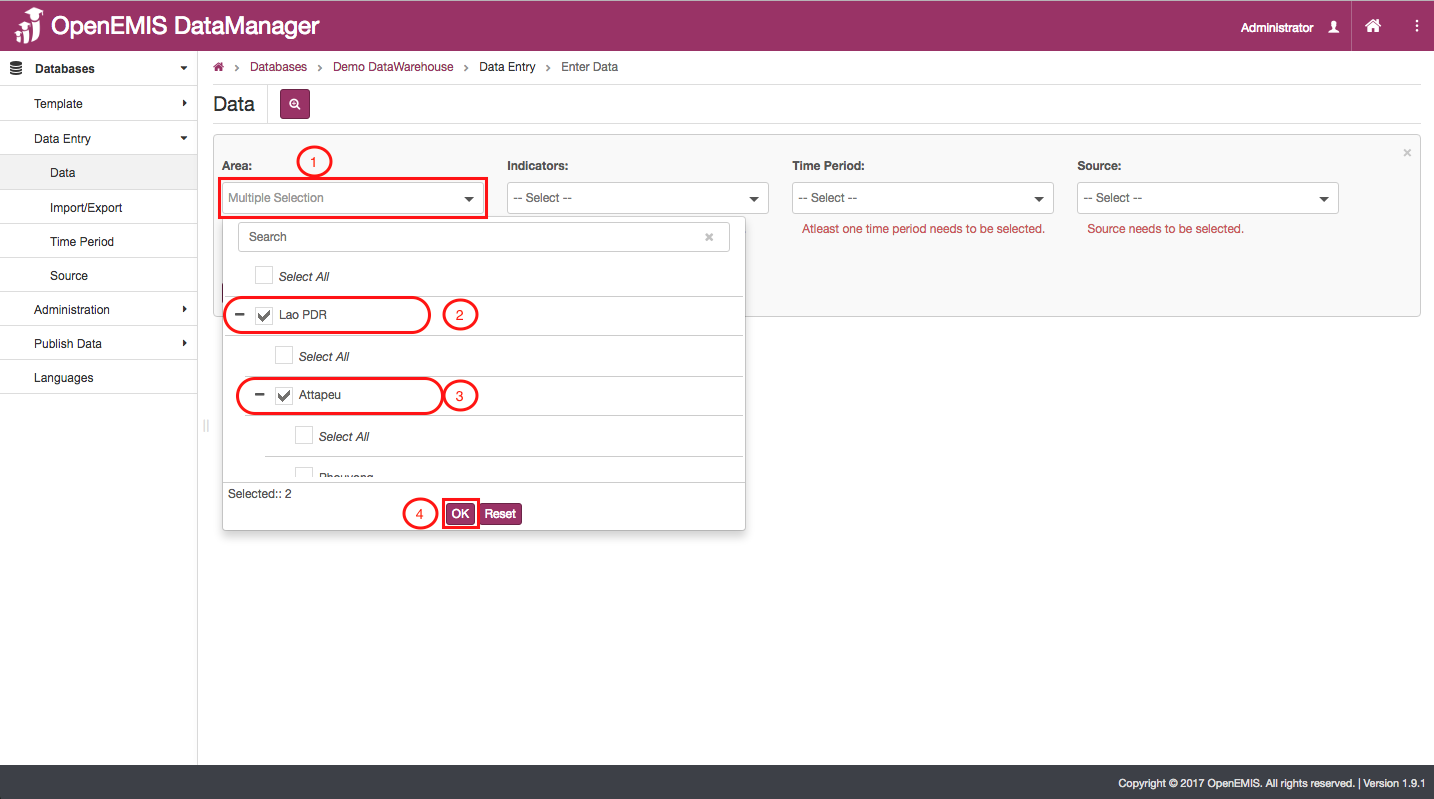
- The first information you must input is the area of the data you are looking for.
- Select the “Level 1” area that is associated with your data. “Level 1” is the broadest category of areas, this could be labeled as something different, such as “country”, in your OpenEMIS.
- If you are looking for a more specific area, select the “Level 2” area that is associated with your data.
- Once all of the areas at the various area levels have been selected, click “Ok”.
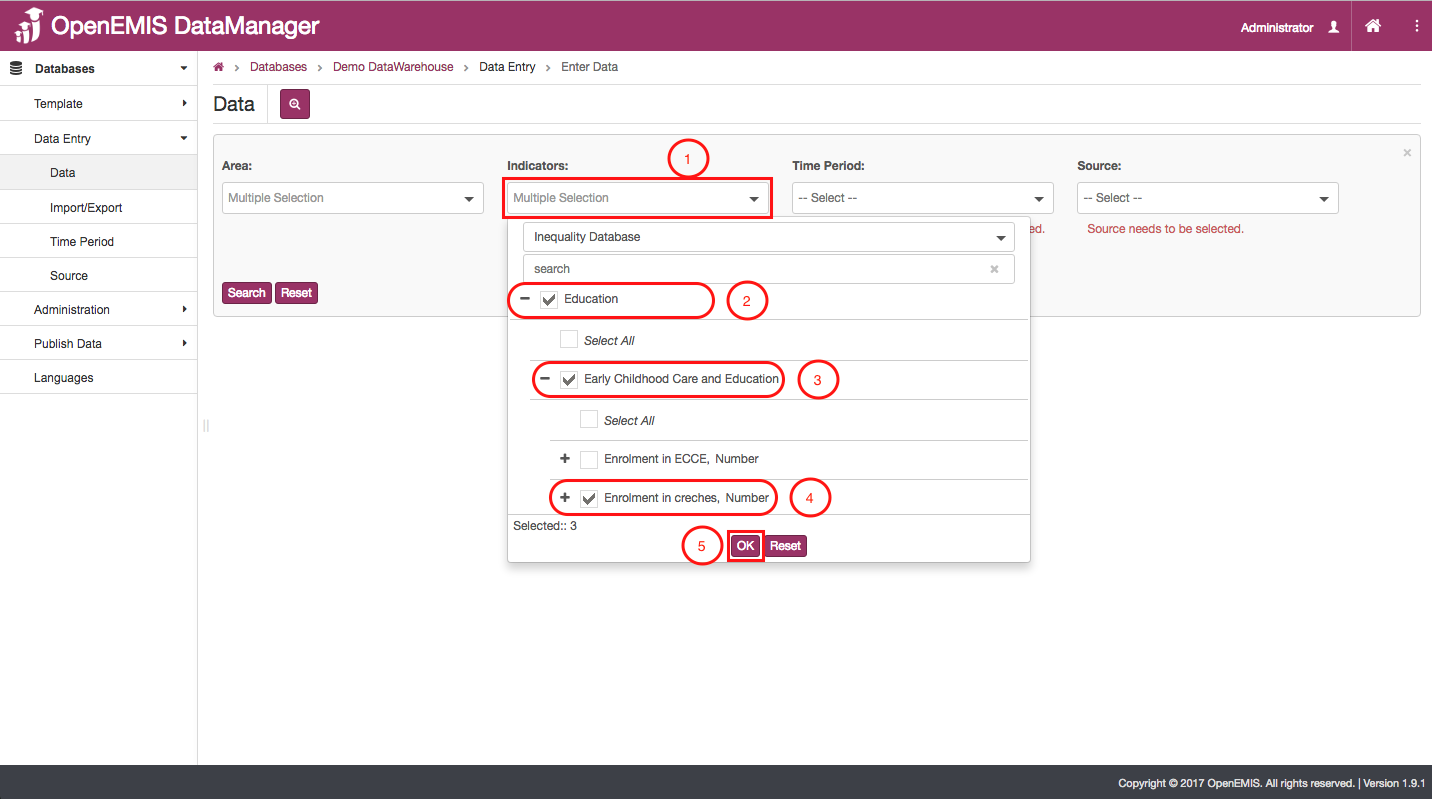
- Now that you have inputted the area for your data, select which indicators you want to look at.
- The Indicators are organized into different categories, you must first select the broad classification for your indicator, in this case, Education.
- Then select the category under Education (specific to this example) that related to your indicators.
- Once the proper categories and classifications have been selected, then select all of the indicators you wish to look at.
- Click “Ok” to move on to the next section
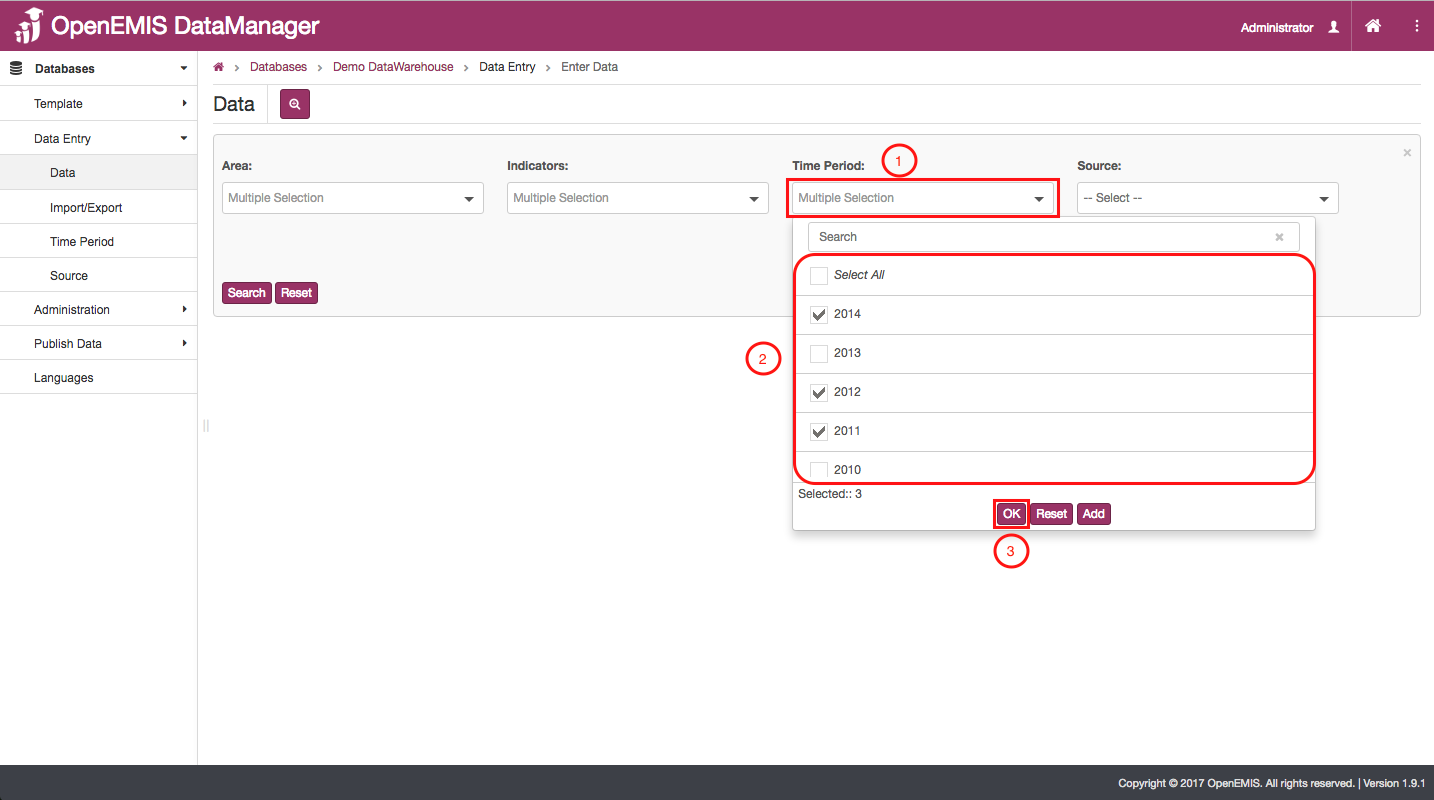
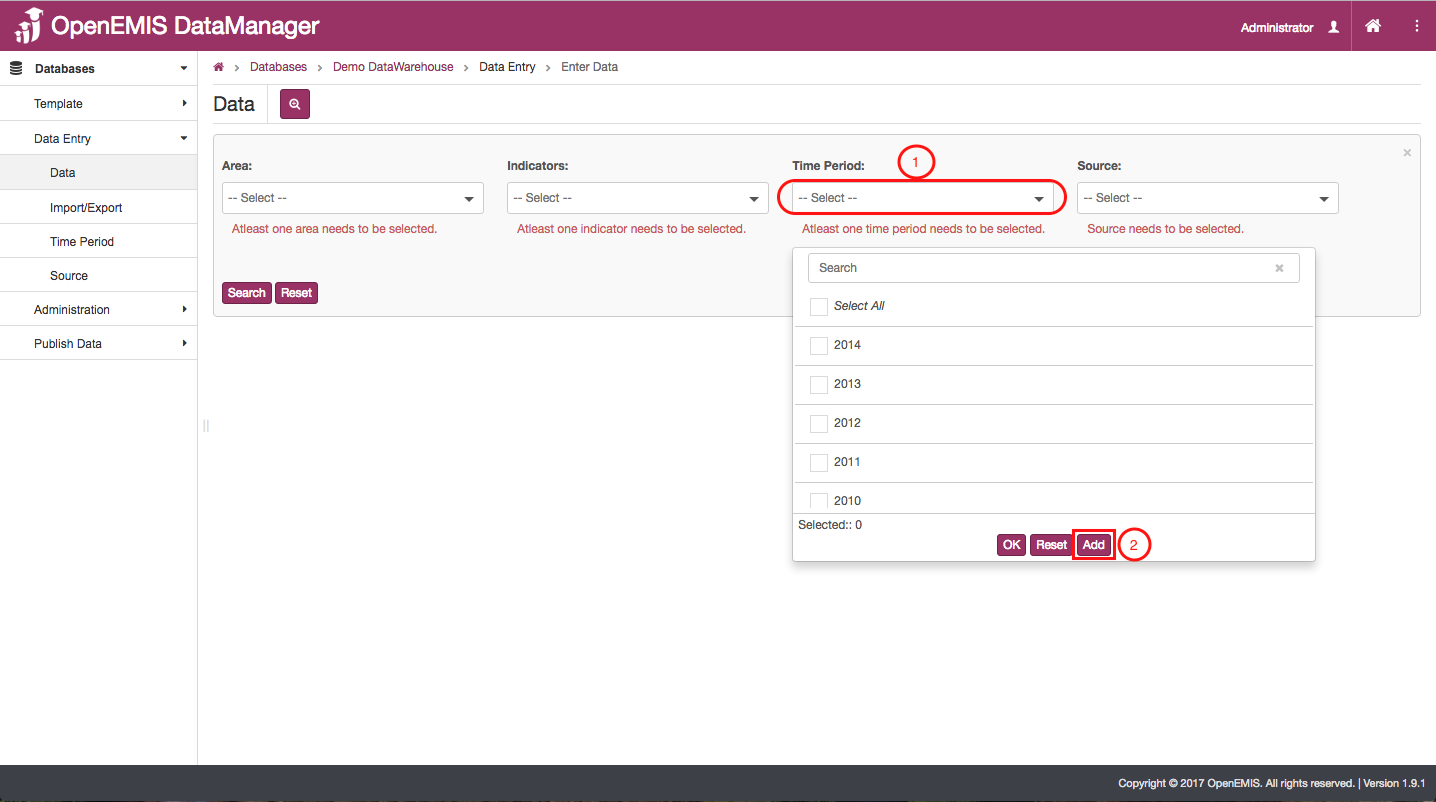
- The time period selection serves to define the year that the data is from.
- Select which year or years that are appropriate for your data.
- Click “Ok”
Searching for Data Video:
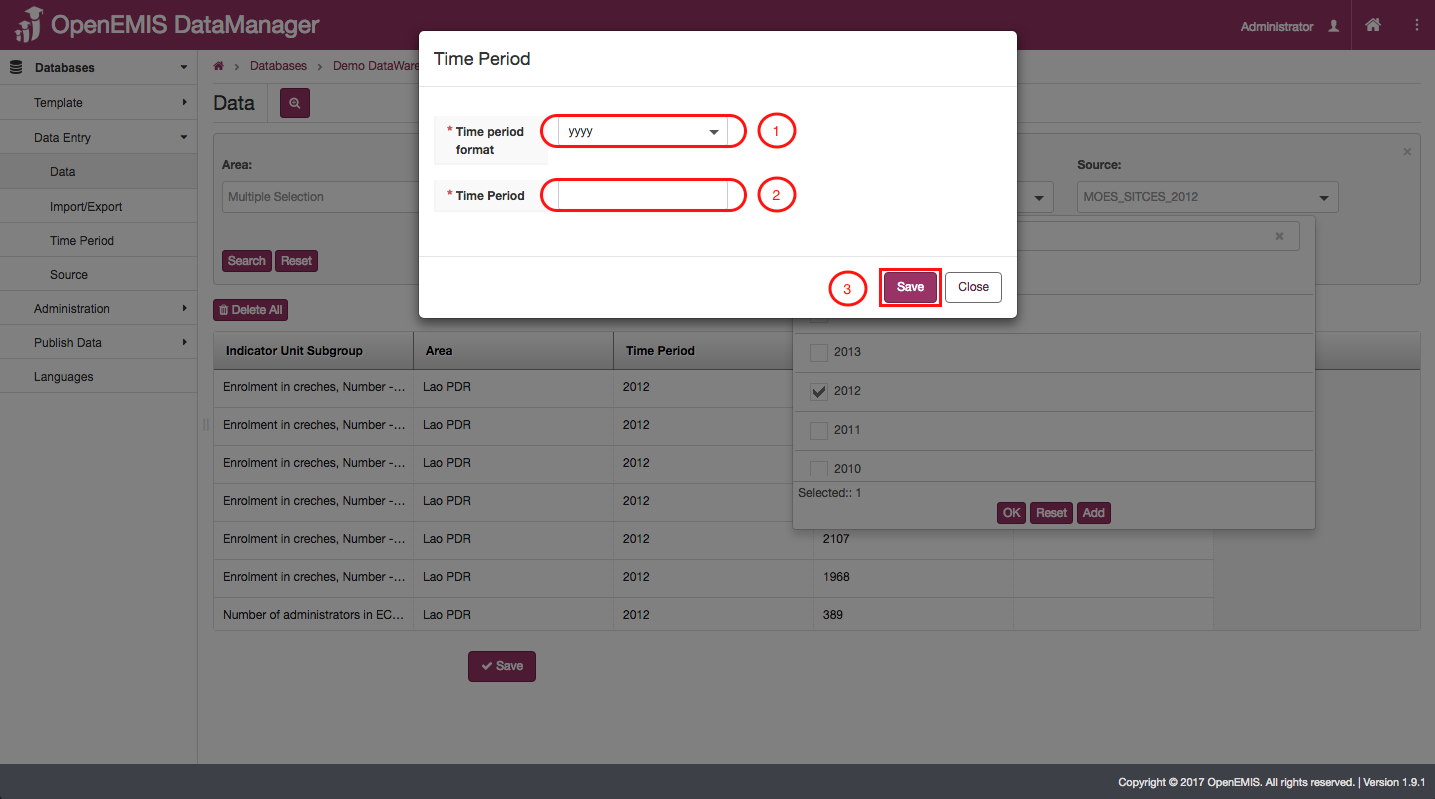
Add a Time Period:
- If the time period that would be relevant to your data is not there you can add a time period to the list.
- Click on “Add”.
- Select which format for entering the time period that you will use to enter your time period.
- Type in the time period into this box using the same format you selected in step 1.
- Click “Save” to permanently save your time period.
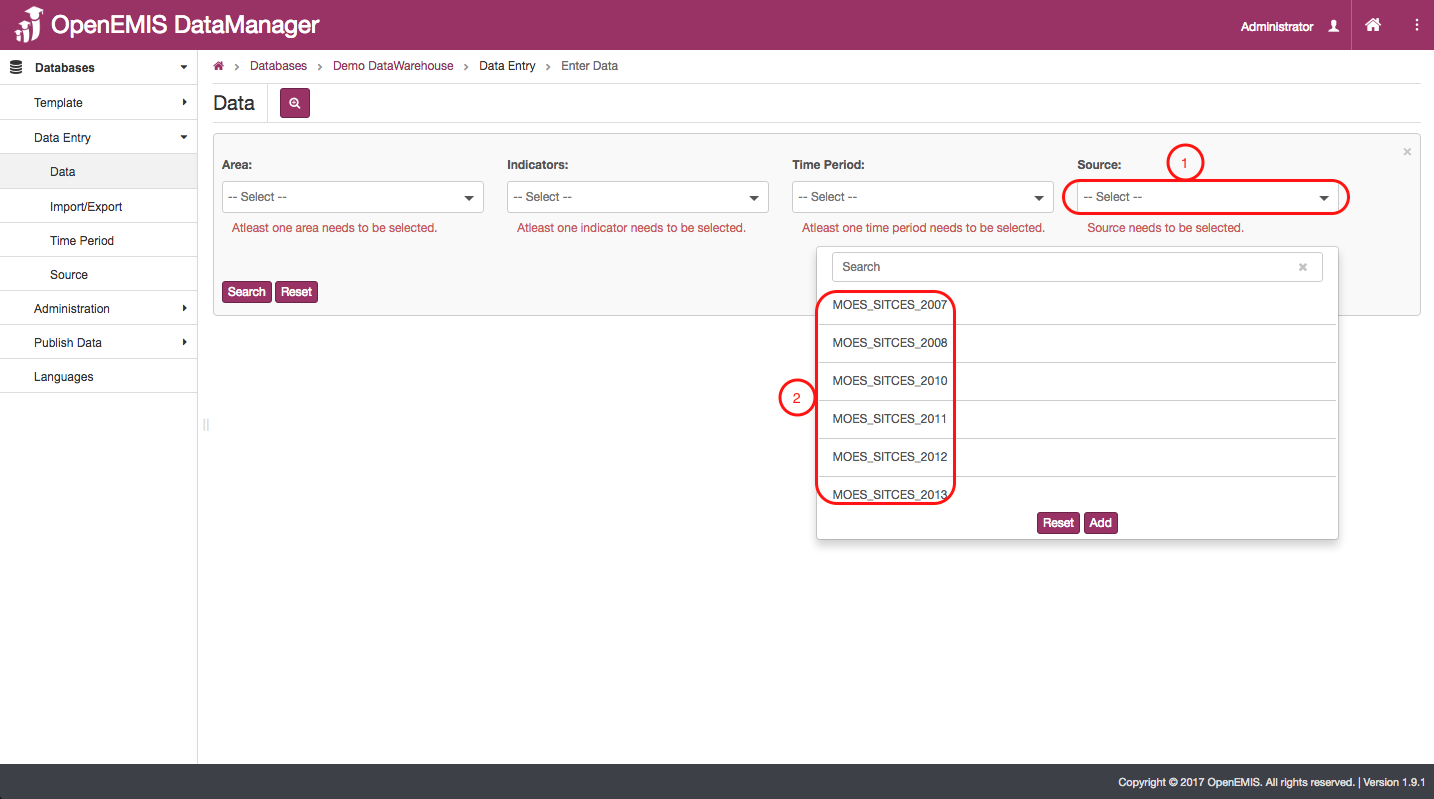
- The final thing you will have to do to complete your data search is select the source. Make sure that the time period you selected in the previous section matched up with the time period your source is from.
- Select which source is appropriate for the data you are searching for.
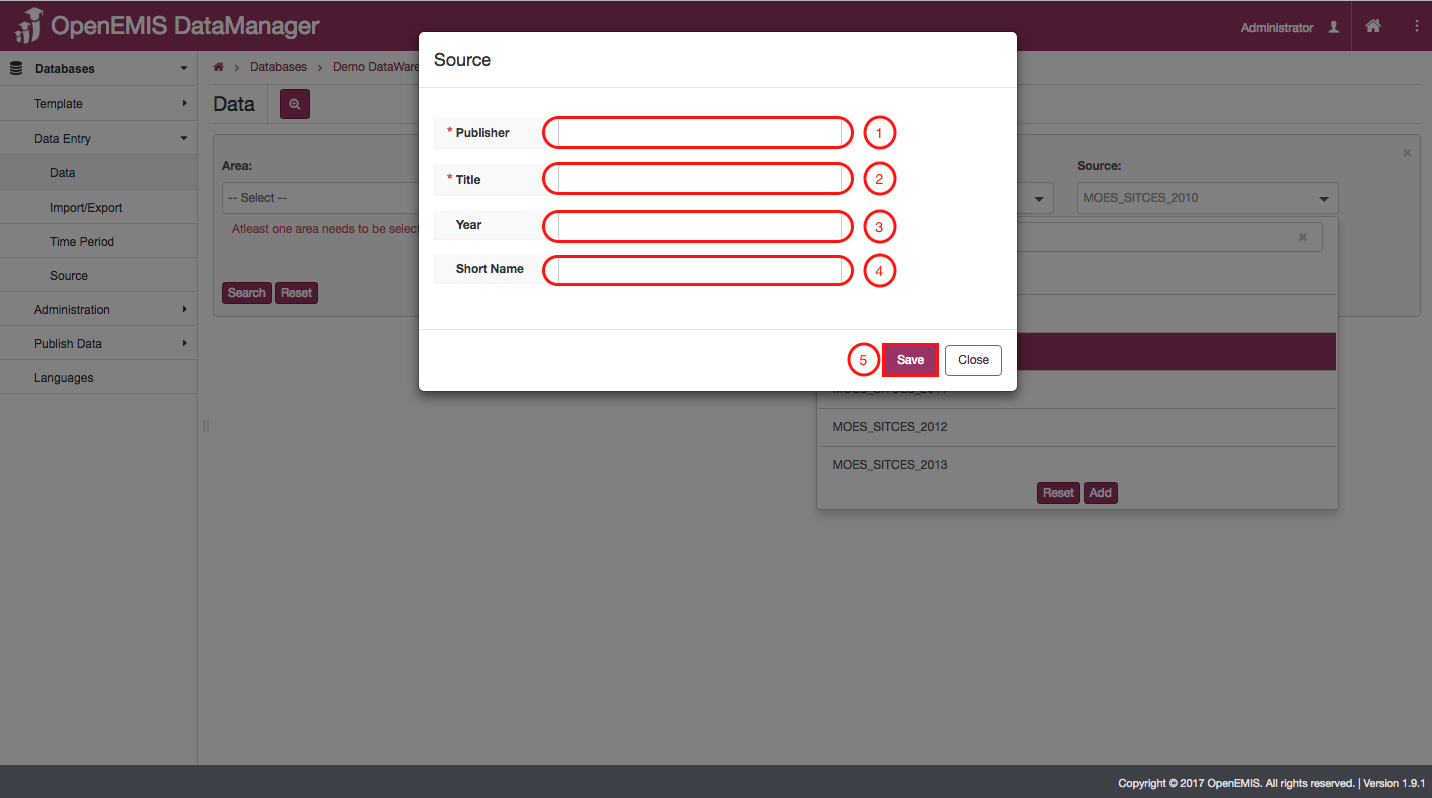
Add a Source:
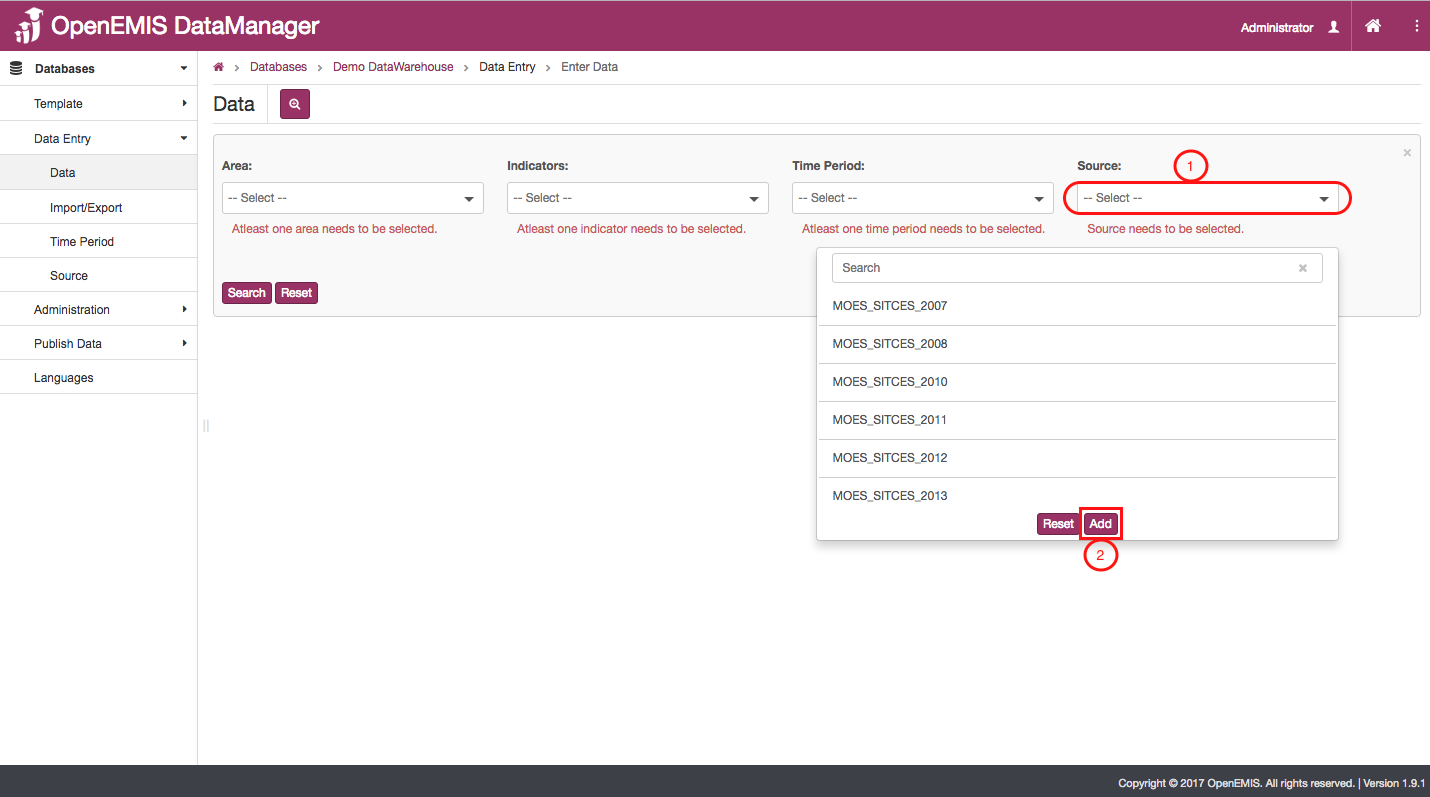
- If the source that would be appropriate for your data is not in the list then you can add a source.
- Click on the “Add” icon.
- To add a source, first, enter the name of the publisher into the first box.
- Give a label to the source, this is what it will appear as in the list.
- Enter the year of the time period that your source relates to.
- If you want to, enter a short name for your source.
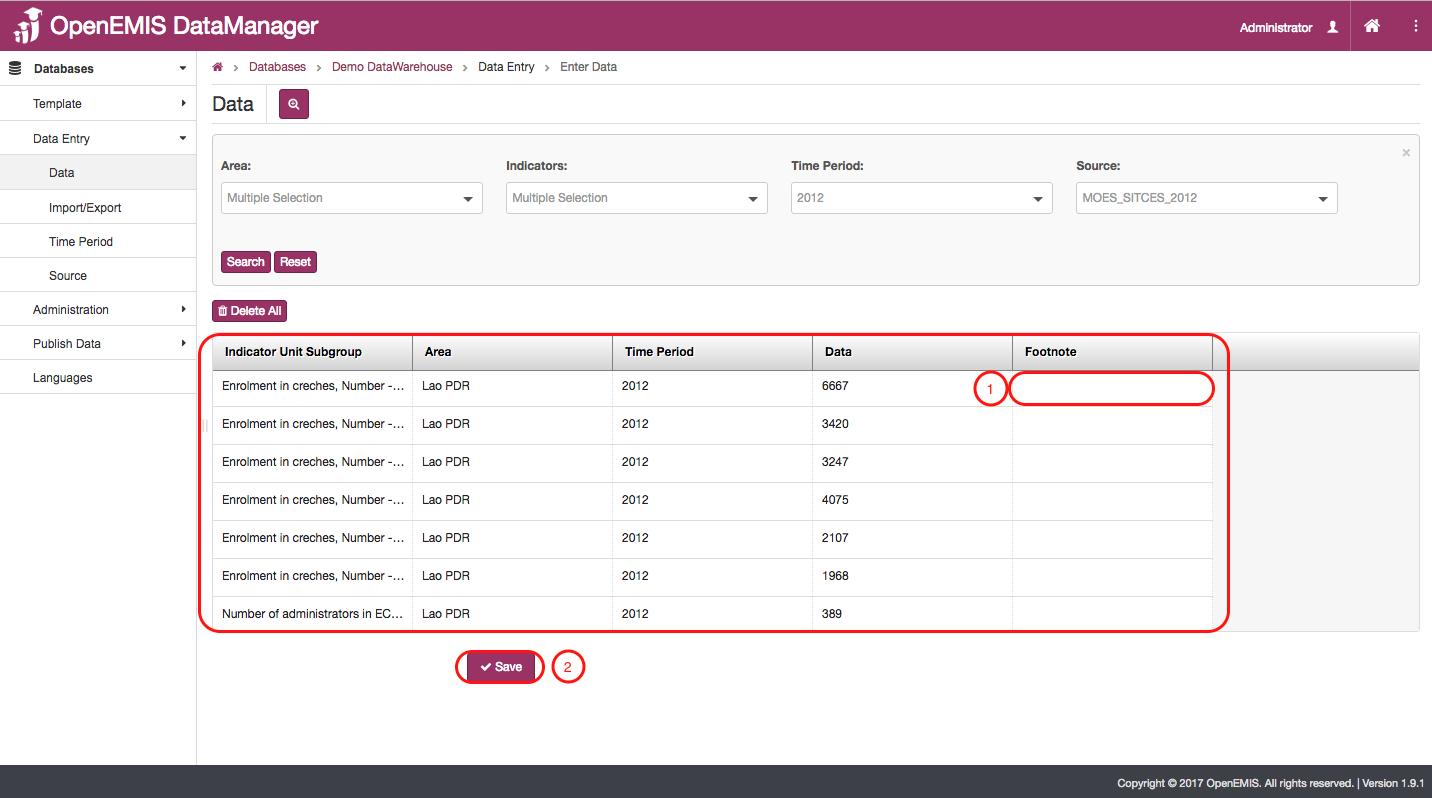
The data that results from your search will appear in the area below the search engine. From here you can edit data, add footnotes, and browse individual data values.
Add a Footnote:
- To “Add” a footnote click on the box that is linked to the data value you wish to add a footnote for and enter the information for the footnote.
- Click “Save”