Name: OpenEMIS DataManager
Article Name: Data Import/Export
Category/Module: DataManager Data Entry
Tags: Import/Export, Data Entry
Version: 1.9.1
Date Updated: 12 June 2017
Article Name: Data Import/Export
Category/Module: DataManager Data Entry
Tags: Import/Export, Data Entry
Version: 1.9.1
Date Updated: 12 June 2017
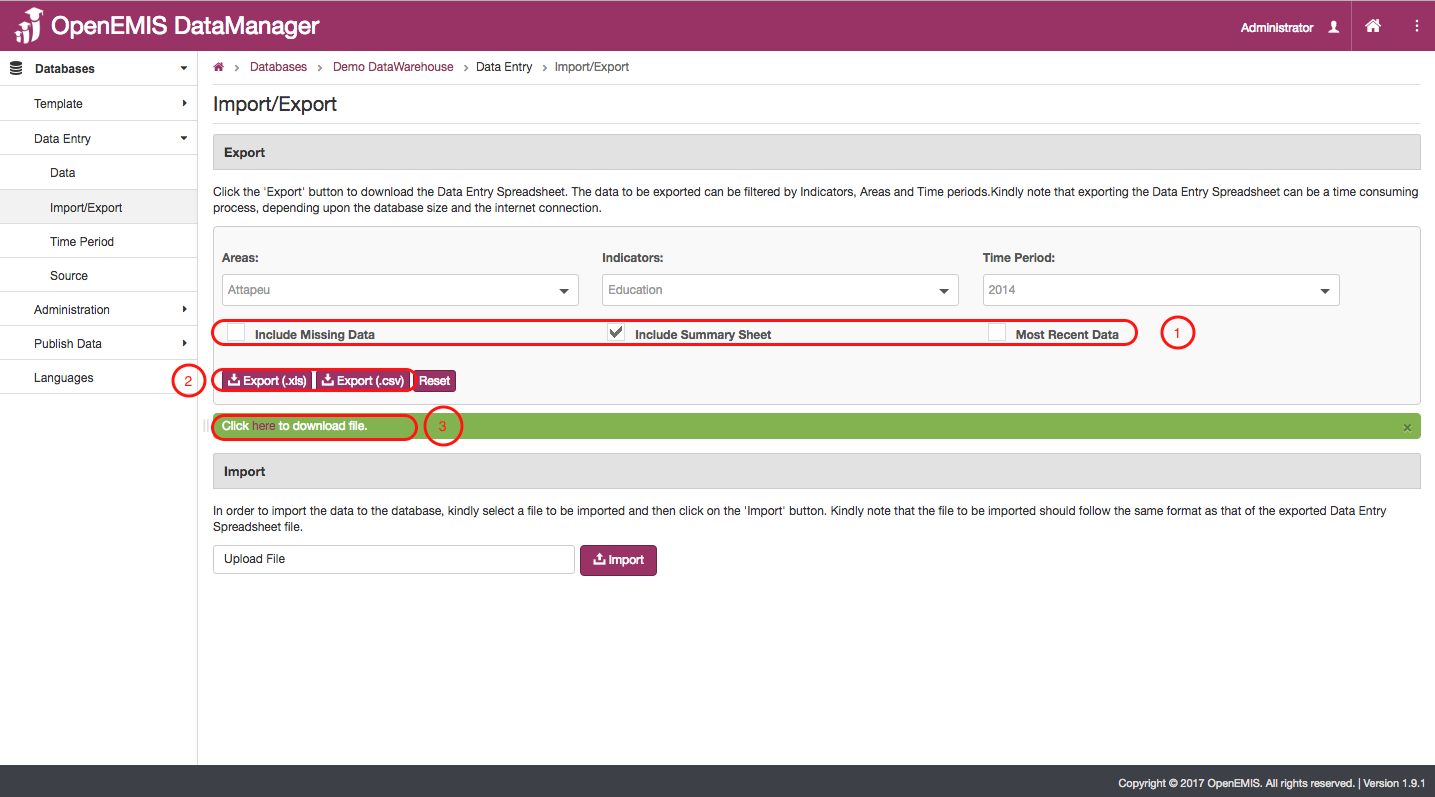
Purpose: In the Import/Export subsection of the Data Entry section you can search through your data to find groups of data that you can export to your computer. You can also upload and import data directly into the software for your use.
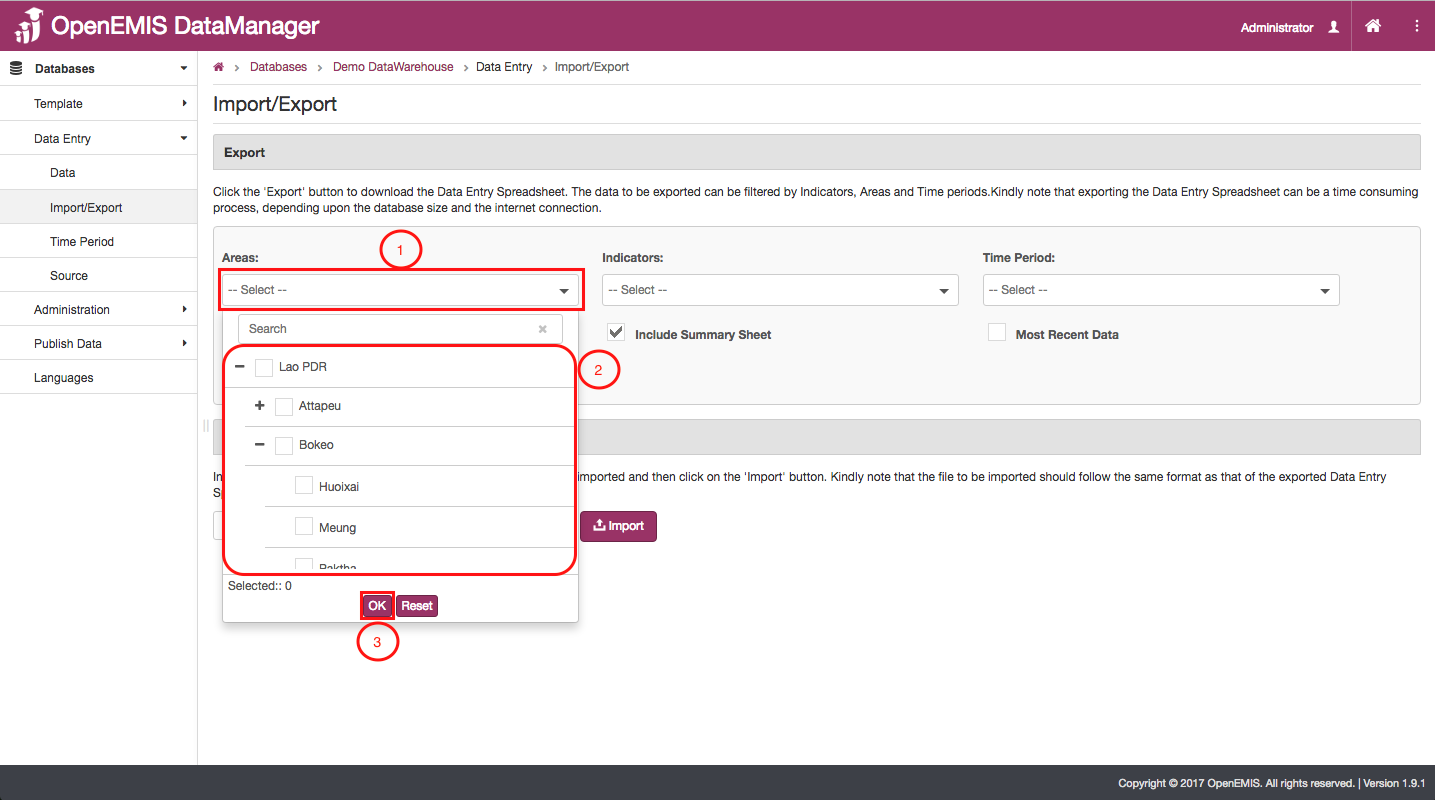
Export:
- The first thing you need to input into the search engine is the area associated with the data values you wish to export.
- Use this drop down menu to select the areas you need from the different area levels.
- Click “Ok”
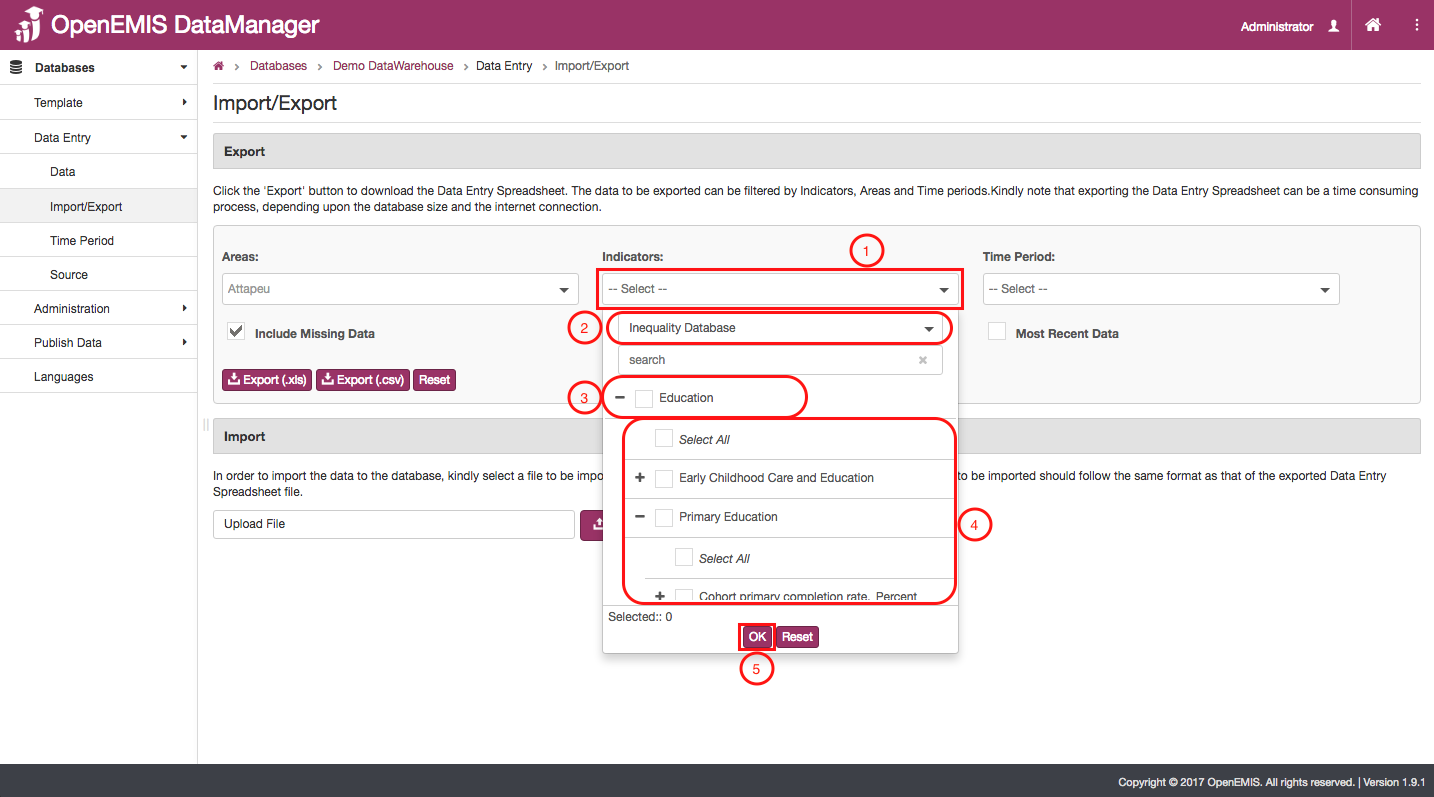
- The second type of information you will have to specify in the search engine is which indicators you will use.
- Select the sector of indicator classifications that you want to export information from. In this example, the sector is “Inequality Database”
- Then select the which of the classification categories relates to the indicators you are looking for. In this example, the classification category is “Education”.
- Once you have selected the classification category, select the classifications that relate to the indicators you are looking for. Then, select the Indicators that you need.
- Click “Ok”
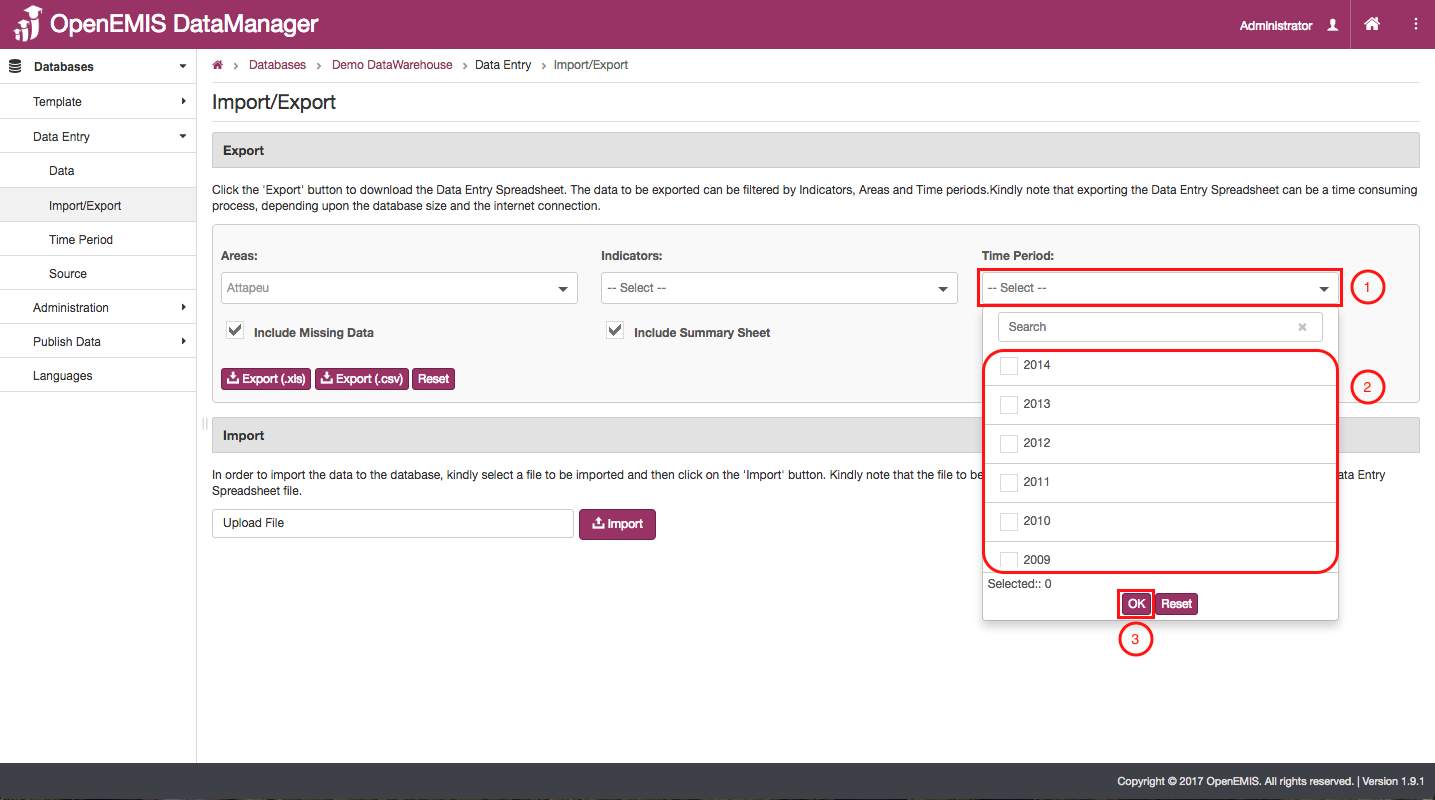
- You will need to input the proper time period into the search engine so that you can specify which data you want to export.
- Select which year or years are appropriately related to the data values you are looking for.
- Click “Ok”.
- Once you have entered all the necessary information into the search engine you will need to select whether or not you want to include “missing data” into the file you will be exporting. To indicate this either check or do not check the box labeled “Include missing data”. Then, decide if you want to include a summary sheet in your exported file. If you do, then check the box label “Include Summary Sheet”. Lastly, if you wish to include the most recent data in your exported file then check the box label “Most Recent data”
- Select which file format you would like to export your file as. The options are (.xls), which is an Excel file, or (.csv), which is a comma-separated value file that can be opened by Excel and other software.
- Once you have picked the type of file you will be exporting, click “here” to download the file.
How to Export Data:
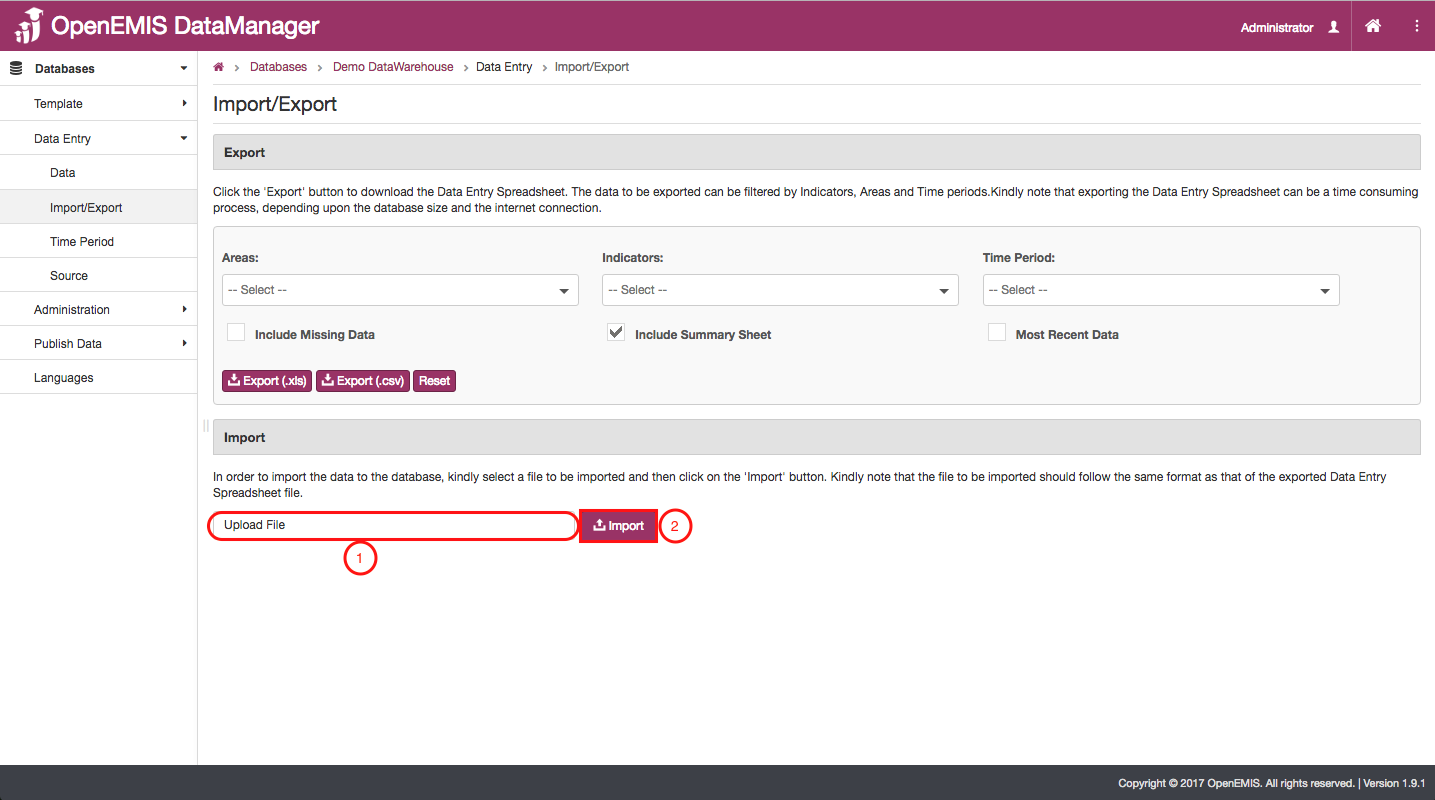
Import:
From this section of the Import/Export page, you can upload and import files.
- First, upload the file that you wish to import. It is necessary that this file is in the same format as files that were exported from DataManager.
- Once the properly formatted file has been uploaded, click on the “Import” icon.