Schools can manage the transfer of students online through an automated approval workflow between two schools. Below is a video tutorial and step by step guide for this process:
For instance, say a student needs to be transferred from one school to another, the Administrator or Principal should first navigate to the students’ profile by clicking Students. They then click the student’s name in the list or select “view” from the Actions drop down.

Next, click the Transfer button at the top of the students’ profile to begin the transfer process.

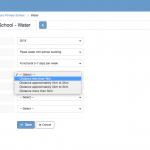
The current Education Grade to which the student is being transferred will be displayed by default but can be changed if necessary. The principal should then select the school to which the student will be transferred, the reason for transfer and make any additional comments. Click Save to finalize the transfer.

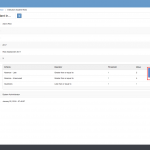
The request will be saved and the student status will change to “Pending Transfer.”

When the Principal or Administrator from the school receiving the transfer logs in, he will see a new notification on his workbench. This is the transfer request. To review the request, he should click on the title of the request.


If he selects “Approve” the request will be saved and the student’ status will change to “Enrolled” in the school accepting the transfer.

The student’s status will then change to “Transferred” in the school that requested the transfer.