Name: OpenEMIS DataManager
Article Name: User Management
Category/Module: DataManager Administration
Tags: User Management, Administration
Version: 1.9.1
Date Updated: 12 June 2017
Article Name: User Management
Category/Module: DataManager Administration
Tags: User Management, Administration
Version: 1.9.1
Date Updated: 12 June 2017
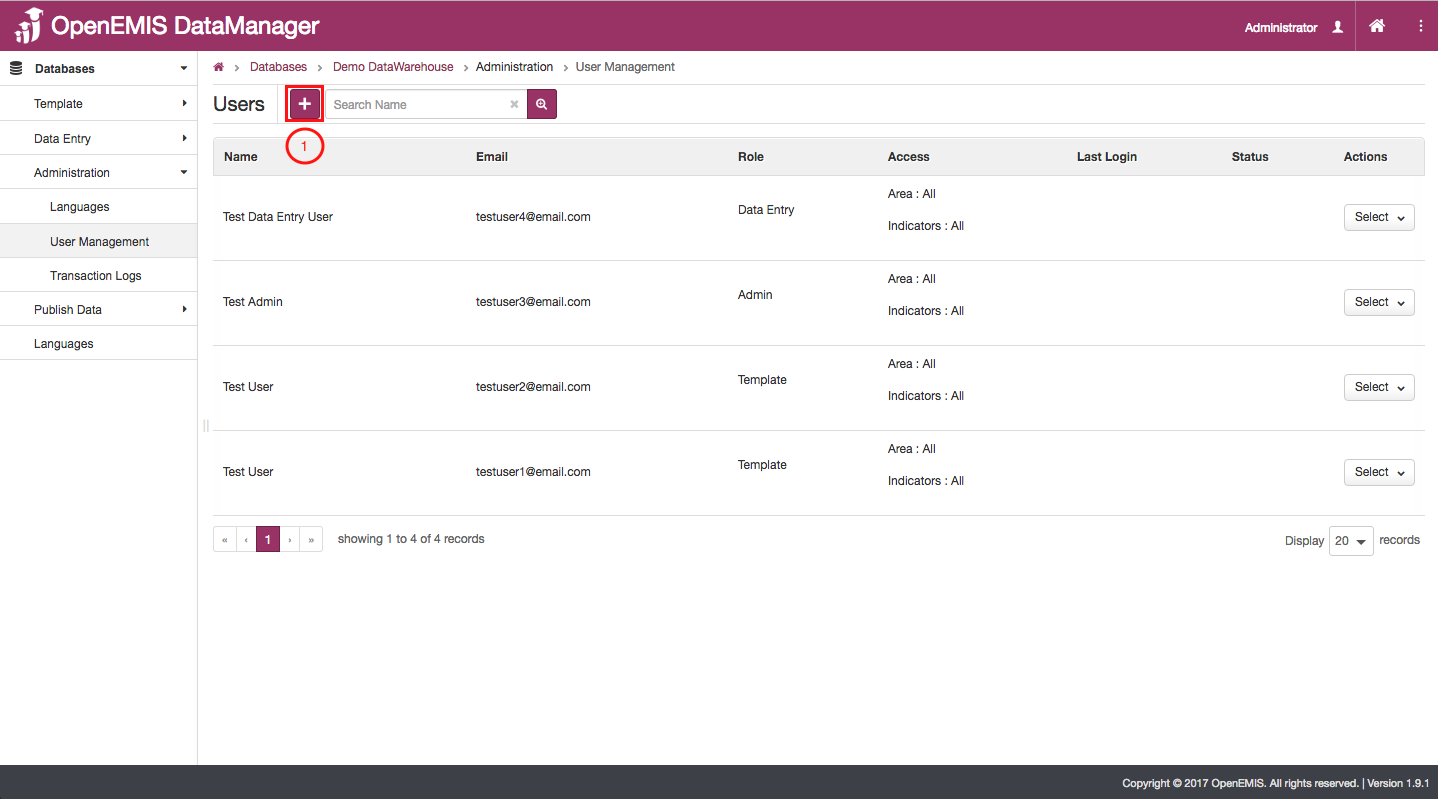
Purpose: The User Management page of the Administration section serves as the location where you can manage and edit the various users of your DataManager. The three distinct types of user are Admin, Template, and Data Entry. Each user type has a different level of access to the DataManager software. Template users can only perform functions in the template section of the software, data entry users can only perform functions in the data entry sections. The Admin users can access the administration section, as well as the data entry and template sections. A user can be both a Template and a Data entry user.
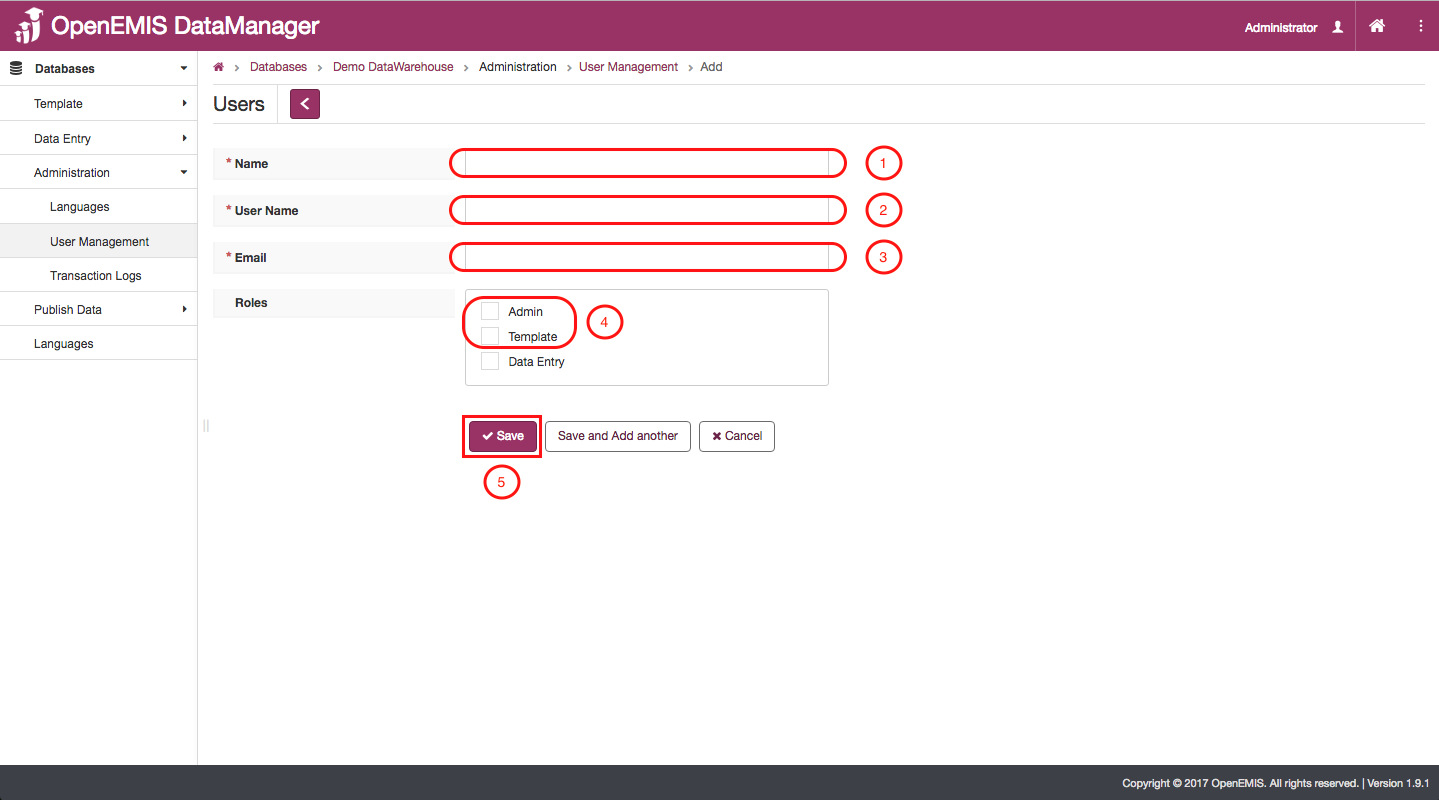
Adding a User
- Click on the “Add” icon.
- Enter the Name of the user into this box.
- Enter the User Name of the user into this box.
- Enter the email address that the user will link to DataManager.
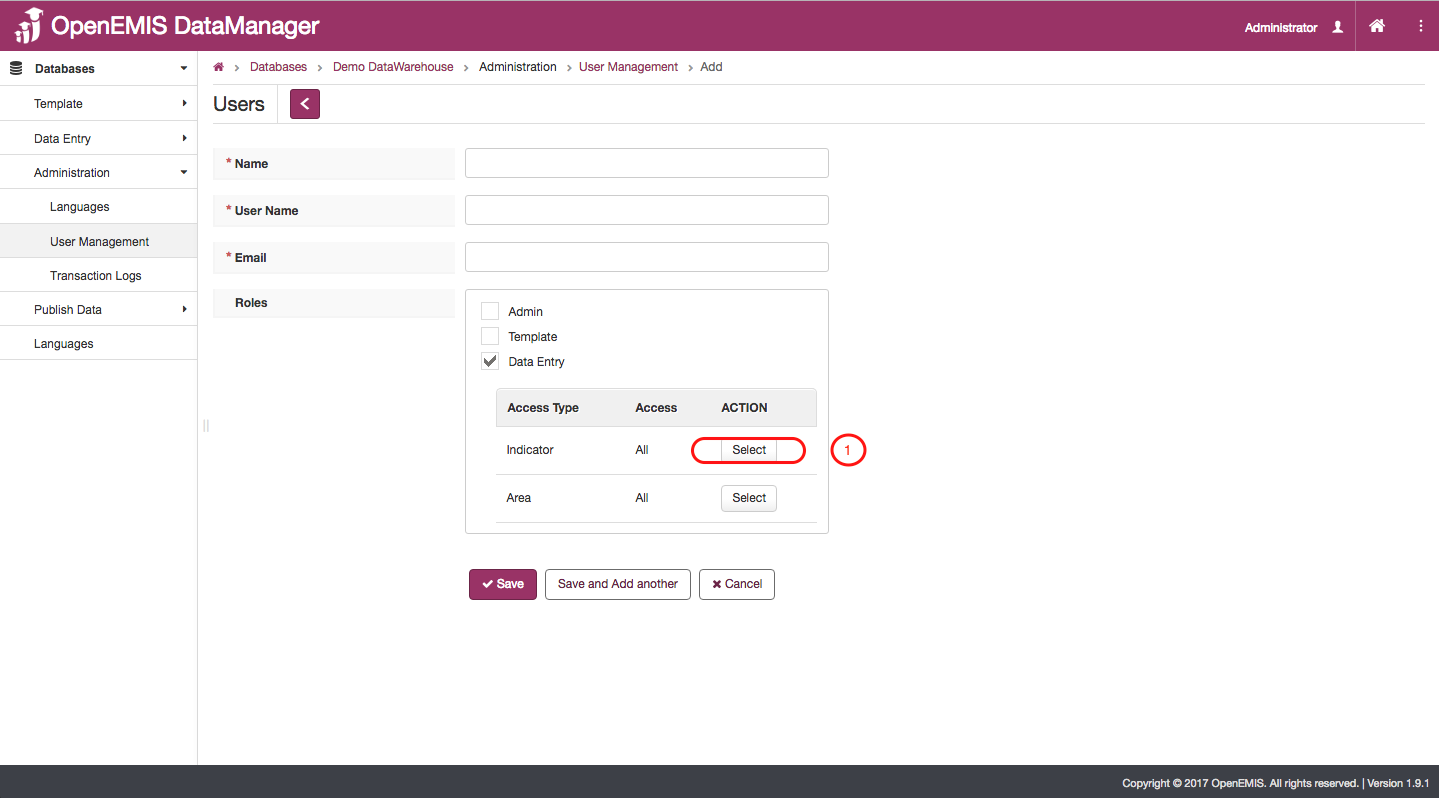
- Select the role that you would like the user to perform. If you select Admin or Template then you can continue to step 5. If you select the Data Entry role then proceed with the User – Creation process.
- If you selected the Data Entry role then you will need to specify what kind of data that the user will be able to manage.
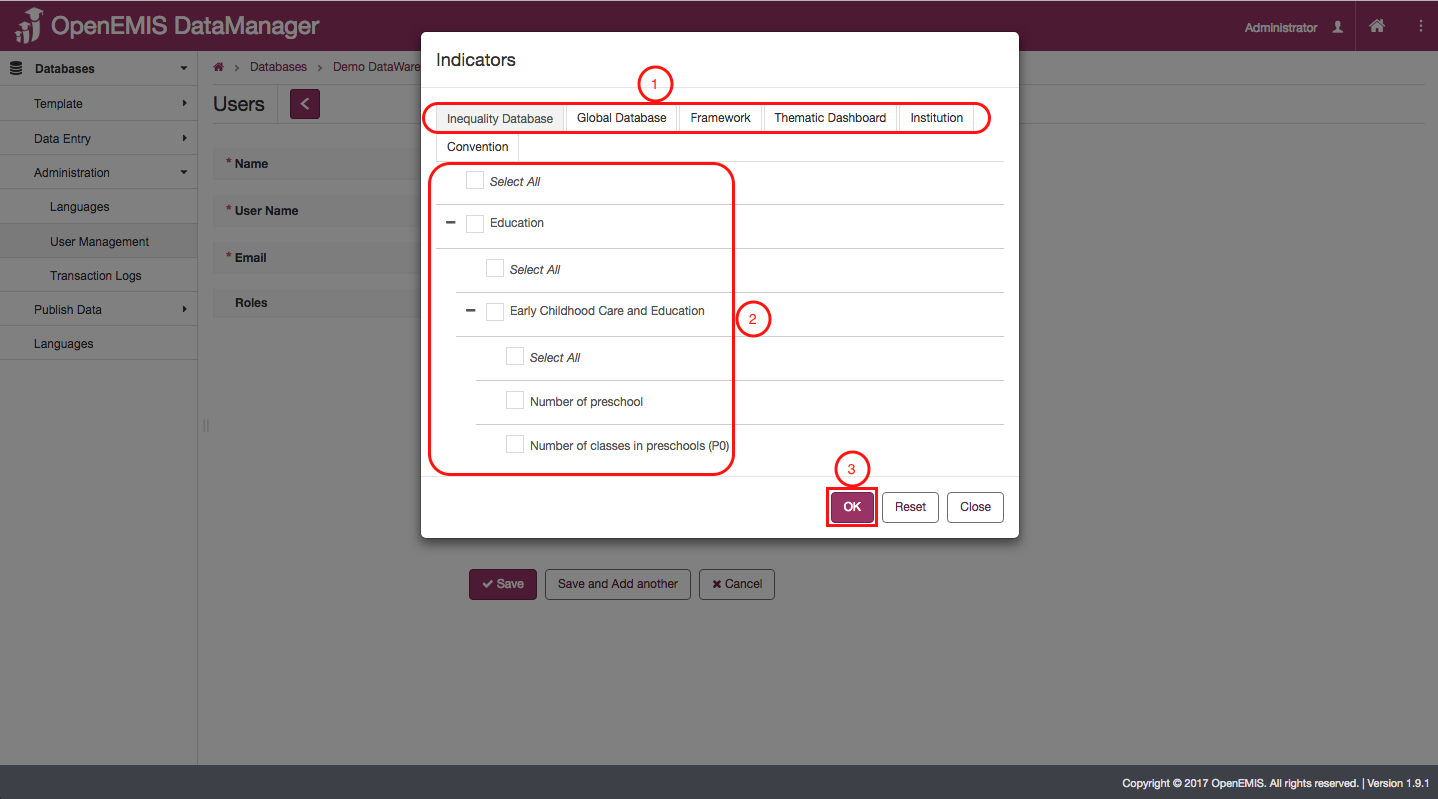
- The first type of restriction you will need to specify for the data entry user is which indicators he or she is allowed to manage.
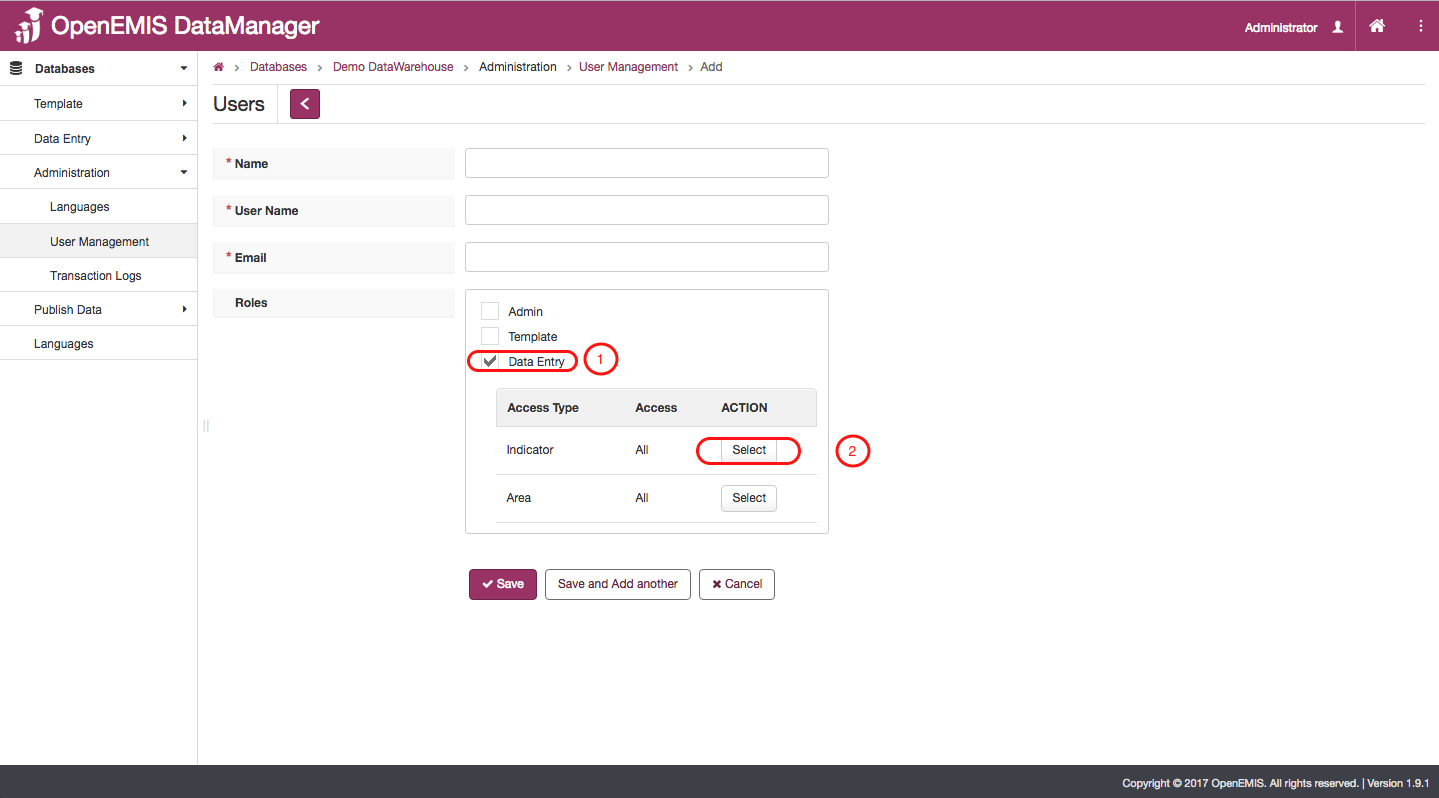
- When selecting which of the indicators the data entry user will work with, first select which of the categories the indicators will be in.
- Then select which classifications of indicators, or, more specifically, which individual indicators the data entry user will work with.
- Once all of the indicators have been selected, click on the “Ok” icon.
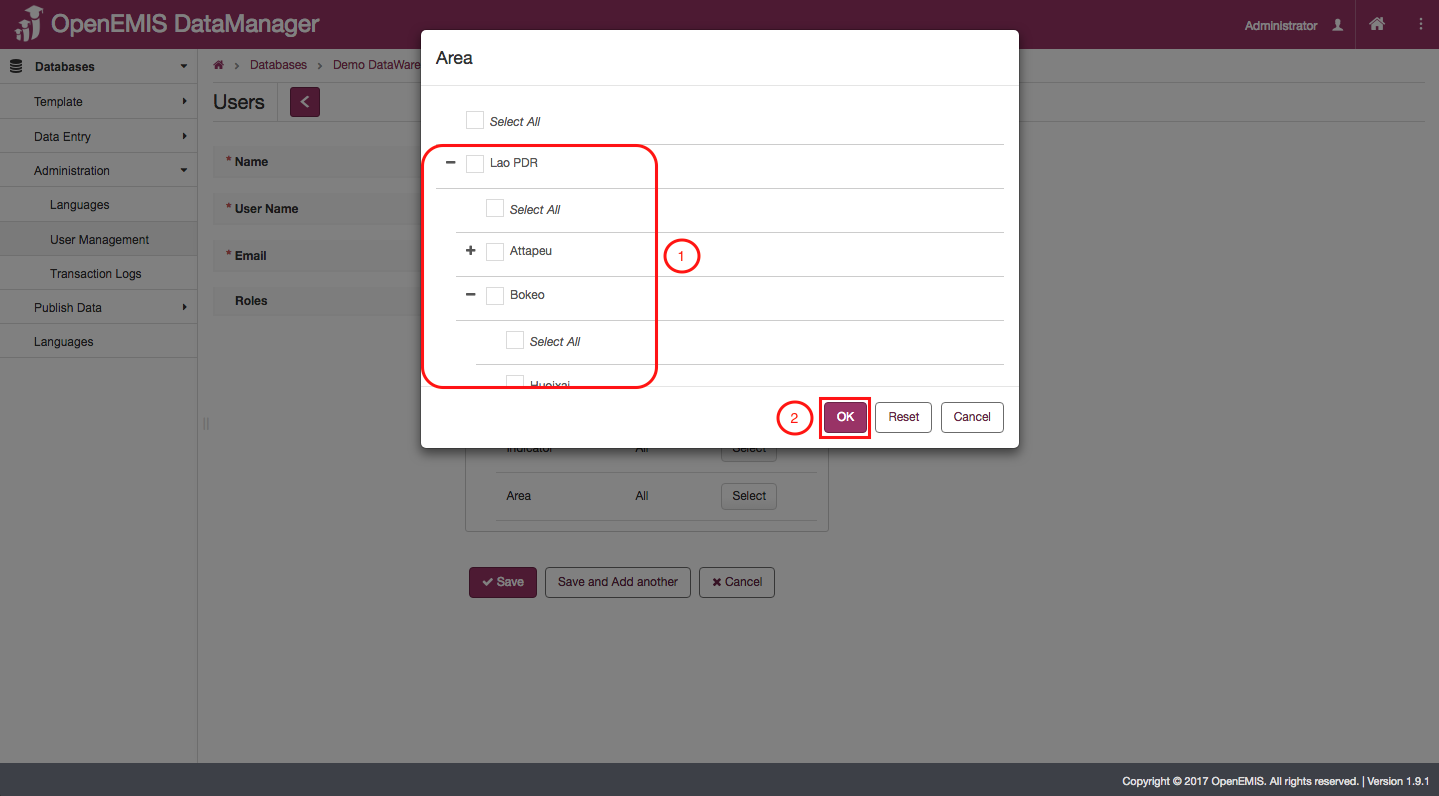
- Now, select the geographical area that the data the user will be using is from.
- Once you do then this pop – up window will appear. Select the geographical areas that the data that the user will be using is from.
- Upon having selected all of the necessary areas then click on “Ok”.
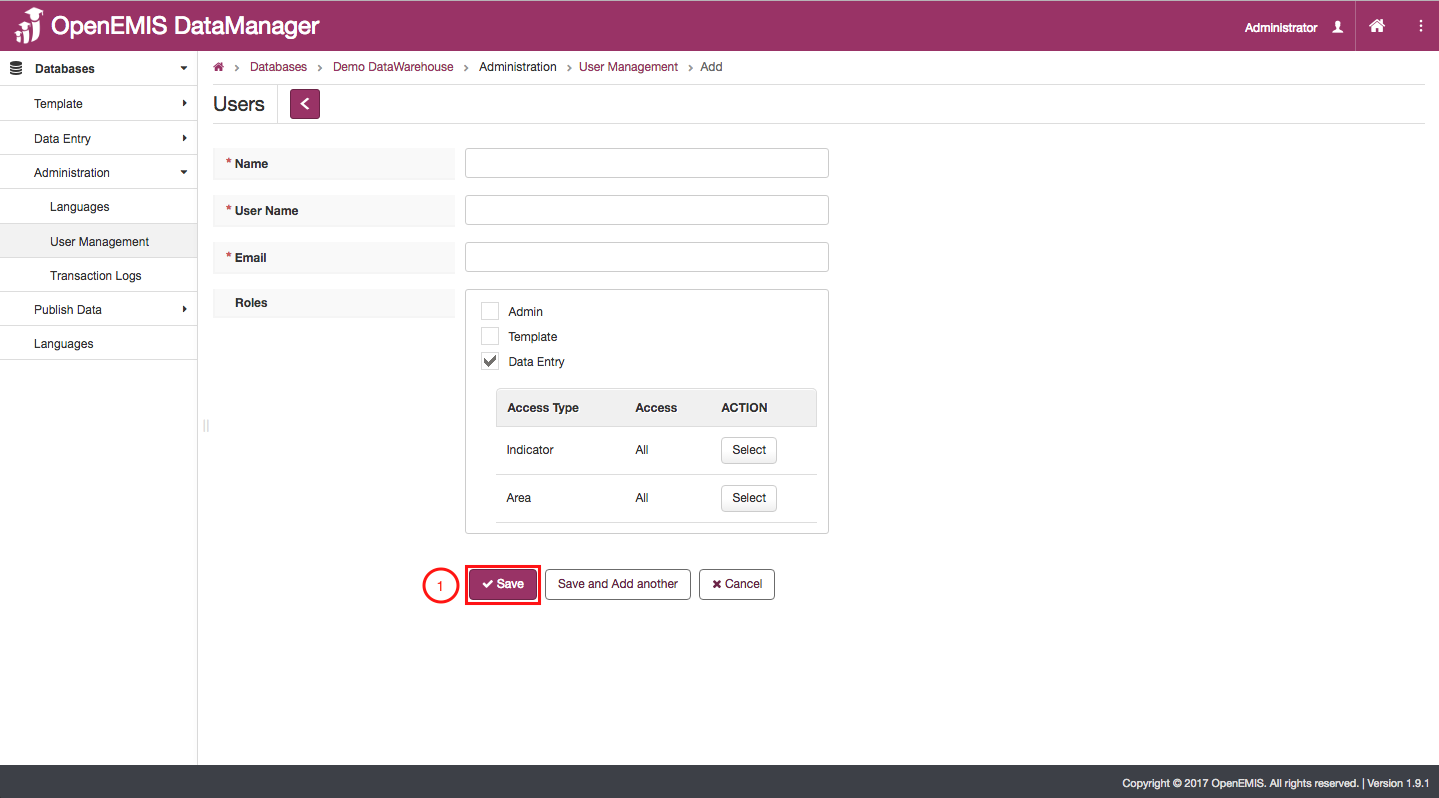
- Once all of the proper specifications for what the user will be working with have been inputted, click on “Save” to permanently save your changes.
Adding a User Video:
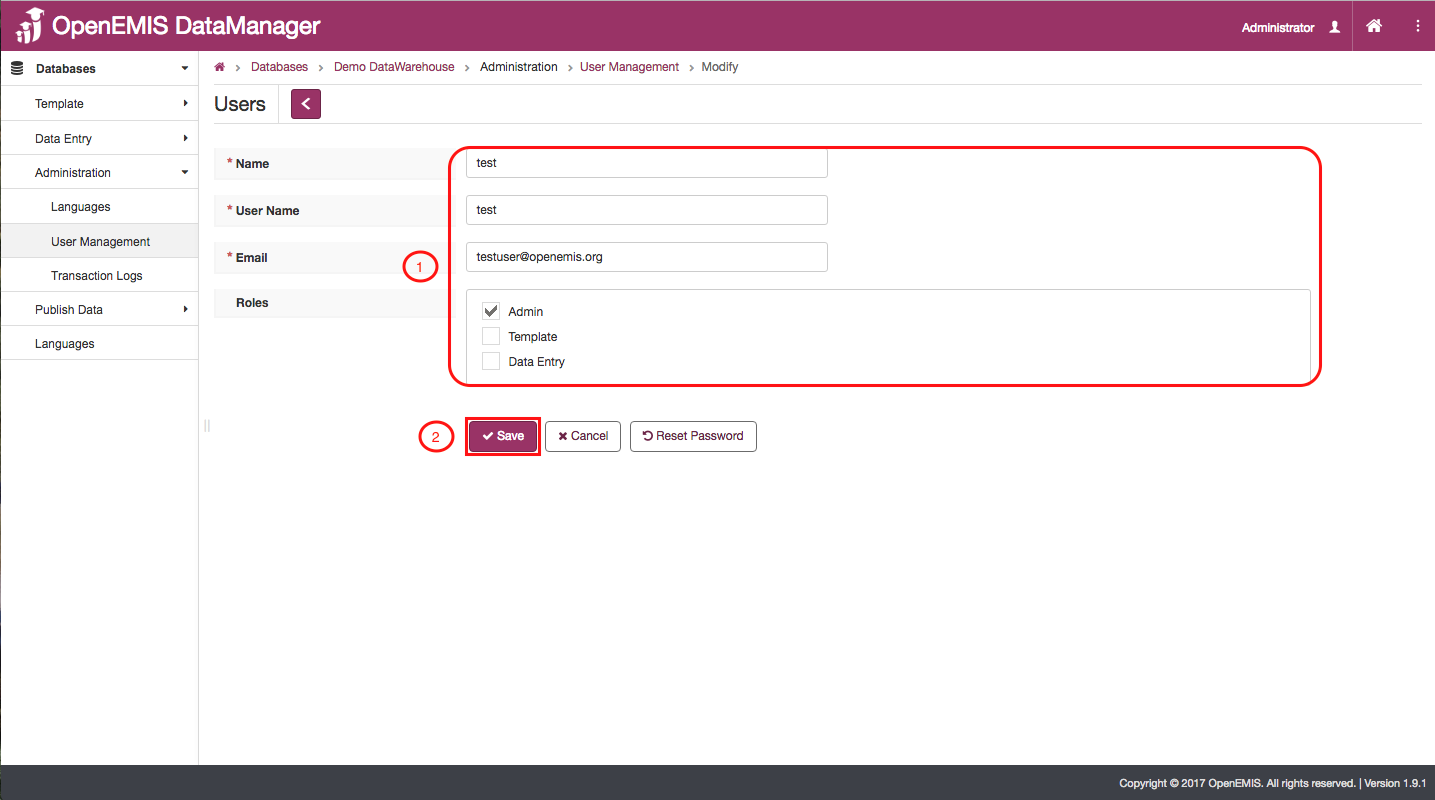
Editing a User
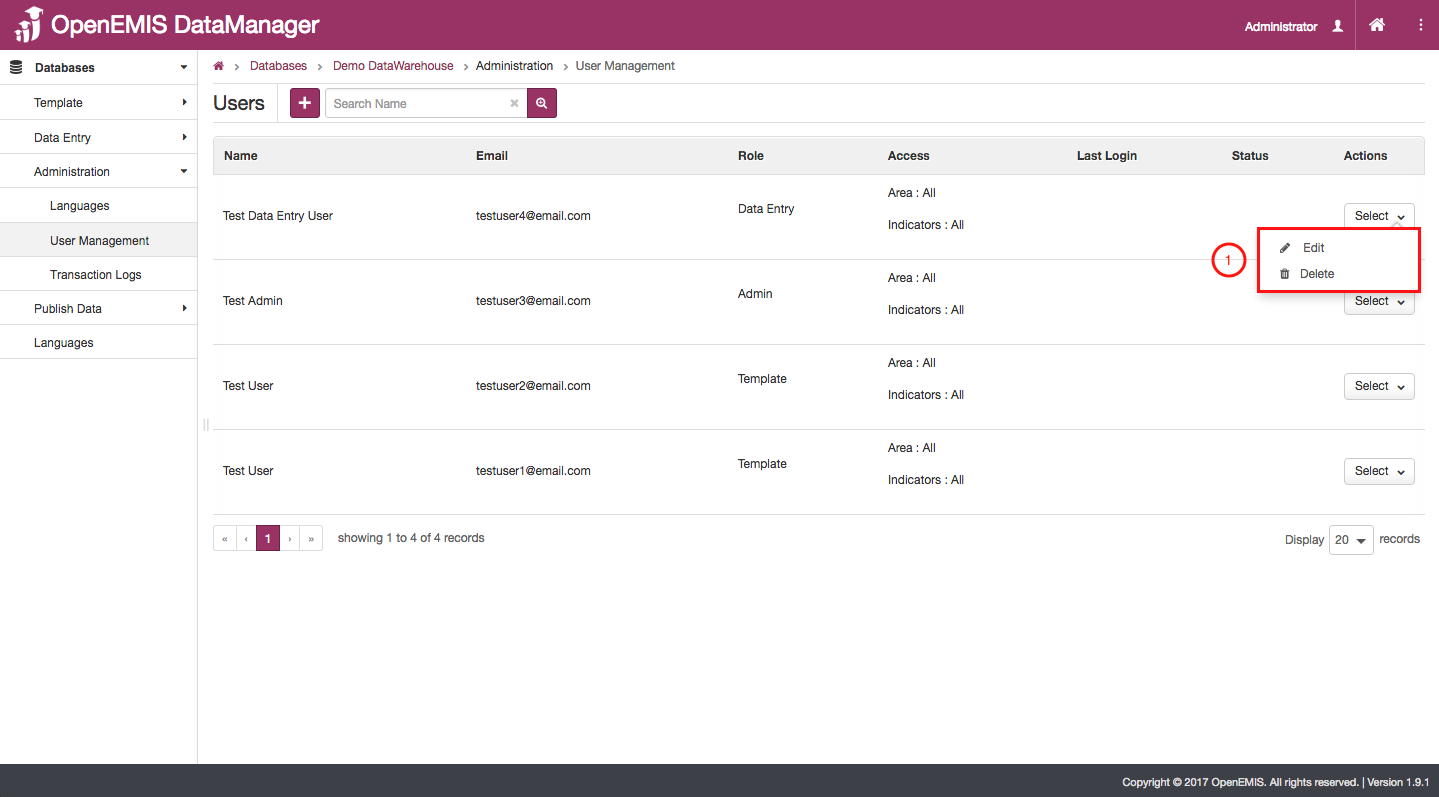
- By clicking on the “Select” icon for a certain user, you will make a dropdown menu appear. From here you can either select on “Edit” and proceed to the editing page or select “Delete” and delete the respective user.
- Edit the information in the same way as it is illustrated in the “Add User” section of this Knowledge Base article seen above. You can edit everything from the name of the user to the functions that the user is allowed to perform in DataManager.
- Once you have made all the necessary changes click on “Save”.