Article Name: Add External Students
Category/Module: Administration
Tags: External, Data Source
Version: 3.8.6
Date Updated: 10 Jan 2017
1) Go to OpenEMIS Core
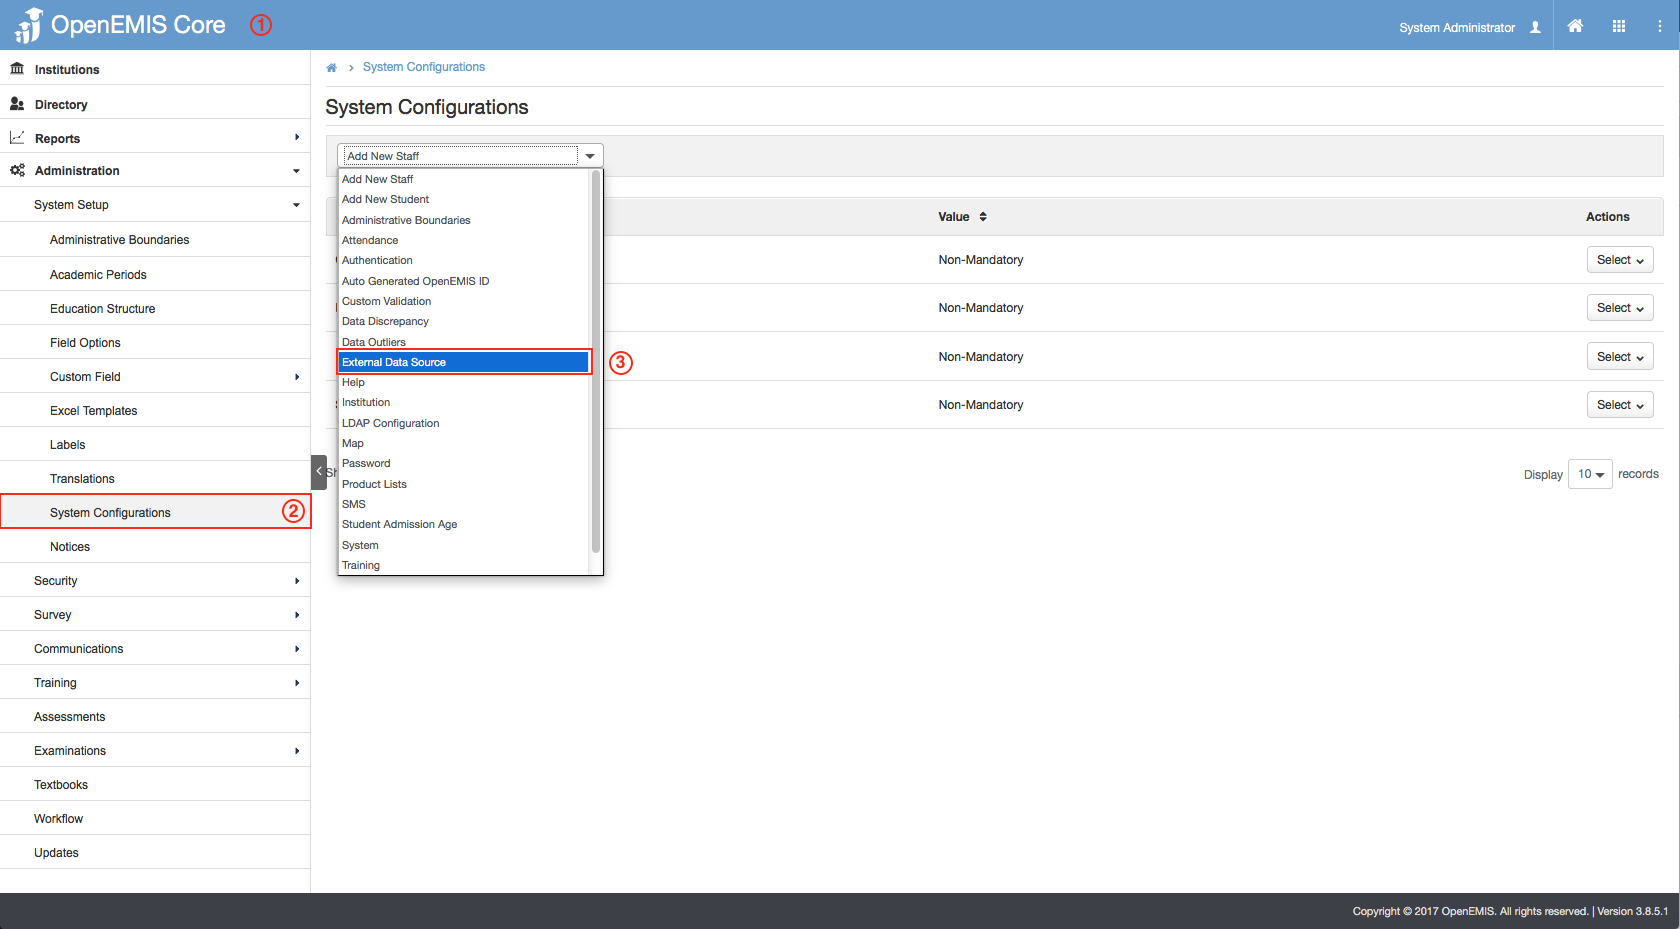
2) Go to Administration > System Setup > System Configurations
3) Select External Data Source in the Dropdown list.
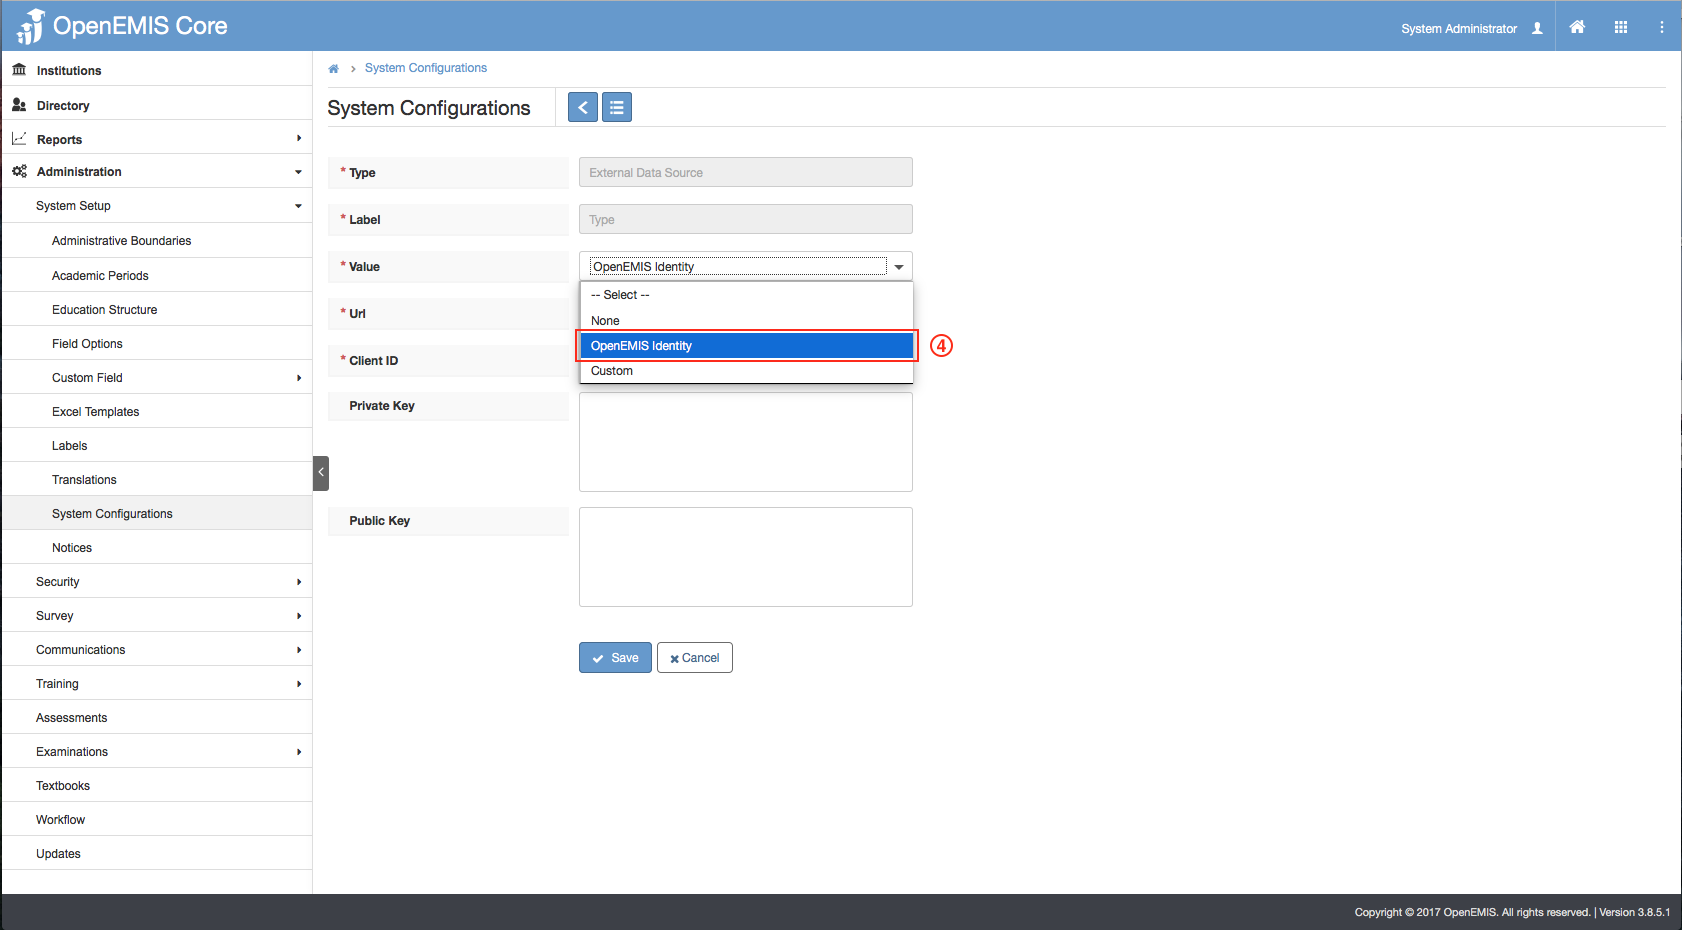
4) Select OpenEMIS Identity in Value list.
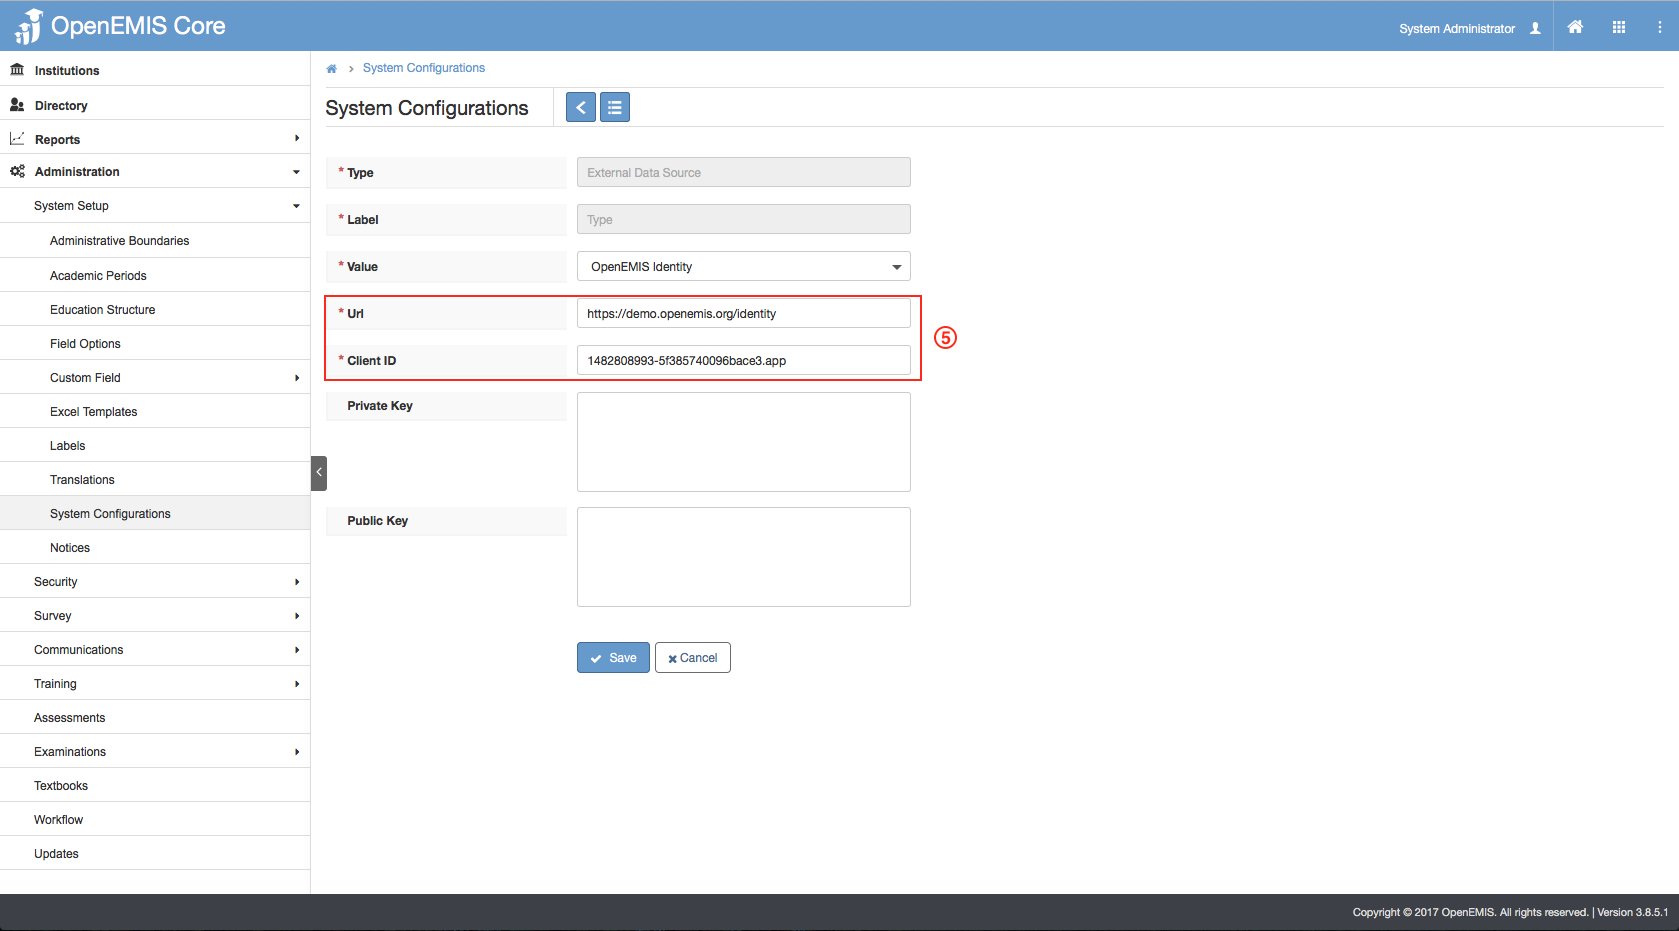
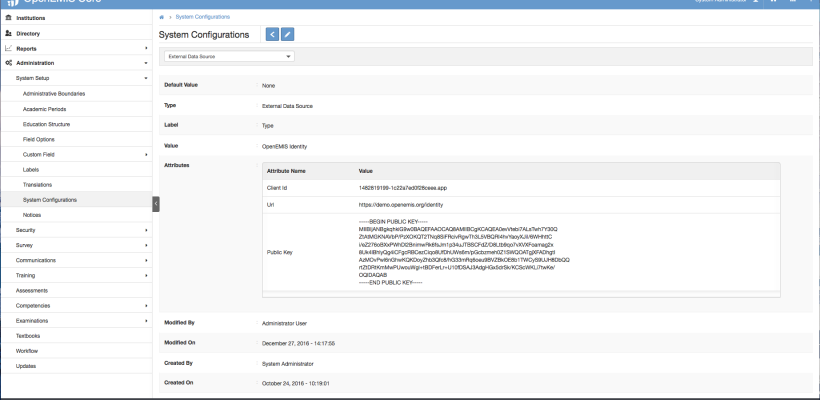
5) Enter the URL (which would be the Identity URL), Client ID (which would be the Client field in OpenEMIS Identity)
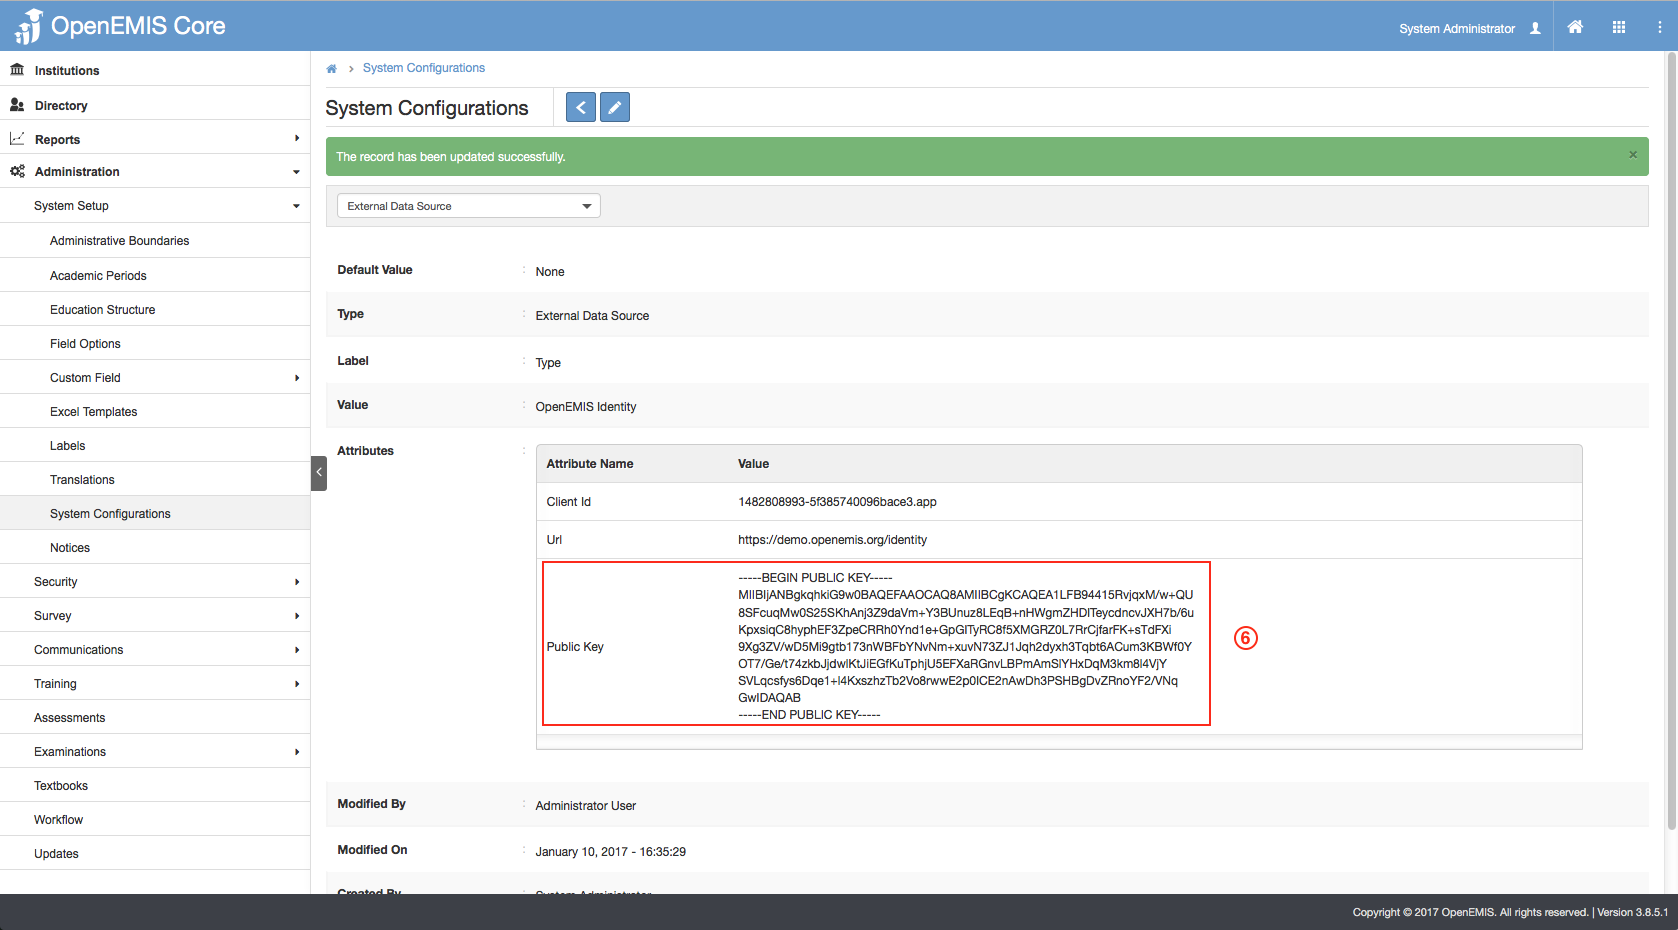
6) Select Save, you will be able to see the public key being generated. Private key will be visible only upon selecting the edit icon.
Add External Students
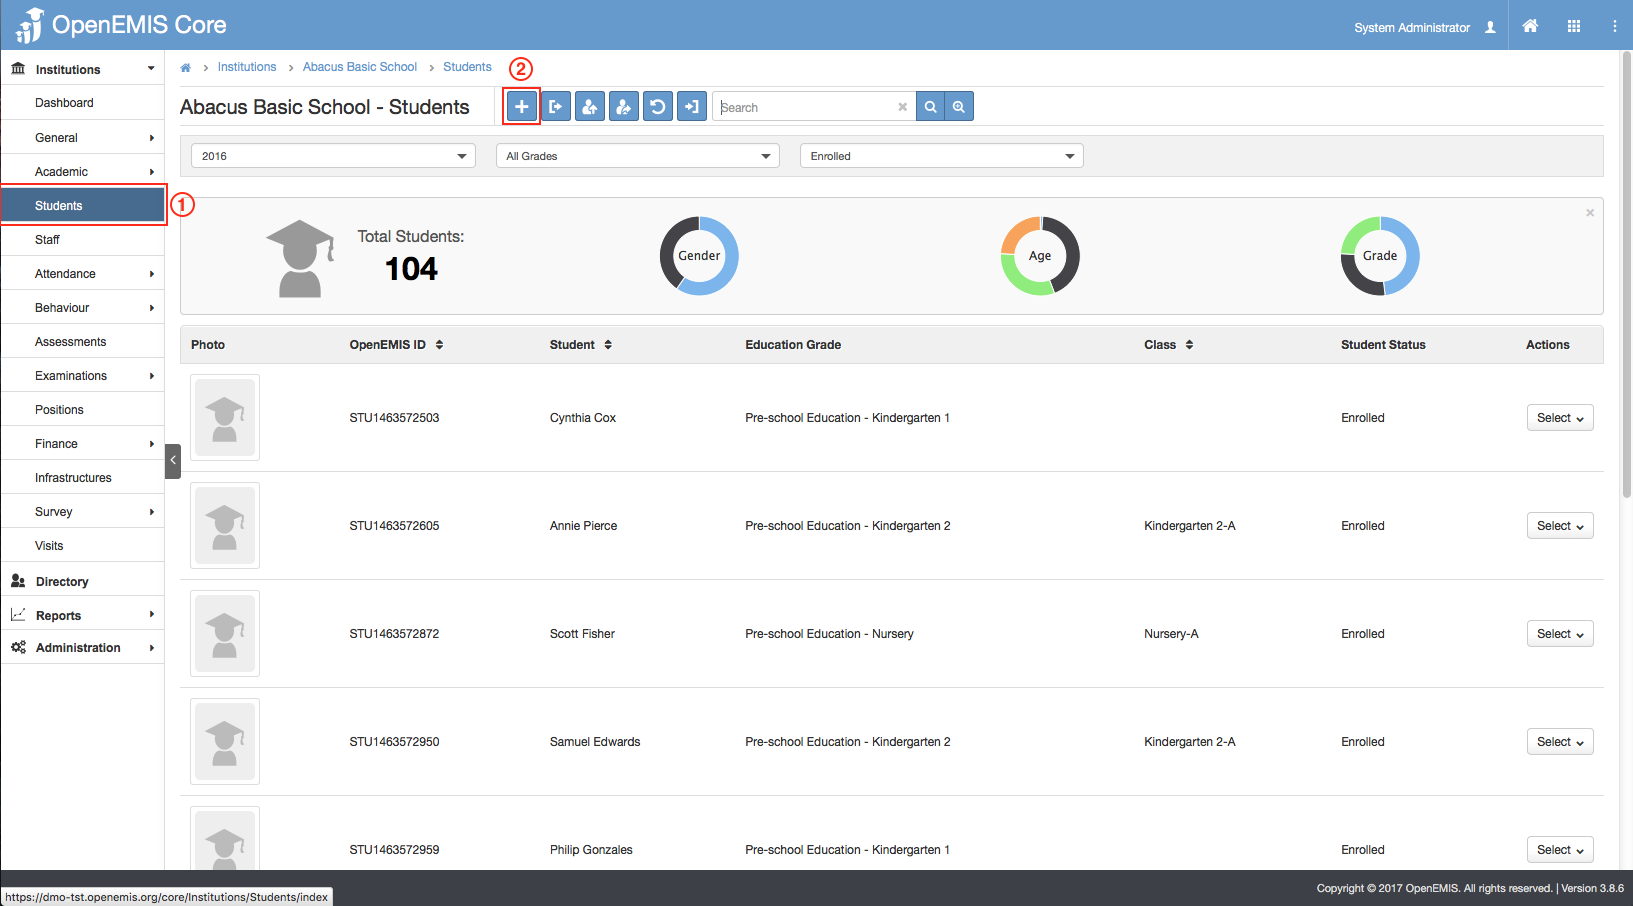
1) Go to Institutions > Students
2) Select on Add icon
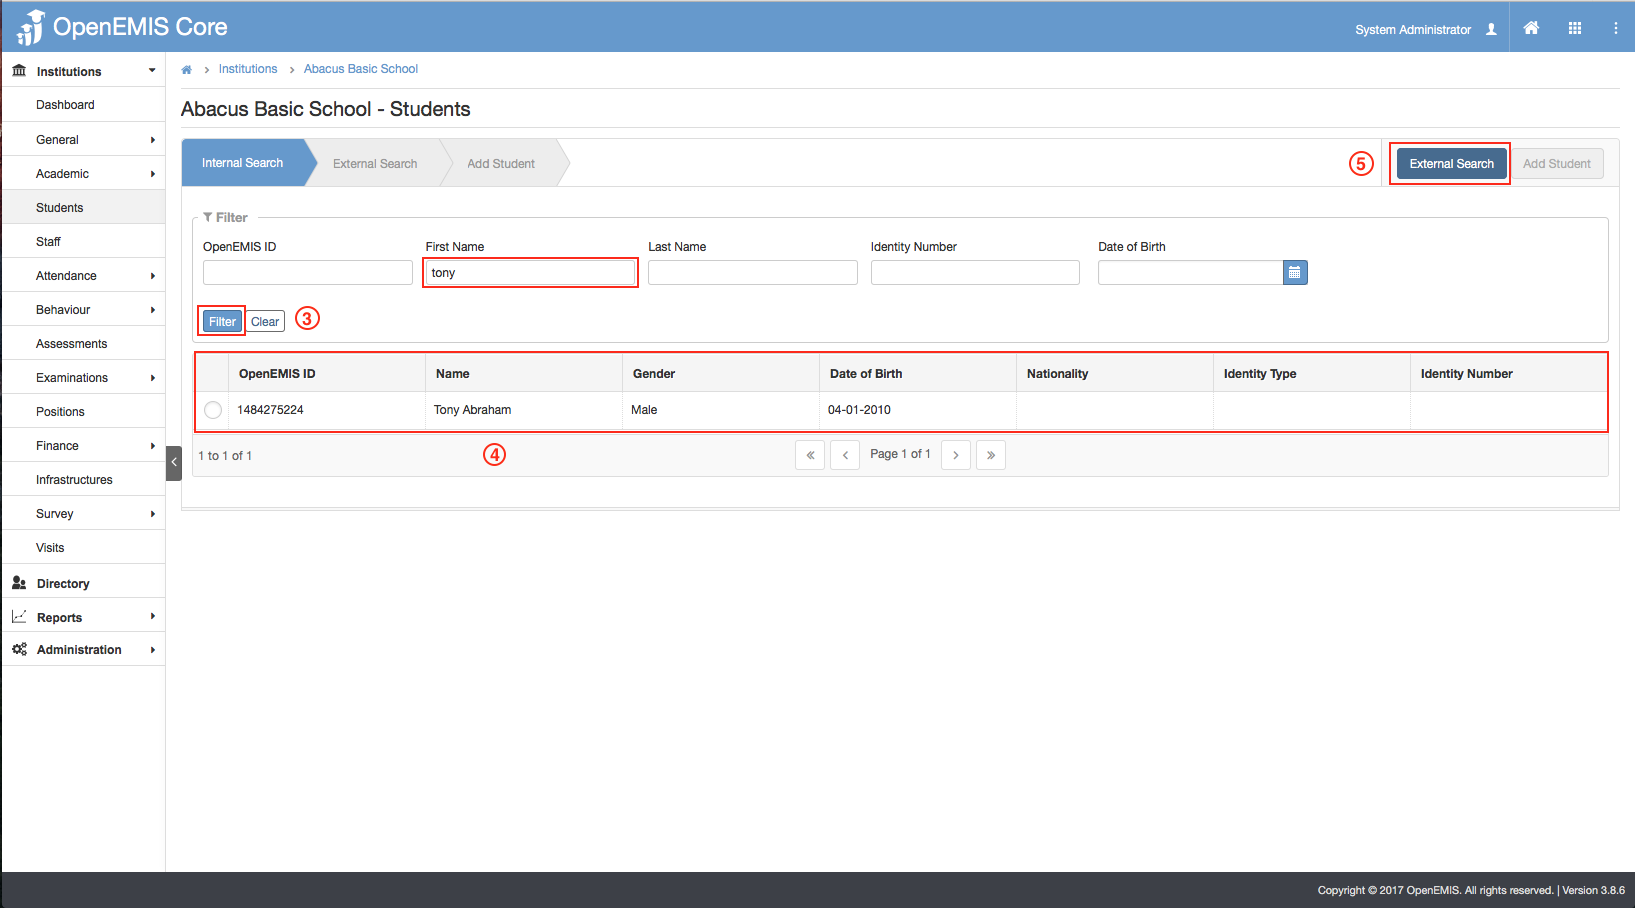
3) To trigger the External Search, you would have to search for the Student Name > filter
4) The system will search and display all the users in the system (Internal Search)
5) You will now be able to see an External Search button appearing on the page. Select on External Search button.
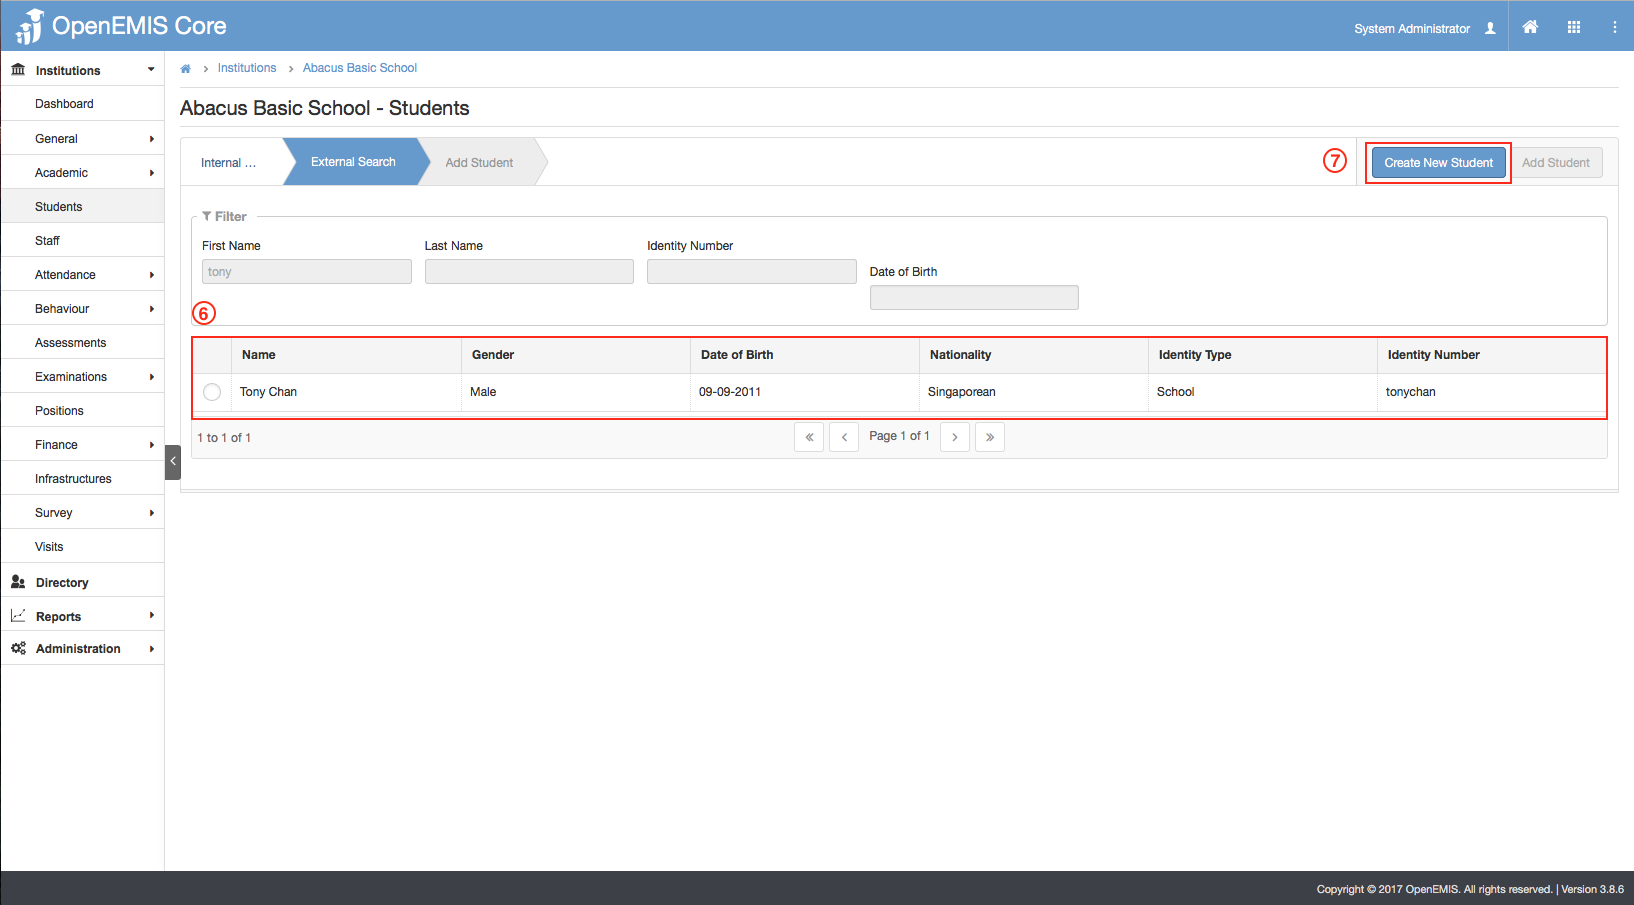
6) System will retrieve all the students in the external data source.
7) By default, you will be able to see ‘Create New Student‘ button.
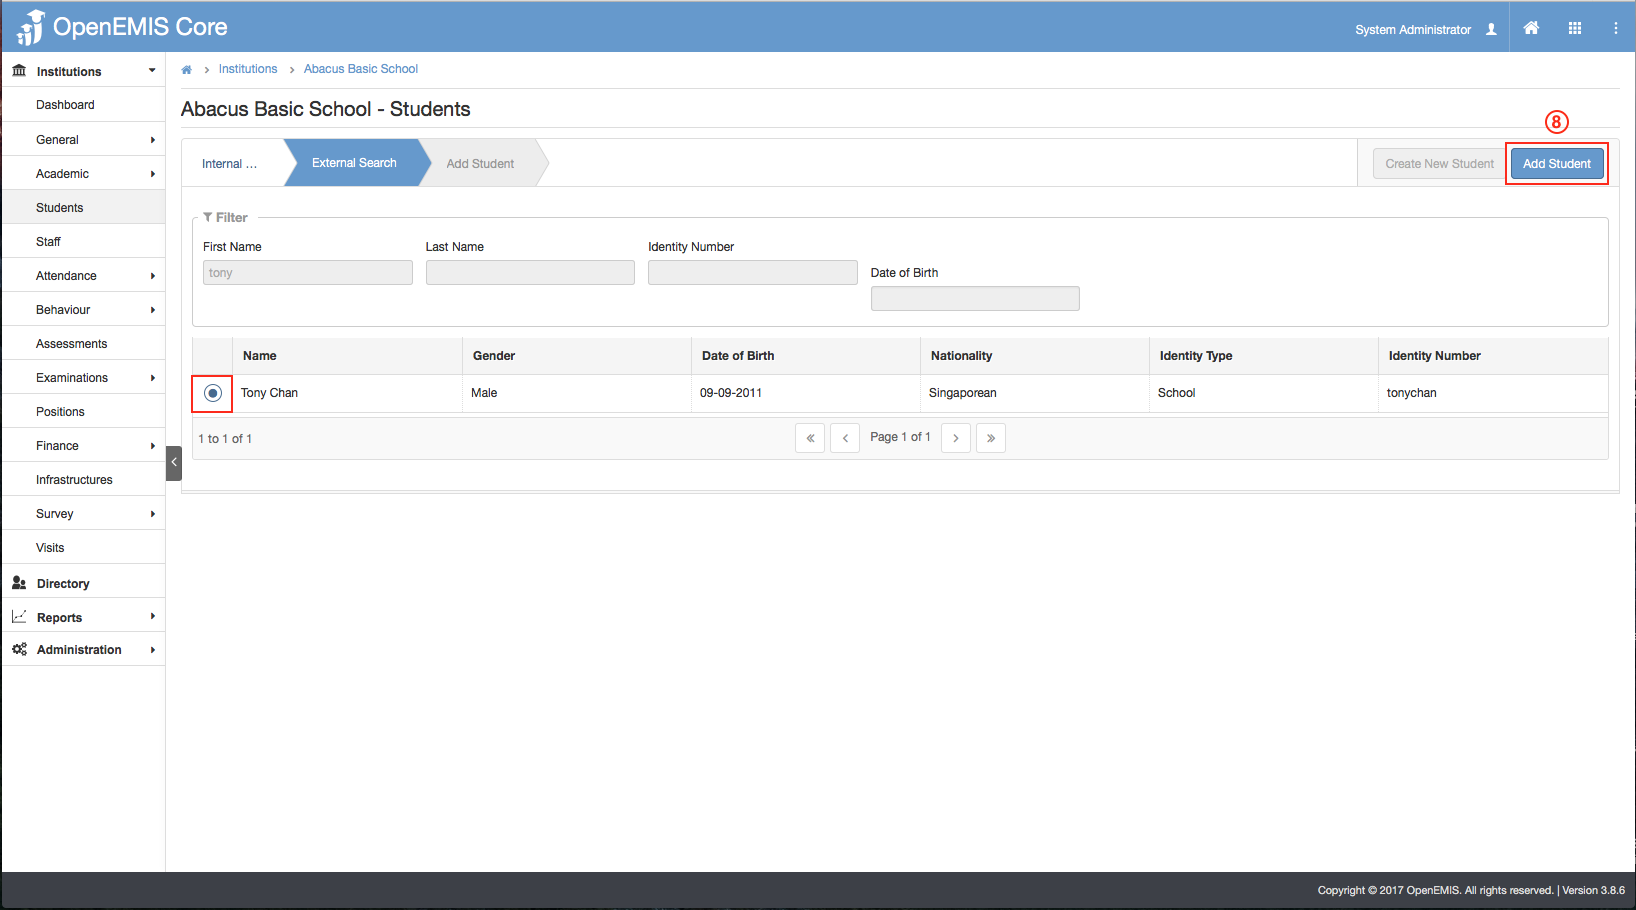
8) However, if you have found the user in the External Search, select on the record, ‘Add Student’ button will appear.

9) Upon selecting Add Student, the OpenEMIS ID will be auto-generated, and the status will be set as default to ‘Pending Admission’, and the end date would display the last day of the selected Academic Period.
10) You can select the Academic Period, Education Grade, Class and Start Date > Complete
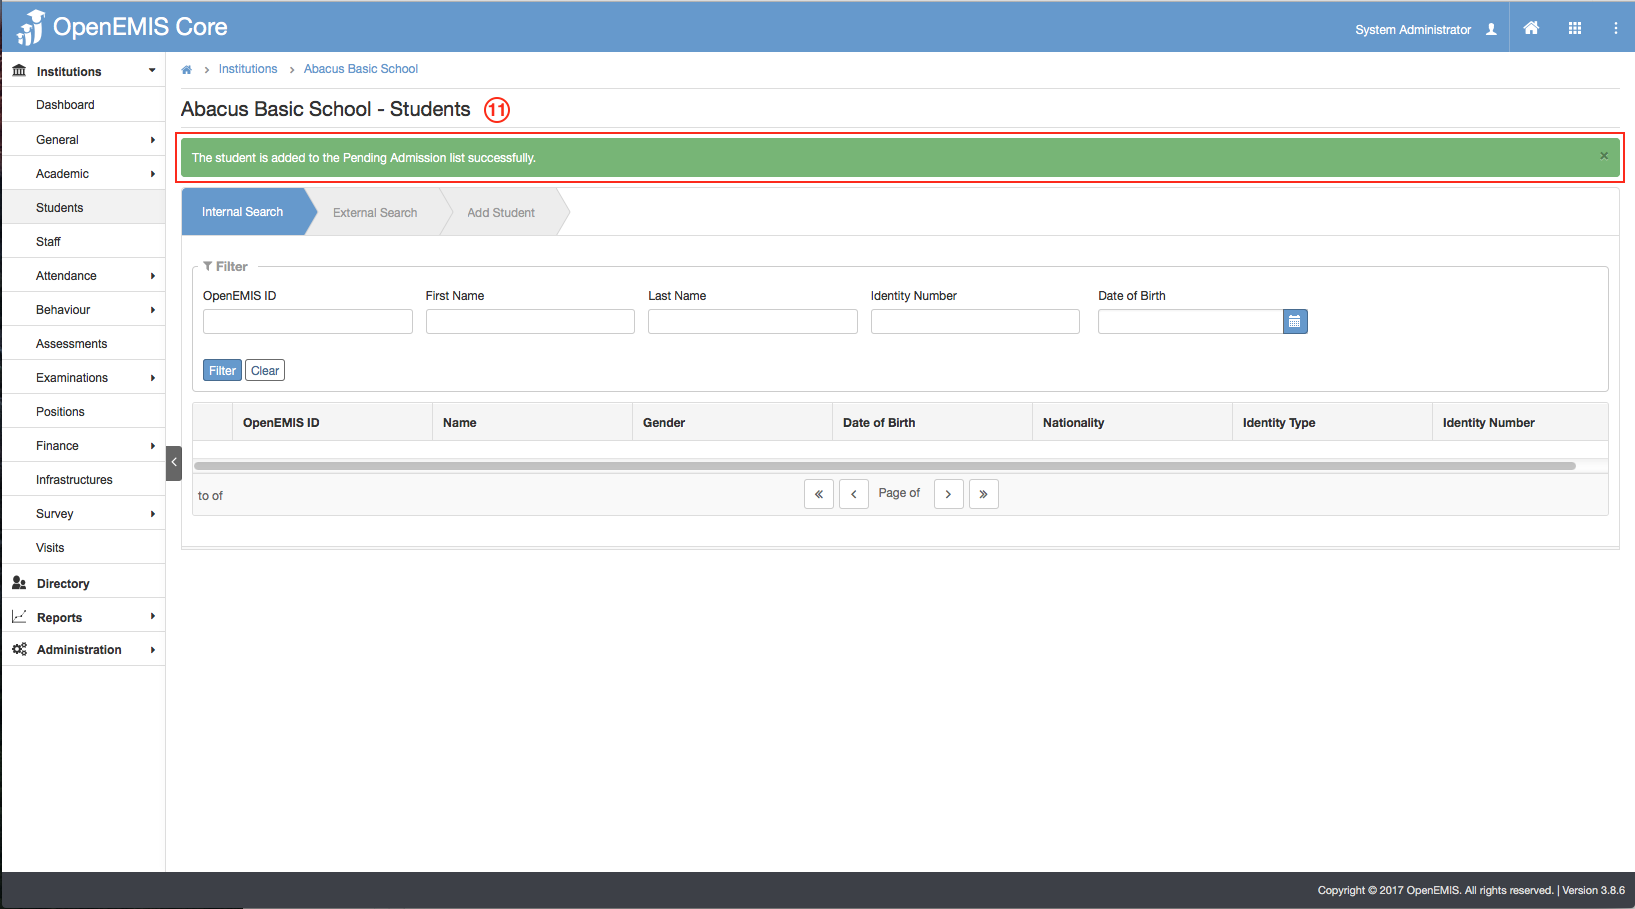
11) The system will display a successful message upon adding successfully.
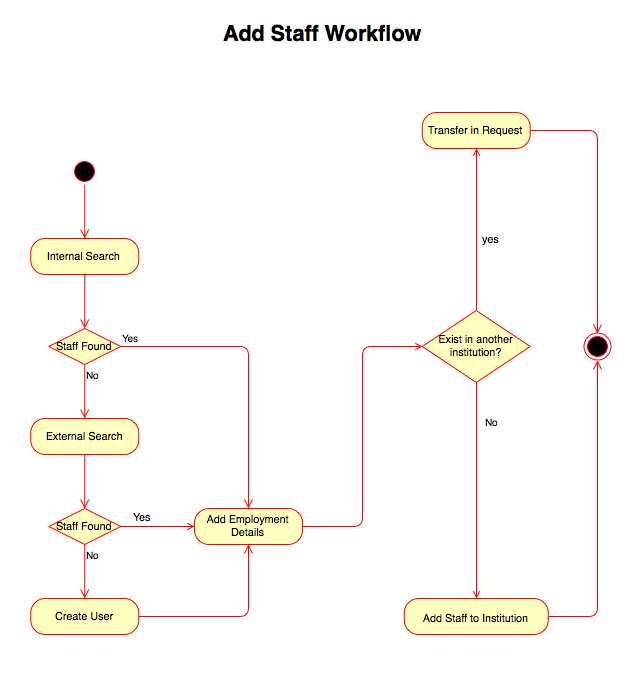
Add External Staff
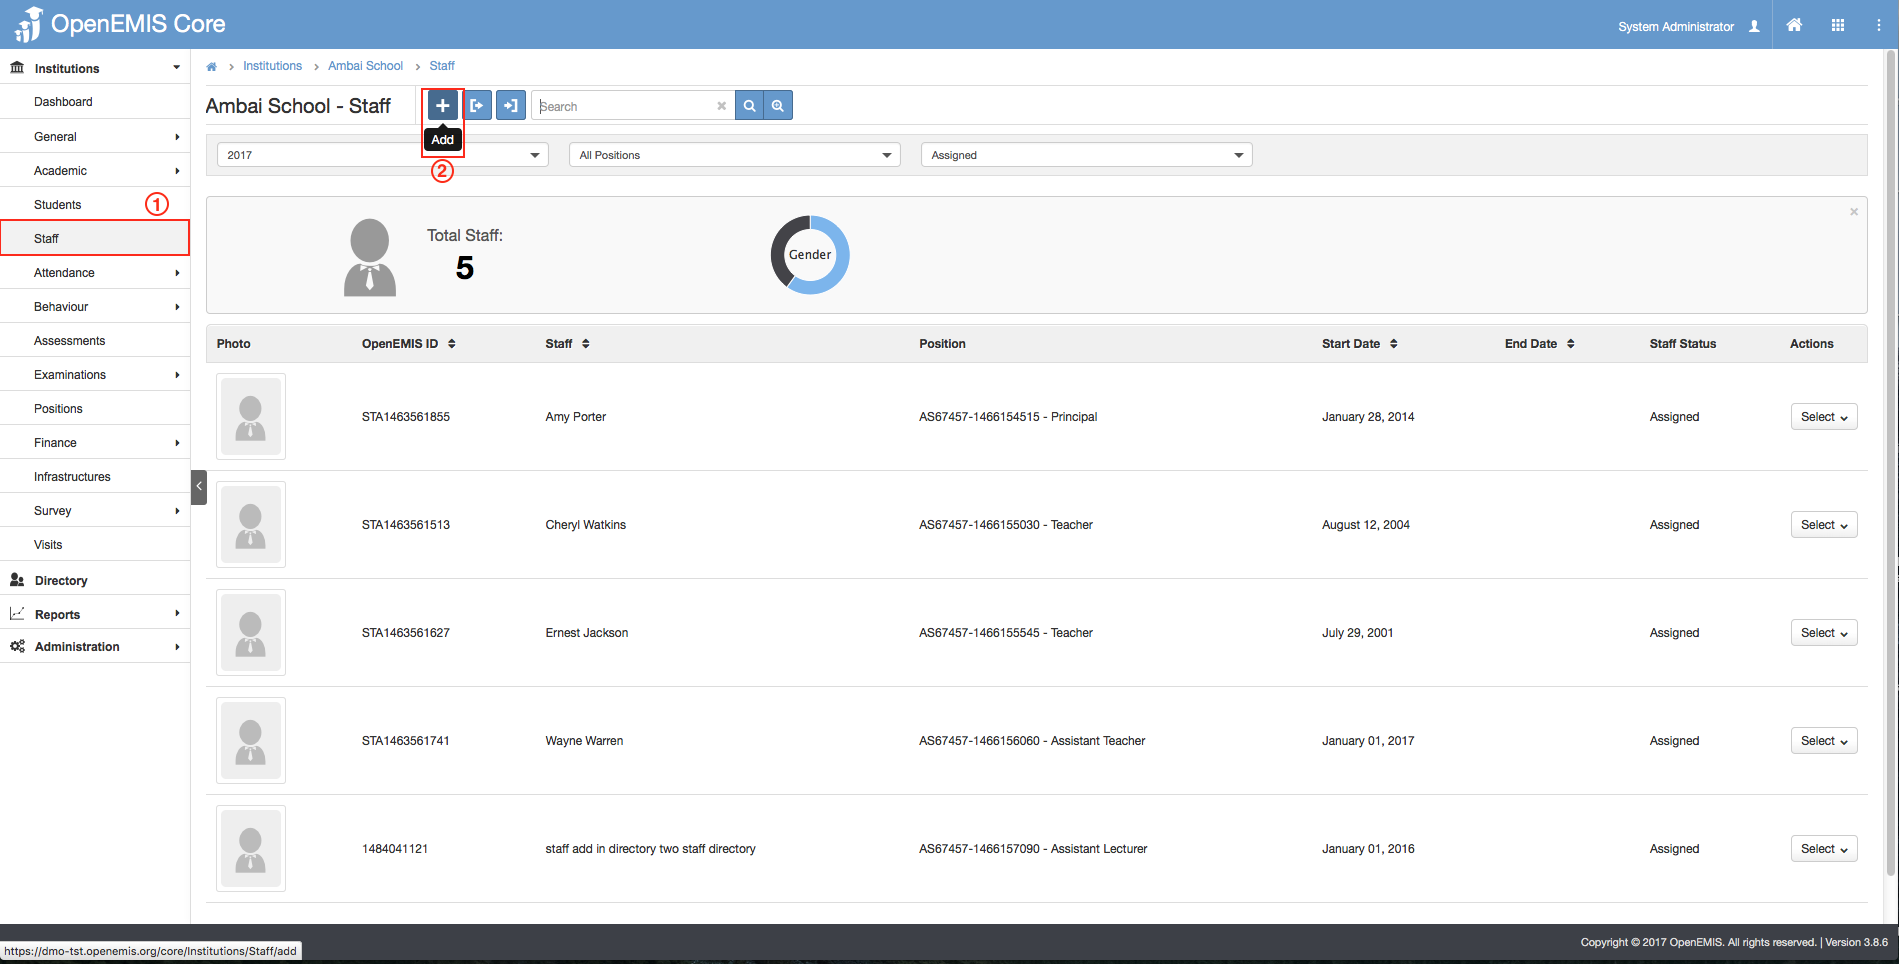
1) Go to Institutions > Staff
2) Select on Add icon.

3) To trigger the External Search, you would have to search for the Staff Name > filter
4) The system will search and display all the users in the system (Internal Search)
5) You will now be able to see an External Search button appearing on the page. Select on External Search button.
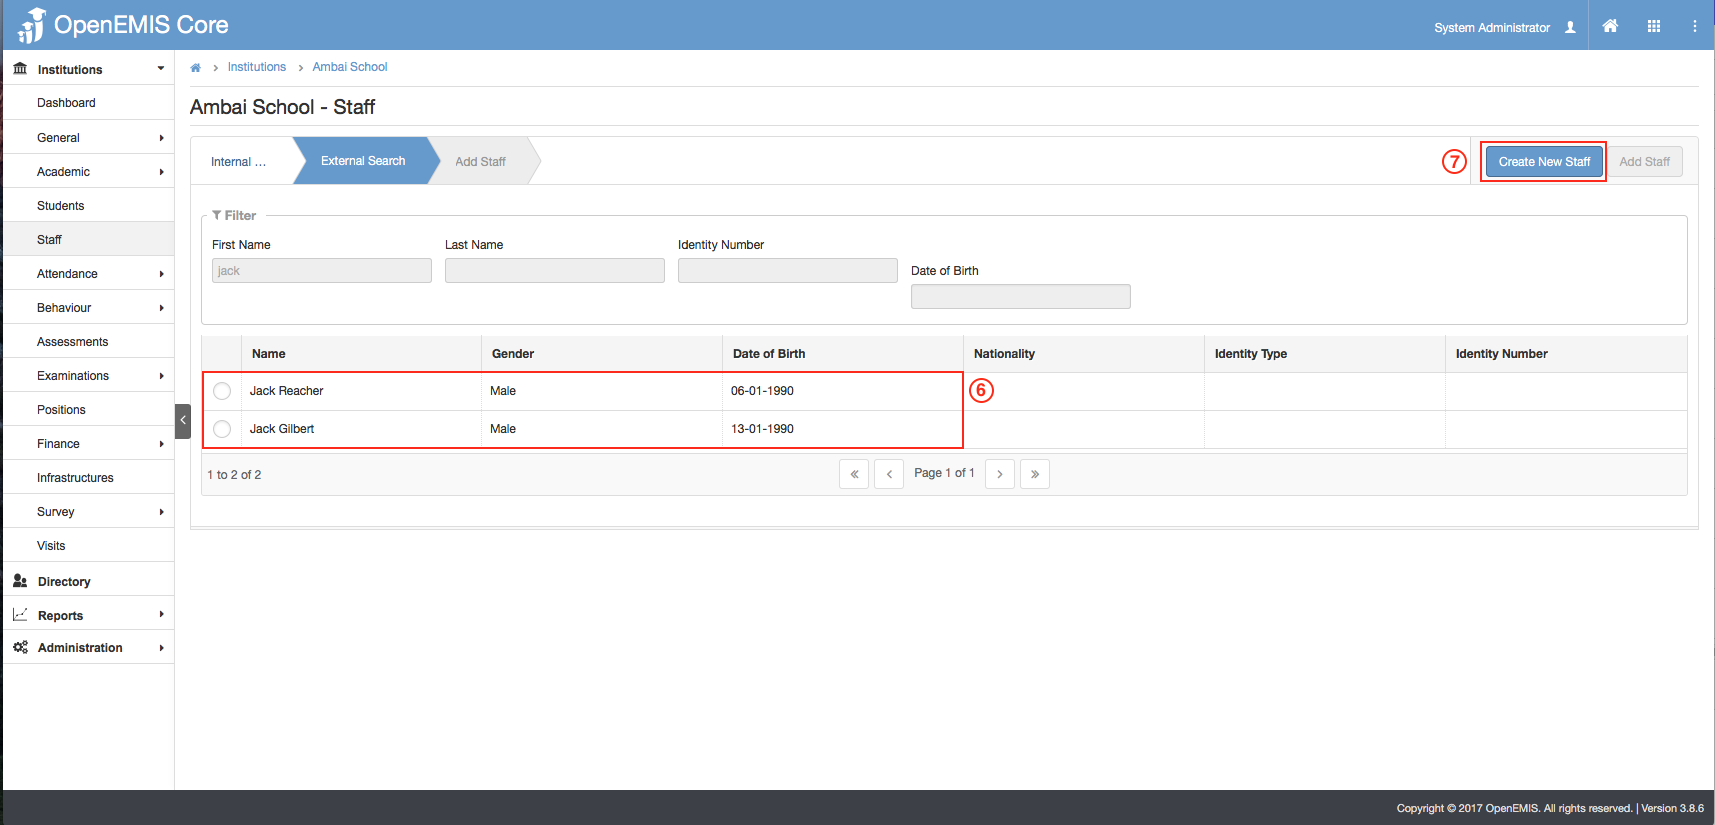
6) System will retrieve all the students in the external data source.
7) By default, you will be able to see ‘Create New Staff‘ button.
8) However, if you have found the user in the External Search, select on the record, ‘Add Staff’ button will appear.
9) Upon selecting Add Staff, the OpenEMIS ID will be auto-generated, and the status will be set as default to ‘Assigned’.
10) You can select the Academic Period, Start Date, Position Type, Position and Staff Type > Complete
11) The system will display a successful message upon adding successfully.

